
This guide will cover the steps you'll take to create a BuzzFeed Trivia quiz, including, in order:
✨ Starting your quiz ✨ Adding questions
✨ Adding answers ✨ The "Force Result" feature
✨ The "Sudden Death" feature ✨ The "Jump to Question" feature
Don't forget to sign up for a BuzzFeed account before you get started!

⭐️⭐️⭐️⭐️⭐️⭐️⭐️⭐️⭐️⭐️⭐️⭐️⭐️⭐️⭐️⭐️⭐️⭐️⭐️⭐️⭐️⭐️⭐️⭐️
To start, log in to BuzzFeed. Then, open up a draft by heading to this link.
This will open up the CMS, aka our Content Management System, where you can create your quiz!
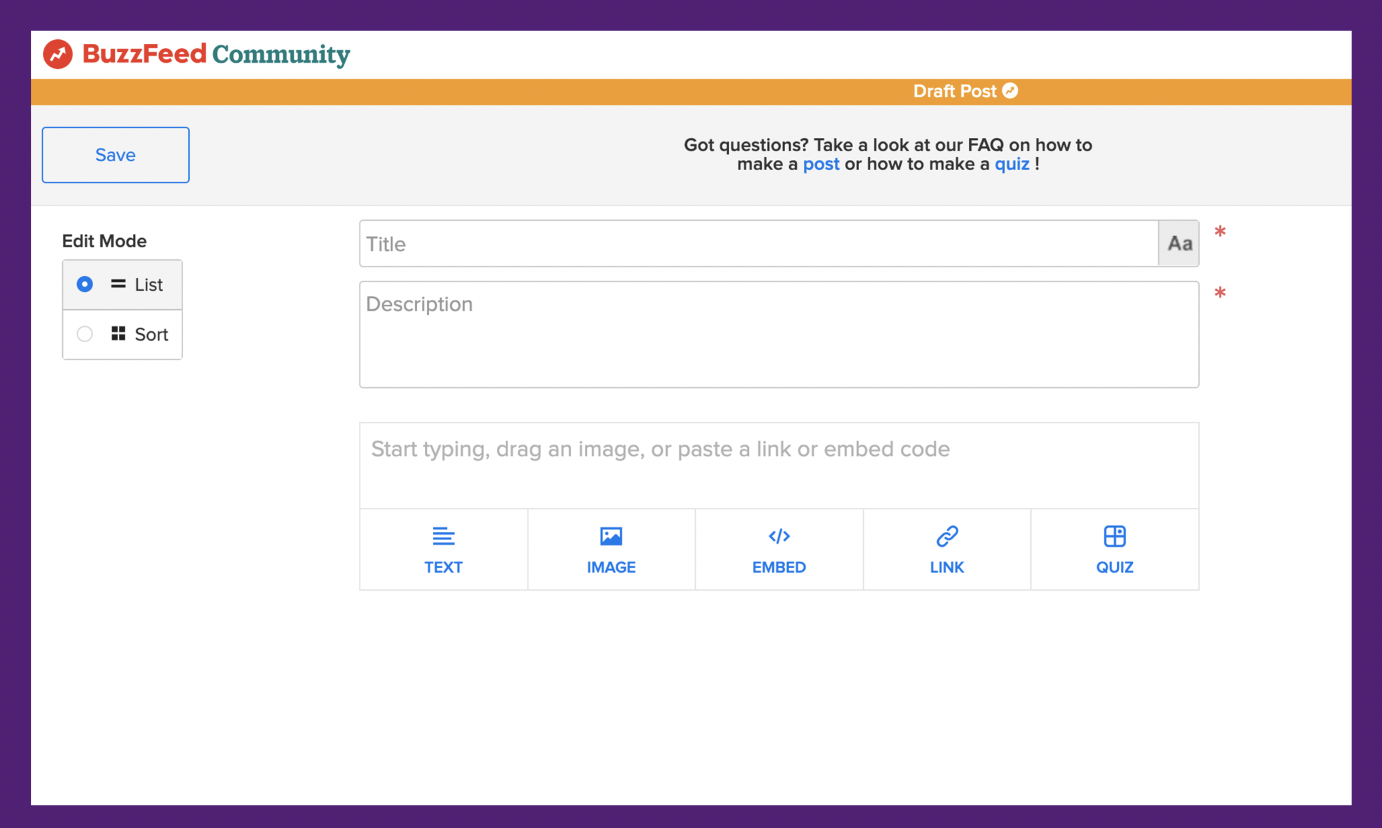
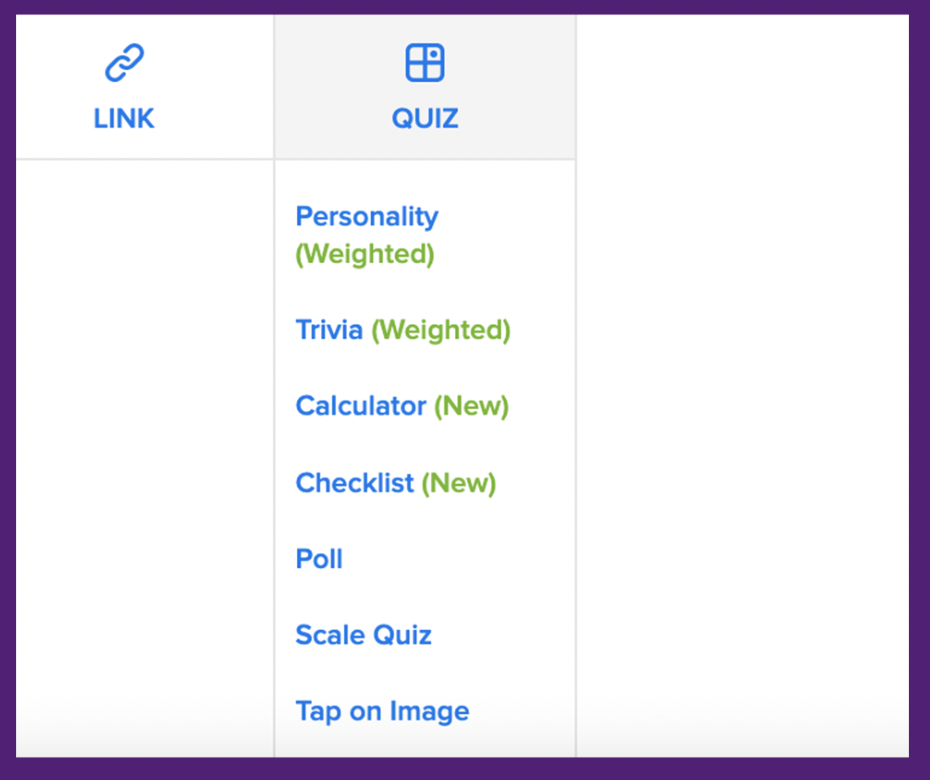
In your first subbuzz (the text and image box in your post, which is where you'll enter all content for your quiz), hover over the "QUIZ" button and select "Trivia (Weighted)":
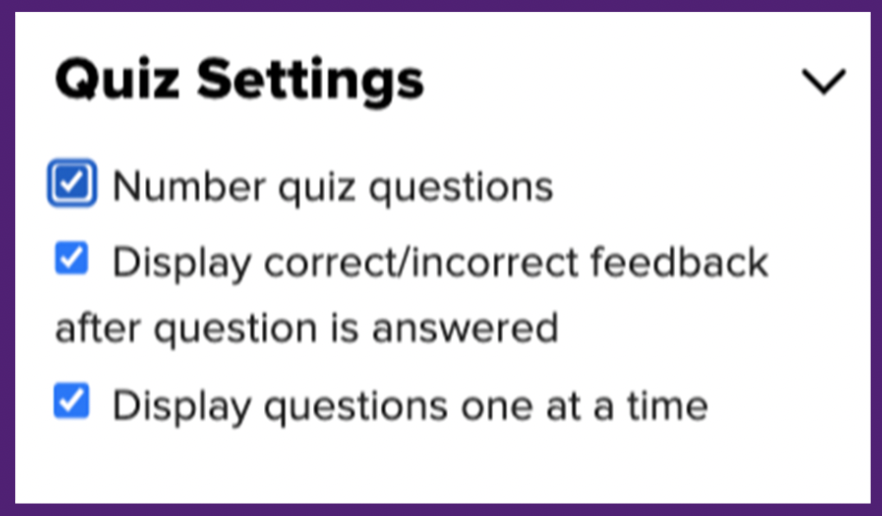
Once your draft is open, you'll see a box that says "Quiz Settings" in the upper-right-hand corner. Here you'll be able to personalize your quiz in a few fun ways!
⭐️⭐️⭐️⭐️⭐️⭐️⭐️⭐️⭐️⭐️⭐️⭐️⭐️⭐️⭐️⭐️⭐️⭐️⭐️⭐️⭐️⭐️⭐️⭐️
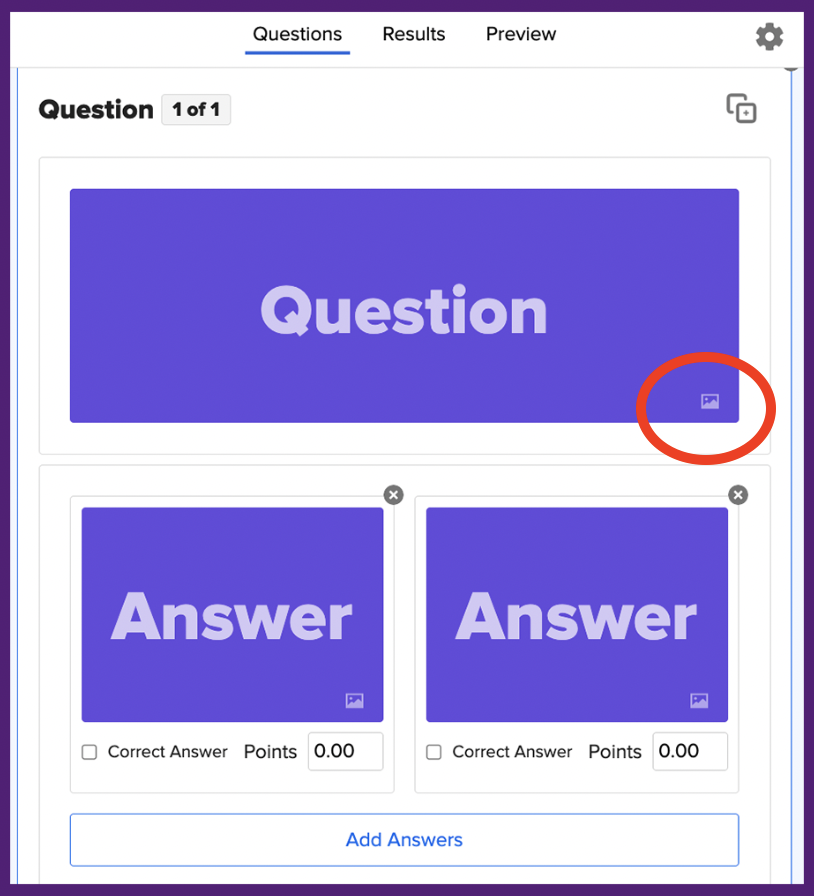
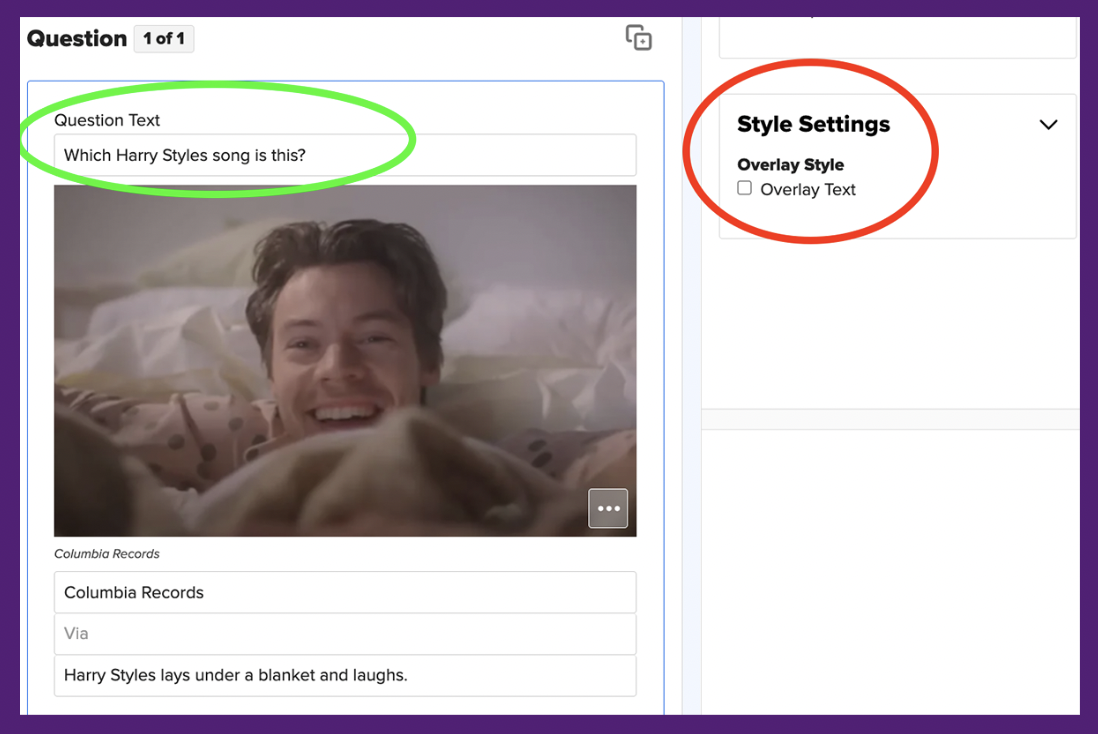
When you open your Trivia Quiz draft in the quiz builder, this is the first thing you'll see. Click "question" in the purple box and you'll have the option to type text into this box. You may also upload an image by clicking on the icon circled in red below.
If you opted to type your question and not upload an image, you can use the right-hand-side bar to play around with the font, colors, and style of both your text and background.
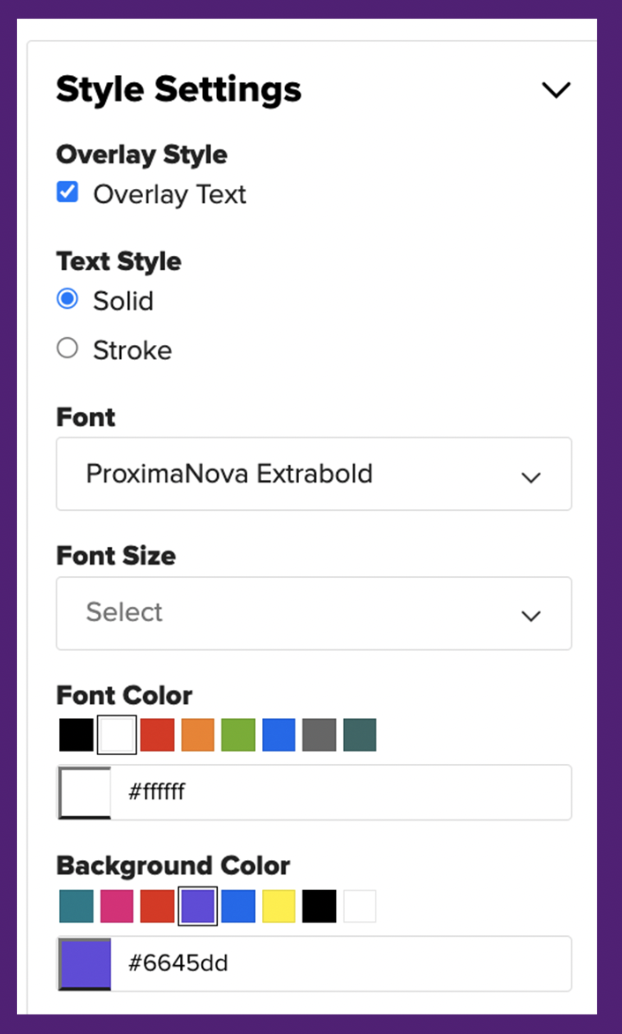
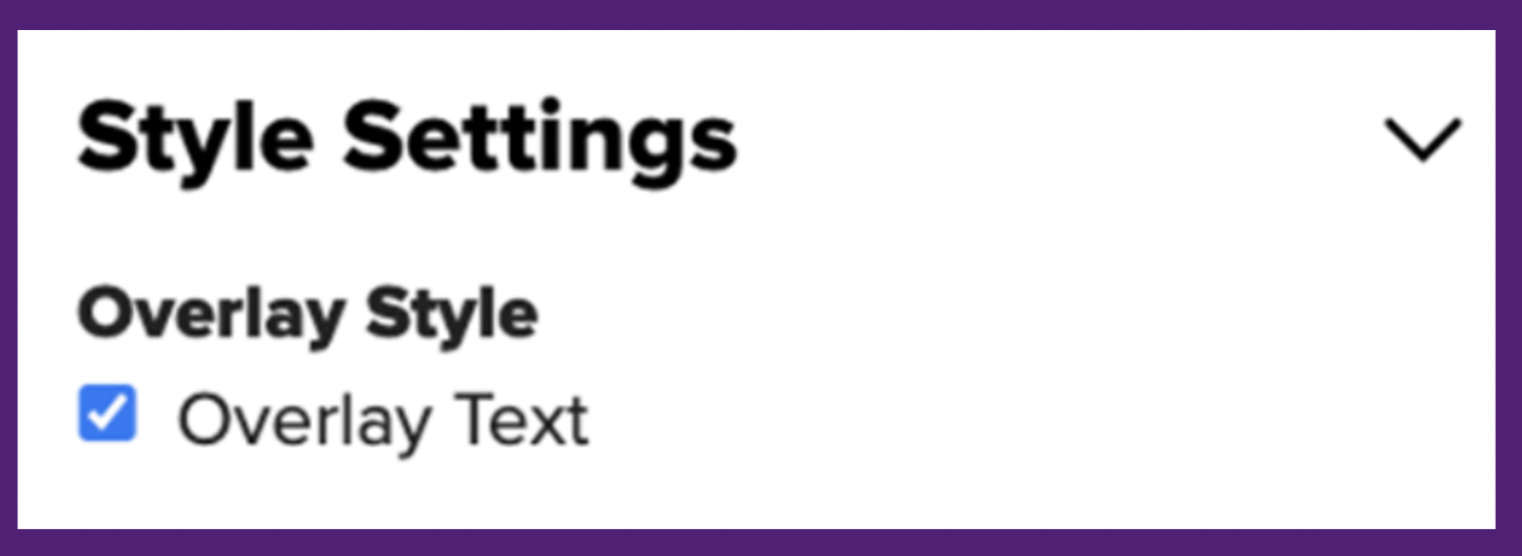
You'll also notice this checkbox that says "Overlay Text." Keeping this checked will ensure your question box looks like the one above, with colored text and background. If you upload an image as your question background, checking "Overlay Text" means that your question will appear over the image you've uploaded.
If you chose to upload a photo and keep "Overlay Text" checked, your text will appear over the photo you've uploaded. You may still play around with the colors, font, and style of the text — but not the background, since your background is the image you've uploaded!

If you've chosen to upload a photo to your question but decide to uncheck "Overlay Text" (circled in red below), that's cool! Your question will instead appear above the image (circled in green below) instead of overlayed on top of it.
⭐️⭐️⭐️⭐️⭐️⭐️⭐️⭐️⭐️⭐️⭐️⭐️⭐️⭐️⭐️⭐️⭐️⭐️⭐️⭐️⭐️⭐️⭐️⭐️
When adding your answers, you may notice this box in the upper-right-hand side of your quiz builder draft:
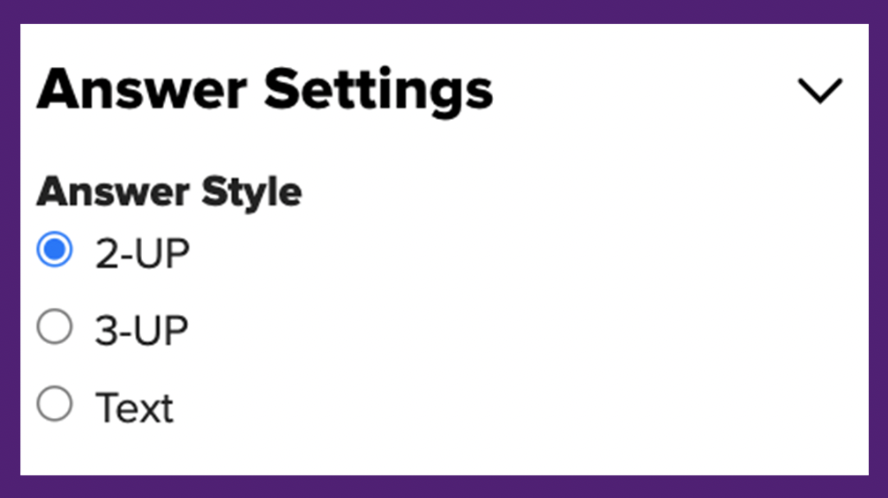
There are two main types of answer choice setups: multiple choice answers and text-based, or colloquially, "typey" answers.
The multiple choice answer setup displays answer options in a "multiple choice" format, meaning all potential answers are right in front of the quiz taker's face, and they just have to pick the right one.
There are three (3) ways to set up multiple choice answers in your quiz:
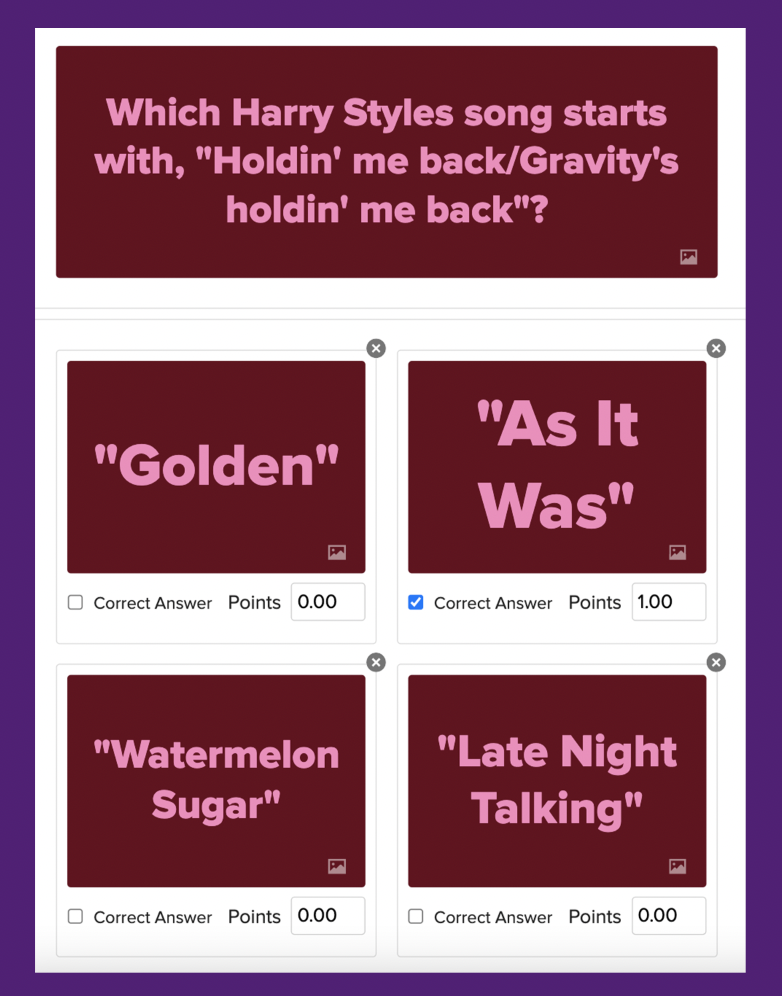
1. You can choose to feature text-only multiple choice answers in colored boxes, like this...
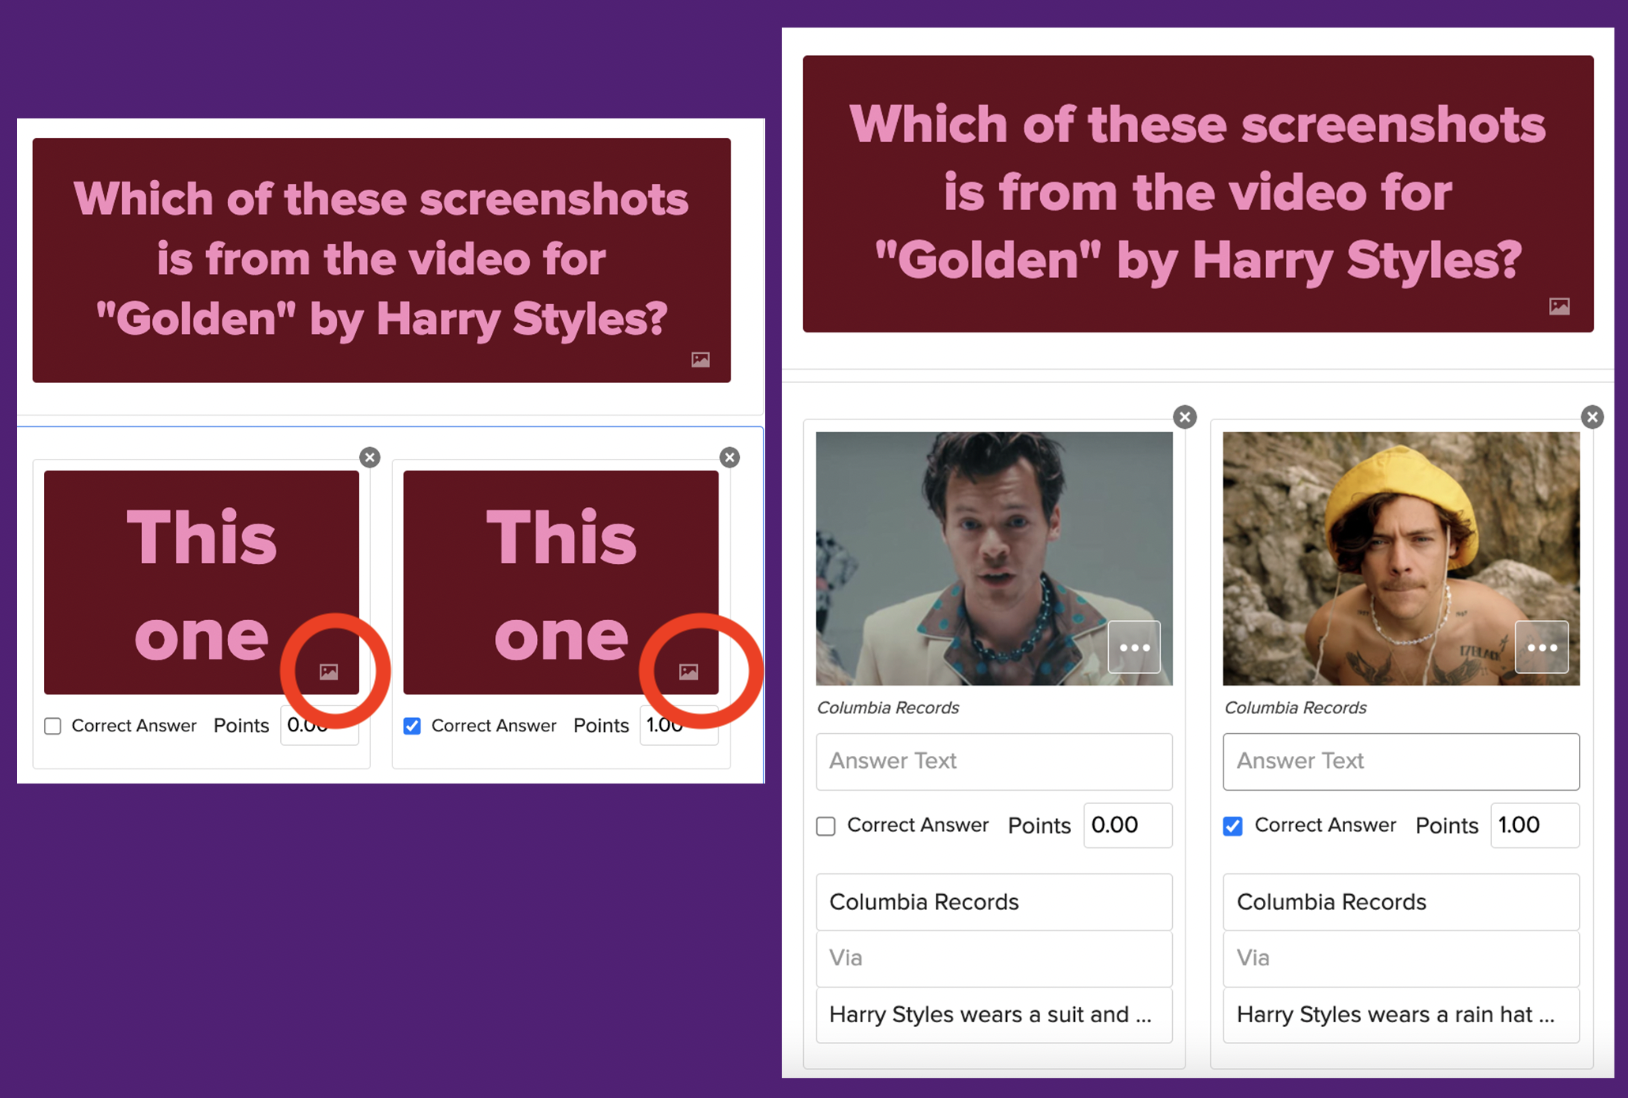
2. Or if you'd prefer to add images from your computer or our Unsplash Image Uploader, you may also do so. Just click on the frame icon in the bottom right-hand corner of the question and answer tiles in your draft:
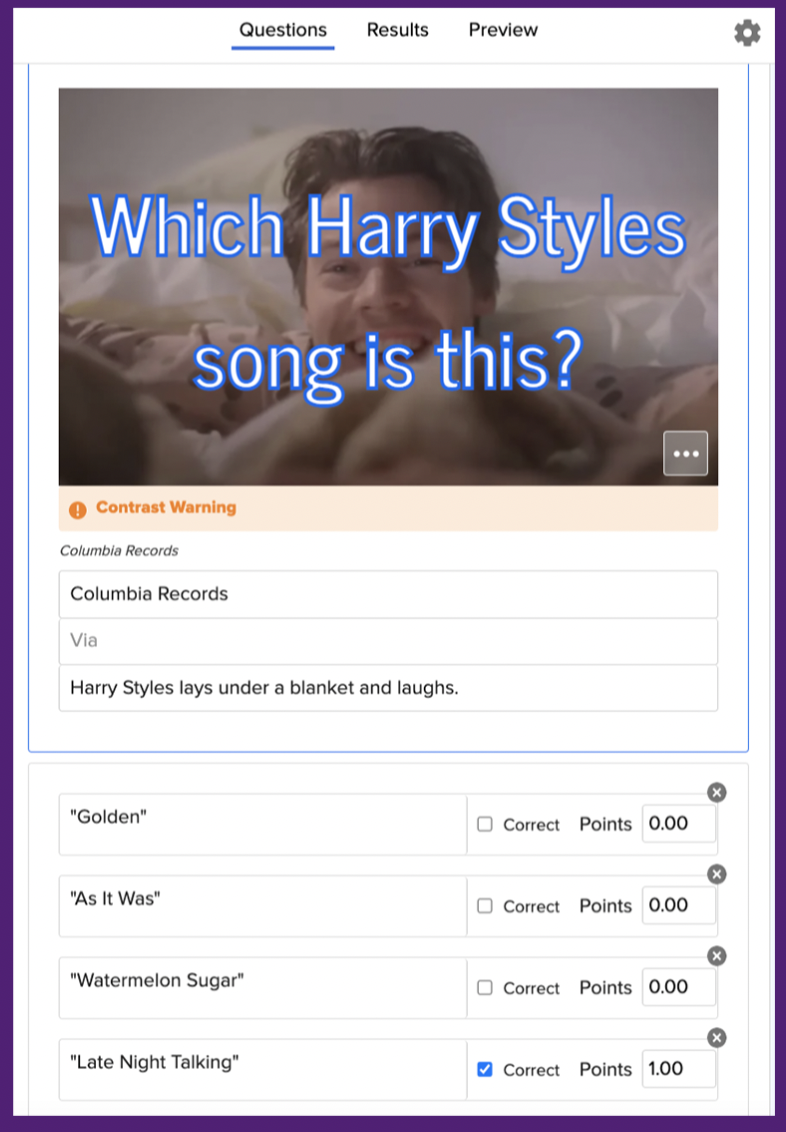
3. And then the third way you can set up multiple choice answer options is simply in a text-only setup like this, with no colorful boxes:
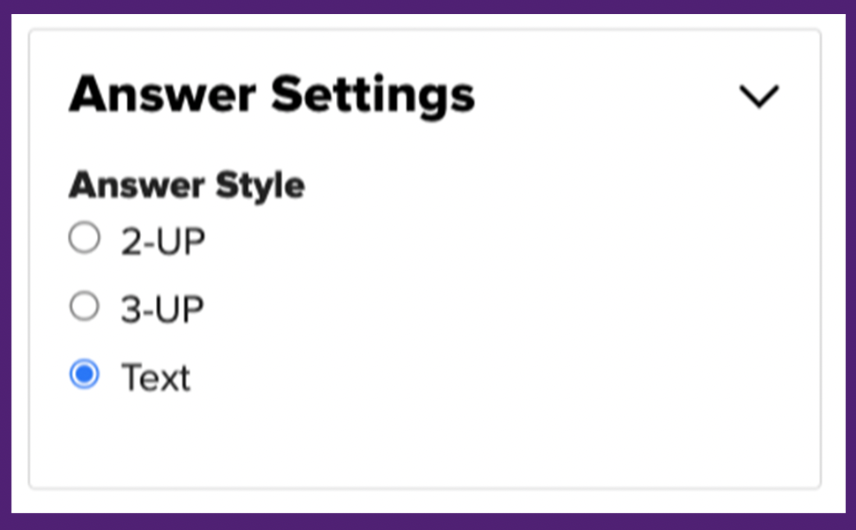
In the default quiz builder, just click on any answer box, and an "Answer Settings" box will pop up on the right-hand side. Select "Text," and enter your answers in each text row!
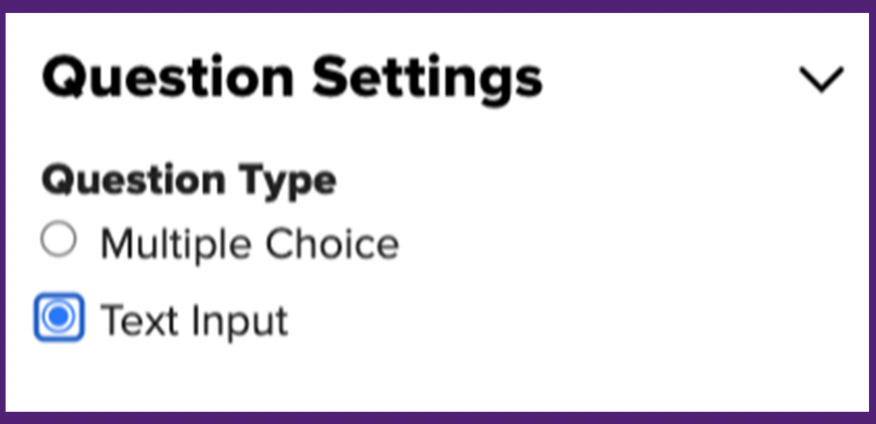
If you'd like to set up your quiz so that the quiz taker has to type their guess instead of choosing from multiple choice options, click on the "Question" box in the default Trivia quiz builder. A "Question Settings" box will appear on the right-hand side. Select "Text Input."
Type the correct answer in the "Primary Answer" box (circled in pink), and then in the "Alternative Answer" boxes below, type other acceptable answers.

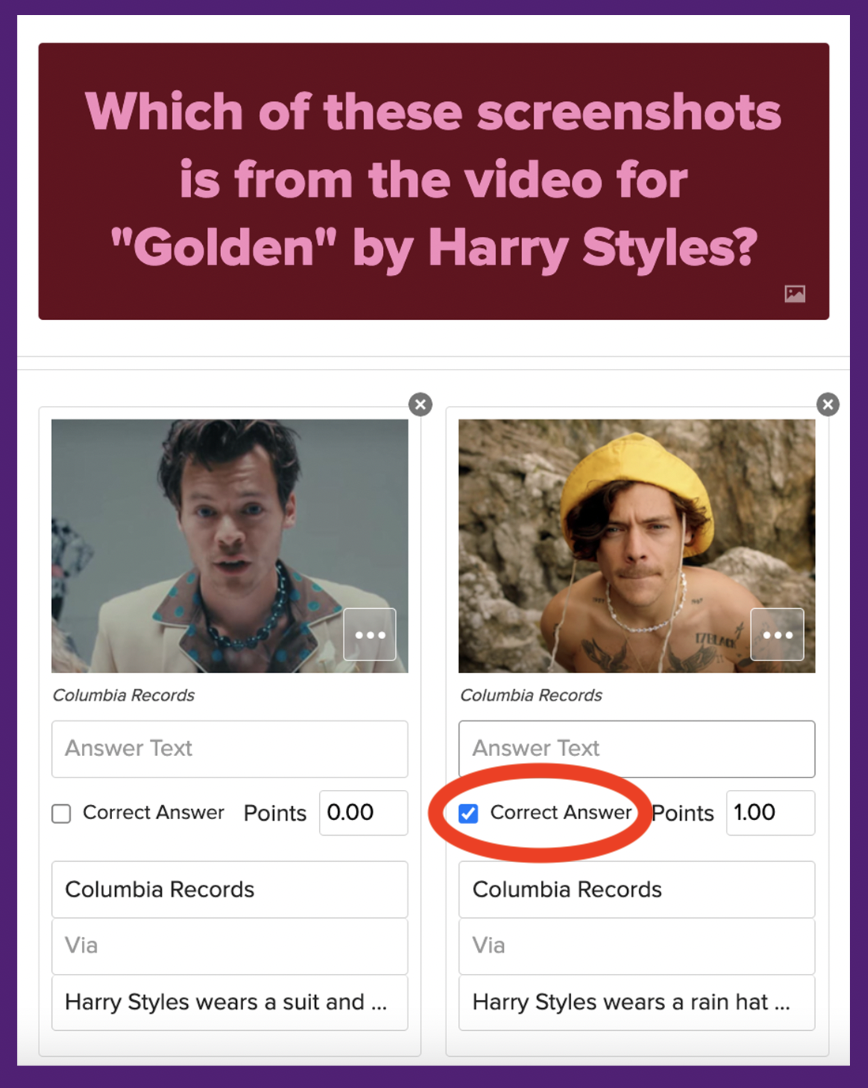
Finally, for multiple choice-style Trivia quizzes, select the checkbox that correlates with the correct answer. That way, when someone takes your quiz, the quiz builder knows whether to give someone a pat on the back or let them know they got the answer wrong. Using a multiple choice quiz as an example:
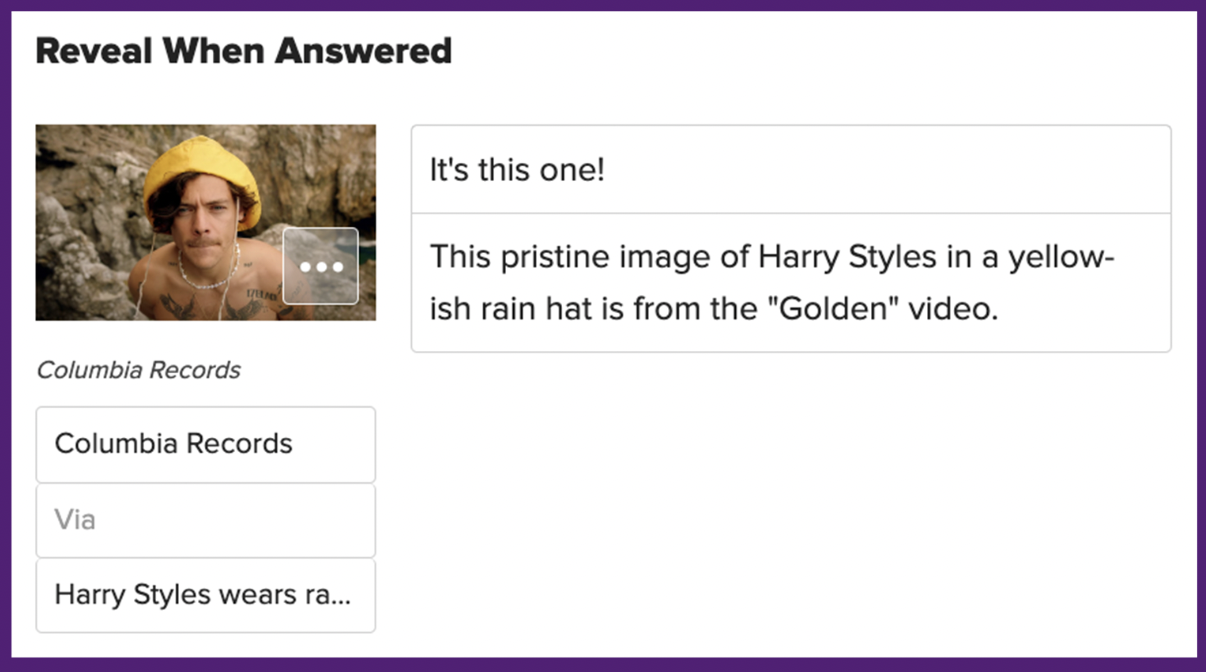
Then, after you've checked off the correct answer in the draft, scroll down just a tiny bit to the "Reveal When Answered" box.
Add some text to the answer and answer's caption and upload an image or GIF for your reveal. This is the box that will appear when someone answers a question on your Trivia Quiz, whether they've gotten it right or wrong. Here's what it looks like from the draft/CMS side (aka the side you see when building the quiz):
And here's what it will look like to the quiz taker when they pick the correct or incorrect answer on your quiz:
Repeat the above steps for each question until you've entered all of your questions (we recommend 5–9 questions).
⭐️⭐️⭐️⭐️⭐️⭐️⭐️⭐️⭐️⭐️⭐️⭐️⭐️⭐️⭐️⭐️⭐️⭐️⭐️⭐️⭐️⭐️⭐️⭐️
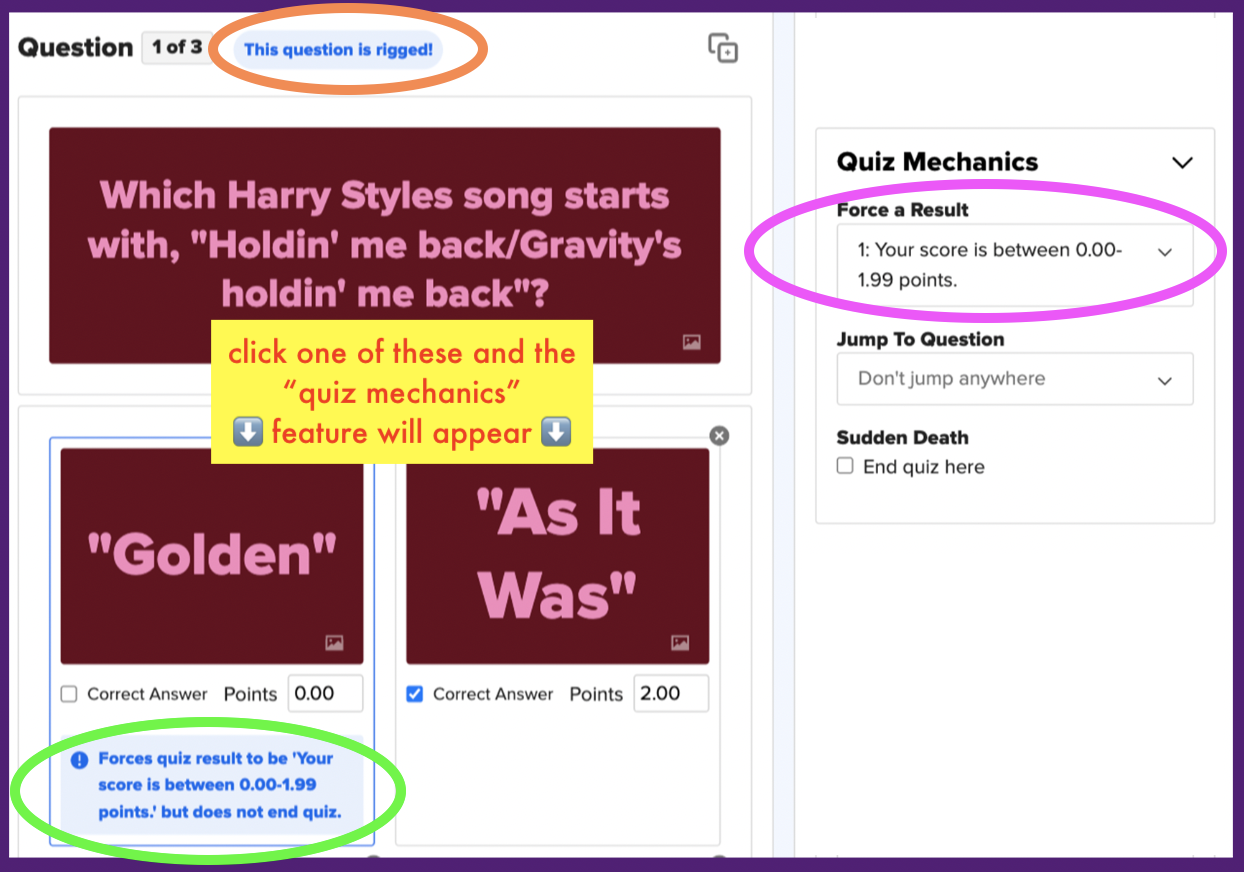
*You're not required to use this feature in order to publish your quiz! If you don't feel like using the "force results" feature, feel free to skip this section when learning how to make a trivia quiz.
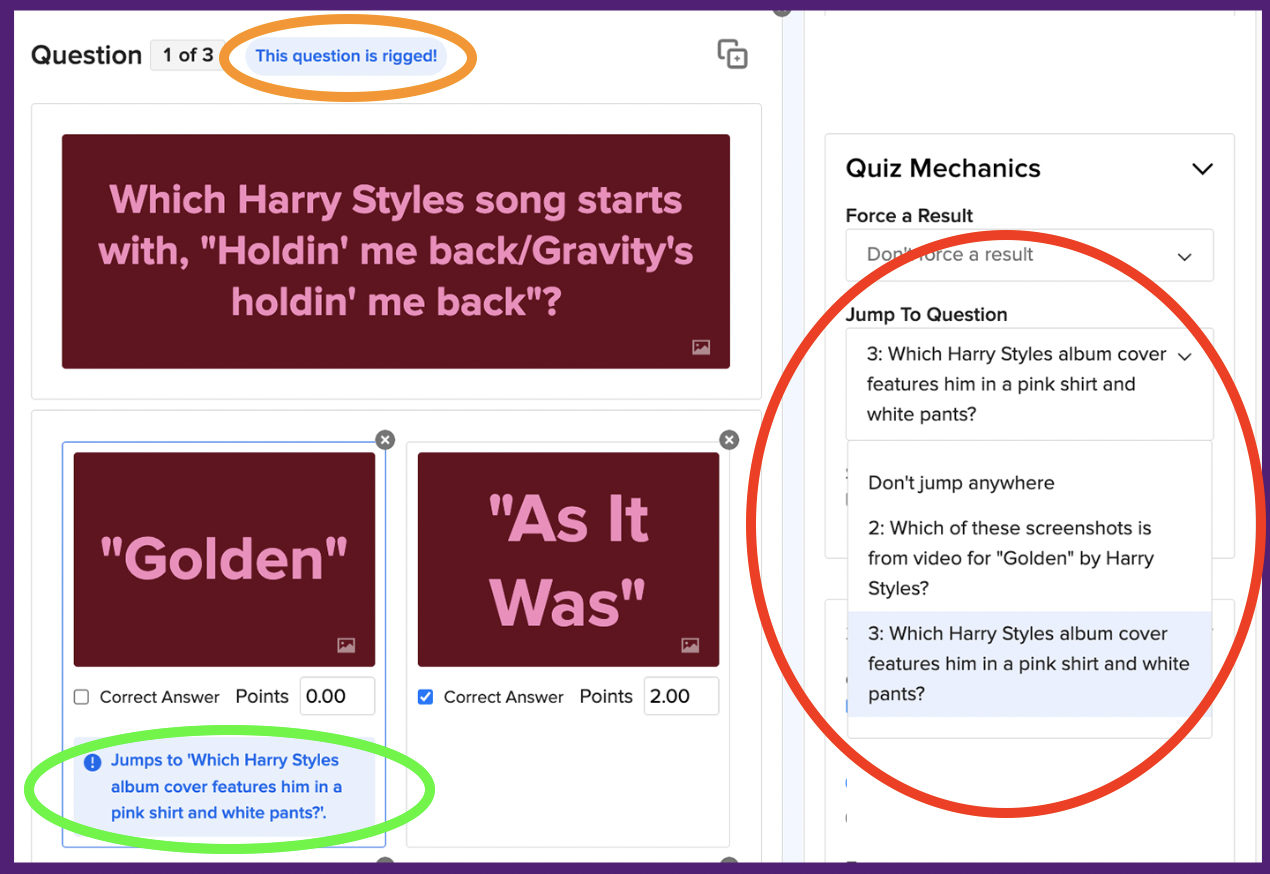
The "Force a Result" feature will automatically give the quiz taker a certain result, regardless of the point value or other answer rigging. They can continue to answer questions in the quiz, but that won’t change the result they’ll get.
⭐️⭐️⭐️⭐️⭐️⭐️⭐️⭐️⭐️⭐️⭐️⭐️⭐️⭐️⭐️⭐️⭐️⭐️⭐️⭐️⭐️⭐️⭐️⭐️
*You're not required to use this feature in order to publish your quiz! If you don't feel like using the "Sudden Death" feature, feel free to skip this section when learning how to make a trivia quiz.
Here are some examples of "Sudden Death" quizzes to inspire you, and for you to test out to get a feel for how they work:
✨ Fewer Than 10% Of "Harry Potter" Fans Can Complete This Sudden Death Hogwarts Professors Quiz
✨ I Bet You Can't Make It Around The World In This Sudden Death Geography Quiz
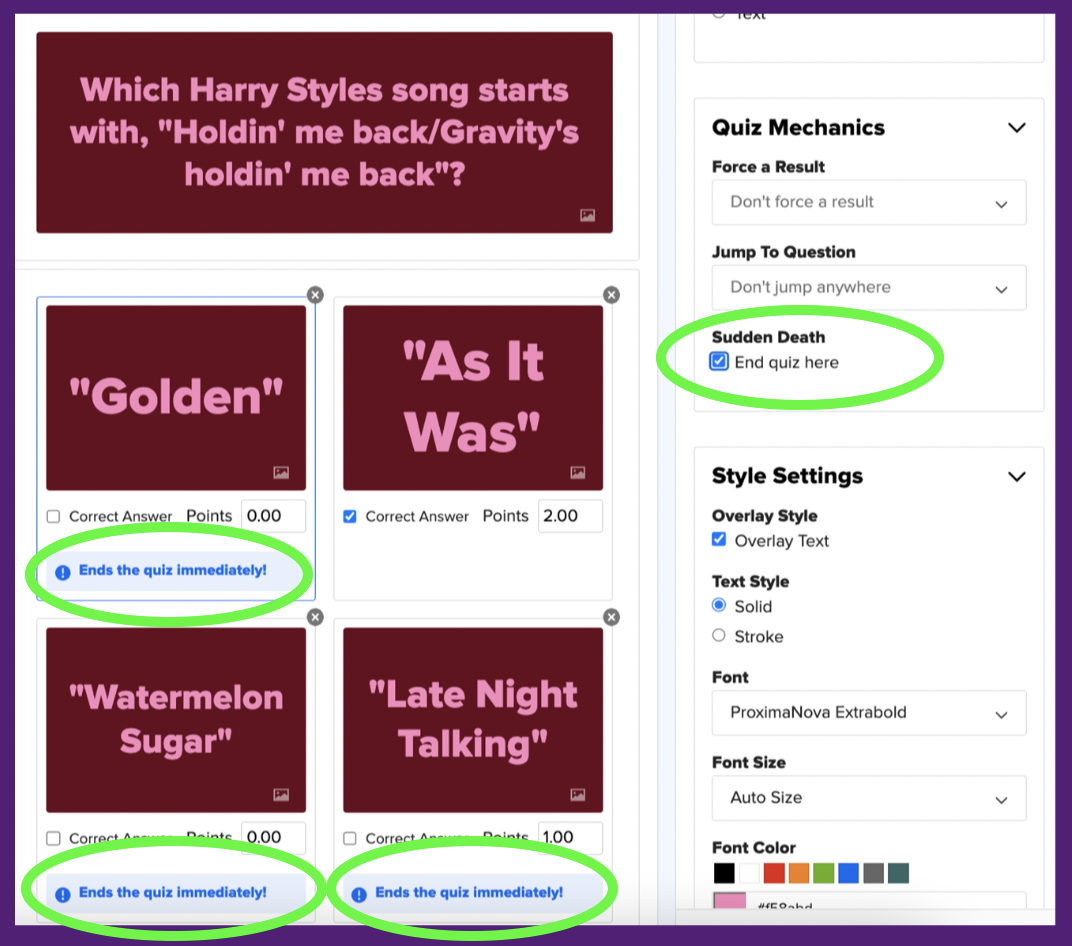
While the "Force a Result" feature leads a quiz taker toward a certain result, the "Sudden Death" feature will cause a quiz to end immediately should a user select an answer that you've selected.
⭐️⭐️⭐️⭐️⭐️⭐️⭐️⭐️⭐️⭐️⭐️⭐️⭐️⭐️⭐️⭐️⭐️⭐️⭐️⭐️⭐️⭐️⭐️⭐️
*You're not required to use this feature in order to publish your quiz! If you don't feel like using the "Jump To Question" feature, feel free to skip this section when learning how to make a trivia quiz.
⭐️⭐️⭐️⭐️⭐️⭐️⭐️⭐️⭐️⭐️⭐️⭐️⭐️⭐️⭐️⭐️⭐️⭐️⭐️⭐️⭐️⭐️⭐️⭐️
Before we get into adding results, now's a good time to talk about points.

You do *not* have to use the Points feature. If you don't adjust any points, your quiz will simply lead a quiz taker toward their results based on the number of questions they get correct or incorrect.
So if you're not interested in using the points feature, then don't! All up to you.
If you *would* like to use the feature, read on!
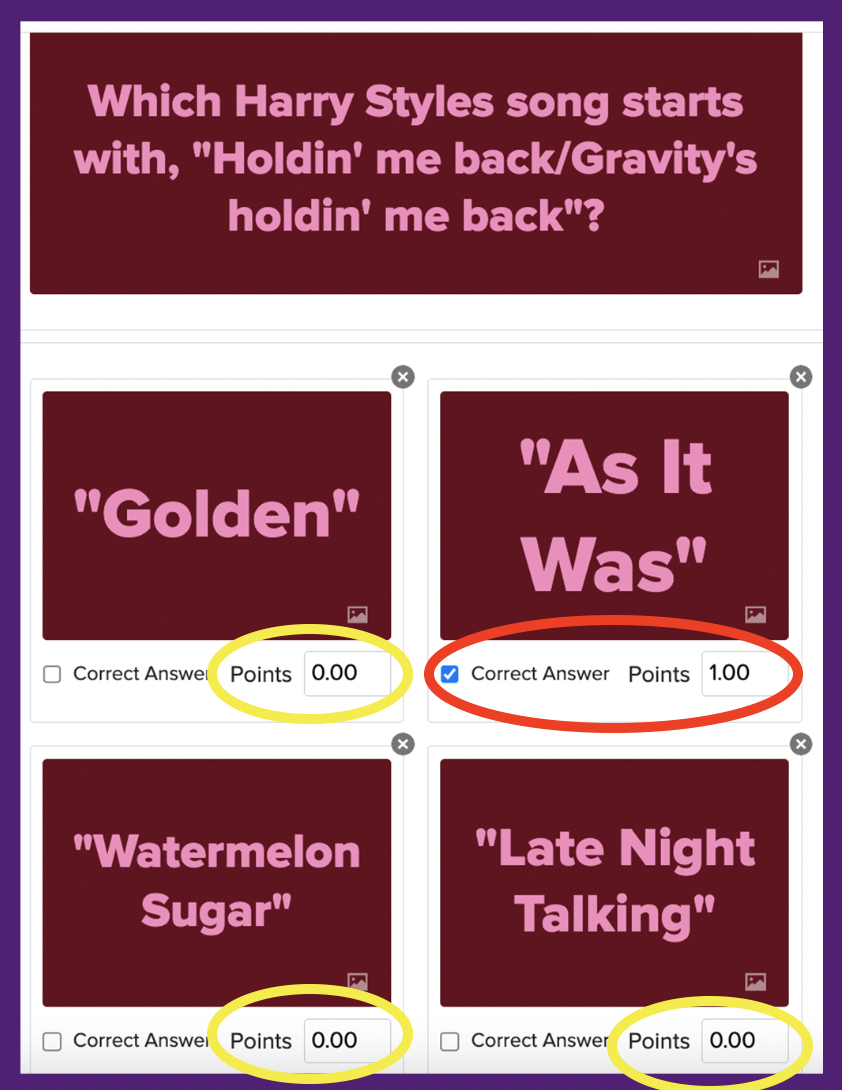
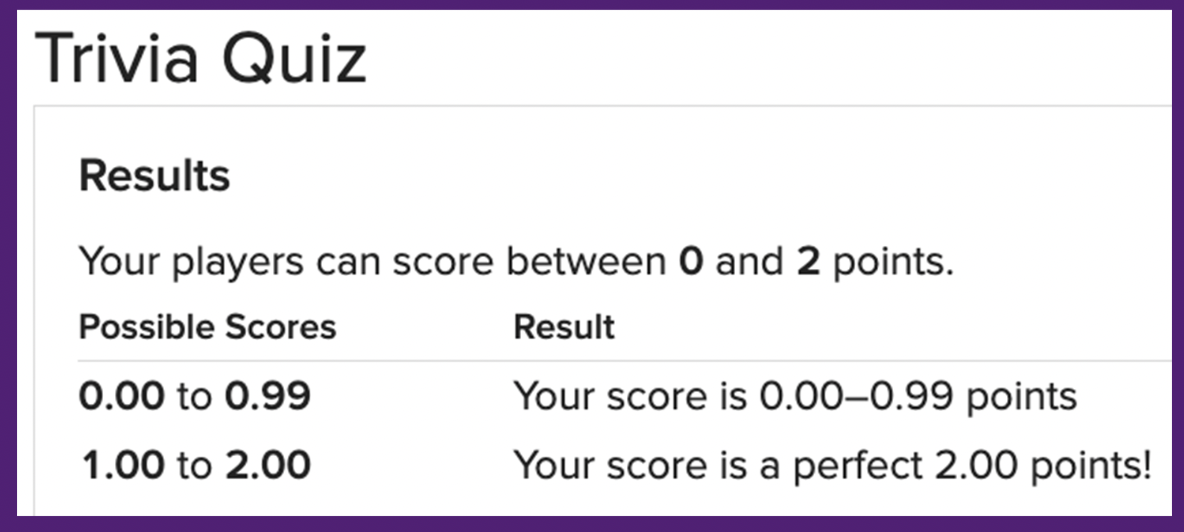
Something important to note is that when a quiz taker starts a Trivia Quiz, their score is at "0.00" points. This means as they go through the quiz, they'll earn points as they get questions correct...but you can change up the point values to make the experience a bit spicier for them. 👀
As mentioned above, after adding each question, press the "Save And Close Quiz" button at the top of your quiz builder draft, and then hit "save" in the upper-left-hand corner of the main part of your draft (the part where you can see the headline/description/list editor).
Once you've saved your quiz, you'll see the below image in your draft:
For example purposes, I've adjusted the answer option points in the above question so that each incorrect answer = "1.00" points, and the one correct answer = "2.00" points.
⭐️⭐️⭐️⭐️⭐️⭐️⭐️⭐️⭐️⭐️⭐️⭐️⭐️⭐️⭐️⭐️⭐️⭐️⭐️⭐️⭐️⭐️⭐️⭐️

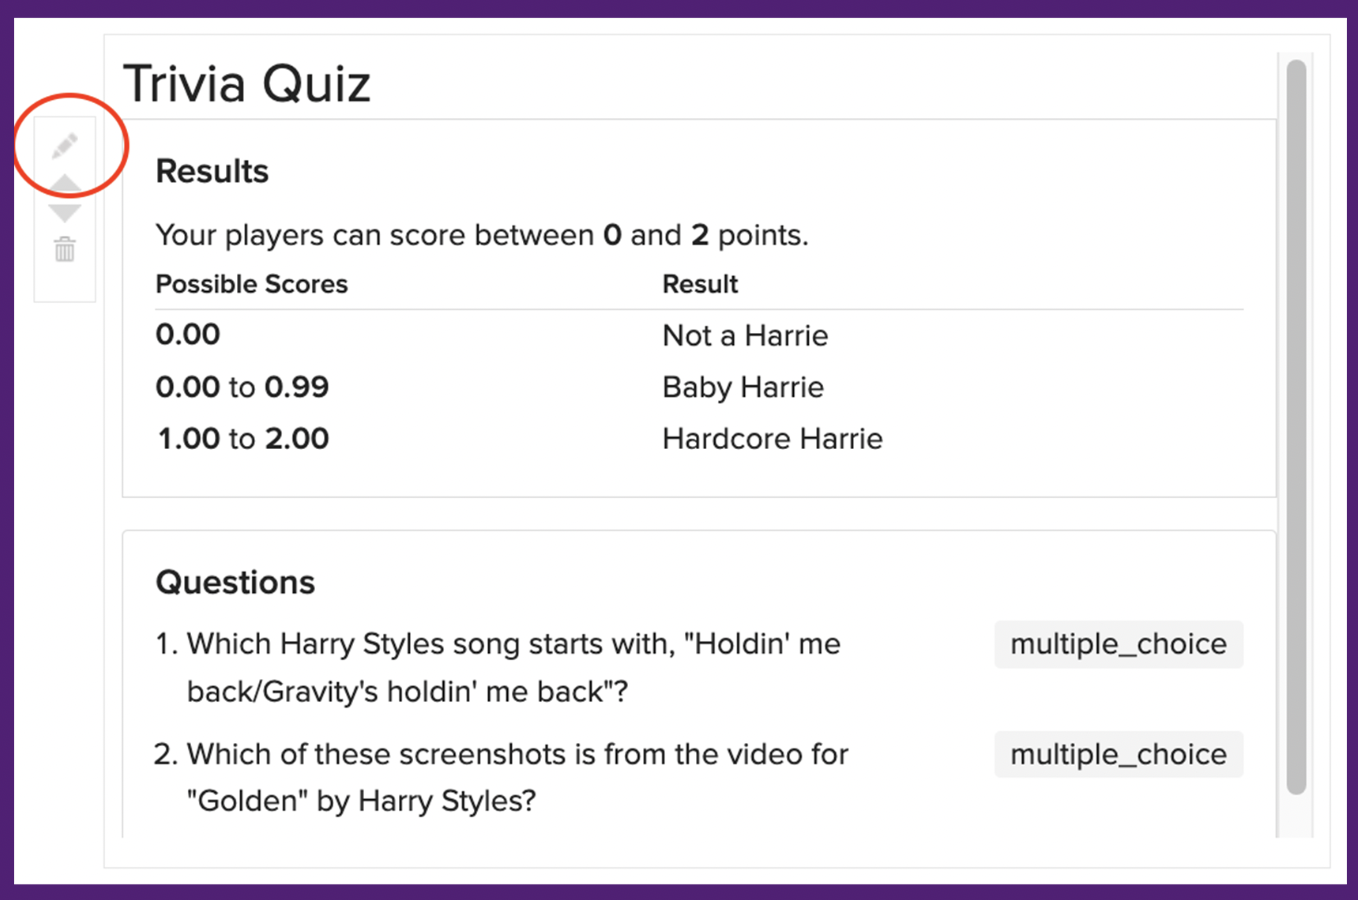
Then, open the editing tool again to add your results by hovering over the box and then clicking on the pencil icon on the left-hand side of the quiz builder:
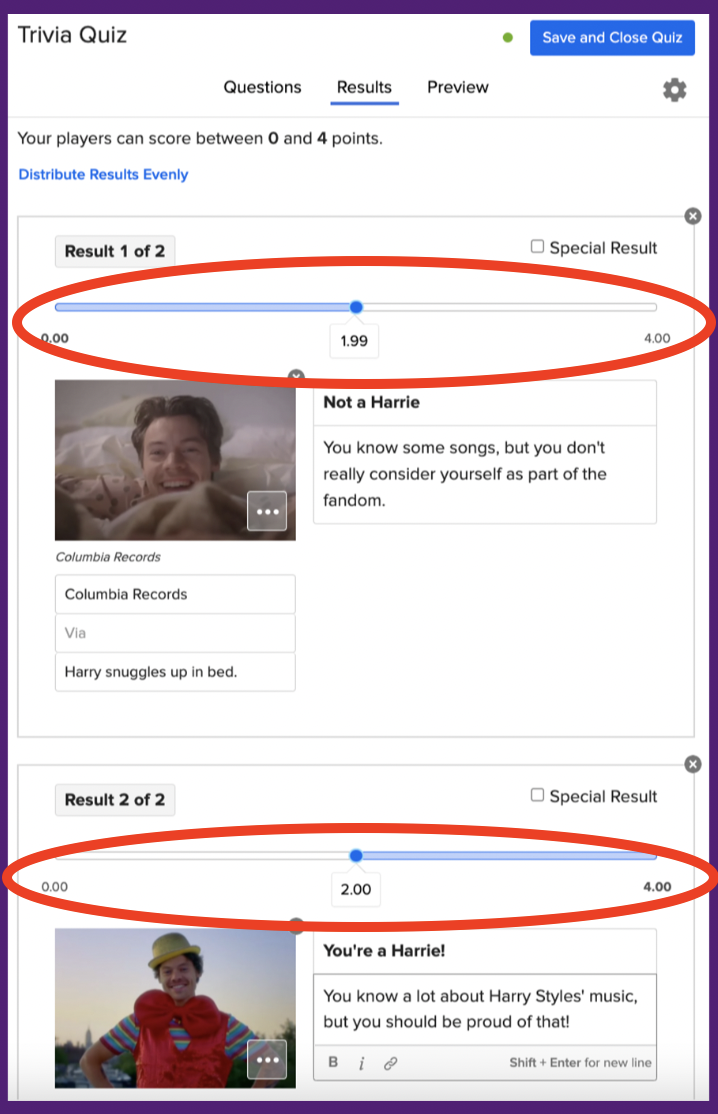
Once you've re-opened the quiz building part of your draft, click on the "Results" tab at the top of your draft:

After adding all of your questions, enter your results. We've included two results below to explain how to add results, but we recommend at least three for your quiz to be considered for homepage promotion.
Use the sliders (circled in red below)* to personalize your results. Then, add fun titles to each result. For example, instead of your final quiz score result reading "your score is 1.99 points," change it to "You're a Harrie!" or "You're not a Harrie!" (just relating this example to the rest of the quiz we've been using throughout this guide — jsyk, "Harrie" is the fandom name for Harry Styles fans).
⭐️⭐️⭐️⭐️⭐️⭐️⭐️⭐️⭐️⭐️⭐️⭐️⭐️⭐️⭐️⭐️⭐️⭐️⭐️⭐️⭐️⭐️⭐️⭐️
Once you've added all of your results, press the "Save And Close Quiz" button again like you did when finished with your questions. Then, it's time to add a headline, caption, and thumbnails! Check out details and tips near the bottom of our Personality Quiz Guide.
Finally, hit "Publish Now" in the upper right-hand corner, and a Community Editor will see your post! All posts that are published will be considered for promotion to the BuzzFeed homepage.
And that's it! You've completed your first trivia quiz!
