
Google Street View has accumulated a tremendous quantity of imagery of cities and rural areas around the world. For someone interested in new ways of using and displaying visual information, it’s a treasure trove. In this post, I’m going to talk about how I used the Google Street View API to build two fun little projects: a map of the urban sky for New York and San Francisco, and a synthesized road trip through the Mojave Desert.

Using Street View imagery, I trained a neural network to dream up a road trip through the Mojave Desert.
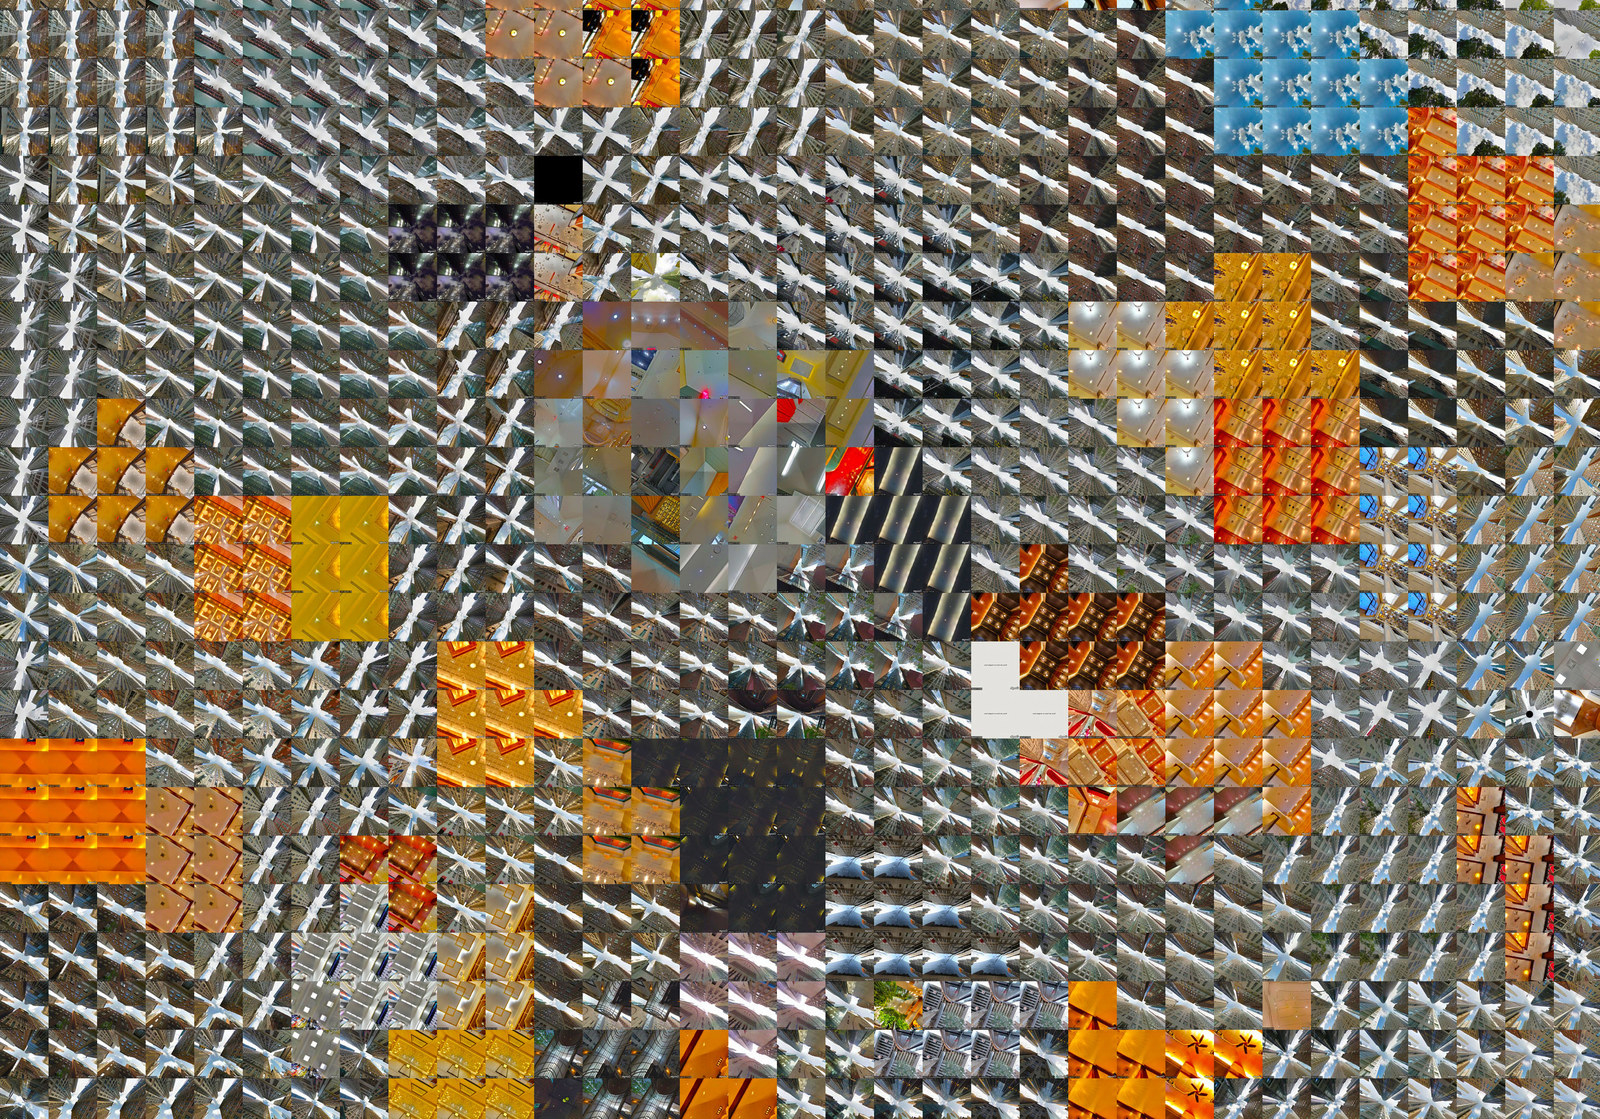
Looking up
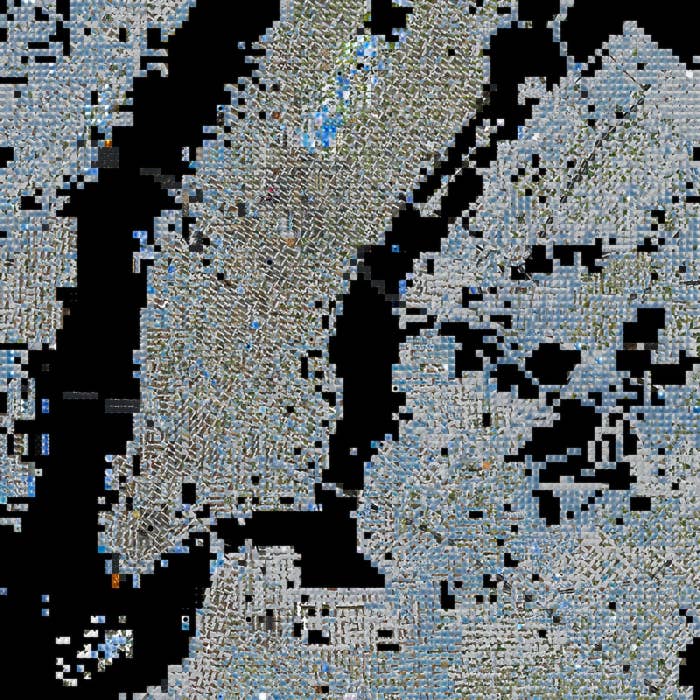
What do you see when you look up? Trees and telephone lines? Skyscrapers? An overpass? Blue sky or fog? A lot of the character of a city and neighborhood is reflected in what’s overhead.
In Manhattan, buildings crowd the sky into narrow alleyways, but the outer boroughs are blue (and in the richer neighborhoods, green with street trees). Bridges and elevated subway lines cut slices across the skyscape and changes in the grid layout appear as crystal discontinuities.
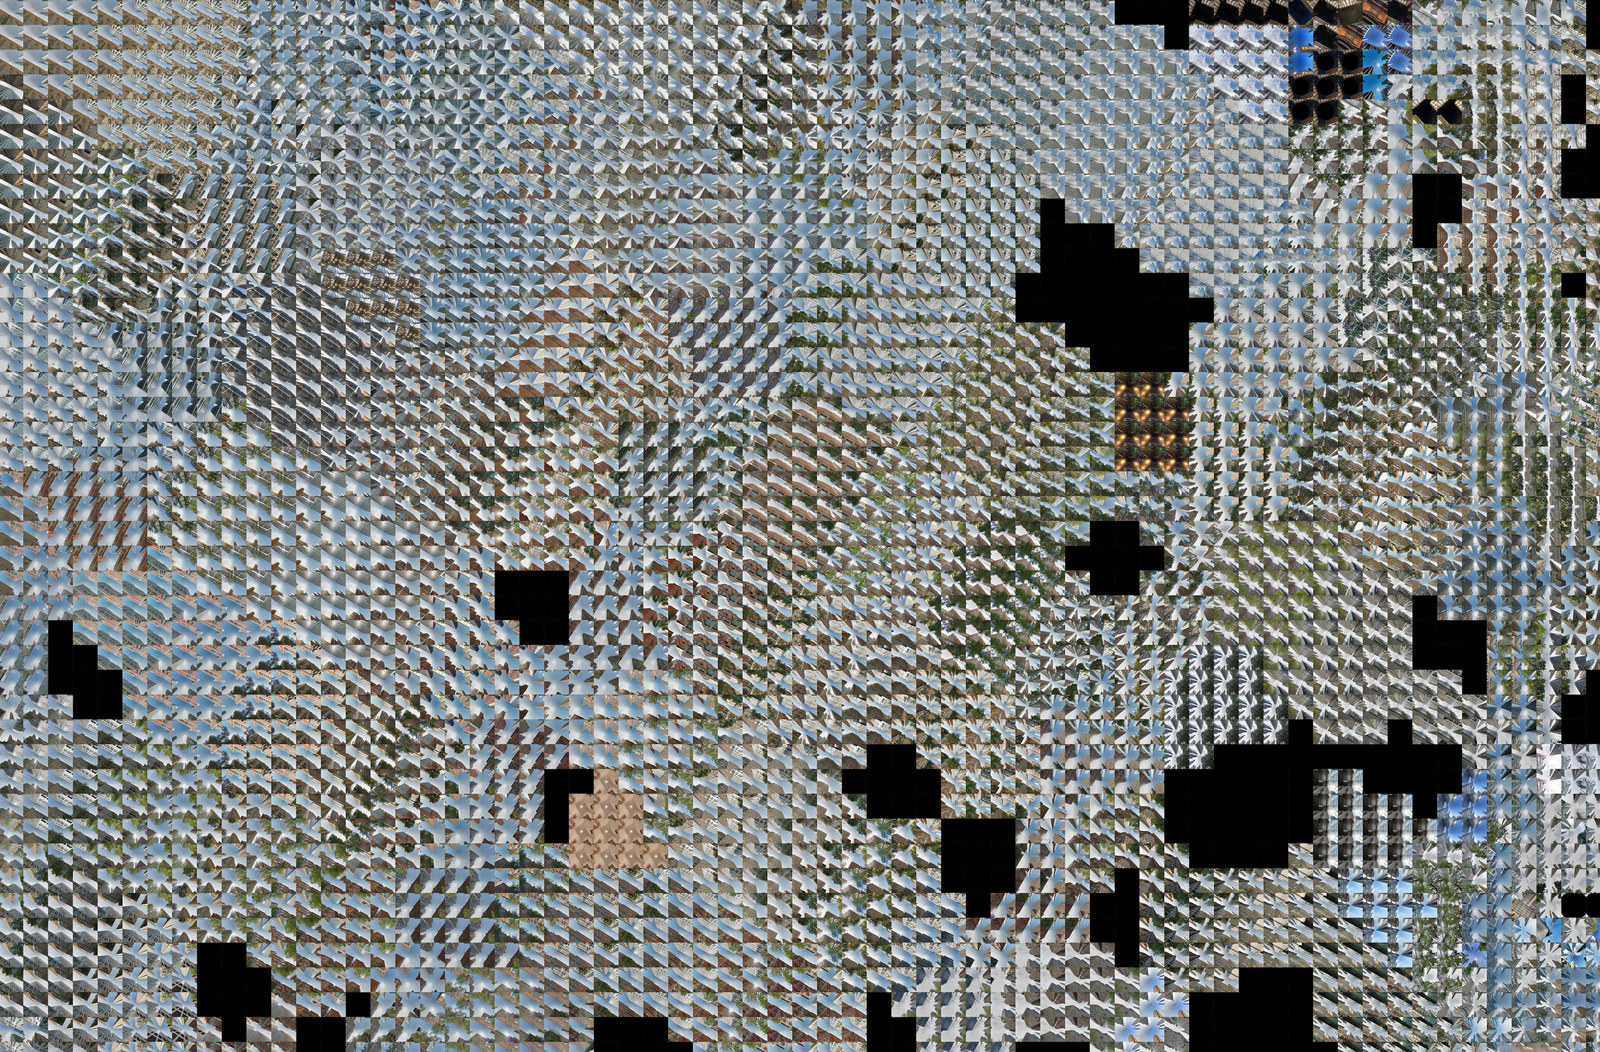
Zoom in closer, and the street grid looks even more crystalline, creating cell boundaries where images jump to cross-streets or indoor locations. (Indoor imagery is a wrinkle I’ll discuss more below.)
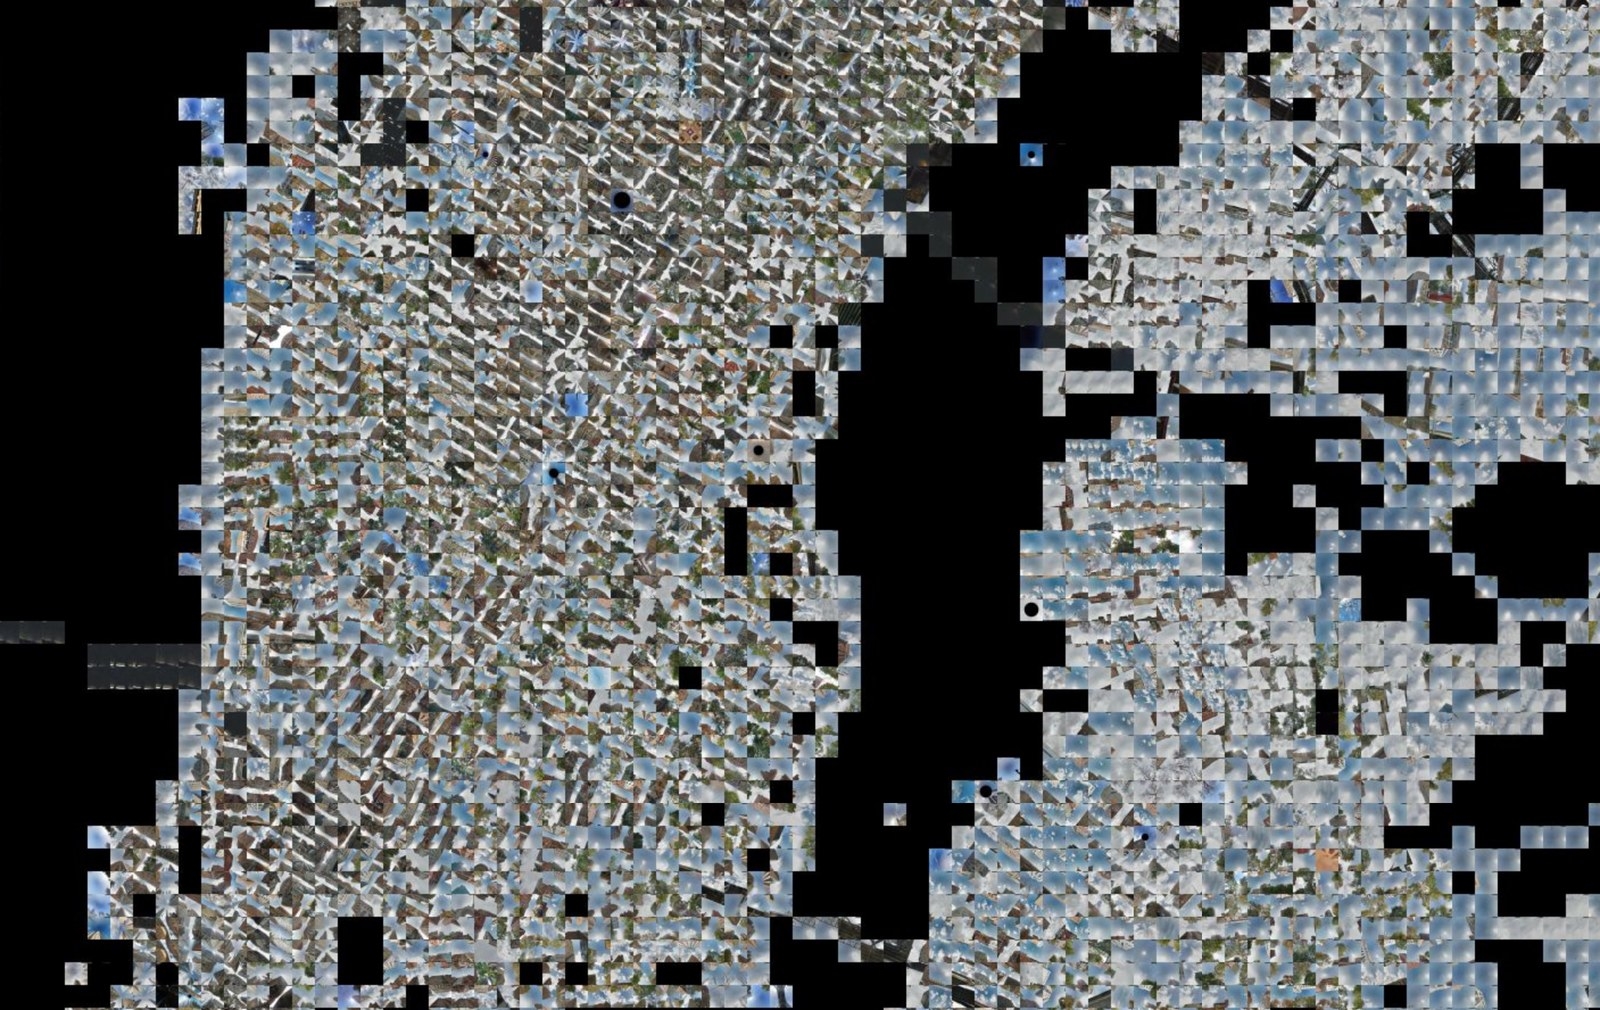
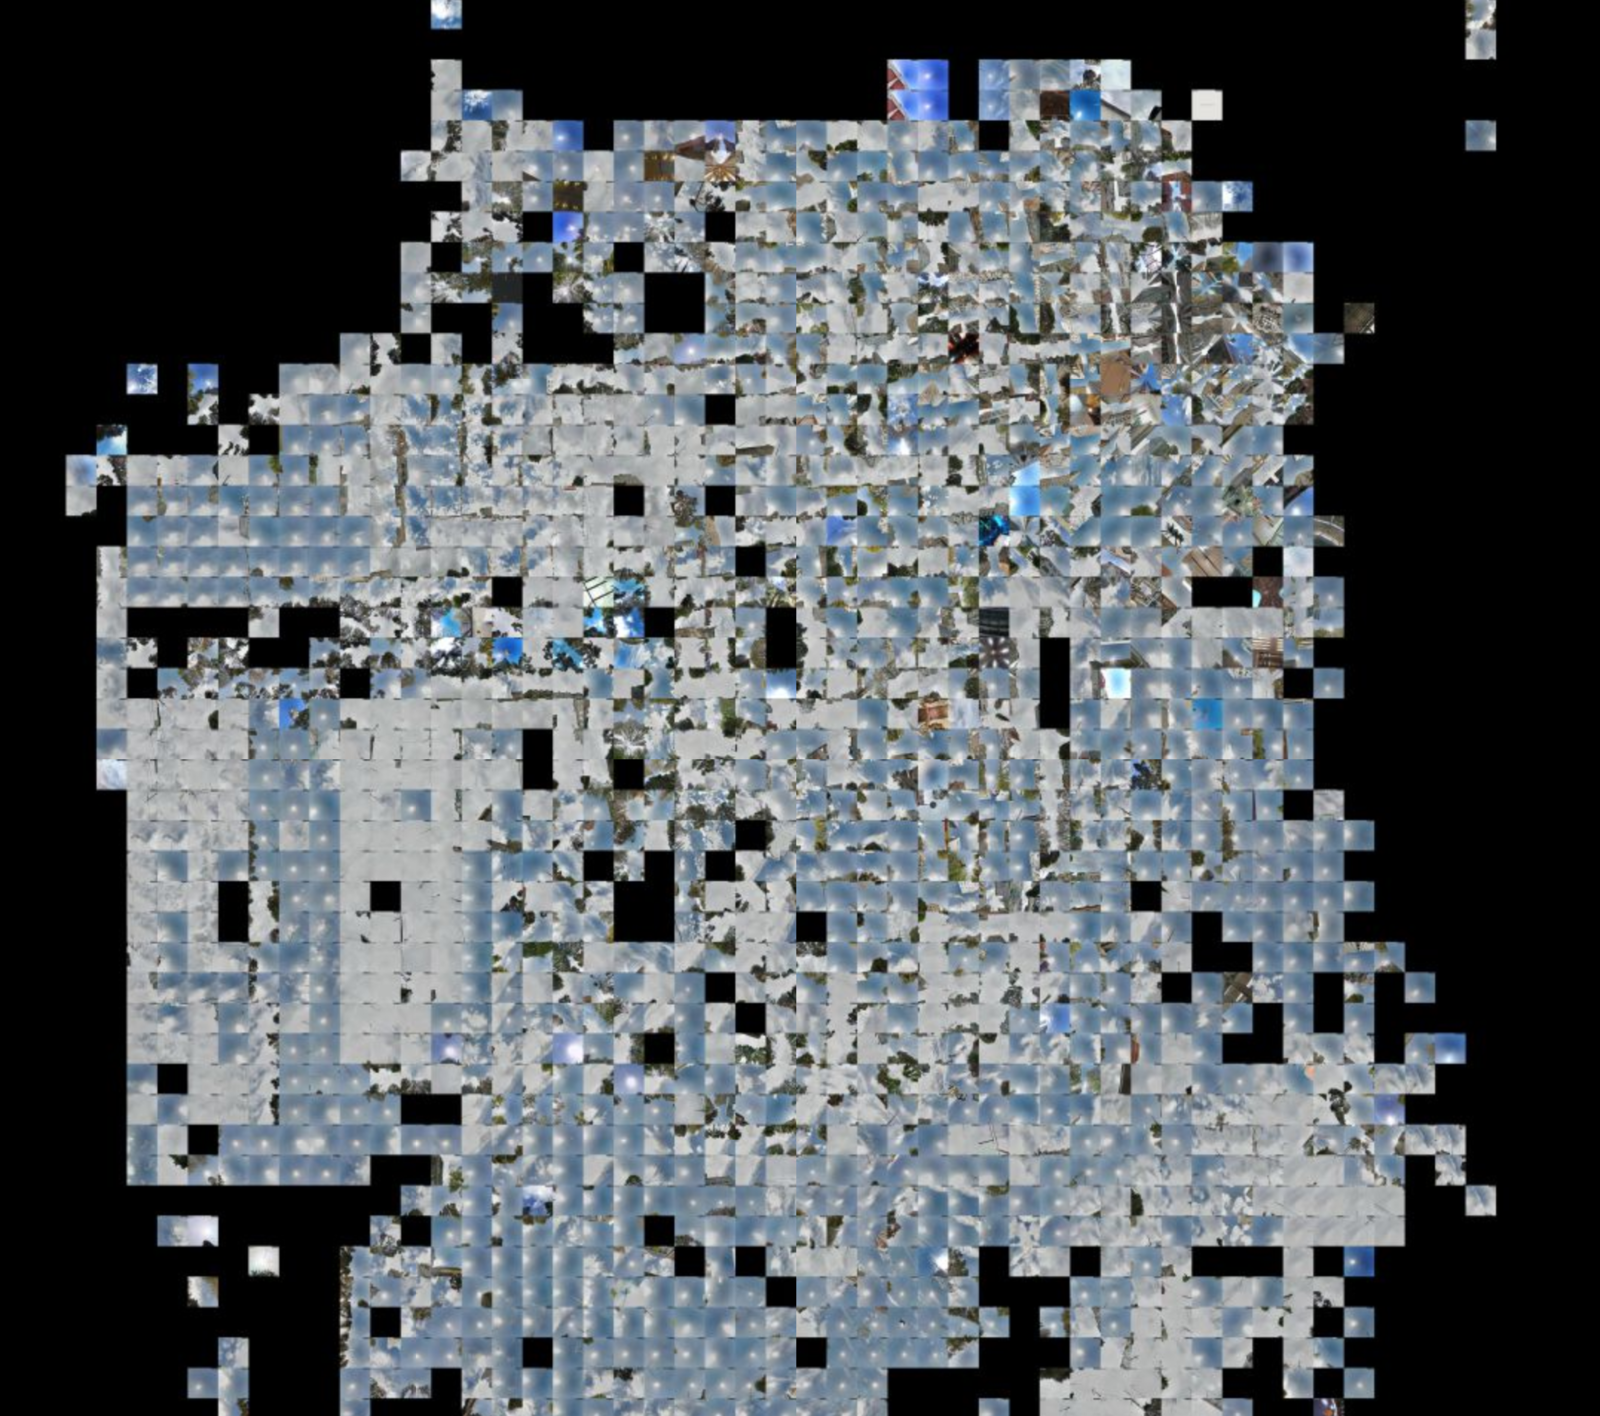
San Francisco is considerably sparser, with buildings only appearing in the Financial District and Market Street corridor. The particular patterns of the Street View drivers are revealed in the shifting weather, with fog more likely as the map nears the coast.
Browse around yourself, in San Francisco and New York.
Downloading images
To make these mosaics, I used the Google Street View API. It's free up to 25,000 images per day, which lets you make some pretty large mosaics in an afternoon. Downloading an image is straightforward. Here's a Python function that makes the request. (You can also use your browser to test it out.)
The request URL takes a few useful parameters: the latitude and longitude that your are requesting an image from, the field of view of the image (120 degrees is the widest angle possible), the pitch (90 degrees is looking straight up), the heading (0 is looking north), and the size of the image (320x320 px in this example.) You will also need to supply your API key.
One issue that I ran into fairly quickly was that a significant amount of urban Street View imagery is indoors now, which can place undesired images in the mosaic. (At least, I didn't desire them. You might!)
There's no way to request outdoor-only imagery, and there's also no official way to even find out if an image was taken indoors or outdoors. Luckily, there's an unofficial way, using undocumented APIs.
The outdoors function queries this private API, and returns a panorama ID number if it is likely an outdoors image (though it's not 100% accurate), returns 0 if it's likely indoors, and returns -1 if something else is going on.
Now it's straightforward to glue these pieces together to generate a map. We iterate through a grid, downloading images and assembling them together into one giant mosaic. Just be sure to watch your API usage! (and RAM!)
Looking ahead
What if we wanted to make an animation of a drive from the point of view of the driver? Something more linear, like this:
For my project, I wanted to animate a portion of a recent road trip, from Barstow to Amboy. We can use the same technique as above to download images, but instead of downloading images in a grid, we need to grab them from points along a path. If the route isn’t perfectly straight (and if your road trip is, I’m impressed!) then this means we’ll need to convert the path of a road to a list of latitude and longitude coordinates.
The ever-helpful GPS Visualizer can convert a Google Maps directions link into a GPX file with the latitude and longitude of every point along the route. However, the points in the GPX path are not spaced uniformly — they tend to be denser around curves and sparser in straight sections. Furthermore, the units of the points, latitude and longitude in degrees, don’t even have a constant conversion to distance — this varies with the latitude. To correct all that, I adapted a bit of Python from a previous project of mine.
This code block loads the GPX file for a path and converts it from a list of coordinates into a list of headings and directions, representing each step from one point to another. Then, it travels along this path, saving new points at regular distances. This is somewhat over-engineered for this application, since latitudes aren’t changing that much, and I’m sure it could be implemented much more “cleverly”. But it works just fine.
Then, we request the Google Street View imagery for each location exactly as before. In the middle of the Mojave though, we’re far less likely to end up with unwanted indoor imagery. In this code block, we also assemble a list of pairs of sequential images — you'll see why soon.
Finally, the directory of sequential images can be converted into a movie like the one above. I like Quicktime Player 7 (yes, really) for this sort of thing.
Making it up
These roadway image sequences all have some characteristic, and perhaps predictable, properties. Clouds swirl through the sky. Bushes and building appear in the center and sweep towards the edges. Lines on the road flash on and off. I wondered if I could train an algorithm to generate what it thought the next image in a sequence of these images would look like. Why do this? Simply put, because when computers aren’t super accurate at predicting things, the results can look cool (like the video at the beginning of this post.)
This video is an earlier version of the one from the beginning of the post. In this version the "dry/wet mix" regulating the feedback does not vary spatially.
We're going to train a type of network that is very good at generating realistic looking images, known as a generative adversarial network (GAN). GANs work by training two networks simultaneously — a discriminator, which tries to tell the difference between real images and synthetic ones, and a generator, which tries to fool the discriminator. If you've been on the internet in the past year, you've probably played around with a GAN called pix2pix, known for generating horrible cats.
We'll use pix2pix as a starting point. The first thing that we need is a training set. Remember the pairs from the Street View download script? Those are going to become our training images — the input is one Street View image, and the network attempts to synthesize (or, to use an evocative term of art, hallucinate) the Street View image from slightly further down the road. This code block assembles the images into a training set.
A utility in the pix2pix repository can process these images into the format expected the rest of the pix2pix scripts:
python scripts/combine_A_and_B.py --fold_A /path/to/data/A --fold_B /path/to/data/B --fold_AB /path/to/data
With the dataset assembled, the model can be easily trained with default settings by running the train.lua script:
DATA_ROOT=/path/to/data name=road_trip which_direction=AtoB th train.lua
You can peek at the progress by looking in checkpoints/road_trip.
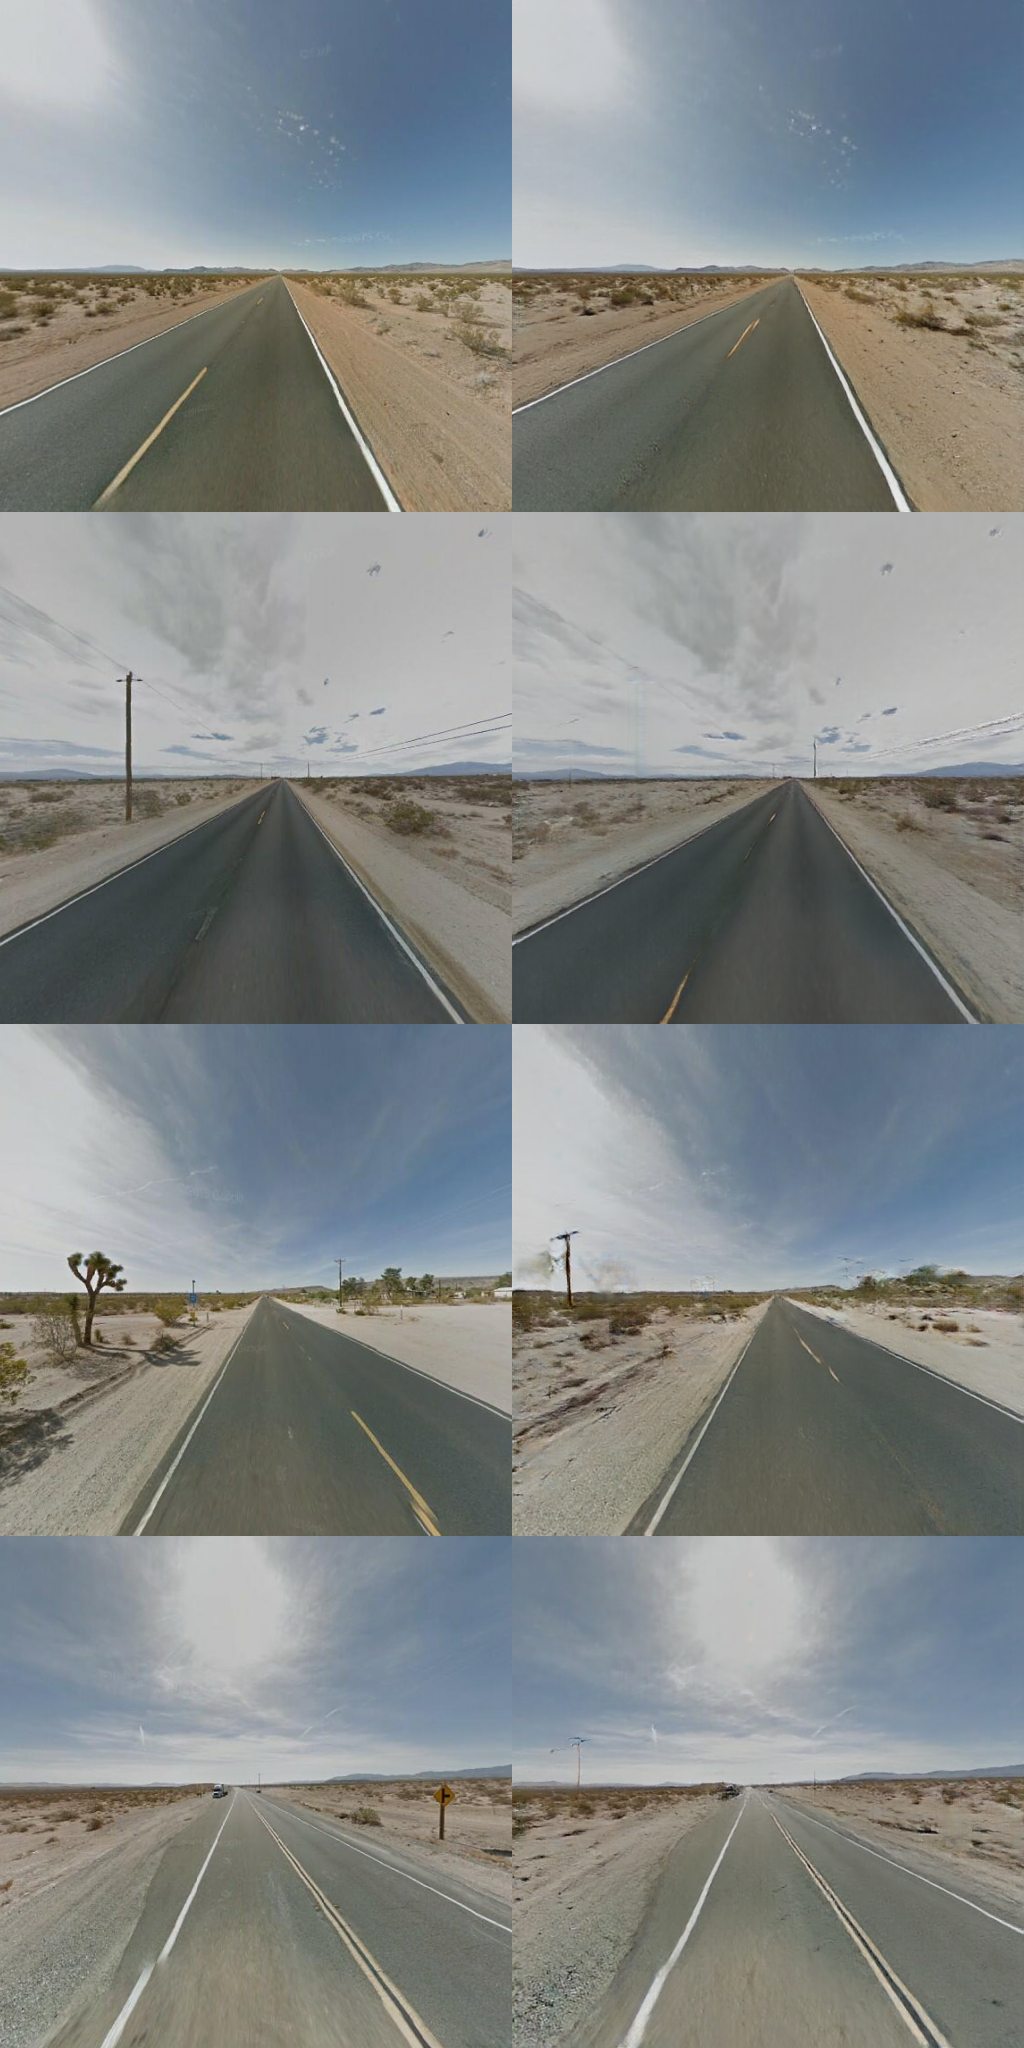
The output starts looking pretty good after around 100,000 steps. Notice how the network has learned that things like trees and power lines disappear if they are near the edges and get bigger if they are near the center.
In order to generate a sequence of synthesized images, we need to repeatedly feed back generated images into the neural network, which requires some modifications to the Lua scripts. While we're at it, let's increase the operating resolution of the networks to 512x512 px, so we get slightly higher resolution output. (It won't really be higher quality, but it will at least be smoother.)
In train.lua, change the "which_model_netG" parameter to "unet_512." I also increased the size of the network slightly more by changing "ngf" and "ndf" (the number of generator and discriminator filters, respectively) to 80. I don't have a good reason for doing this, as I'm kind of a deep learning charlatan, but I thought it produced a slightly higher quality result. Modify the defineG function to look like this, so that it knows what to do with "unet_512".
Now we need to define the network model for the 512x512 size. Add the following function to models.lua.
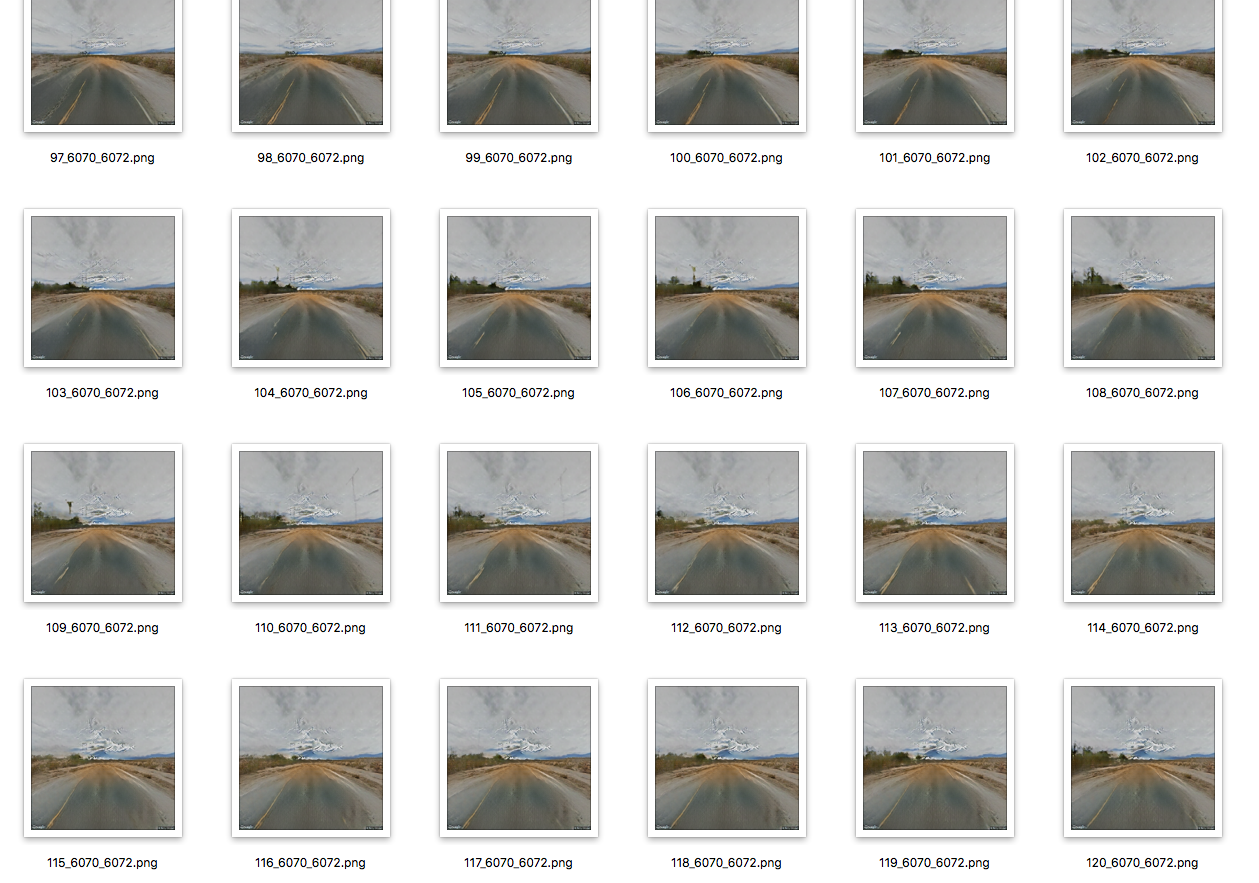
We can now train a high resolution model, the same way we trained the default model above. But how do we generate the hallucinatory output? We need to change the test script so that rather than generating output from pristine images, it generates images based on the last image it generated. However, when the network operates with full feedback like this, it quickly loses its grasp of reality, and it starts to generate boring, uniform content.
To improve this, I added a "dry/wet mix," that controls how much of the input to the network on each step is the previous output (feedback) and how much is the true next image (what the network was trying to hit with the previous output.) The dry/wet mix varies periodically, to create periods of more intense and less intense hallucinations. It also varies spatially -- feedback is encouraged in the center of the image, where the pixels surrounding it act as conditioning and output tends to be more interesting. Feedback and conditioning is implemented in this script, which I named hires_generate.lua.
Finally, you can generate your synthesized images by running that script like this:
DATA_ROOT=/path/to/data/ name=road_trip which_direction=AtoB n_images=1000 th hires_generate.lua
This will generate 1000 synthesized images from the dataset located at "/path/to/data" using the model named "road_trip". Look in results/road_trip/latest_net_G_fwd/images for the output.
If you make something cool inspired by this, send me an email — I'd love to see it. Happy trails!