We hope you love our recommendations! Some may have been sent as samples, but all were independently selected by our editors. Just FYI, BuzzFeed and its publishing partners may collect a share of sales and/or other compensation from the links on this page.

I've been a makeup artist for a few years now, and even create makeup related content and tutorials on my YouTube channel and social media platforms. We all know that the makeup world is overly saturated with a LOAD of products, and it can be hard to know, 1) what's worth buying, and 2) how to use them in the most effective way. Here I'll break it down for you and try to simplify a few common makeup questions (like how to know which brow product is right for you).

&media=https%3A%2F%2Fimg-mkr.buzzfeed.com%2Fbuzzfeed-static%2Fstatic%2F2022-04%2F8%2F13%2Fcampaign_images%2F2673987d3f38%2Fhow-to-choose-the-right-eyebrow-product-for-you-a-2-2016-1649425737-5_dblbig.jpg%3Ftemplate%3Dpinterest-vertical-halftone-v1%26title%3DSG93IFRvIENob29zZSBUaGUgUmlnaHQgRXllYnJvdyBQcm9kdWN0IEZvciBZb3UgKEFjY29yZGluZyBUbyBNZSwgQSBNYWtldXAgQXJ0aXN0KQ%3D%3D%26color1%3Dorange)
Brows are a super important part of your makeup look, because they're the primary feature that frames the face. Whether you have naturally thick brows or relatively sparse brow hairs, you can do everything from filling your brows to just neatening them up with a few simple products. The brow market is highly saturated so it can be easy to get lost amongst all the pomades, brow soaps, and pencils, but bear with me on this and we'll find the perfect product for your look!
1. First, let's take a look at eyebrow pomades.
Who would like it?
These are what you want to choose if you love a bold brow, as they'll thicken up the look of your brows within seconds. If you love that super snatched and defined look, you should definitely consider opting for a creamy brow pomade.
What is it and how do I use it?
These look pretty similar to potted gel eyeliners, only they have a much creamier texture. They work best when used with a thin, angled brush, which you want to dip straight into the product. Apply the pomade more so to the tail of your brows, and use it a little more sparingly when it comes to the front of the brow. Brush the product out with a spoolie as you go along and build it up as and when you see fit. By gradually building the product up as you go, you'll find you're more than capable of creating that classic instagram ombré brow.
The Anastasia Beverly Hills Dipbrow Pomade is a cult classic, and probably the most popular choice when it comes to brow pomades. (I used mine every makeup day for the best part of seven years, so it's safe to say I'd recommend this one).
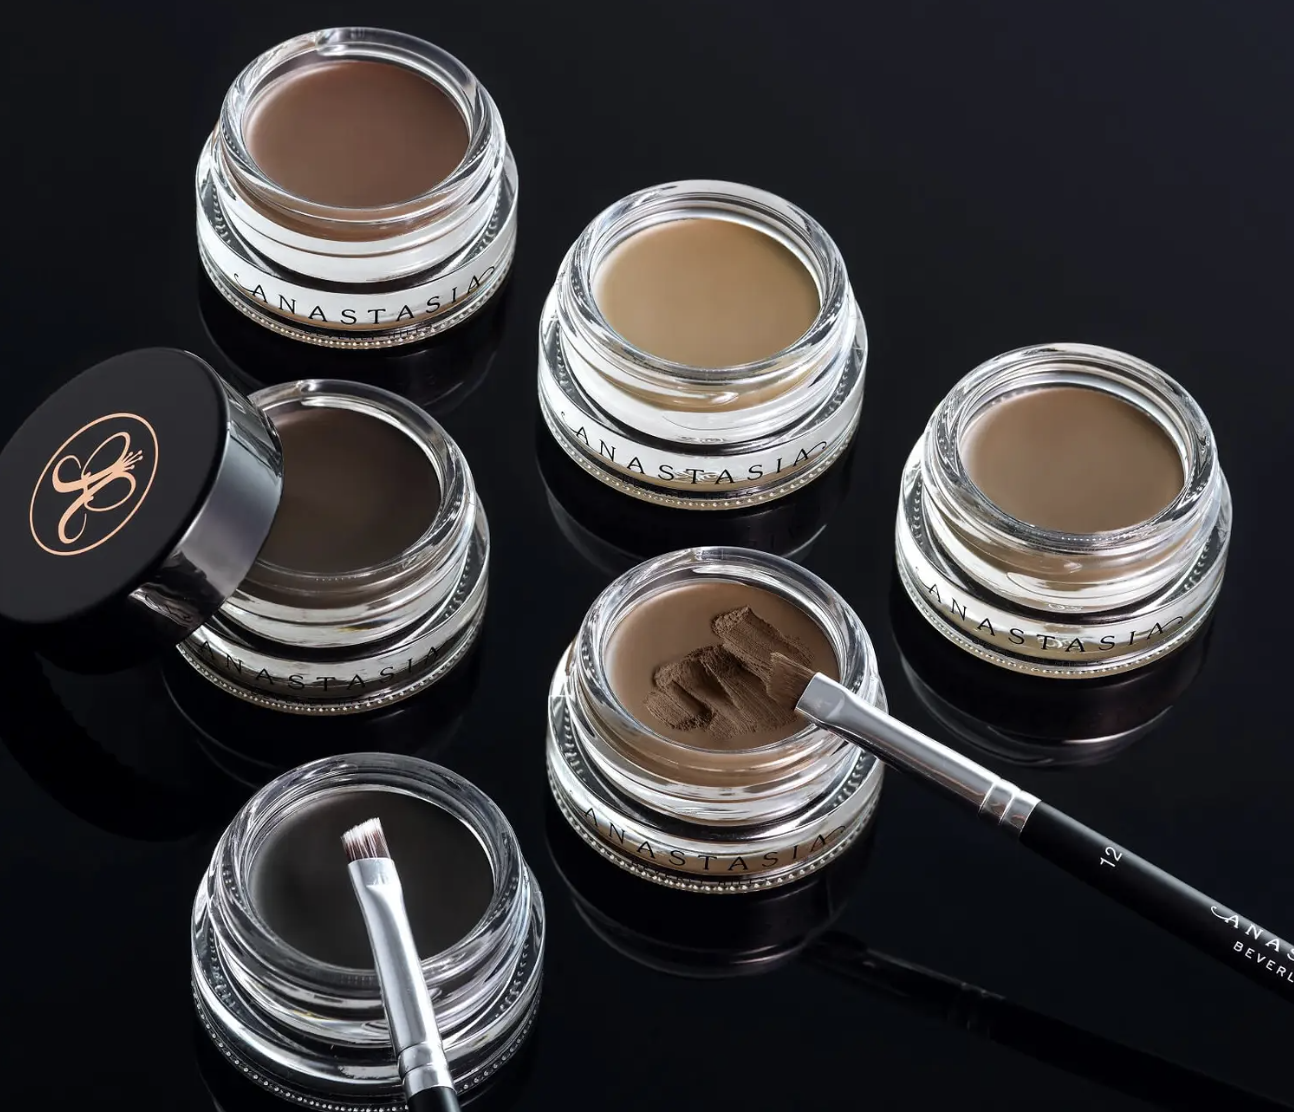
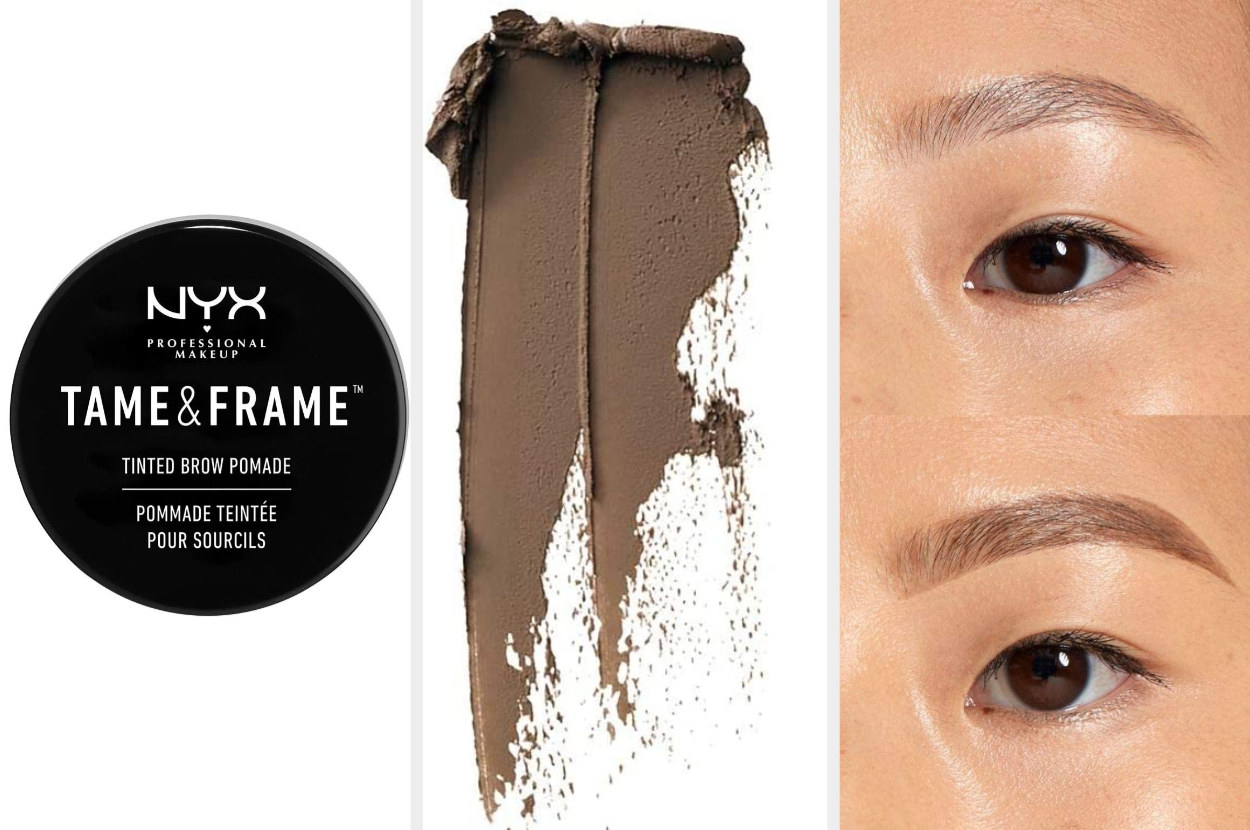
A cheaper alternative is this eyebrow pomade from NYX. In my experience the formula is just as creamy, although slightly less pigmented than the previous one. If you like the sound of a pomade but want it to look just a little softer, this could be a good one to choose.
If you're sold on a pomade, you'll need a brush to apply it with. This one is pretty much perfect, and even comes with a spoolie on the other end.

2. Next, brow powders.
Who would like it?
If you like the sound of the boldness pomades offer, it might also be worth considering brow powders. The main difference between the two is that brow powders are a little softer, have a powdery texture as opposed to a creamy formula, and are easier than pomades to work with if you're just starting out.
What is it and how do I use it?
It comes in a palette, similar to how eyeshadows tend to look. They often come with a mini brush in there too, ready for you to dip into the product and gradually stroke over your brows. As it's a powder formula, it's a lot more forgiving than a pomade so you can rub bits around as you go, but bear in mind that it creates less of a sharp and defined look compared to if you were to use a pomade.
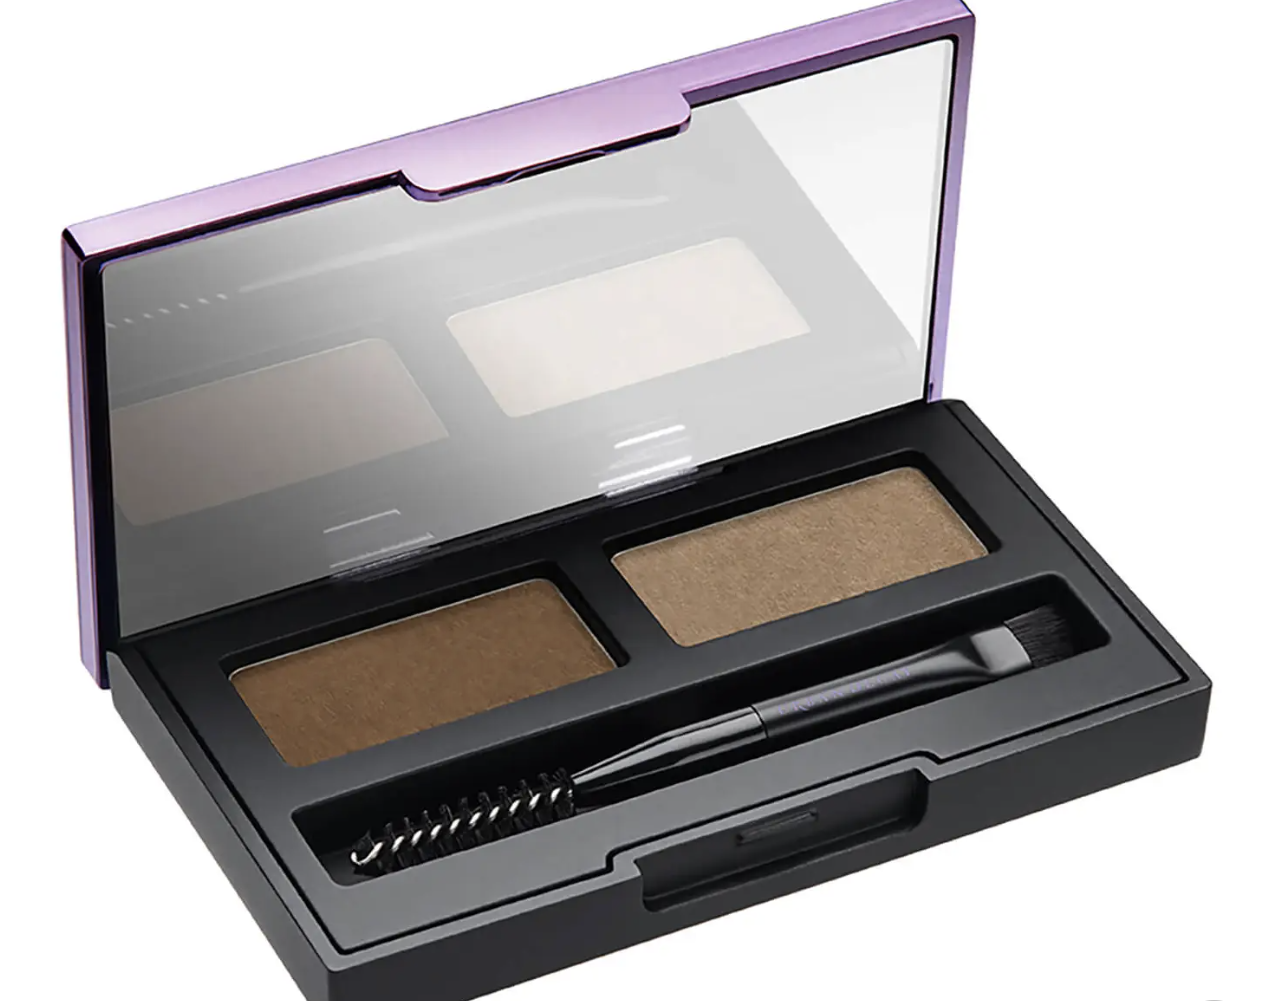
This one from Urban Decay comes with two different powder shades. Having two shades to hand will be super useful if you want to create some dimension with your brow, by making it lighter at the front and darker towards the tail.
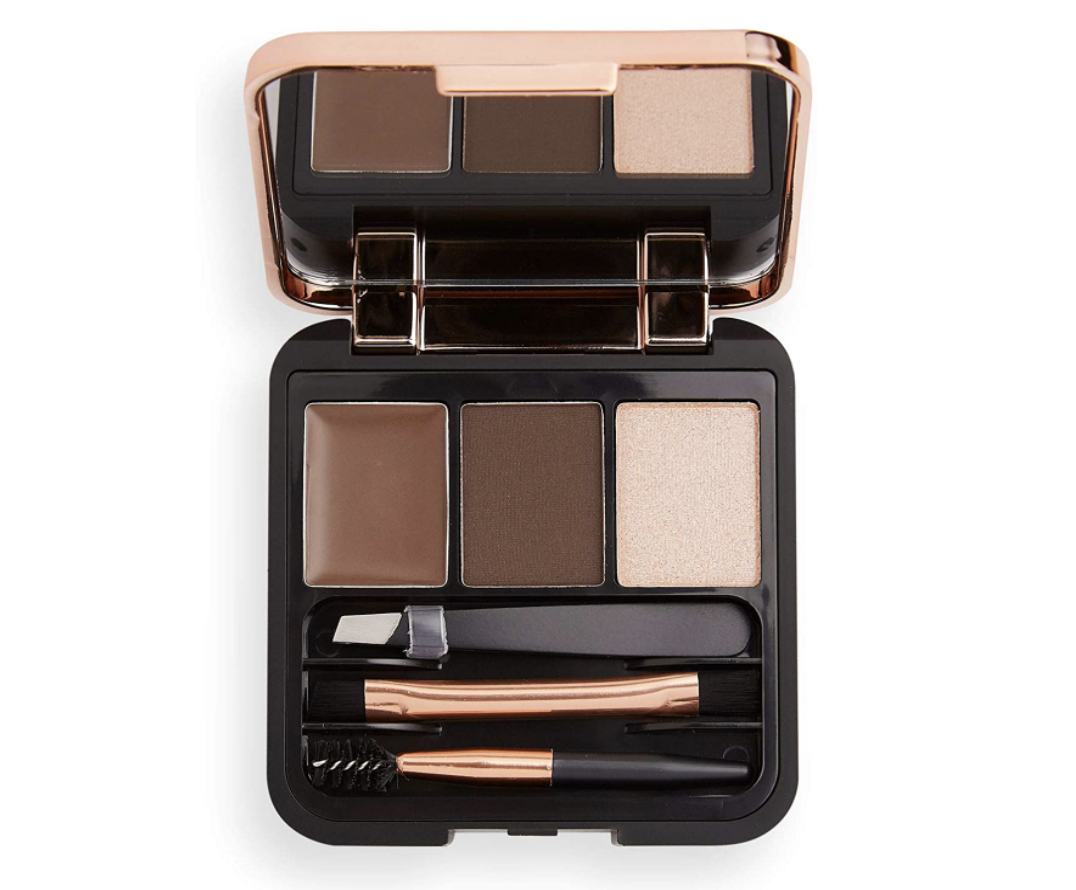
This one from Makeup Revolution is a little different as it comes with a brow wax, powder, and highlighter. The tinted wax will allow you to sculpt your natural brow hairs in place before applying the powder on top. The highlighter can then be applied under the arch of your brow to make it stand out and pop a little more.
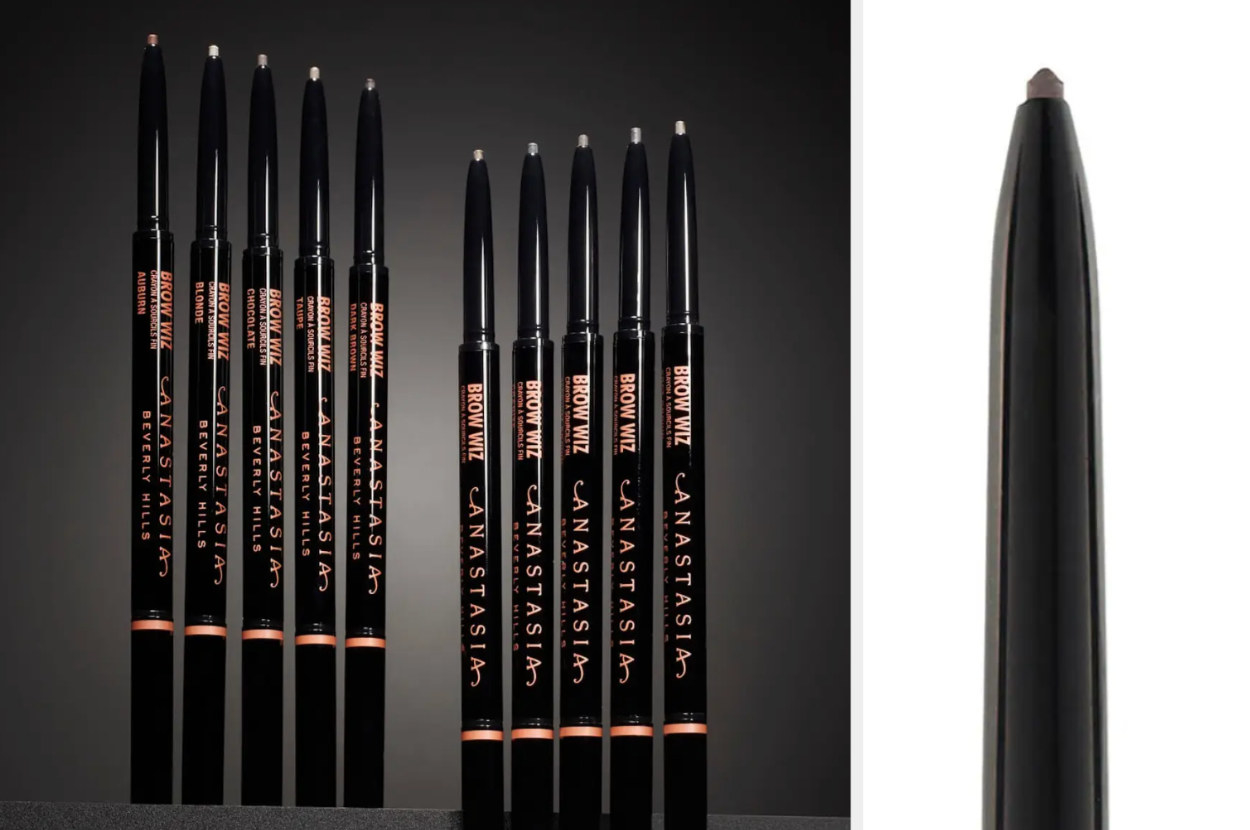
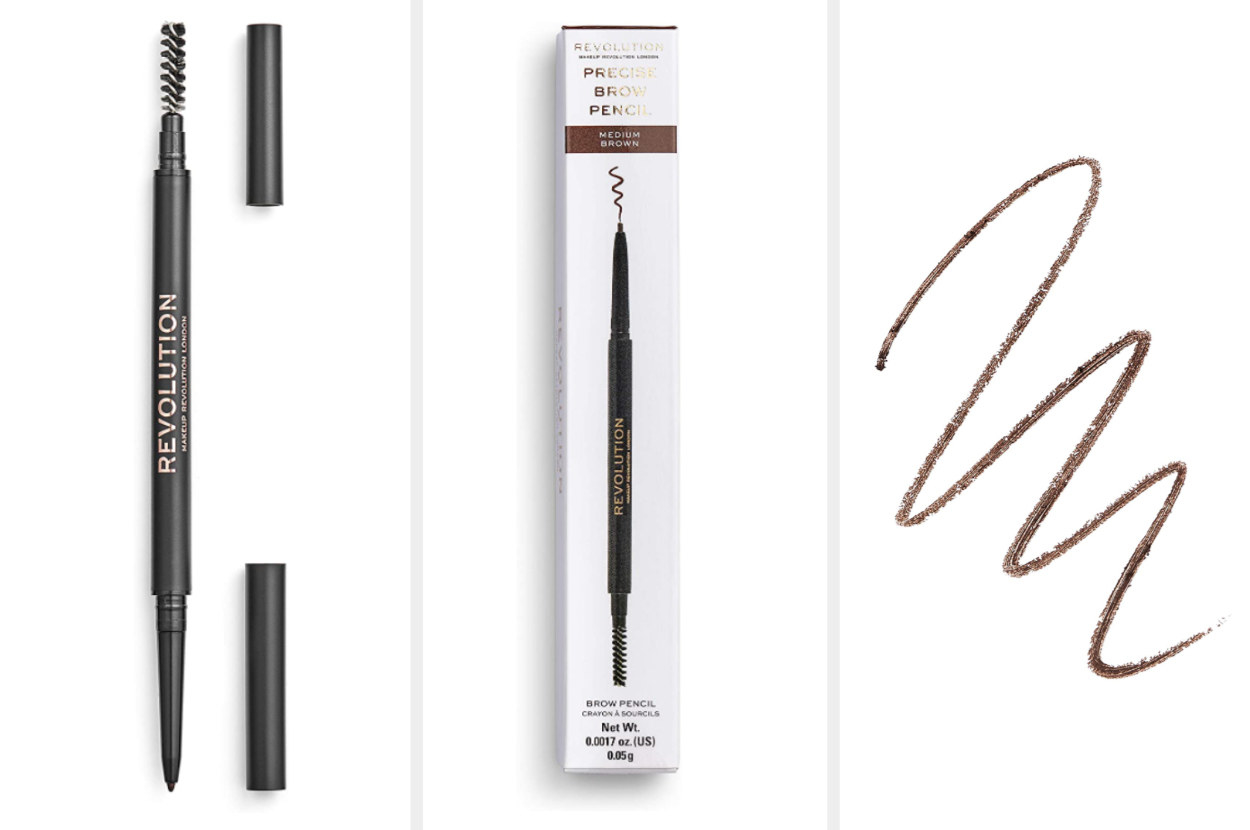
3. Now let's move on to the classic eyebrow pencil.
Who would like it?
If you already have pretty full-looking brows and just want to discretely fill in a couple of gaps, this is definitely the one for you.
What is it and how do I use it?
There are traditional looking pencils that you sharpen, or mechanical ones that you simply twist up. Personally I'm a fan of the mechanical ones (which I think is quite a popular opinion), as you get a lot more precision when drawing straight onto your brows. If you're curious, this has been my main choice of brow product for the past couple of years now, and I'm still just as obsessed with it as I was when I first started using it.
Anastasia Beverly Hills have this very popular one and if I'm honest, I can't fault it. It's got the perfect texture making it easy enough to glide onto the brows, without being too creamy that it rubs or melts away over the course of the day.
This Makeup Revolution pencil is a lot more affordable, and happens to be the one I use pretty much everyday. I do go through it a little bit quicker, but that's the only negative I have to say about it if I'm honest.
For a pencil with a slightly thicker nib and creamier consistency, check out this pencil from e.l.f.

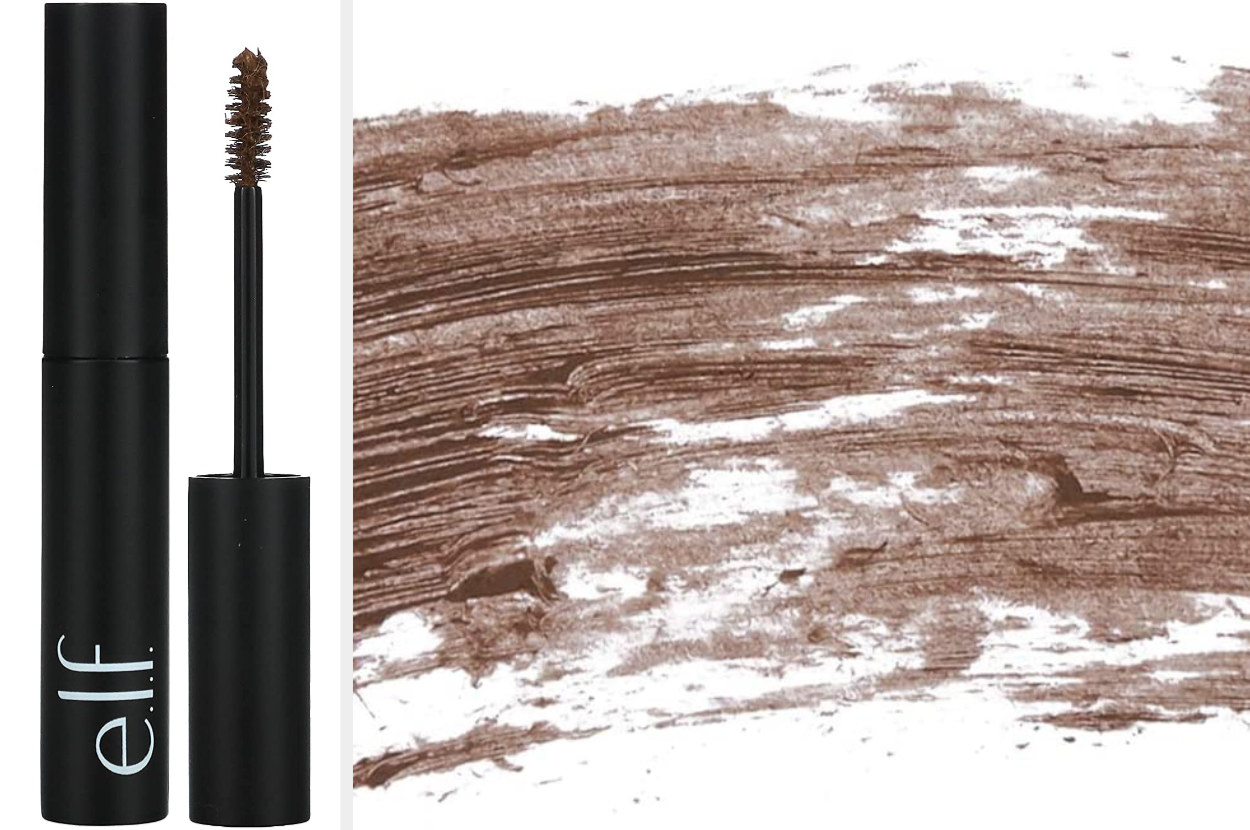
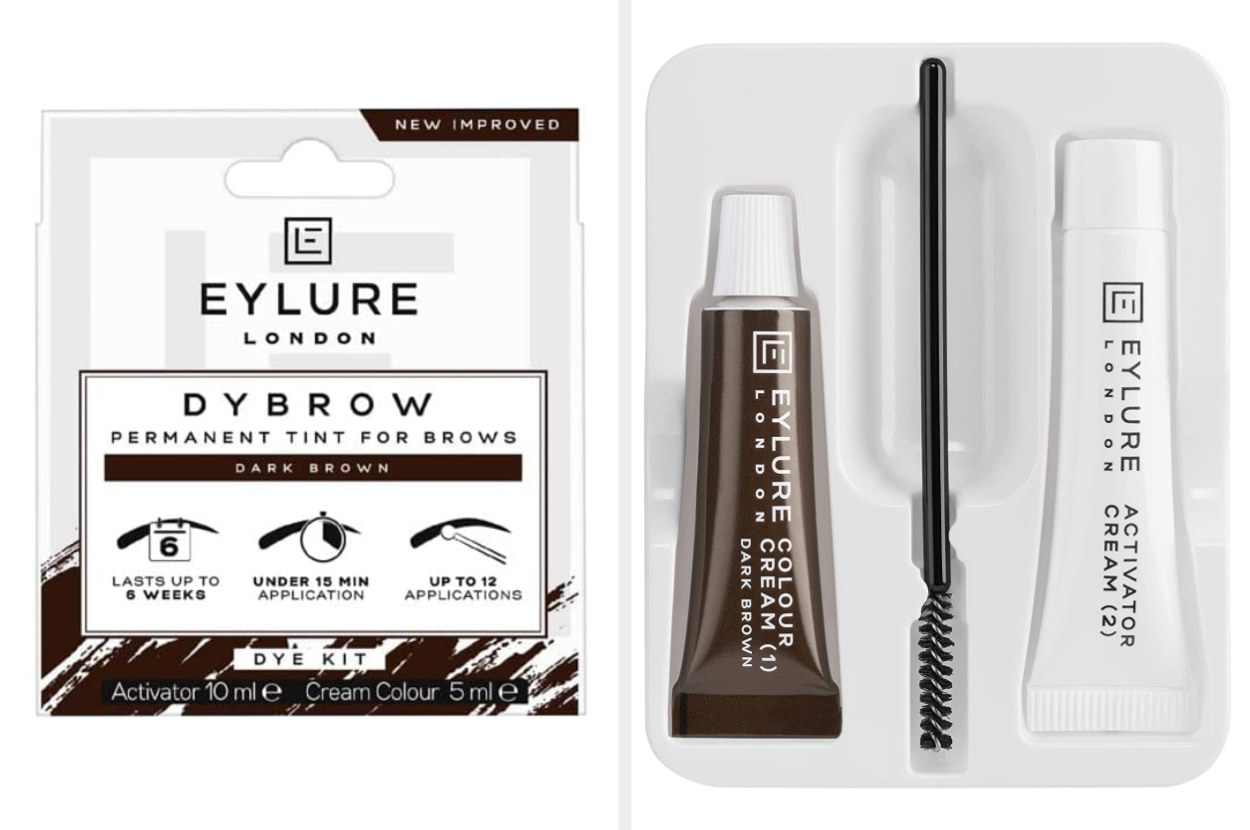
4. Let's talk about eyebrow tints, whether that be an eyebrow gel or a dye.
Who would like it?
If you have faint brow hairs that you want to darken as opposed to creating the illusion of more hairs, these are the products you should be looking at!
What is it and how do I use it?
You can either use a tinted brow gel, which you brush on in just a few seconds, or a permanent eyebrow dye if you're looking for something more long-lasting and less cosmetic. The brow gel comes fitted with a spoolie that you brush across your brows to sculpt and tint them, and is probably one of the quickest brow methods out there. The permanent dye comes as a similar-looking gel that you brush through your brows, but the effects of this one will be permanent instead of lasting just a few hours.
This e.l.f. tinted brow gel is buildable, volumising, and super quick and easy to use.
This Eylure dye kit takes less than 15 minutes to apply, lasts up to six weeks, and provides you with 12 applications.
5. Next up, temporary brow laminating products.
Who would like it?
If you want to capitalise on your natural brow hairs to create a thick and fluffy look, creating the illusion of laminated brows is the way to go. Depending on how soft or defined you want your brows to look, you can choose a soap brow product or a strong, clear, eyebrow gel.
What is it and how do I use it?
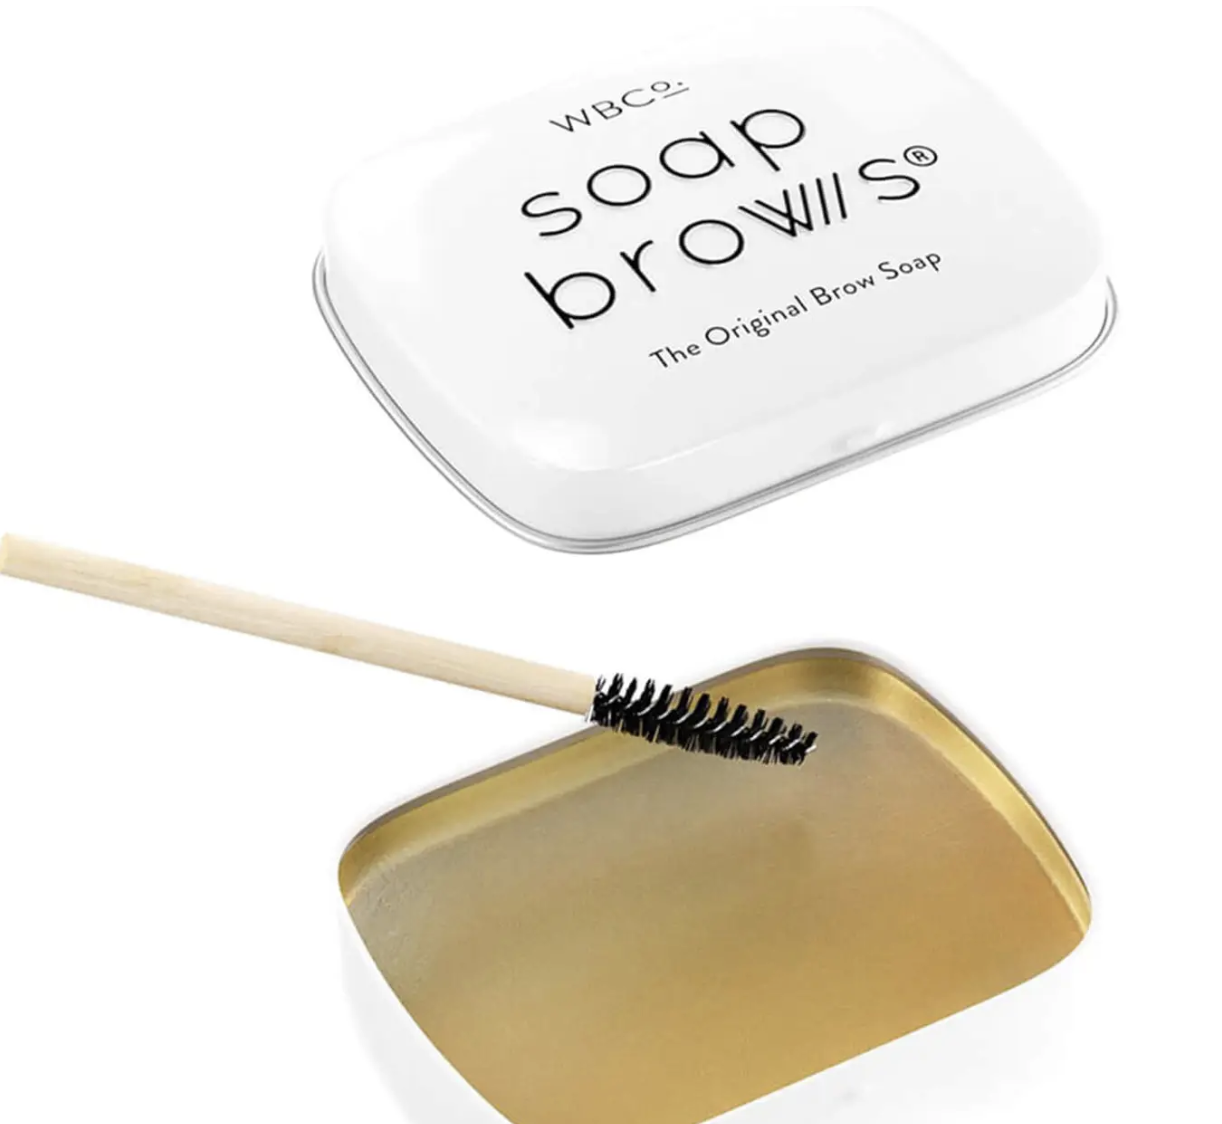
When it comes to creating soap brows, you need to wet the soap with either some water or a setting spray, brush a spoolie over it, and comb the product through your brows. Once they're fully coated you can style them however you choose, knowing they'll stay in place. With a strong eyebrow gel you just have to take the spoolie out of the tube and apply it straight to your brows, sculpt them, and you're pretty much done!
This soap brows product comes ready with a spoolie, and is a pretty popular choice for those that are a fan of the feathered brow look.
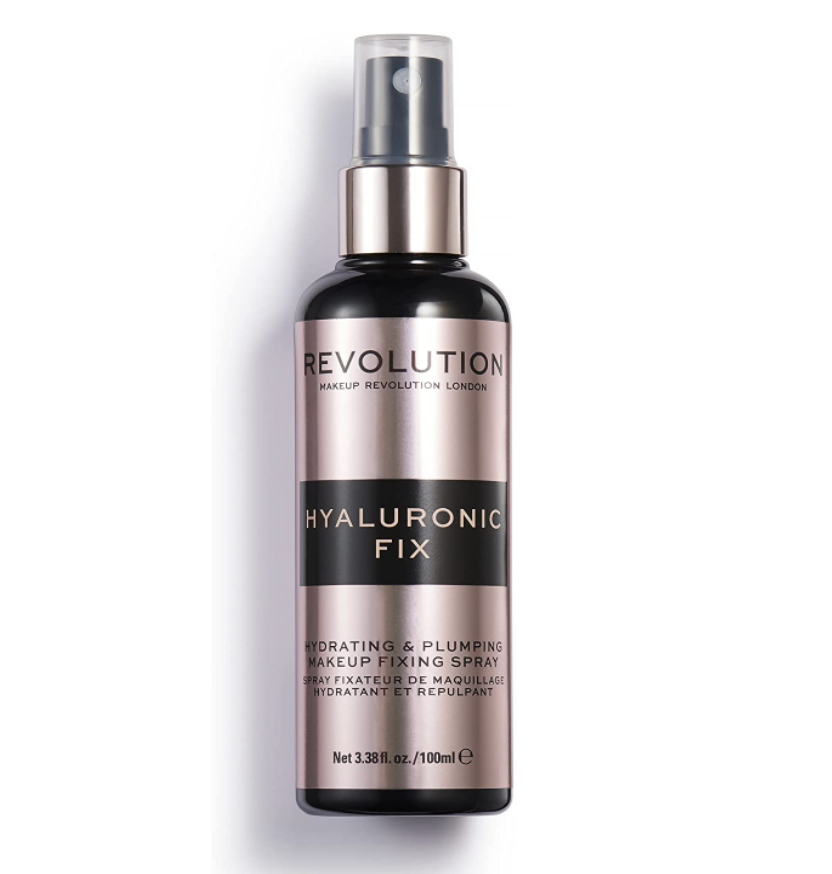
If you want to go for that extra hold with your soap brows, wet the product with a fixing spray instead of water. My current favourite spray (which I can't get enough of) is this one from Makeup Revolution.
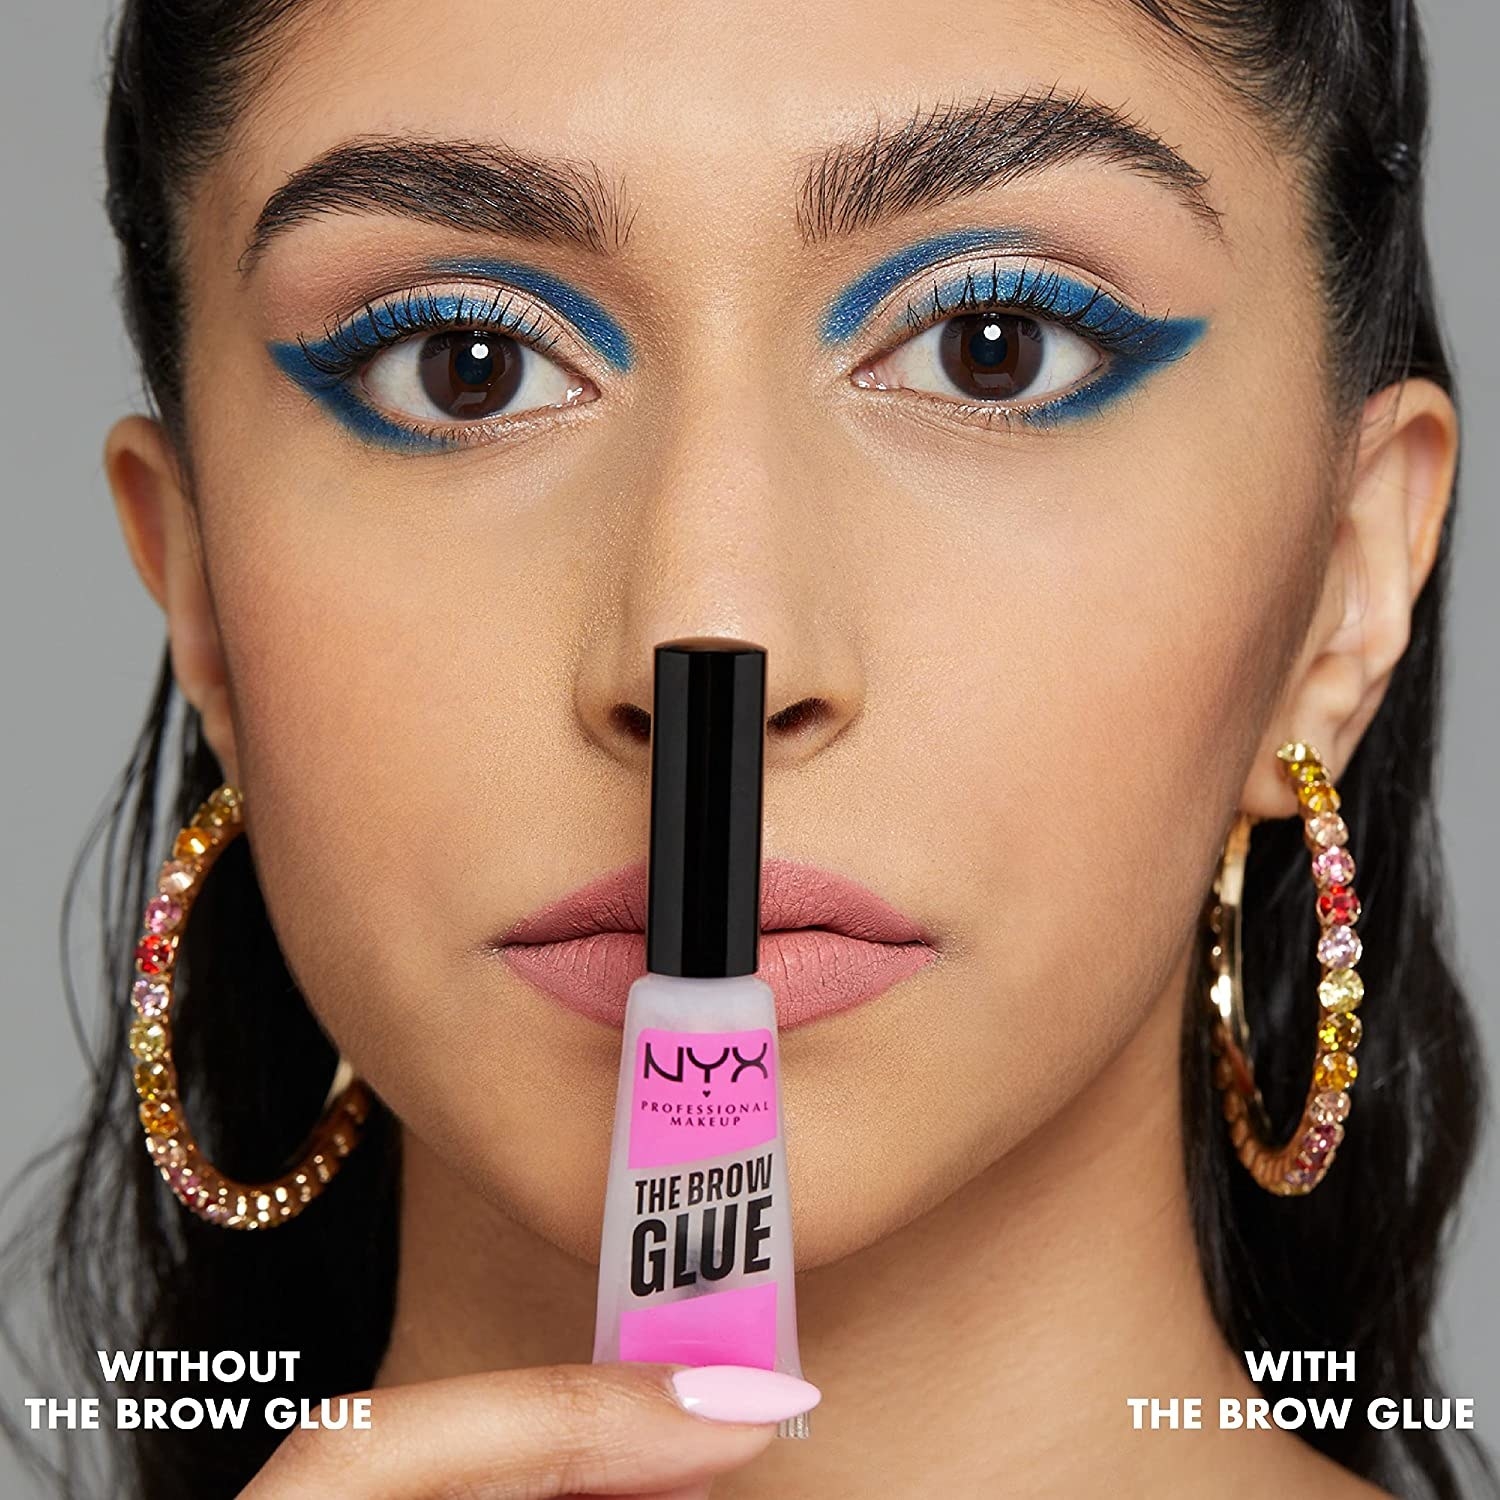
The faster alternative (which I often opt for), is this NYX brow glue. Personally, I think it's a hugely underrated product.
6. Finally, we have brow pens.
Who would like it?
If you love the natural look and don't want to make it too obvious that you've got product in your brows, you'll love these brow products. With these pens you can recreate the look of individual brow hairs, which will blend in perfectly with your existing hairs. *Insert "nobody's gonna know, how would they know?" TikTok audio here*.
What is it and how do I use it?
It's looks like a regular felt tip pen and is super easy to use. Just use a light hand to simply draw individual brow strokes wherever you want your brows to appear a little fuller. You can even use a product like this over the top of your soap brows to create a thicker brow look.
This Makeup Revolution brow pen has a super fine tip, which allows you to be extra precise when it comes to recreating hair strokes.

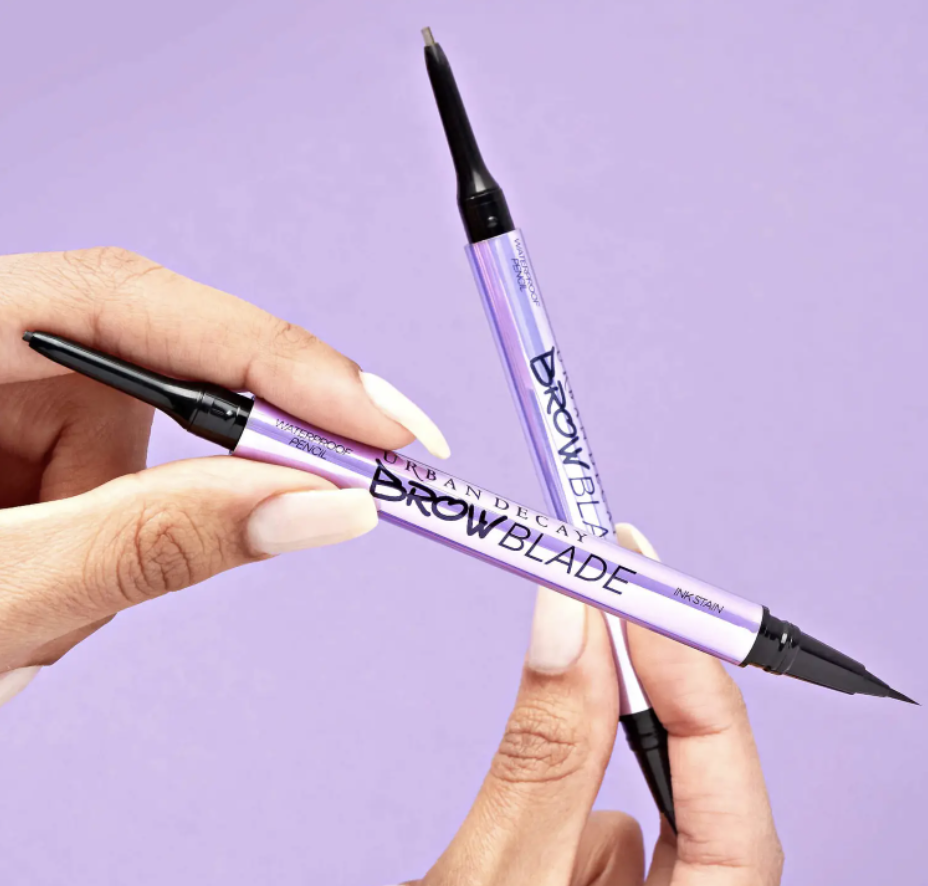
If you want a 2-in-1 product, this Urban Decay brow pen also has a fine eyebrow pencil fitted on the other end.
So there you have it – my ultimate choices for every type of brow! If you're after even more of my tips, check out some of these pieces:
💄As A Makeup Artist, Here Are 20 Things I Know You Won't Regret Buying