
MATERIALS:
3 empty plastic bottles
Masking tape
Paint
Twine
Box cutter
Scissors
Drill
Cup hook
Miracle-Gro® Moisture Control® Potting Mix soil
Indoor plants
INSTRUCTIONS:
1. Save up 3 empty plastic water bottles.
2. Cut off the top of the water bottles using a box cutter and scissors to the desired height.
3. Drill two holes on either end of the bottles near the top edge.
4. Drill a few holes on the bottom of the bottles for drainage and to help water the planter’s underneath.
5. Tie the ends of a piece of twine within the top holes for the first bottle.
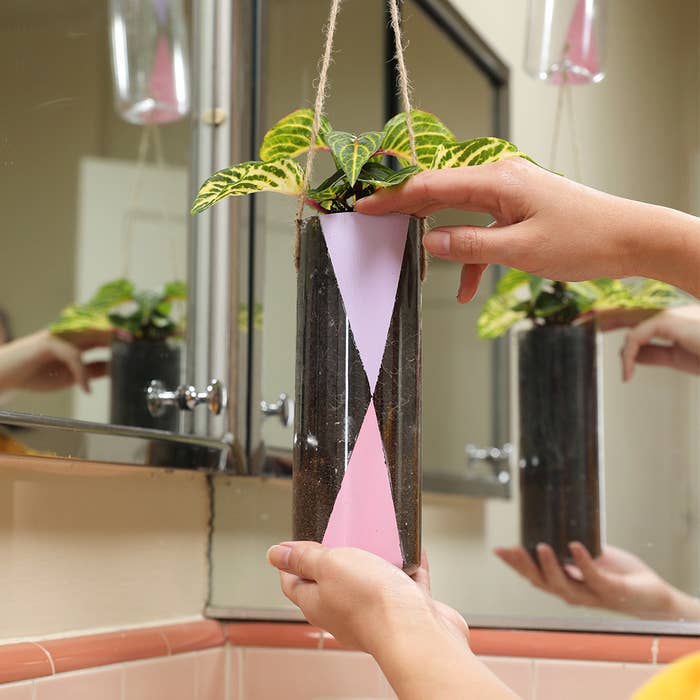
6. Use masking tape to create a design on the bottle and paint clean lines on it. Remove tape when the paint is dry.
7. Tie strands of twine in the top holes for the rest of the bottles. Add designs.
8. Connect the bottles by tying the twine through one of the bottom holes.
9. Add Miracle-Gro® Moisture Control® Potting Mix soil to the bottom halves of the bottles.
10. Place indoor plants into the bottles.
11. Use a cup hook to hang the planter column in a bright room.