Hey, it's Krista, back again with another topic on Find the Facts — a weekly series where we relearn things we may have been taught incorrectly and debunk viral information from the internet.


Recently, I have seen so many people contouring in these really interesting ways on TikTok. Enter example A:
And example B:
I had my doubts about the videos above, but they ended up looking amazing! This brings me to my point for today's topic: Contouring and highlighting take your makeup look to the next level, but is there a right or wrong way to do it — and what is the best way to do it?

To get the information we need to know, I spoke to celebrity makeup artist Lauren D'Amelio, who is also an educator teaching master classes on makeup application.

Here is the full video of my interview with Lauren if you want to watch. Otherwise, scroll down for a breakdown of everything!


View this video on YouTube

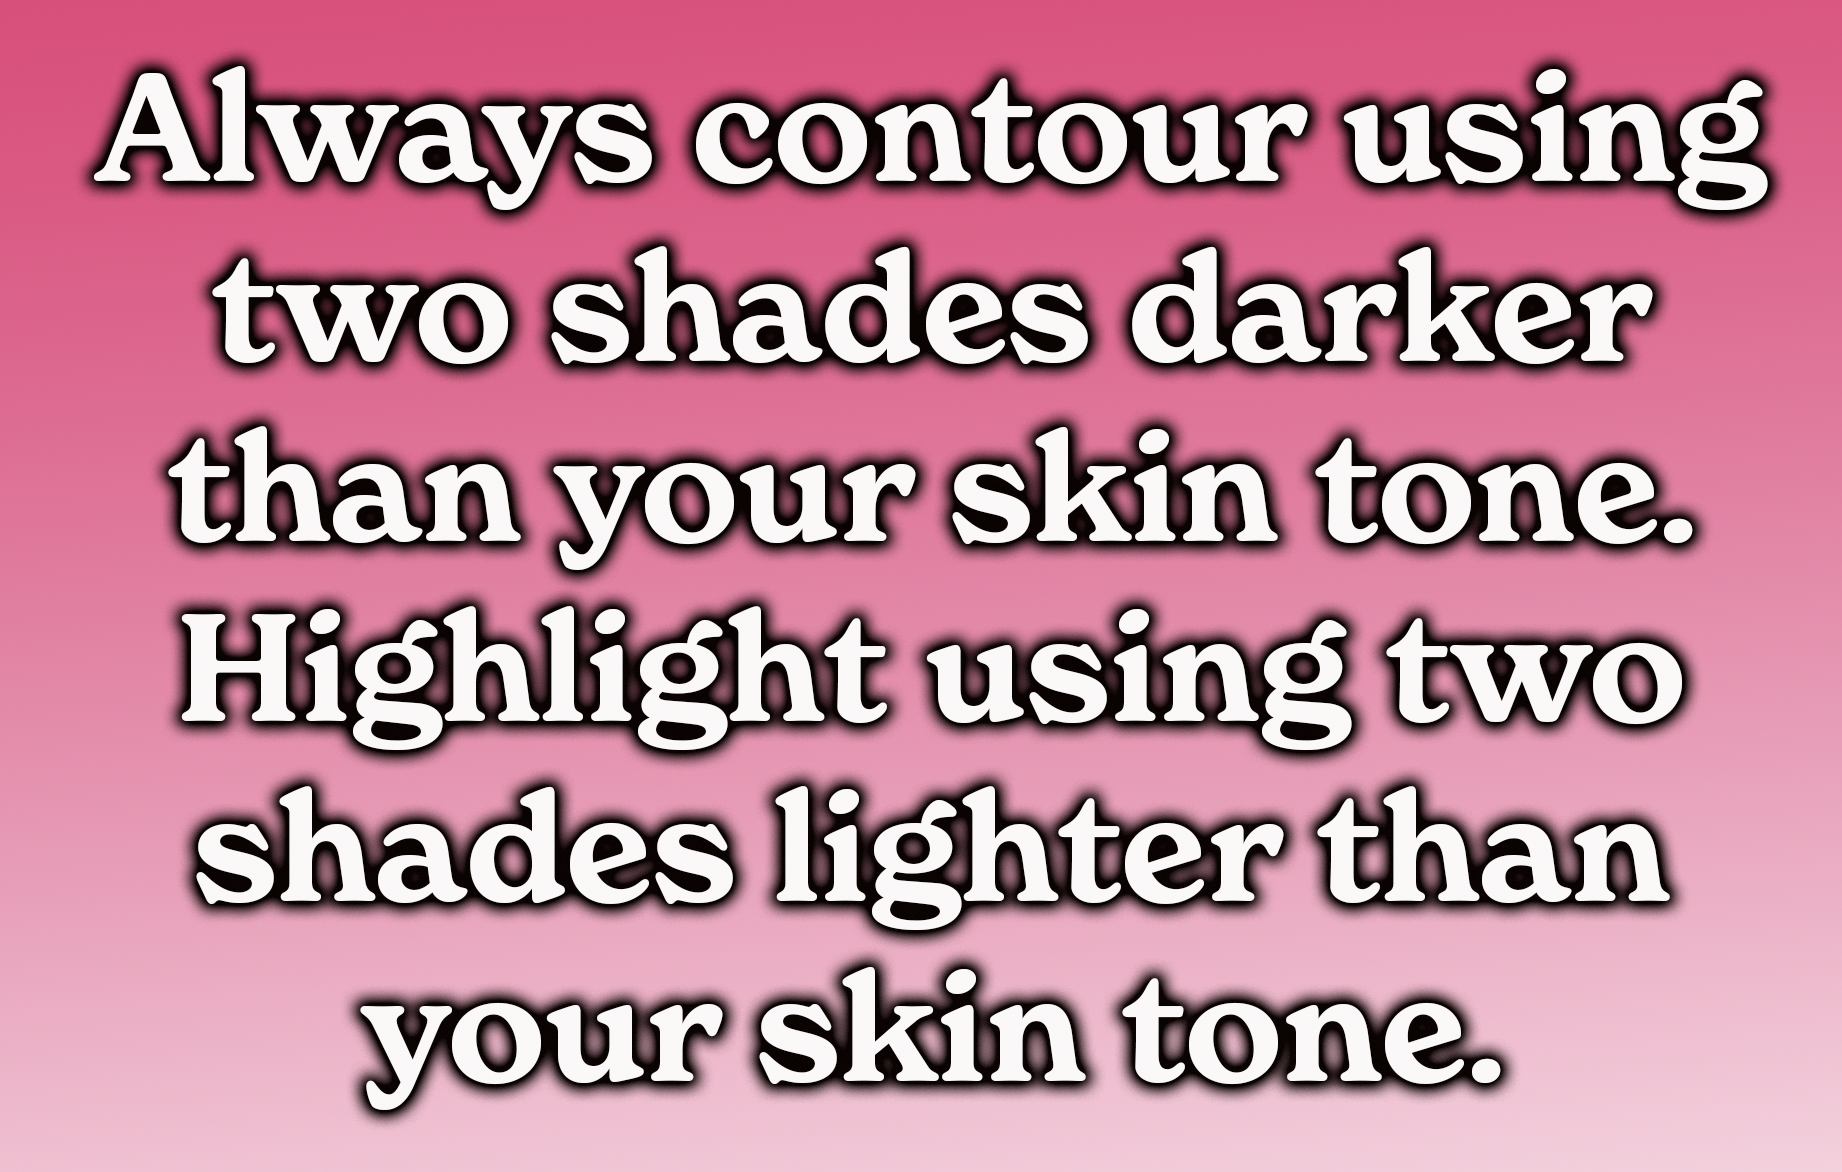
First of all, contouring is where you use a darker tone to create shadows on your face, and highlighting is where you use a lighter tone to bring things forward.
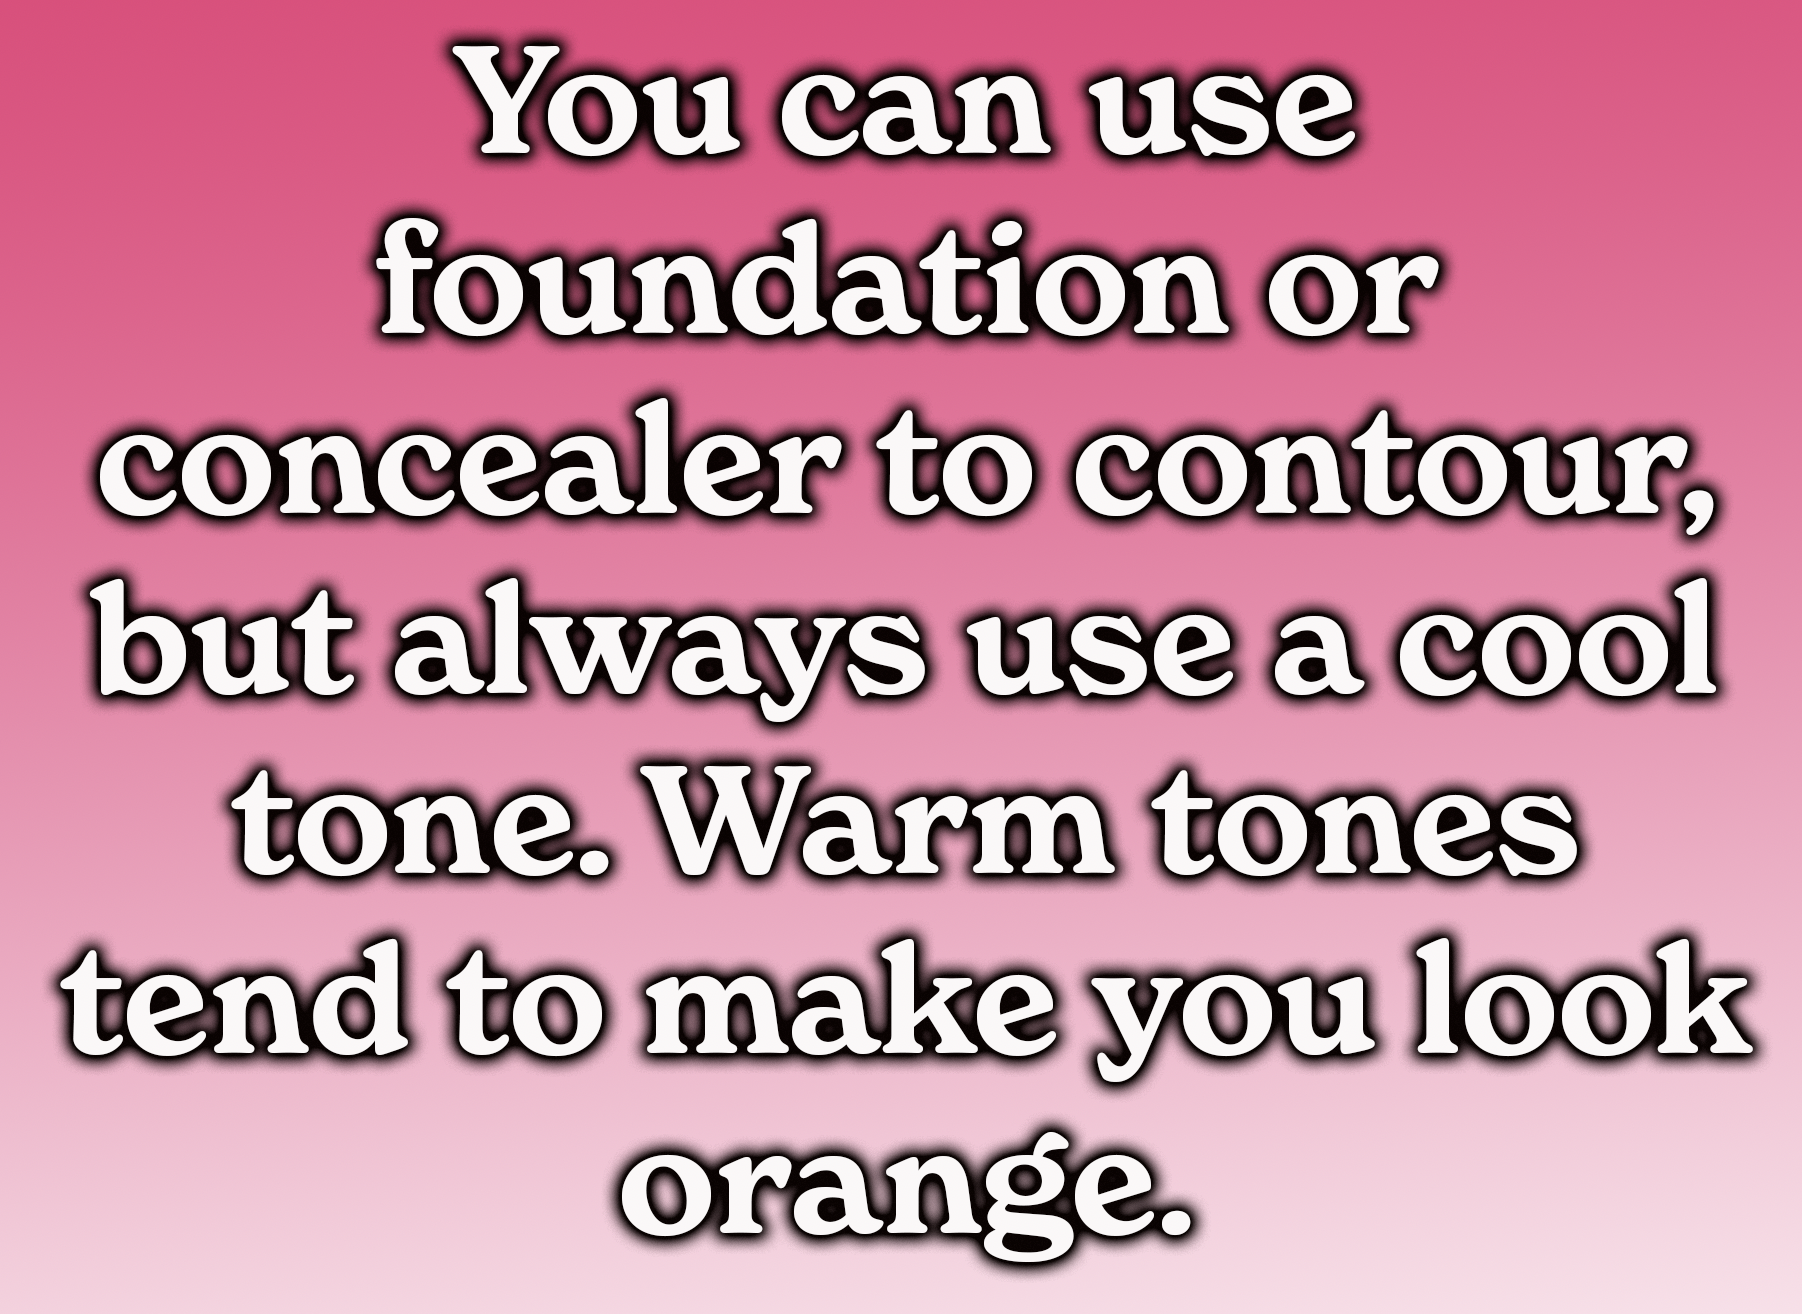
Lauren said that you can use whatever product you want for contouring and highlighting. However, one important thing to note is that your contour needs to be a cool tone. "If it's a super-warm tone, you're going to get these orangey stripes down your face. It's good to add warmth in certain areas, but when you're trying to contour, it's more of a shadow, so you want it to be a little more cool-toned," she explained.
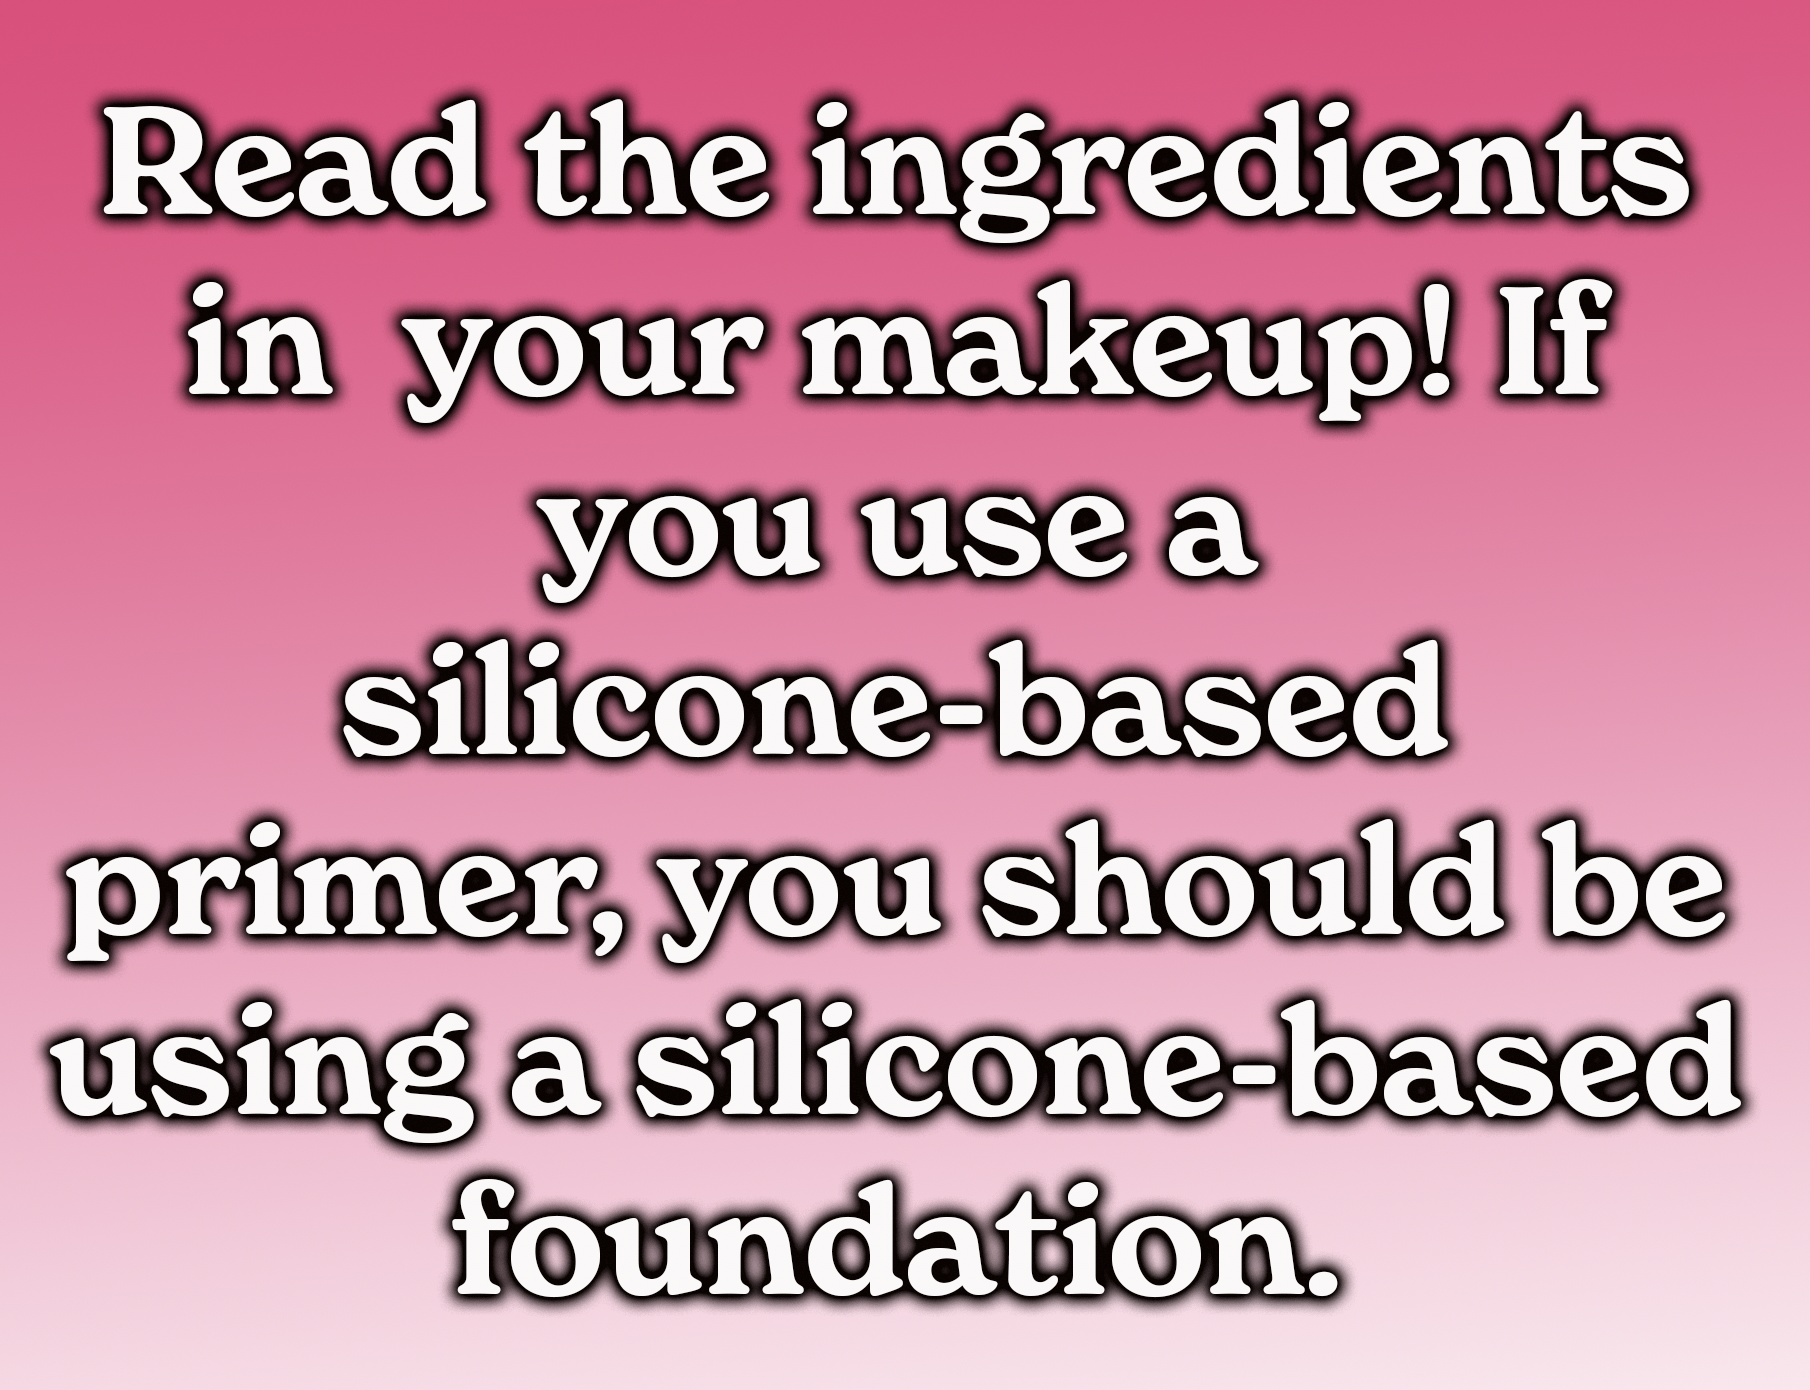
Speaking of what products you're using, it is important to understand what ingredients are in your makeup to know what will blend properly. "Never use a water-based foundation over a silicone-based primer because it won't sit well. Thinking about water and oil, they're not going to mix and, throughout the day, it's going to break apart."
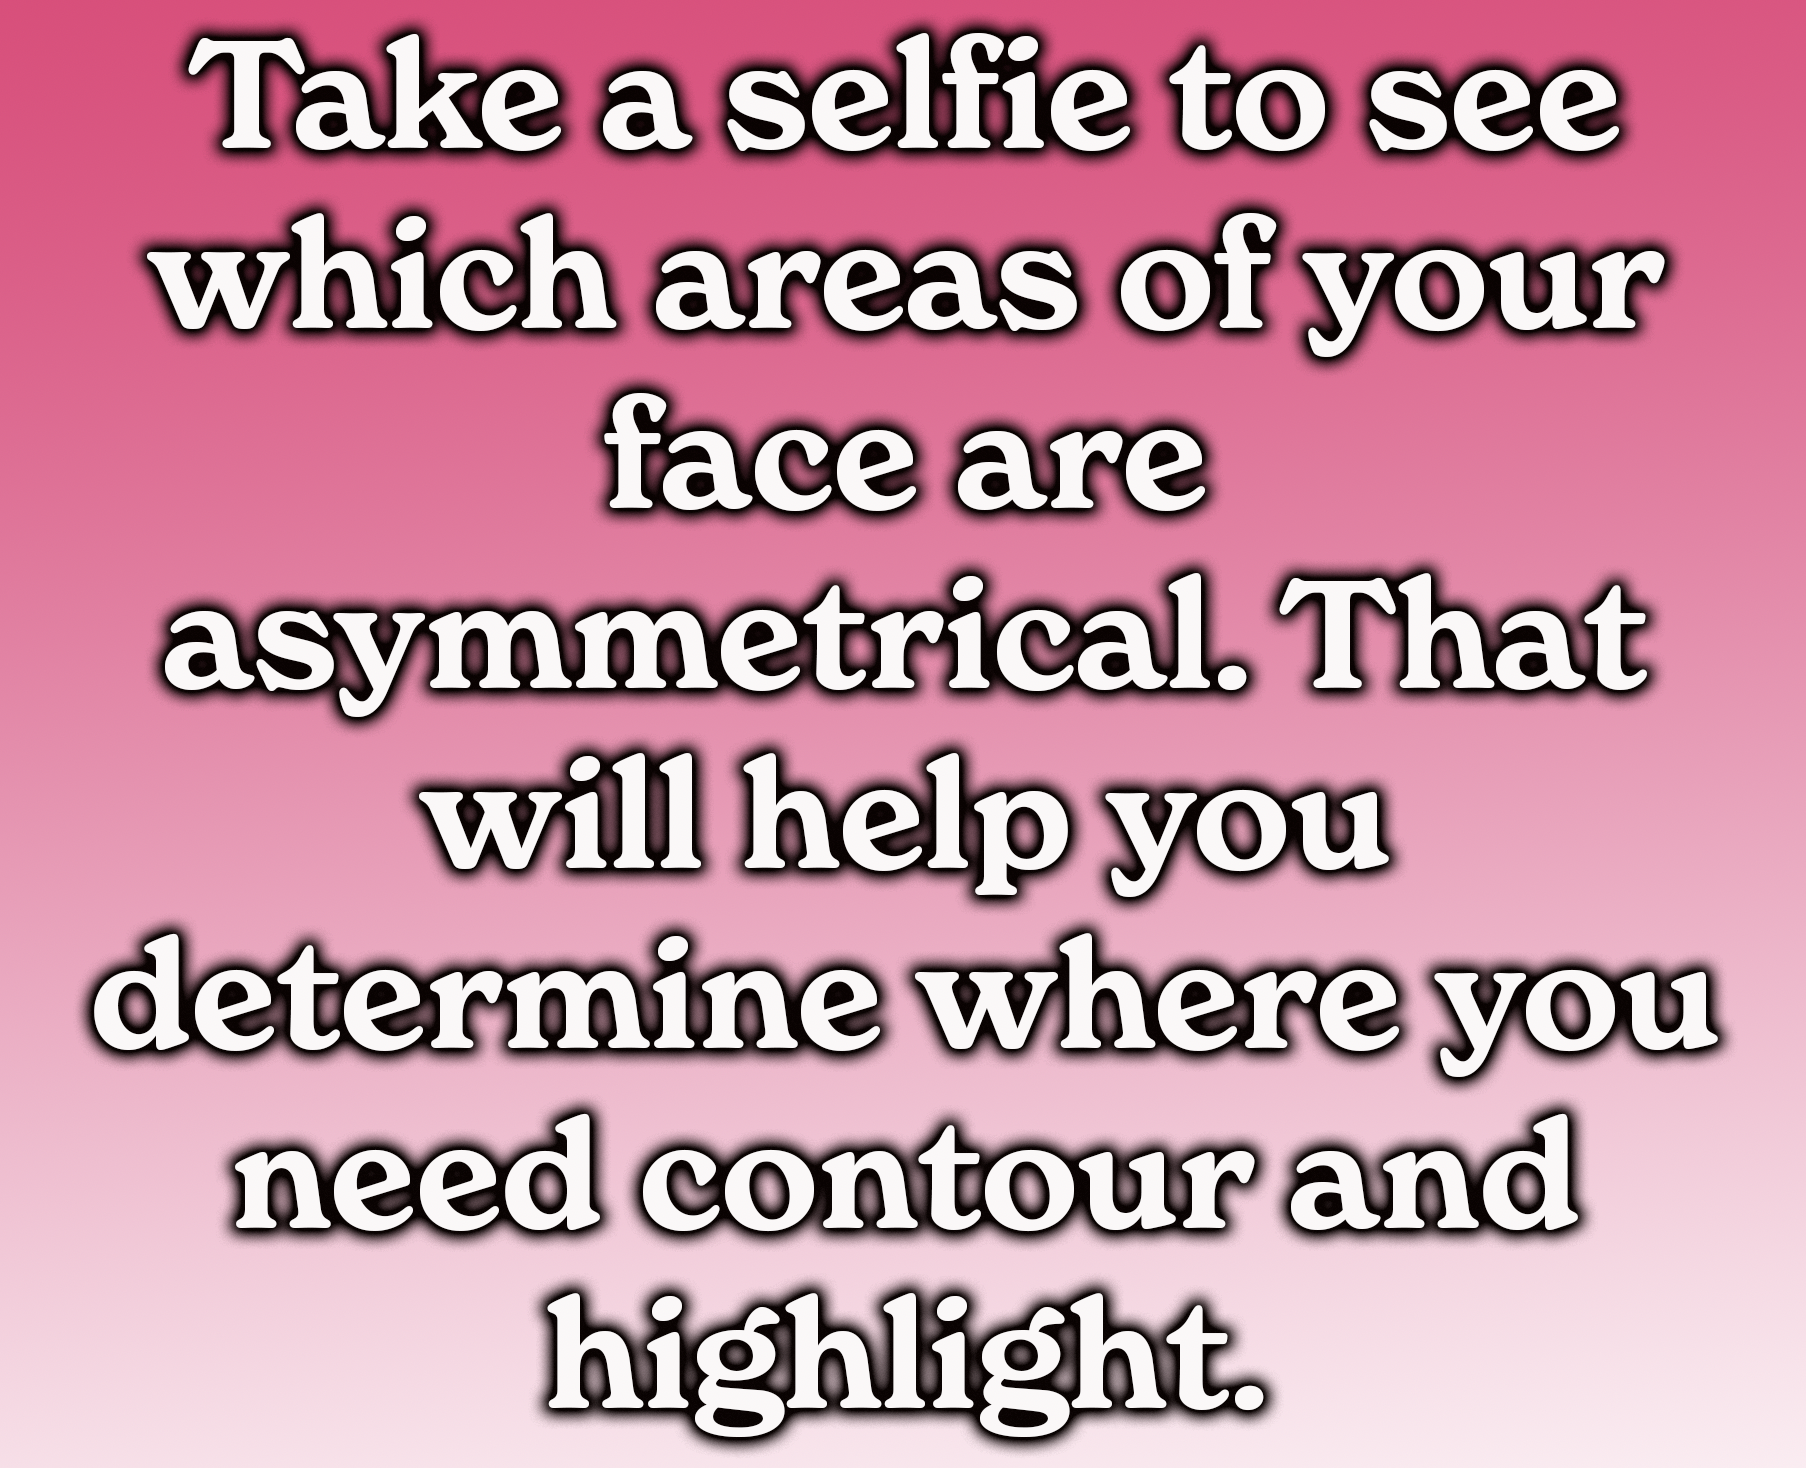
In order to get a great-looking contour and highlight, Lauren said you need to start by examining your face. "I feel like everyone tries to contour the same, and that is totally wrong. No one has the exact same face. So you need to contour based on your face."

OK, so how do we contour based on our face? The best trick to do this is to take a selfie of yourself straight on and see what sides of your face are asymmetrical. "Whatever is asymmetrical, you're going to be able to correct by contouring and highlighting," said Lauren.
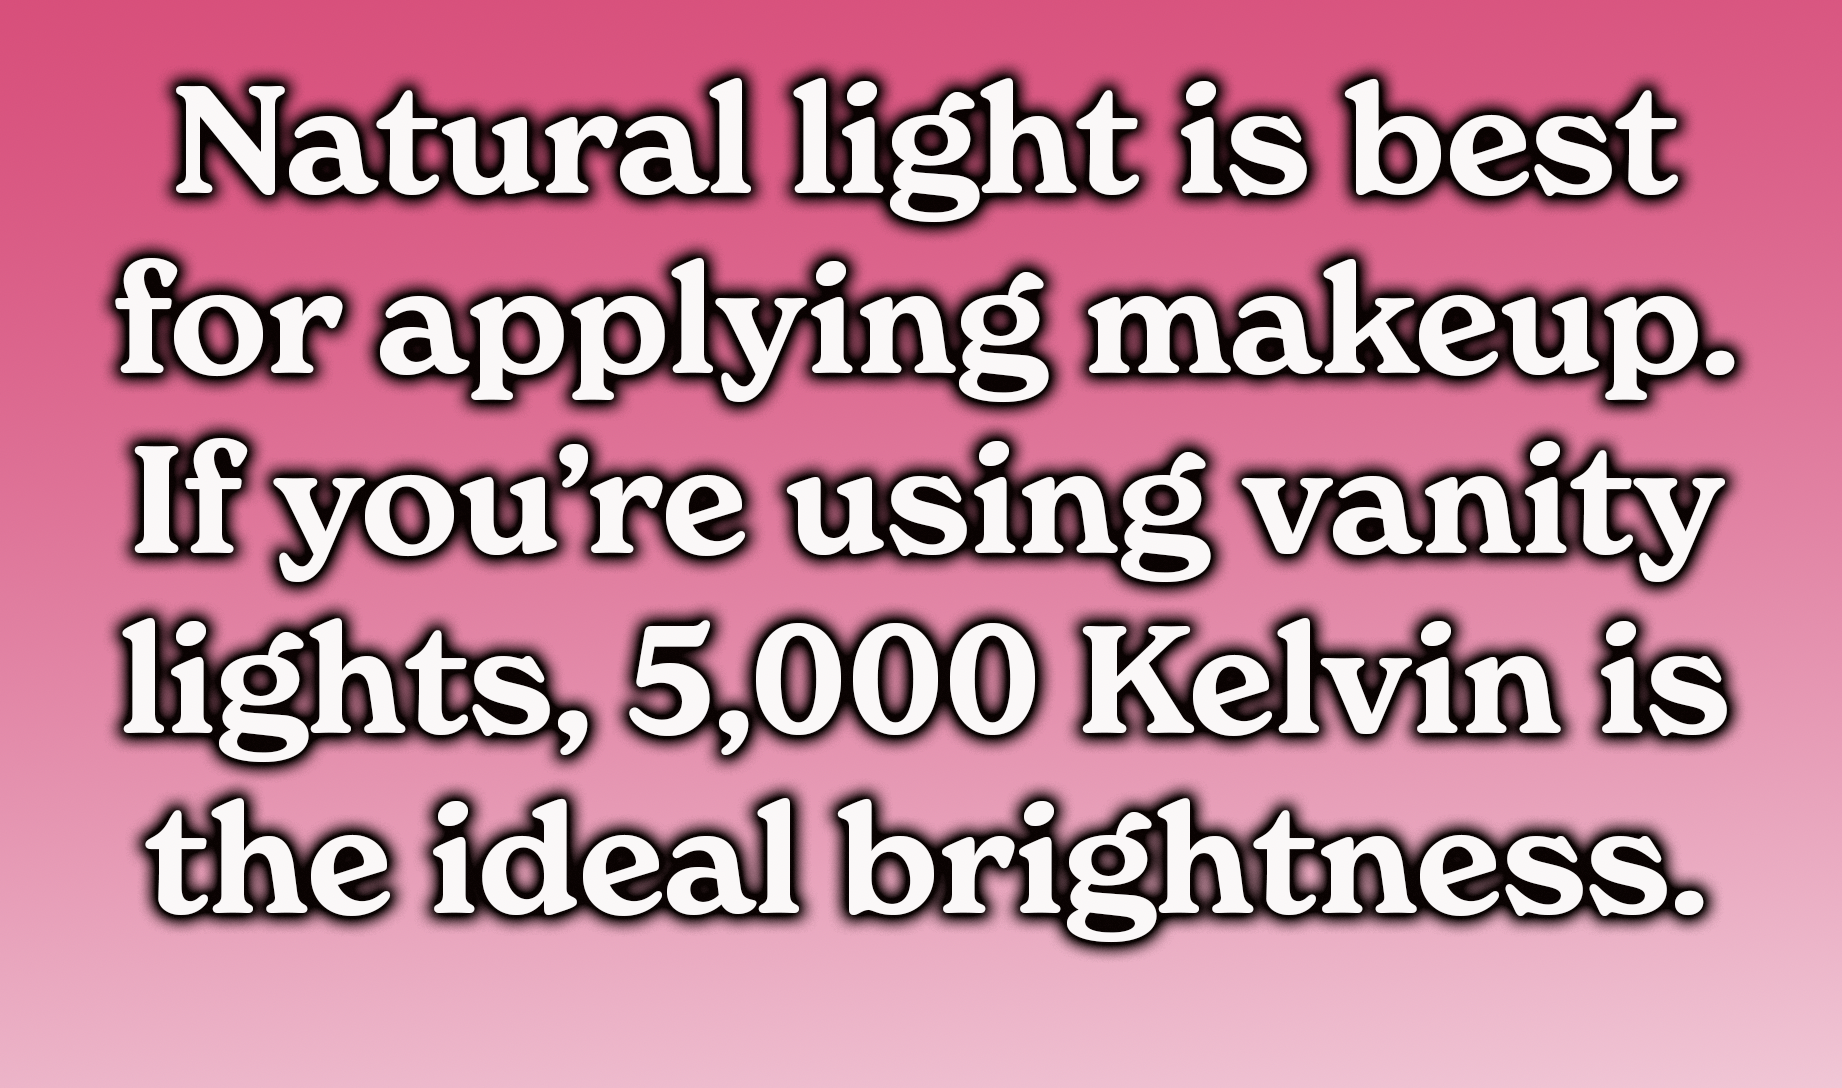
You should also avoid putting makeup on with fluorescent lighting. "You want to be in daylight lighting — natural light is going to be your best friend. If you are using vanity lights, avoid downward lighting — you want lighting coming forward," Lauren said.
Now let's learn the step-by-step process of Lauren's go-to contouring and highlighting technique. (You can tweak each step based on the facial features you want to accentuate.)
To begin, prepping your skin is key. "If you're not prepping your skin the right way, it can look super cakey. I use the Tatcha Stick Serum and their Firming Eye Serum because my skin is very dry."
After her skin is prepped, Lauren does her eyes and brows first (she already had them done when we began to save time). She then uses concealer to cover any blemishes or redness on her face. Next, she adds small layers of foundation on her entire face using a foundation brush. "I love beauty blenders, but they will absorb your product, so I recommend using your fingers or a brush for skincare when applying foundation," she explained.
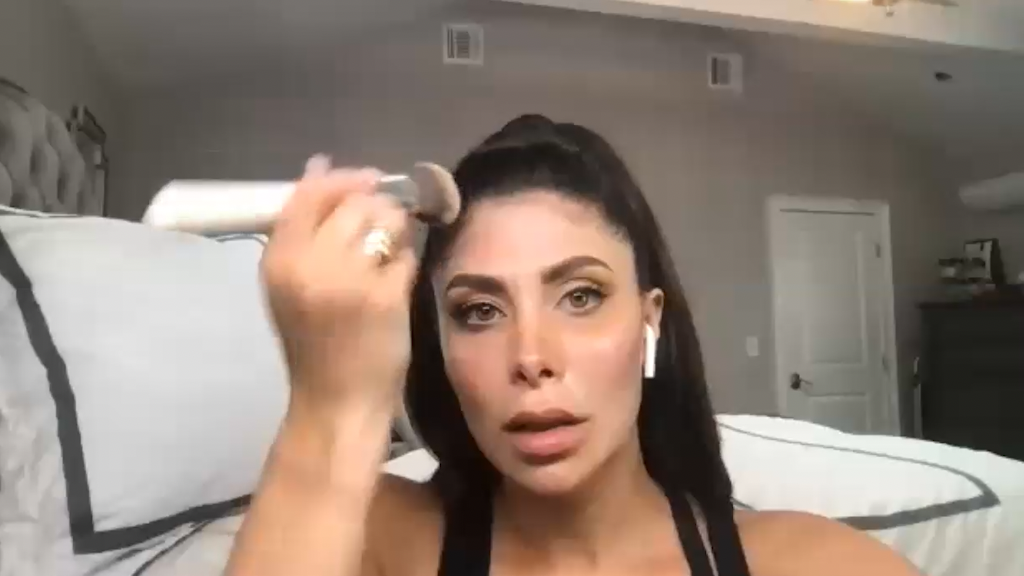
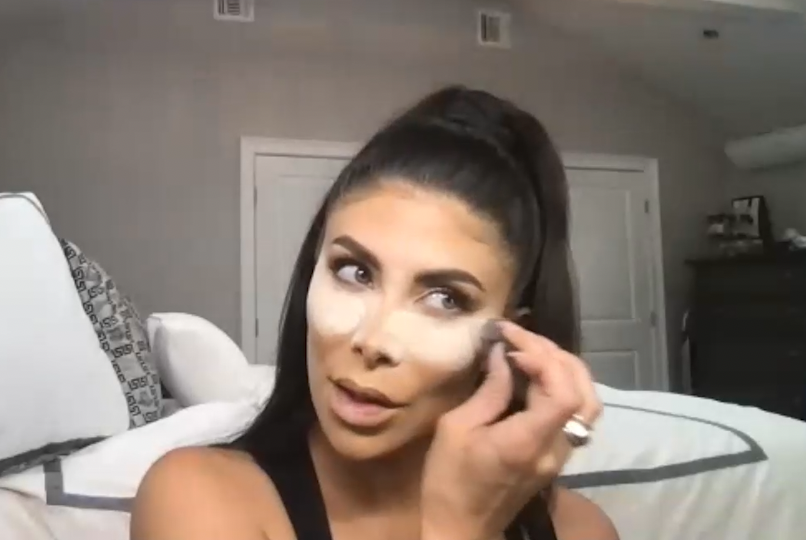
Then Lauren likes to add an eye brightener. "A super-light pinky-peach will take away any darkness under the eye. I like a super-bright under-eye, so you could skip this part if you don't want it to be super bright. But I think it does add to the definition of your face. I also take the brightener down the sides of my nose, using a beauty blender to blend it out into a super-thin layer," she said.
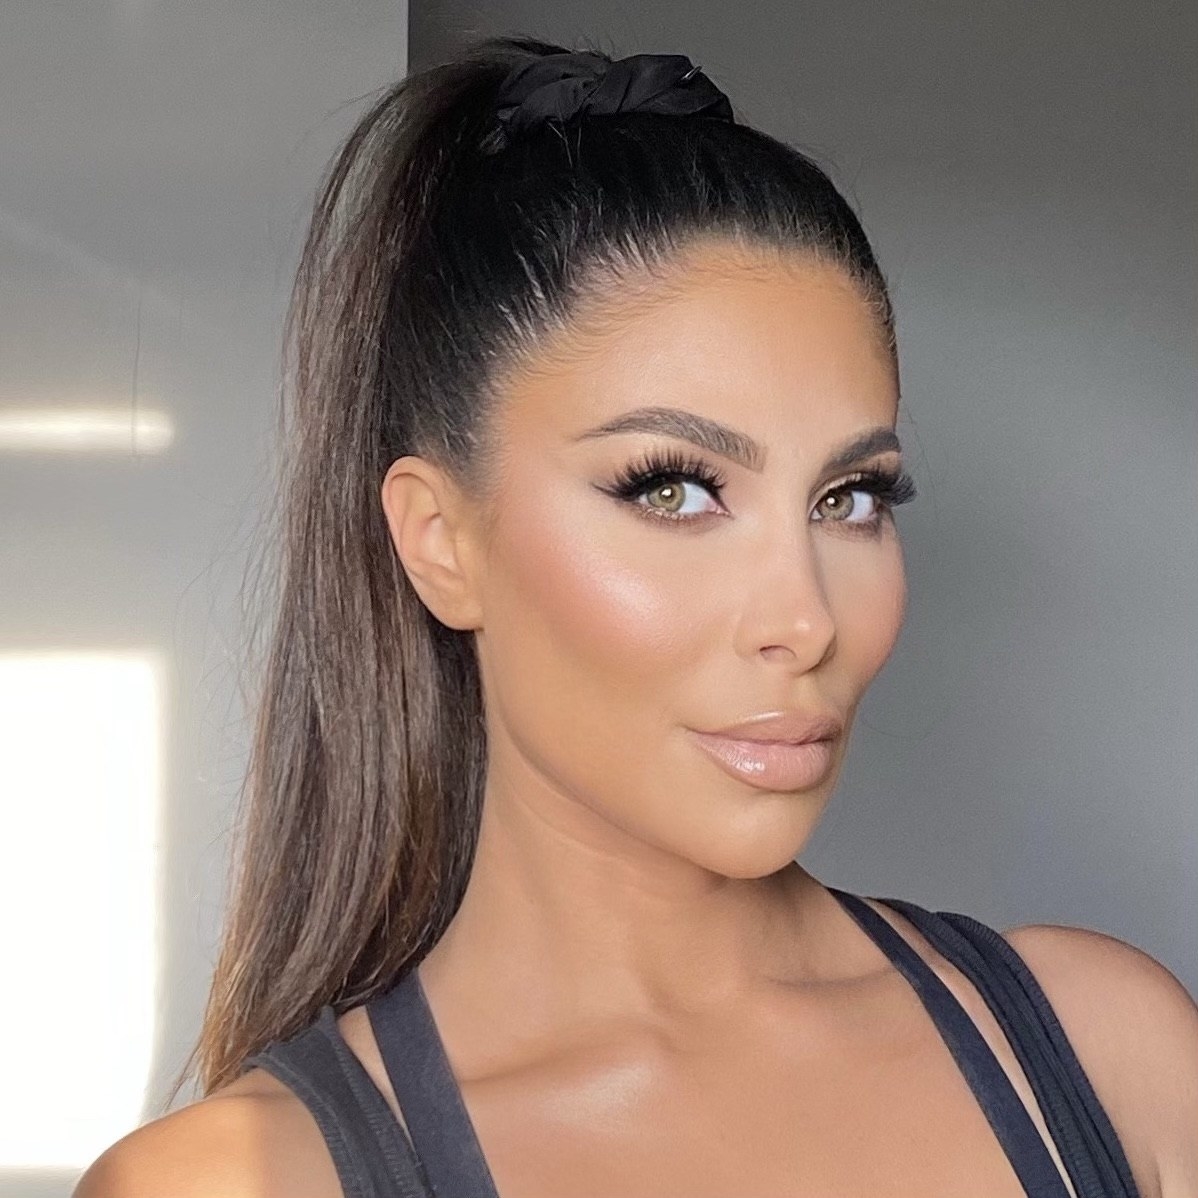
Now it's time to highlight the areas of your face that you want to bring forward! "Typically, I do the bridge of my nose and make a little tree on my forehead. If you have a very large forehead, don't over highlight. I like to put the highlight by my eye up so I look lifted. I also highlight my chin and the top and bottom middle of my lips. This makes my chin pop and lifts my smile."
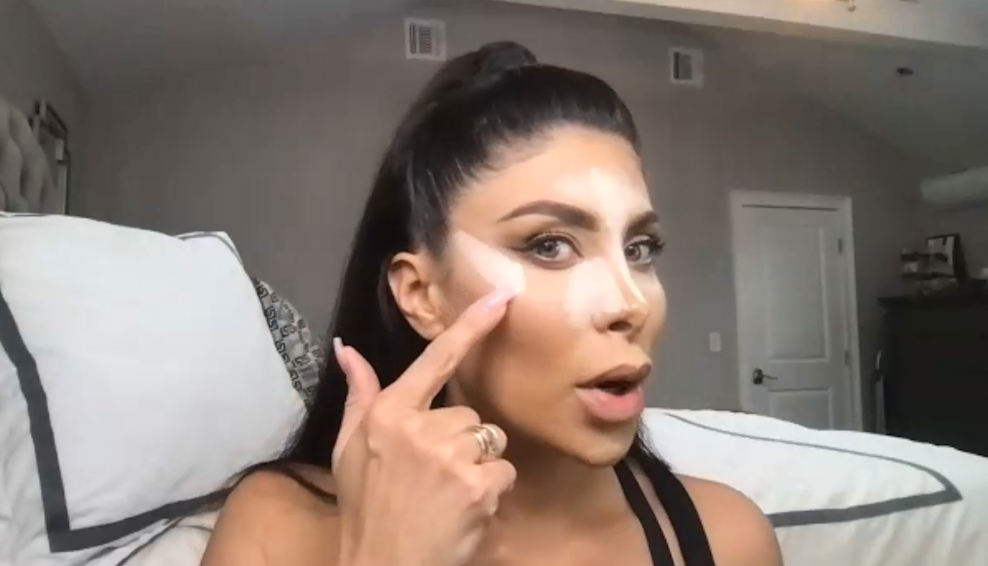
Then she goes in with a foundation stick to contour. When it comes to contouring your cheeks, Lauren said to feel the dip where your cheekbone goes in and contour along there. "It's normally at the base at the top of the ear. I also kind of make a checkmark line because it makes you lifted and brings the apple of the cheeks out. The lower you make your contour line on your cheeks, the rounder your face is going to look."
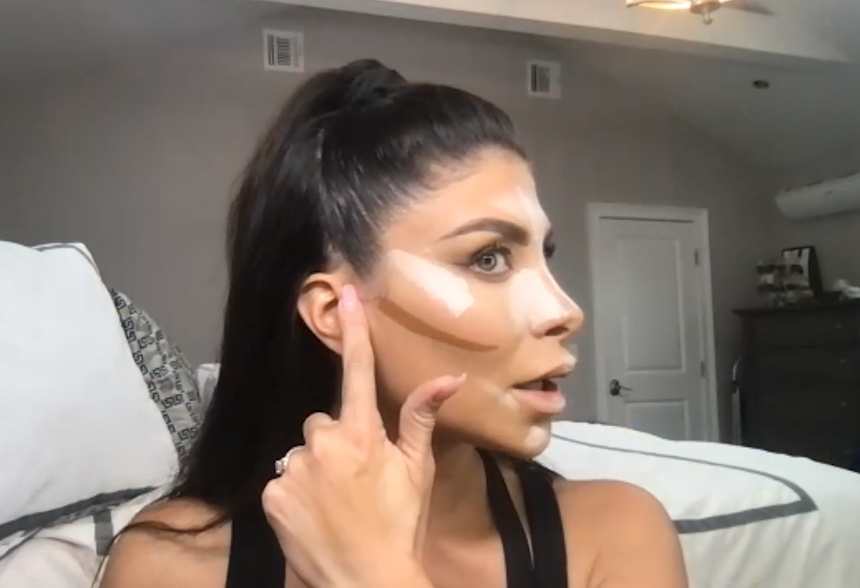
Lauren also contours around the top of her forehead, around her hairline. She has a smaller forehead, so she doesn't do much contouring there because she doesn't want it to look too small. "I also contour my nose, and I like a super-sculpted jaw, so I contour up a little higher than my jawline. But, if you go up too high — and you're not using the right products — you can make yourself look like you have a five o'clock shadow."
"Before you begin blending, make sure everything looks pretty symmetrical. You don't want one side super high and one side super low, unless you're trying to even out your asymmetry," she added. Once her highlighting and contouring look good, Lauren blends everything out with a fluffy makeup brush.

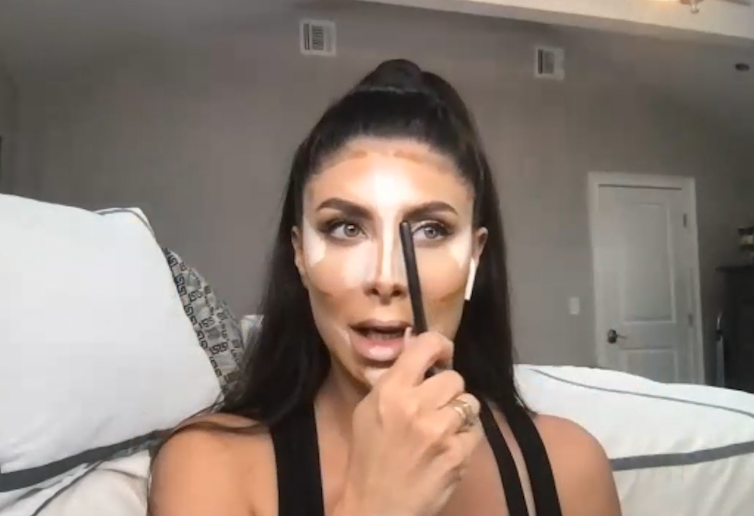
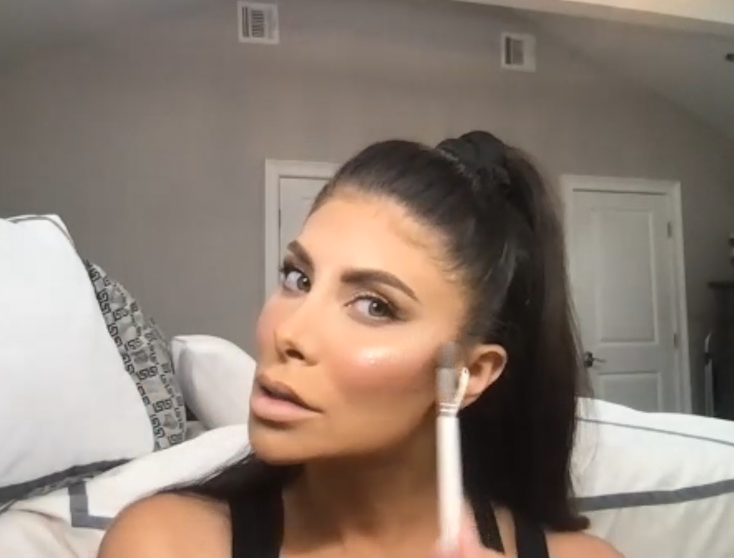
After it's all blended, Lauren starts BAKING! Baking is a term used to describe the process of using loose or setting powder in the areas where you want the makeup to really sink in and stay put. "It is a sculpting method, and if you are oily, it will actually help the product set better. Baking also helps prevent you from getting oily throughout the day."
Lauren then uses a face powder that matches her skin tone under her cheekbones. Next, she applies blush. "I like to bring mine up, but if you want a more youthful, rounded cheek, you can concentrate it on the apples of your cheeks. After that, I add bronzer to my jawline, cheekbones, forehead, and down the sides of my nose using a fan brush. I end using a shimmer highlight with a dense brush."
Lastly, Lauren puts on a lip color of her choosing and some false eyelashes — she sets the final look with a setting spray. She also recommends spraying the inside of your mask with the spray so the makeup won't transfer.
Special thanks to Lauren for teaching us everything we need to know about contouring and highlighting! You can follow her on Instagram — or visit her website if you're interested in taking a makeup course!