When I was younger, I took a quiz that told me I was a visual thinker. Apparently, my brain responds better to shapes, patterns, and images than words. And yet I'm terrible when it comes to all things arty.
A particularly frustrating example is taking pictures. Give me a camera and ask me to create something, and all I’d give you in return is a wonky blur.

But all this changes now. I really like photography, and I've always aspired to take good photos. So, when Google offered to let me borrow a Pixel 2 for a few days, I knew exactly what I was going to do with it: take a lesson in photography from an expert. The Pixel has a fantastic camera (ranked best mobile camera of all time), and I have a fantastic desire to learn photography. Will I develop a photographer's eye, or will I fail miserably? We shall soon see. Good luck, me!

If anyone’s going to teach me how to take better photos, it’s David East. A video director as well as a photographer, David has gone pretty far in search of a good snap or two. He’s toured the world with rock stars, shot music videos in exotic locations, and even scaled Mount Everest. Today, he has the distinct and unique pleasure of giving me a photography 101 lesson. Personally, I think it’s his most daring feat yet.
Unlike most photographers, David likes to travel light, often only with his Google Pixel 2 XL. As David told me, gear is not the secret to great pictures. Having a good camera that also fits in your pocket is the ideal for capturing the perfect moment at any time.

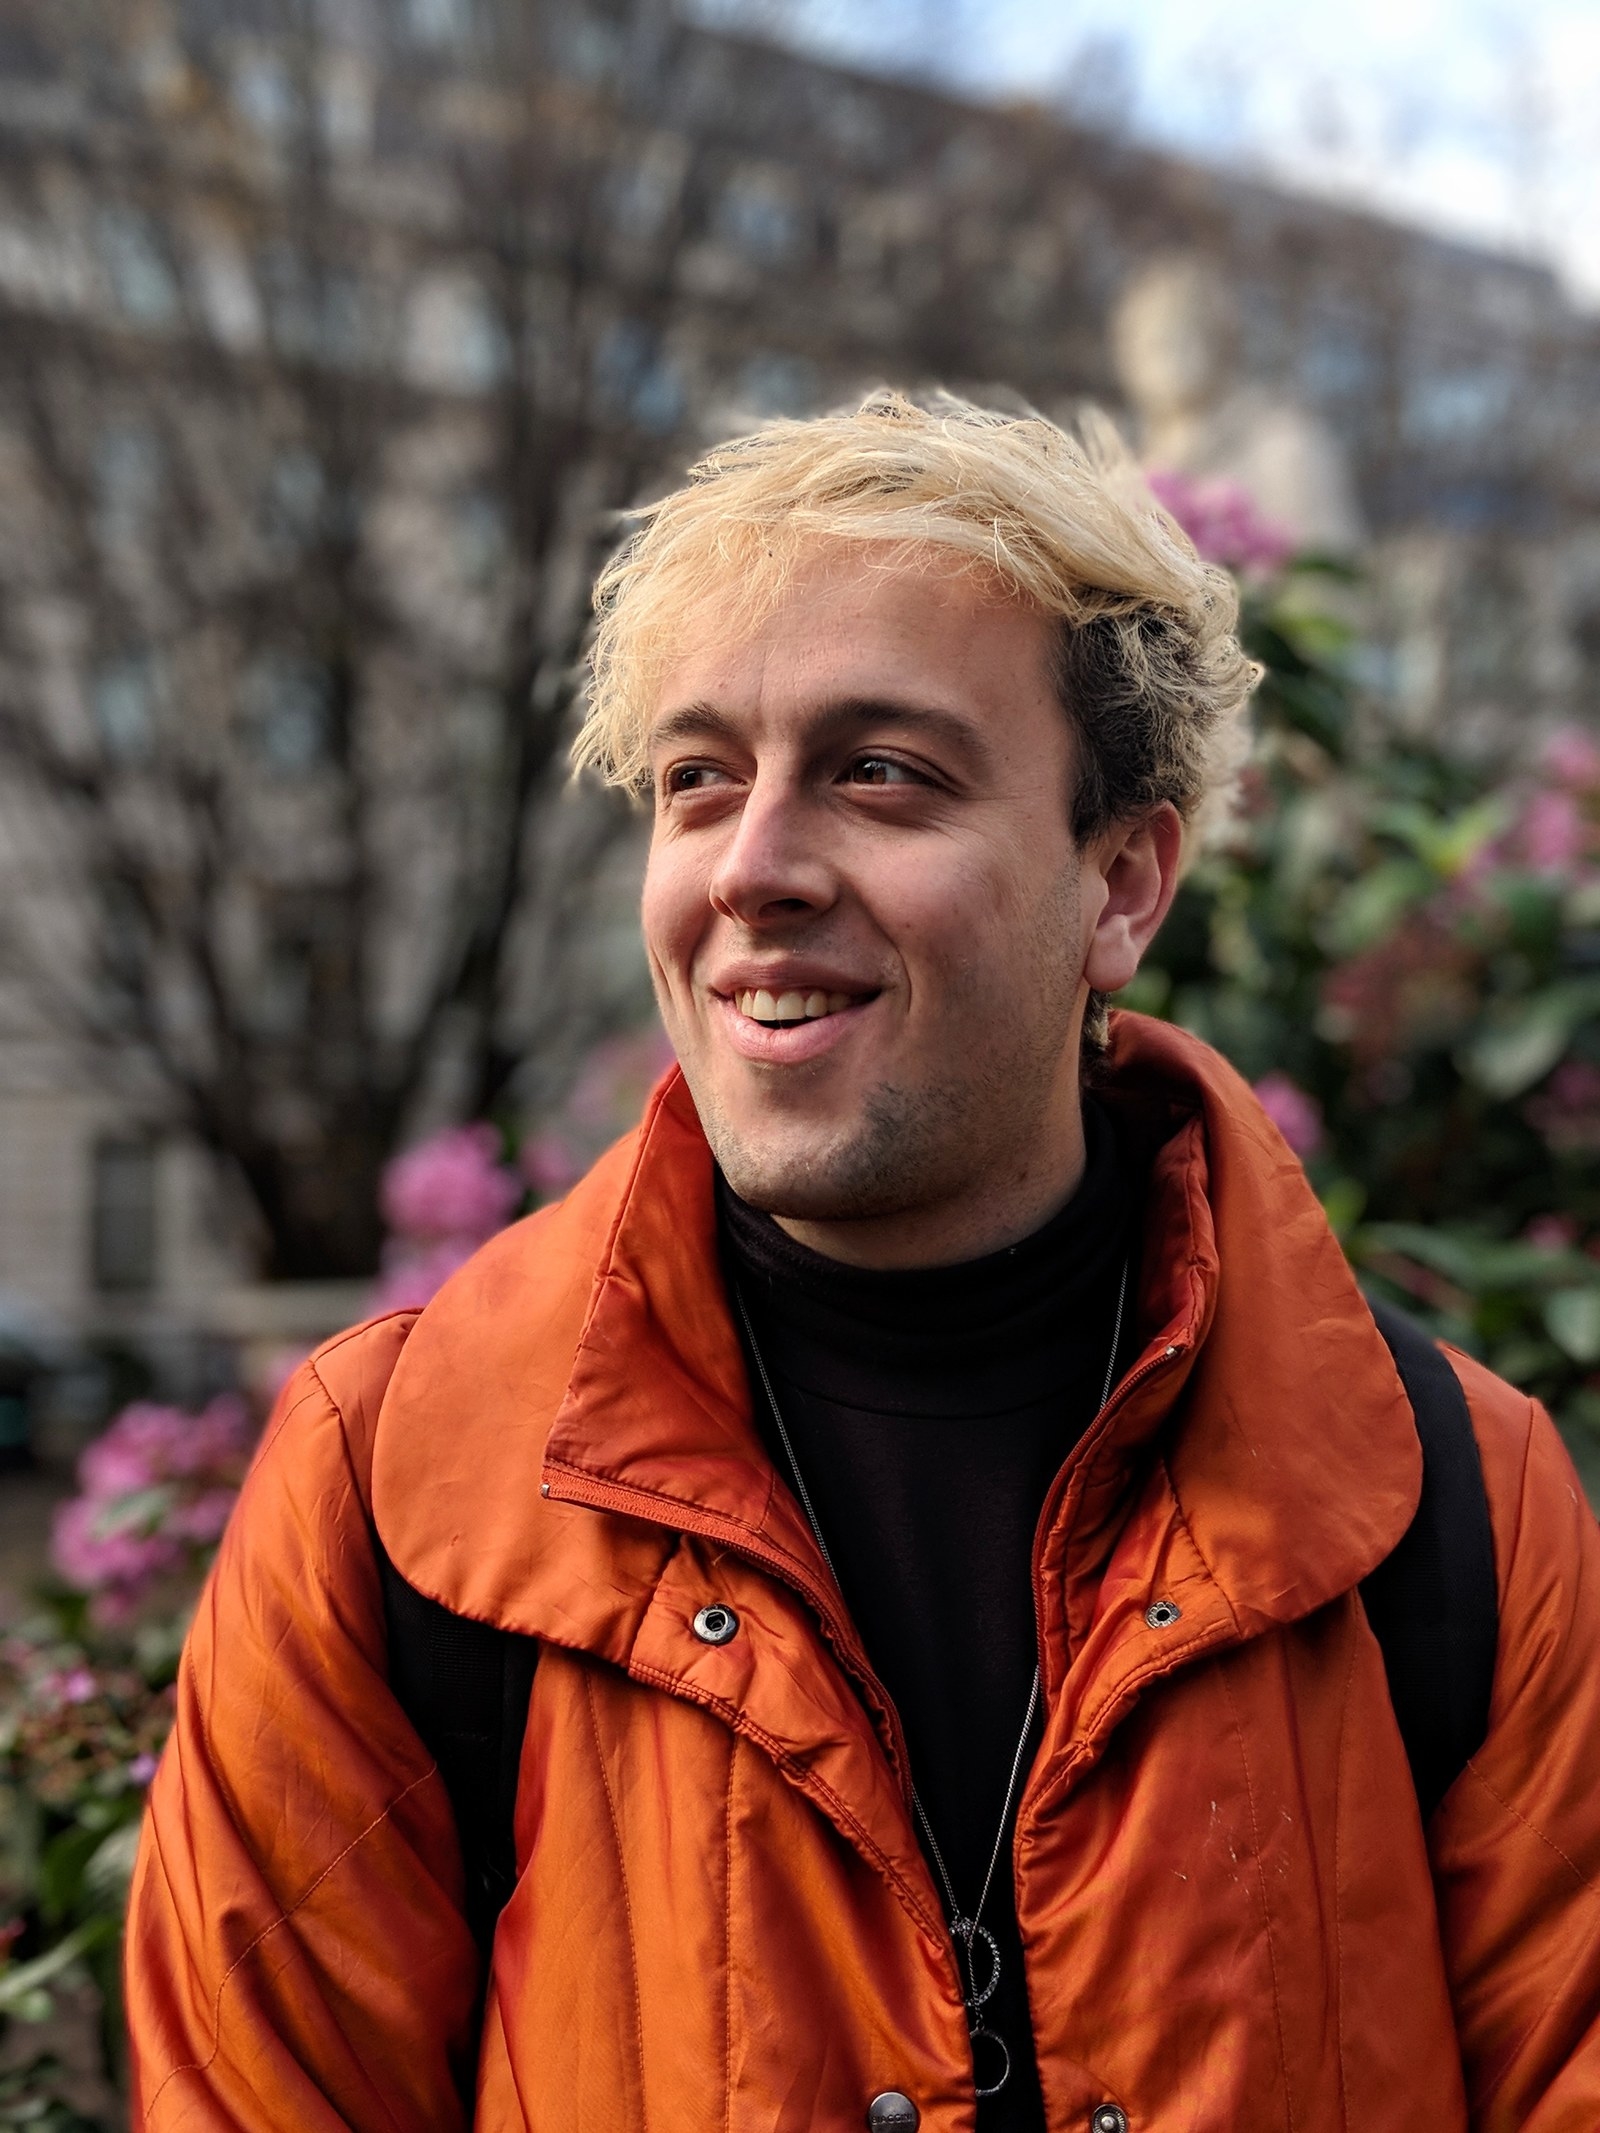
Every photography lesson has to start somewhere, and mine started with selfies.
On the subject of selfies, David had a few pearls of wisdom to share. “Selfies shouldn’t be all about you," he said. "You’ve got to include your surroundings and use them to make the picture a bit more engaging.”
With this in mind, we went in search of somewhere cool to act as the backdrop for my vainglory. The first spot we happened across was a public garden with a patch of flowers that I thought looked pretty. Pixel in hand, I stood in front of it, extended my arm as far in front of me as it would go, and started snapping.
“Am I doing it right?” I called over at David. From the look on his face, I could tell I clearly wasn’t. After showing him a few of my snaps, he had a few simple tips to show me.
- Go with the grids. "Go in to the camera settings and switch the grid options on. Basically, these grids give you a better idea where you are in the frame of the picture.”
- Experiment with your backdrop. "You don't always have to be at the centre of the picture. Moving around so that you get much more of your background in can work too."
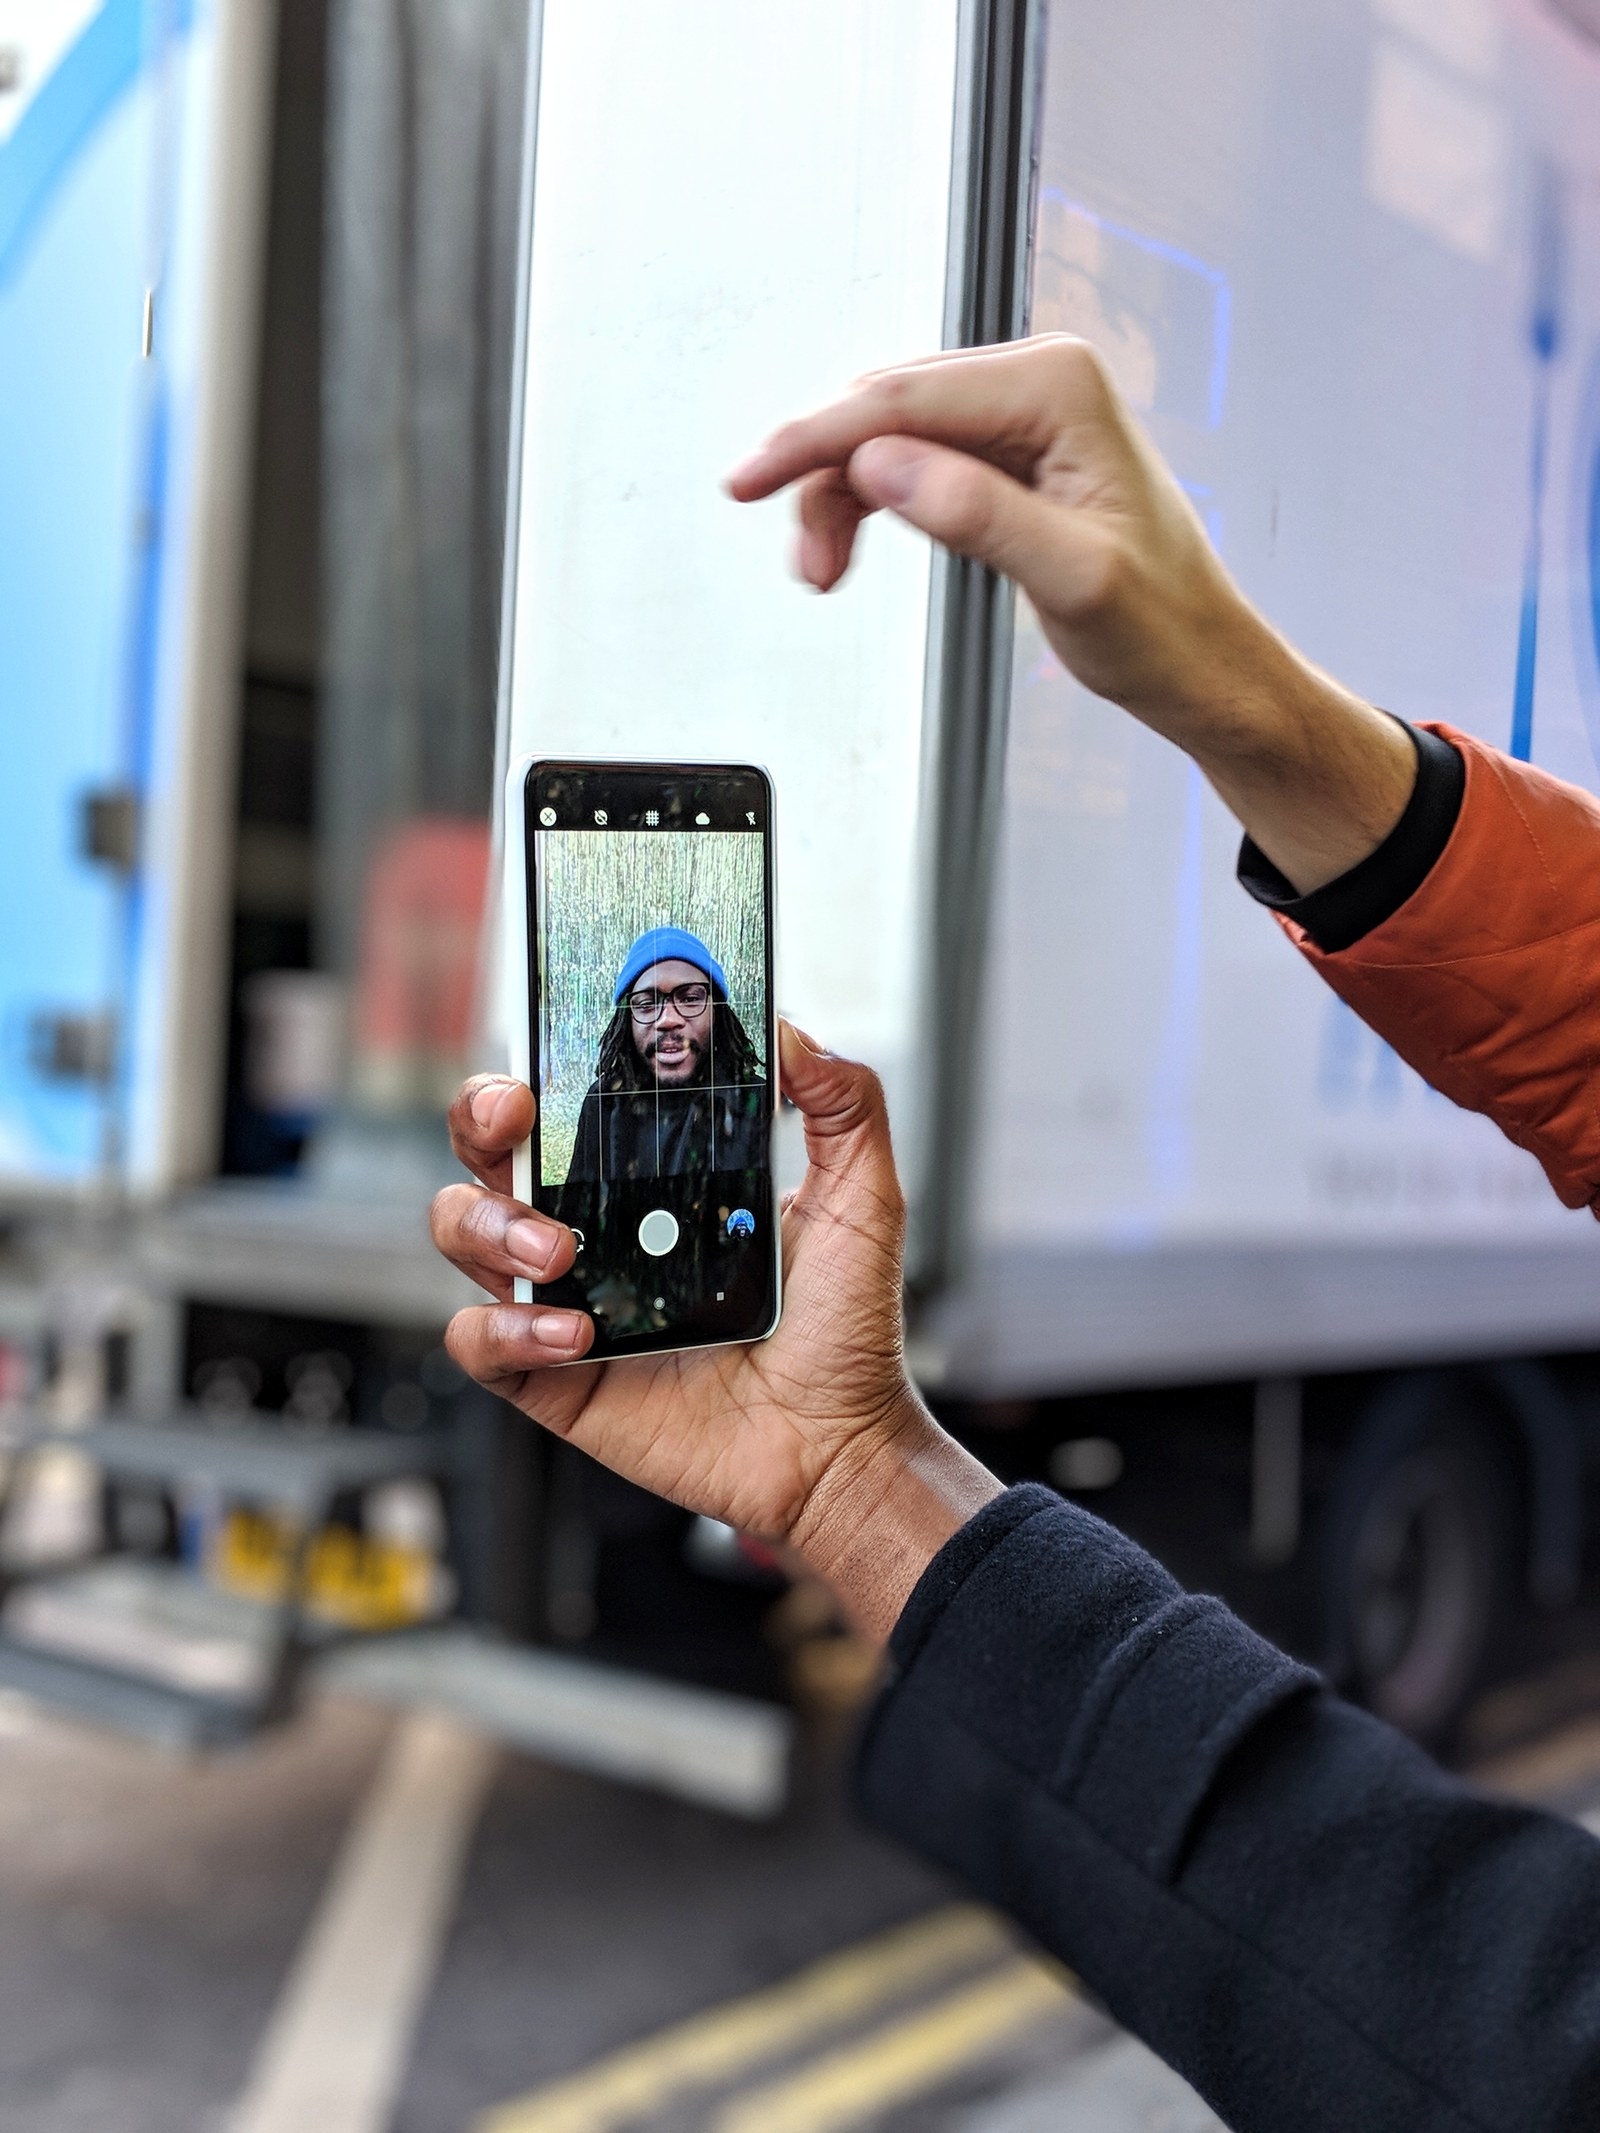
- Try it with portrait mode. It was here that David put me on to one of the Pixel's coolest features: portrait mode. Perfect for taking selfies, the Pixel’s portrait mode places your background out of focus and adds a whole other dimension to your pictures.
Following David’s advice, I ended up with quite a snazzy shot. Much better than the selfies I’d usually taken indoors with only my bedroom walls as a backdrop. I was so pleased with my results I even made an effort to smile in the next few pictures I took.

Next up in our lesson plan was food photography. Before I tell you about how this went and what I learned, I feel it's important to make something clear to you, dear reader: I eat a lot. Like a lot. So this part of my education was exceptionally crucial for my lifestyle.
My first attempt at food photography involved taking a picture of some truly delicious ice cream. It looked as great as it tasted, and I wanted to show it off with a great picture. As I readied my phone's camera. Dave reminded me that the same advice for selfies can work for food; namely, experiment with a depth-of-field backdrop and use portrait mode to improve focus on your (delicious, tasty, mouth-watering) subject.
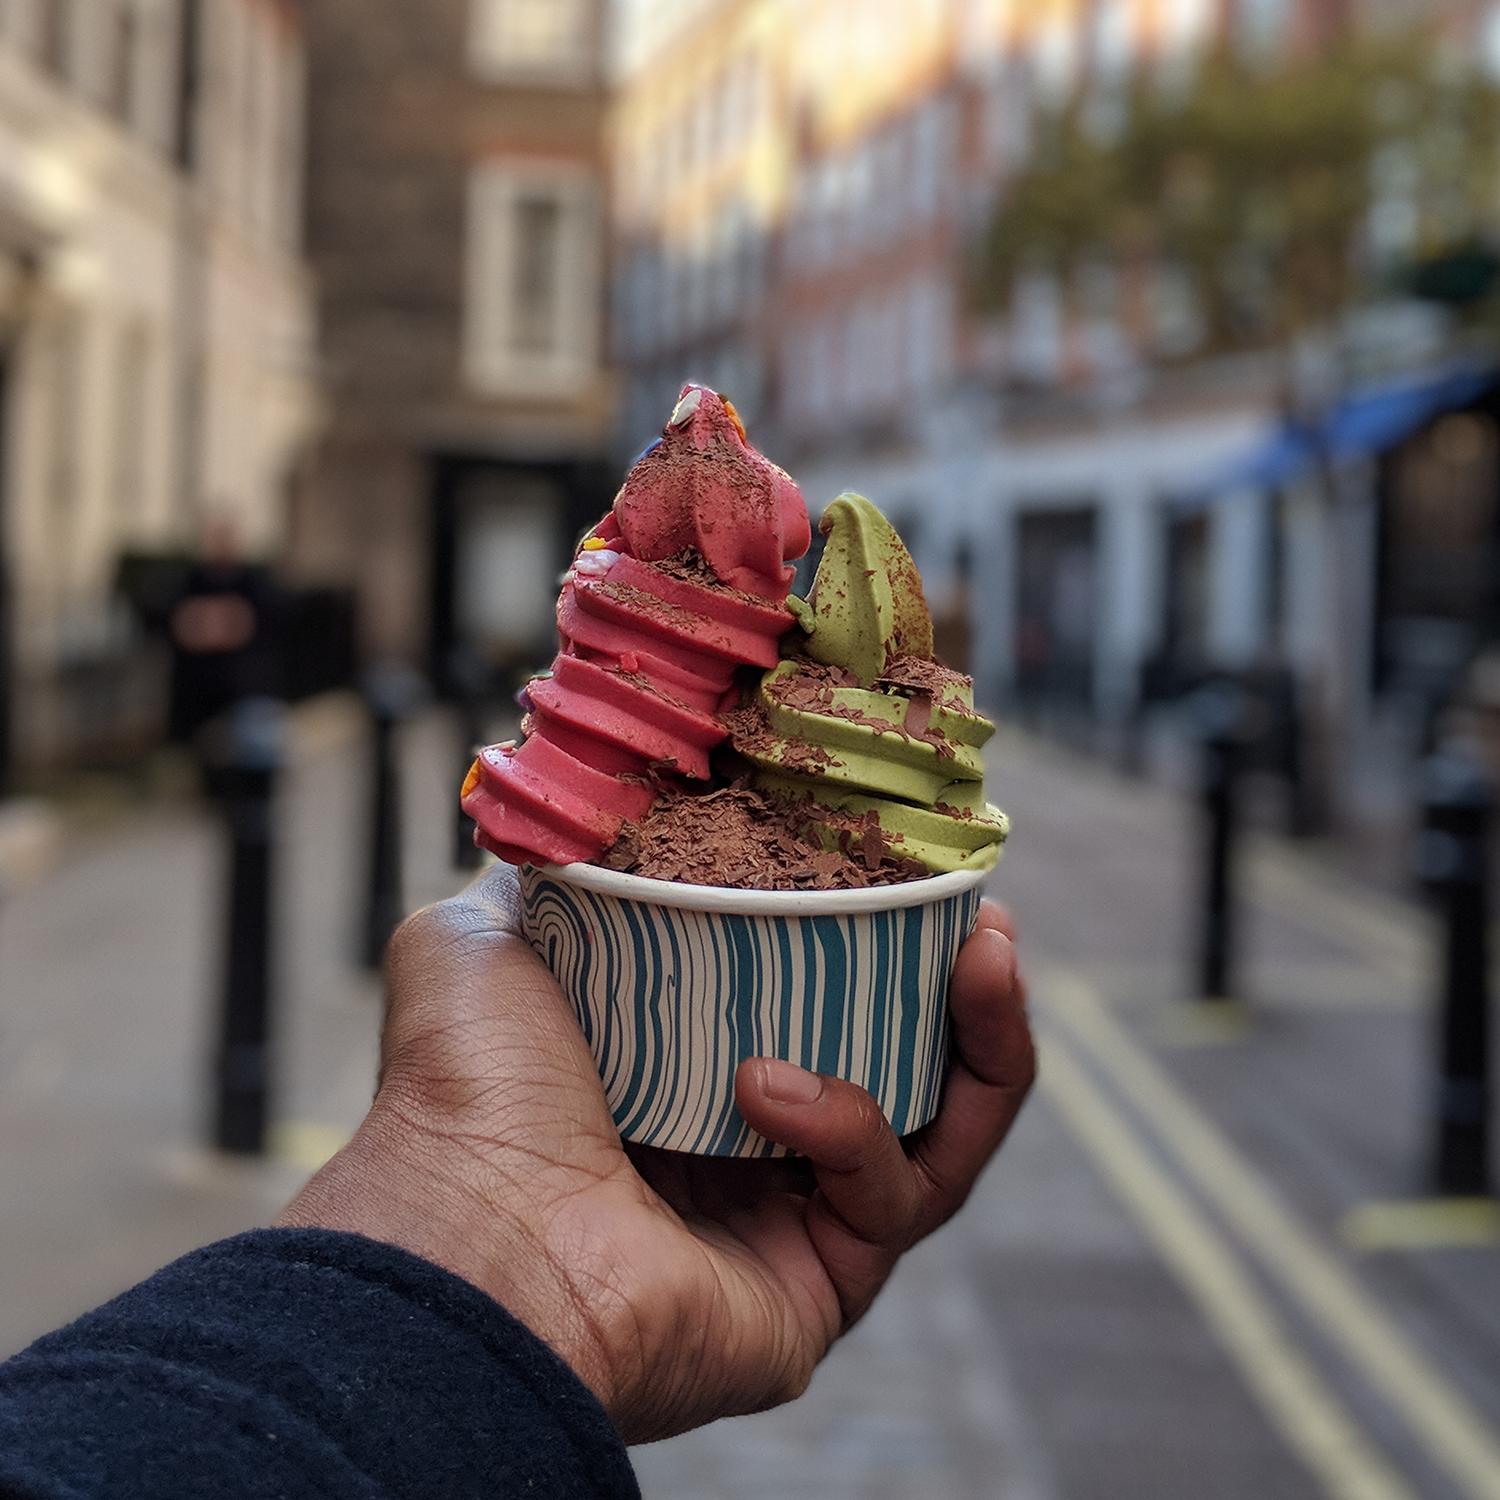
Another useful feature here is the camera switch function. You can swap from the camera to selfie camera by double-twisting the Pixel, which makes it easy to capture your delicious food and your expression of pure longing while you're waiting to tuck in. To do it, just hold the Pixel out as though you're taking a photo, and then quickly turn the screen away from you and back, twice. The phone will vibrate and the camera will reverse.

One thing I really wanted to learn from David was how to capture exciting moments as they happened. But before I got a chance to ask, David spotted something and gestured at me to get my phone out.
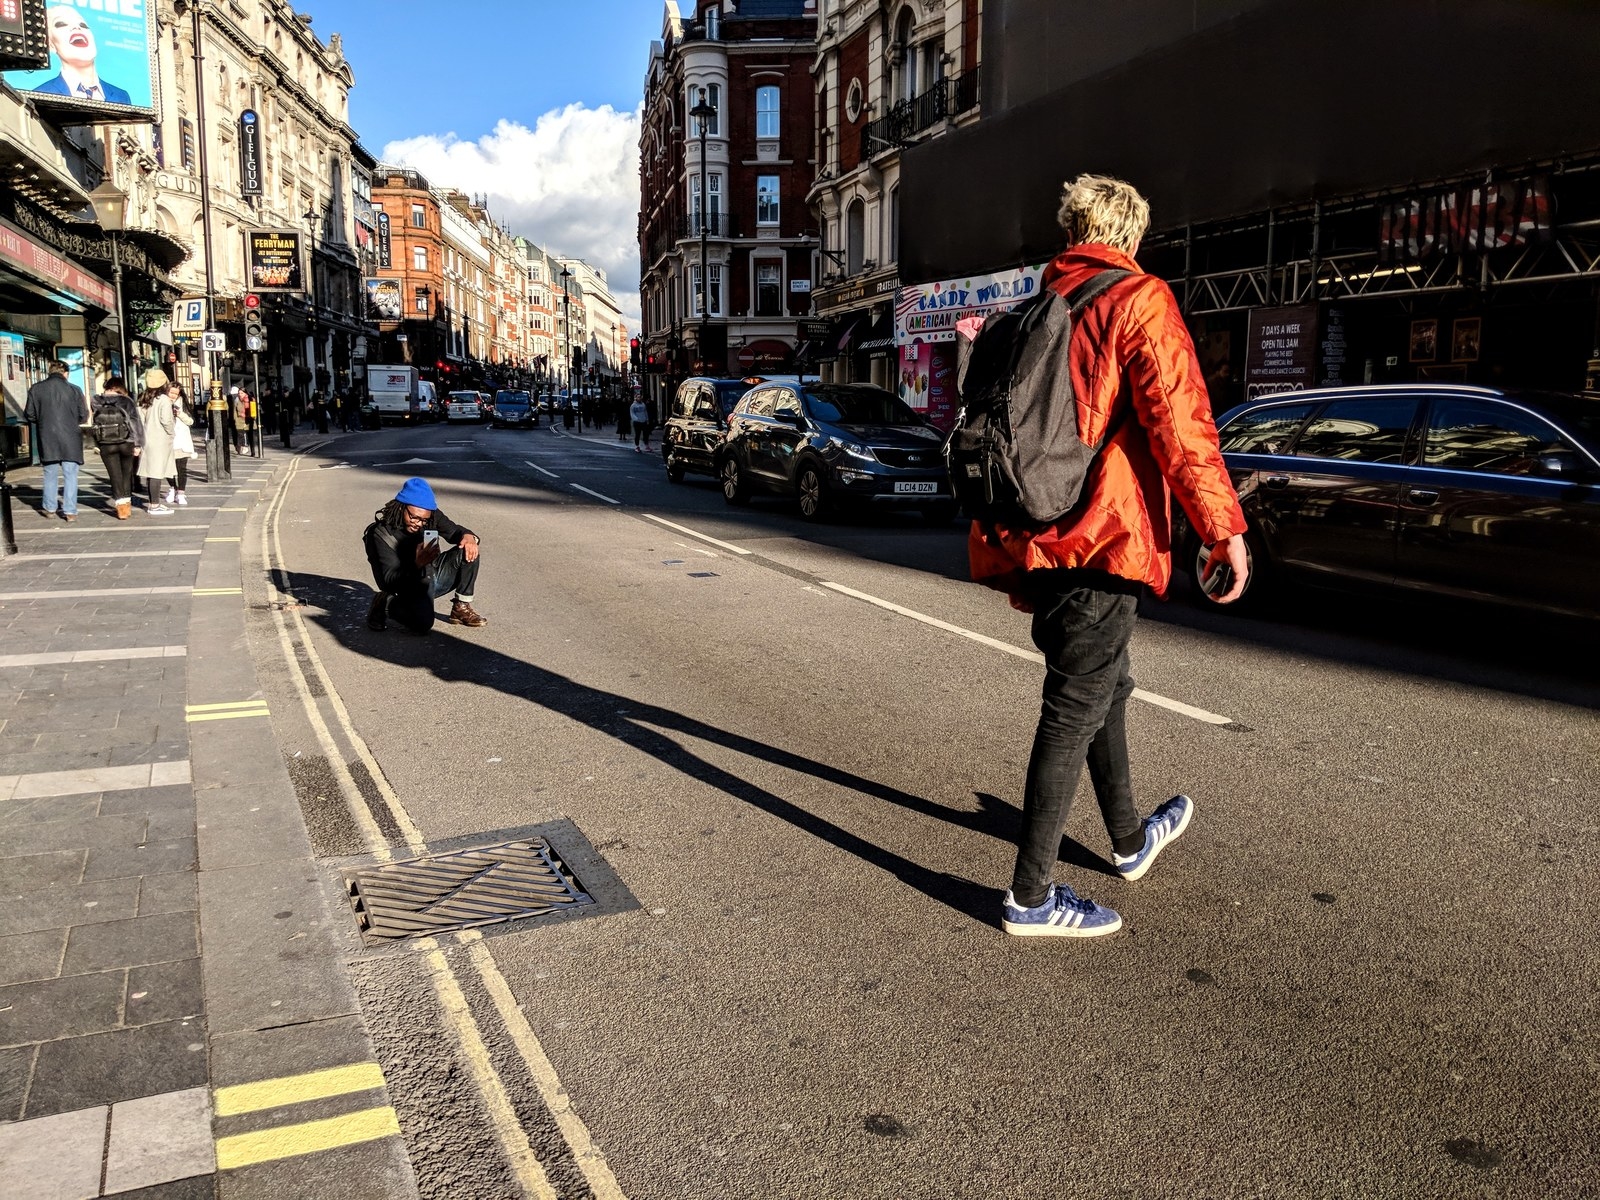
“The lighting is great here!” David said. He pointed up at the sun and then pointed down at the busy main road in front of us.
I’ll be honest here and say I had no idea what was going on, other than that David wanted me to get in the middle of a busy road and take a picture of him. We waited until traffic died down and then jumped into action. Instructing me from several feet ahead, David told me to crouch down and aim my lens at him. I centred David on the phone and tilted my lens upwards towards the sun.
Once I’d gotten a few hundred shots (literally – holding down the shutter button on the Pixel lets you shoot hundreds of frames in seconds, which puts the Pixel's unlimited storage to good use!), I stood up and showed David what I’d gotten. “This is close, but not quite there yet. What I want you to do is aim the camera so that you get my head blocking out the sun and the shadow my body casts.”
After a few more tries, we’d gotten the perfect shot. David later explained to me that finding the right lighting is one of the keys to getting a good photo. “When I’m out and about, this is the sort of stuff I’m looking for. One-of-a-kind moments where everything just looks right. Sometimes they surprise you!”

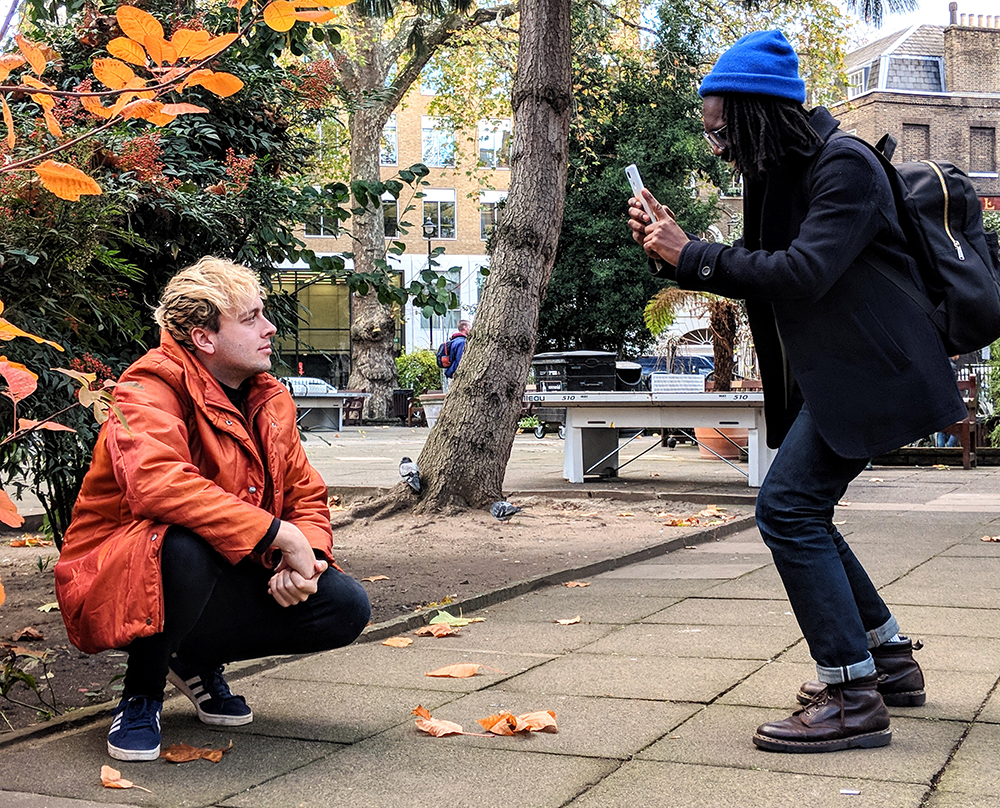
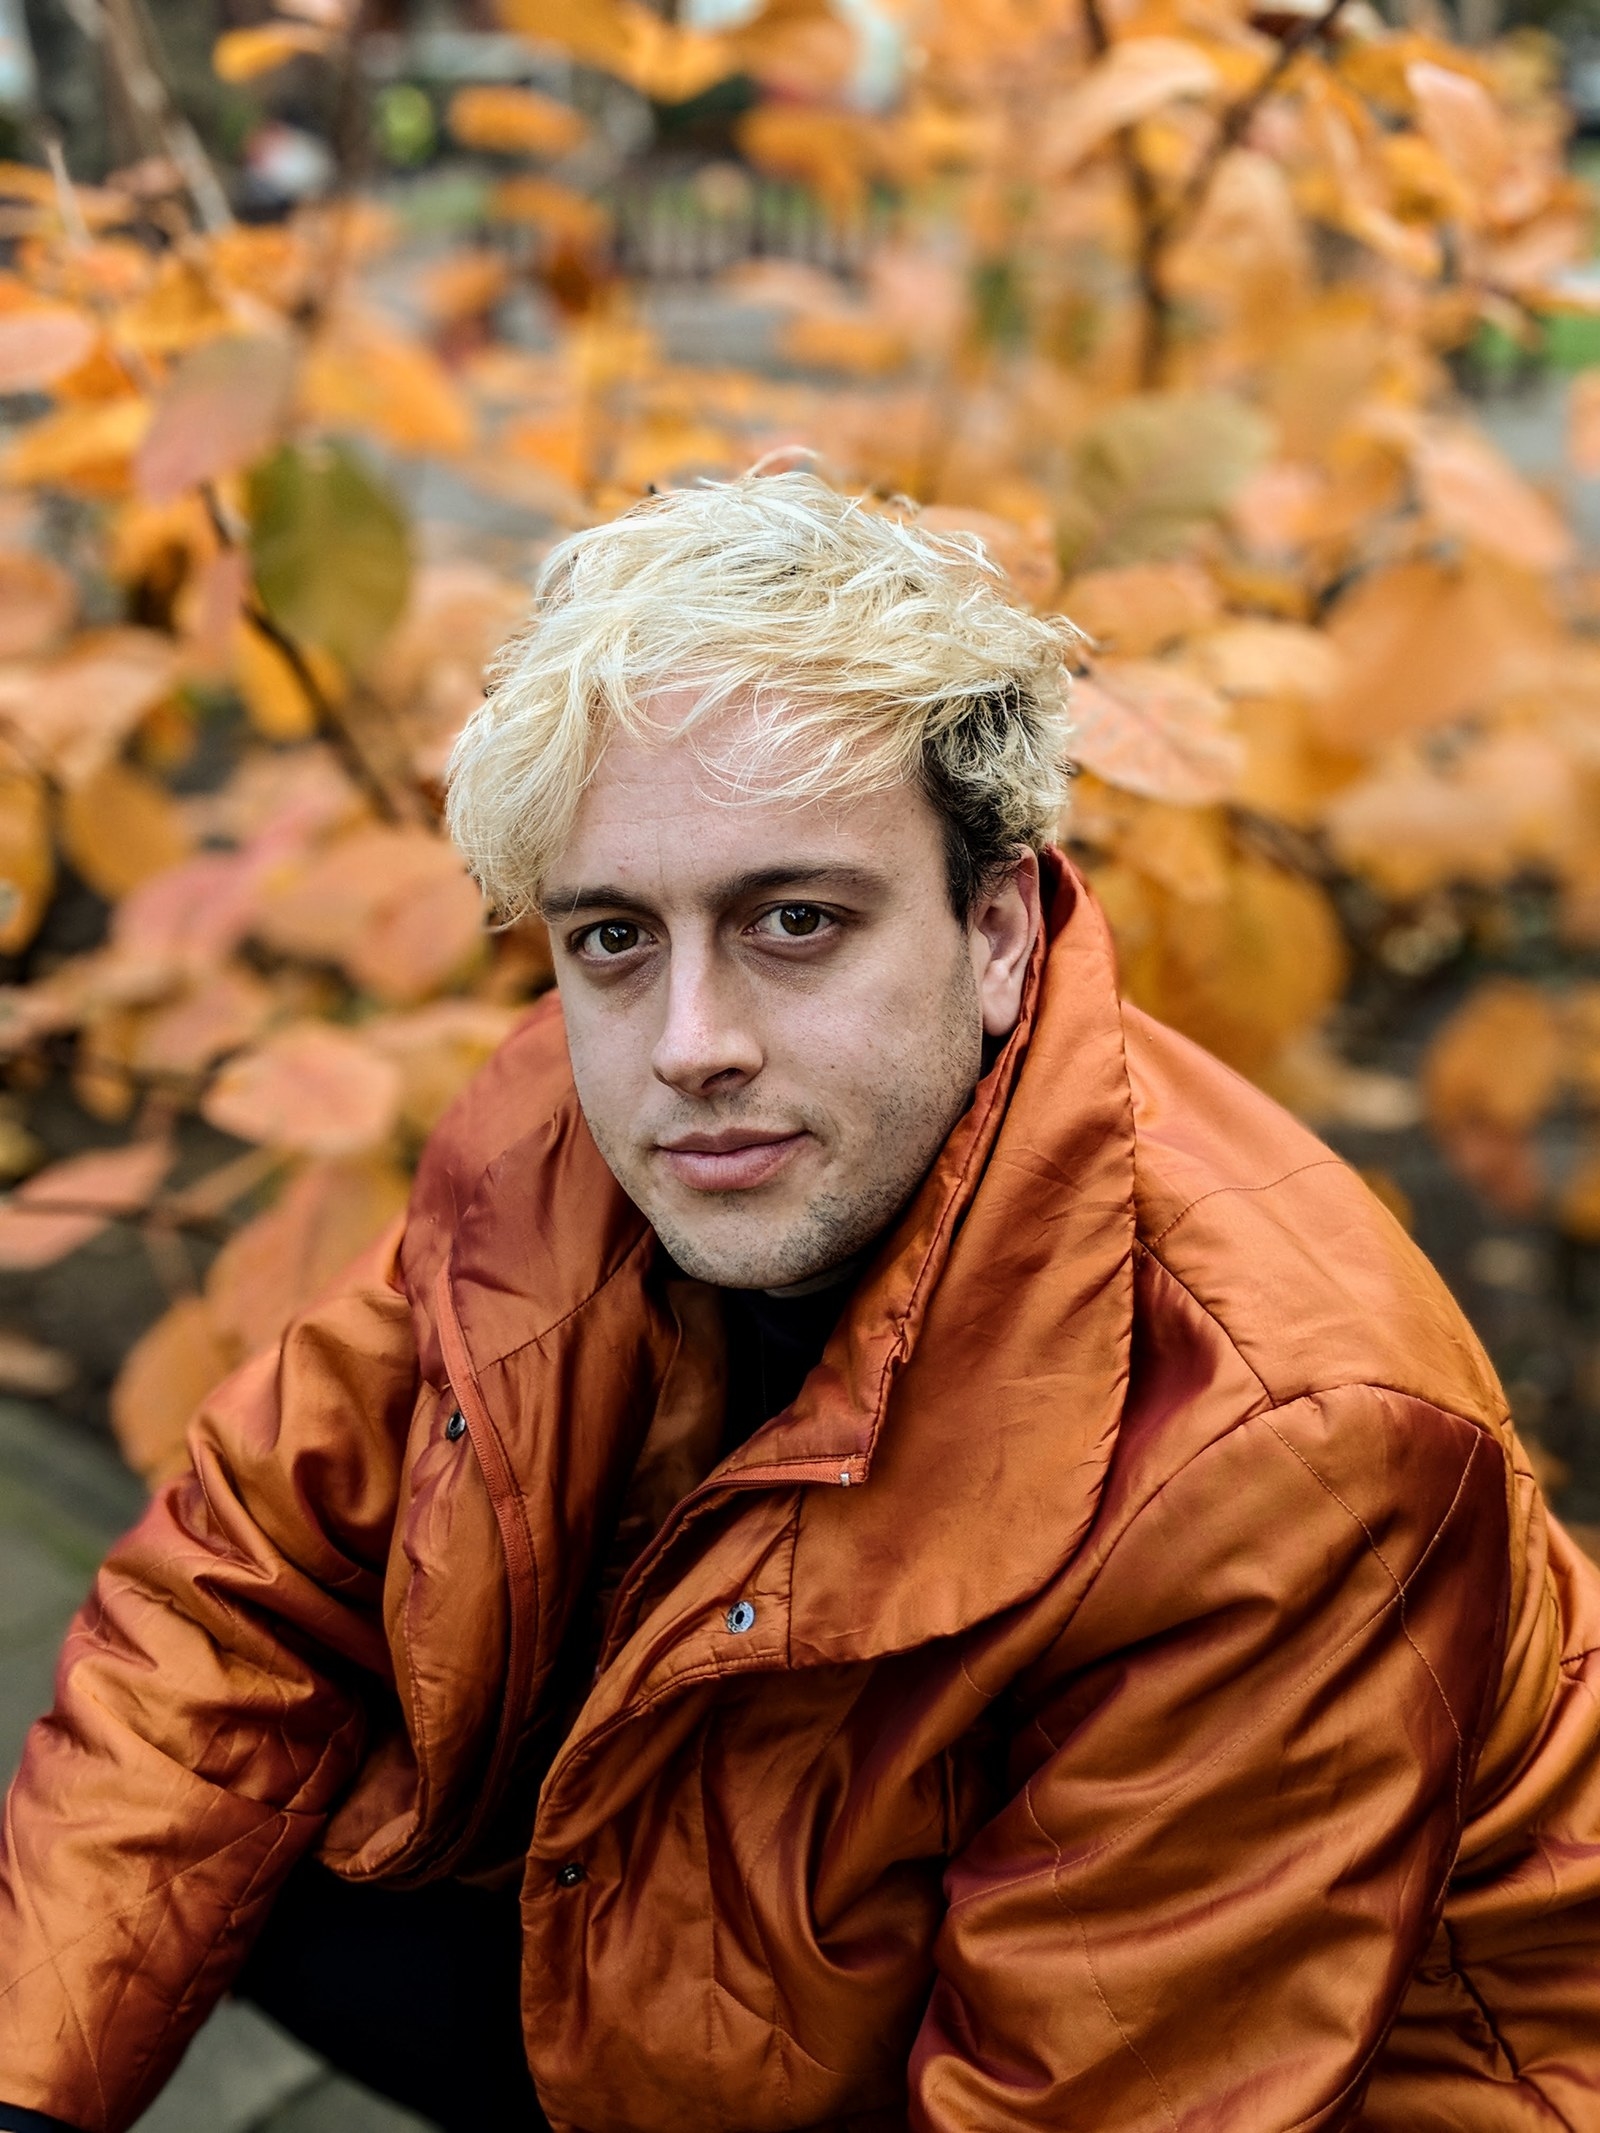
We were halfway through our day, and I really felt like I was starting to get the hang of this photography malarky. As we passed by a particularly orange-looking tree, I stopped David for another picture. “Let me try something here,” I announced, valiantly instructing David through a series of poses until I got the right shot.

Was the pupil becoming the master? Had I finally become worthy of the title “visual thinker”? “Sort of,” David told me after inspecting my shots. “You’ve been pretty clever in choosing a backdrop that complements what I’m wearing. But there are a few things you can do to make this really pop."
Like magic, David showed me how to open up the Pixel’s photo-editing options. In seconds, I was able to do the kind of photo editing I’d imagined people used design software for. Suddenly, my portrait of David was bolder and more interesting. Good job, brain!

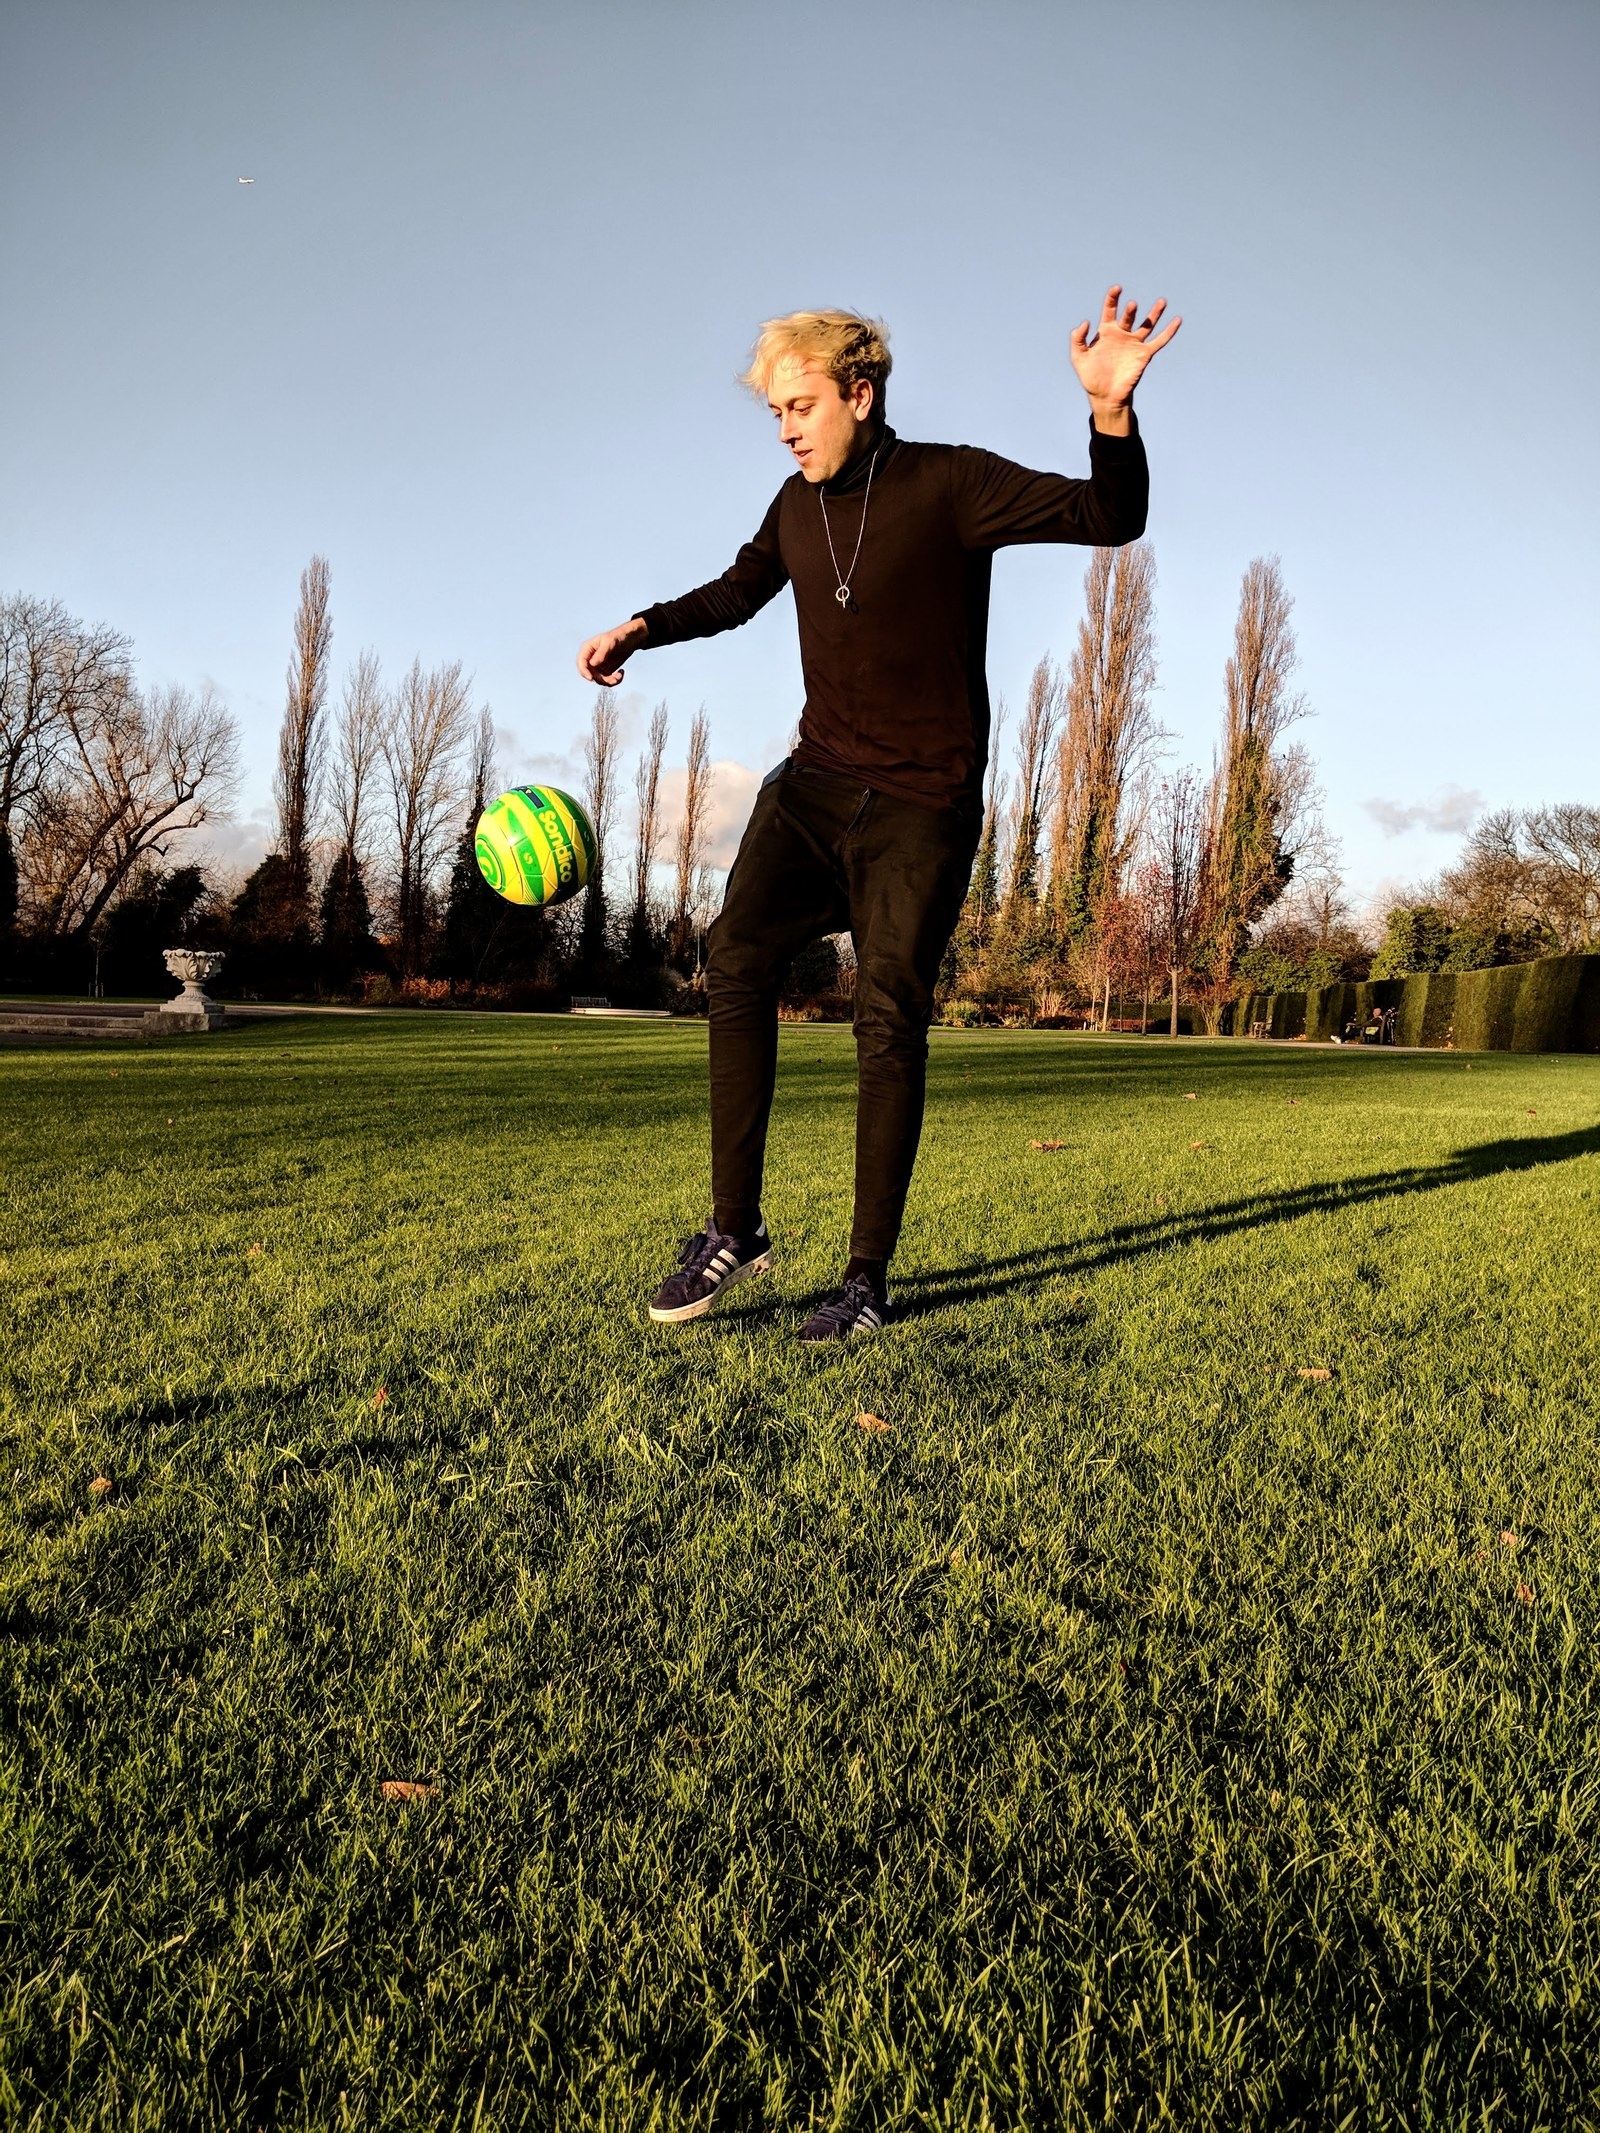
Next up on the agenda was action shots. What better way to improve than by hitting up a nearby park for a quick kickabout?
David seized this opportunity to practice his football skills, and I tried my best to put all the tips I’d picked up so far to good use. There was good light in the park, so I knew we’d be onto something. There was just one problem: I kept ruining the shot with my shadow. Full of knowledge as ever, David knew what to do:
- Be careful with the shadows. "Shooting with lots of light definitely means you can get creative with the placement of shadows, but you’ve got to be careful not to get yours in there as well. Be conscious of where the sun is in the sky, and try to rotate around your subject until your shadow is hidden. You can also get closer to the ground to shorten your shadow."
- Timing is critical. David had already told me that capturing the perfect moment is in an art of timing. You can double-tap the lock button on the Pixel to pull up the camera. Instant access so you don't miss the action!
- Slow it down. While the Pixel automatically captures short motion photos with every snap, you can also turn on slow-motion video, which makes even the humblest game of keepy-uppy look amazing.
With David's tips, these shots were starting to look something close to good. Great, even!

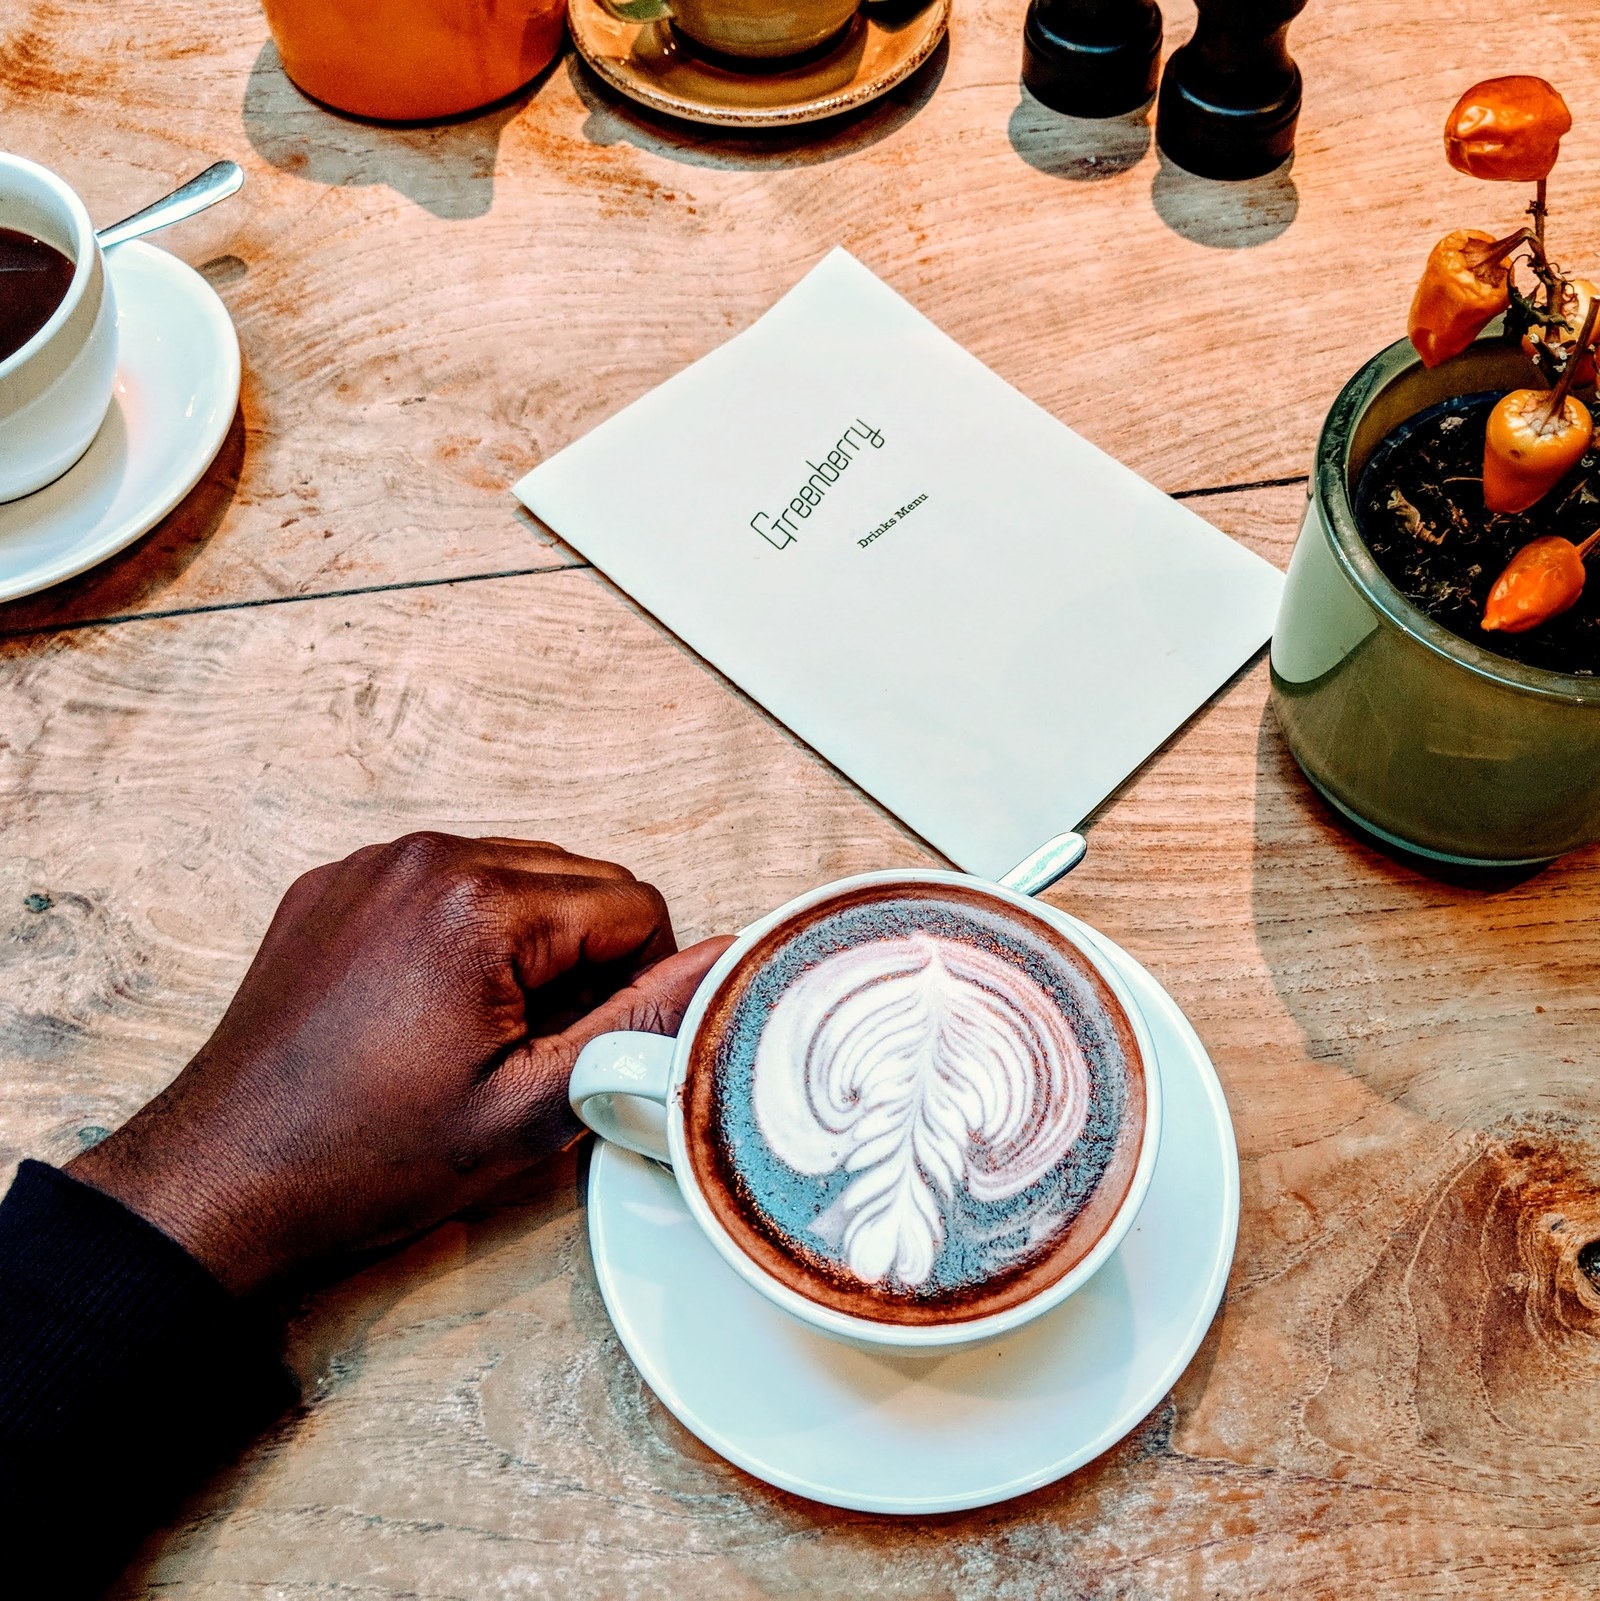
Towards the end of a long day, we decided to recharge our batteries with some coffee. Here, David gave me an impromptu lesson on set dressing.
So, as the other customers around us sipped their coffees, we set about getting our table camera-ready. David explained to me that arranging the objects around the table (as well as myself) could turn a bog-standard picture of hot chocolate into something quite artful. Usually, pictures in settings like this would come out looking gross and sort of yellow, but the Pixel's stellar camera made everything look natural and brightly lit. A few other important things I learned included:
- Adjusting white balance. Whites can be challenging indoors. I found that adjusting the white balance to make my whites look actually white improved the entire photo drastically.
- Adapt your lighting. The Pixel allows you to change from auto to Cloudy, Sunny, Fluorescent, or Tungsten settings to match the lighting in your environment.
- Tap to adjust. When you tap something on your phone screen, the camera auto-focuses on it. But I didn't realize you can spot-adjust the brightness by sliding up and down on the line that appears.

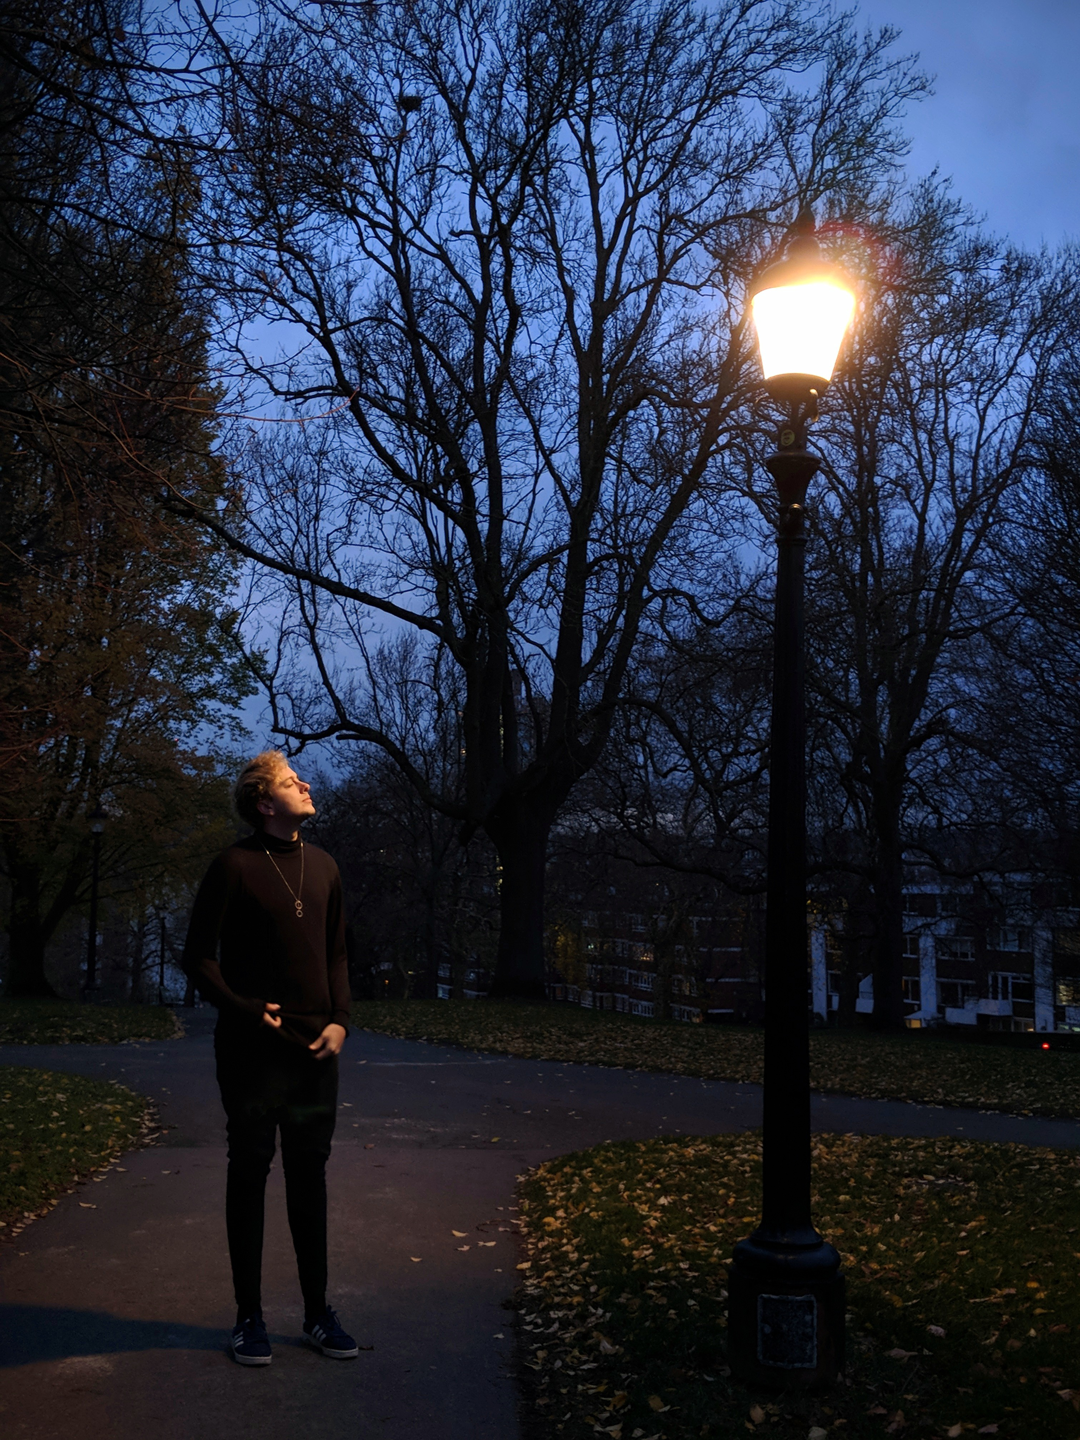
Anyone who's ever tried to take a picture of their entrée in a nice restaurant knows that low-light pics come out blurry and grainy. David has already scaled Mount Everest, but low-light photography would be my Mount Everest.
Under the setting sun in a nearby park, I looked for a cool backdrop. A lamp post would do.
I moved my camera back to get a wider shot of our surroundings and a hint of shadow. To me, the end result seemed pretty great! Most of the time, taking pictures at this time of night would mean you couldn't see a thing, but the Pixel really lived up to my expectations and gave us a clear low-lit snap for our last shot of the day.
Looking through my phone once we’d finished the shoot, I started to feel quite proud of myself. It took a fair bit of trial and error, but, with David’s help and the Pixel 2's killer camera, I’d gone from a photography novice to someone who had a bit of an idea of how to take a good picture. Maybe I am visually minded after all, I thought to myself.
Taking better photos is easy when you've got the Google Pixel 2 with you. Try it out for yourself today.
All photos taken using Google Pixel 2 XL
Images © BuzzFeed / Ben Armson / Charles Olafare