
Instructions:
Chapstick
1. Take apart an empty chapstick container, and clean each piece thoroughly to remove any remaining wax.
2. Trim the center spiral piece if necessary so your drive can fit.
3. Reinsert the top piece that used to hold the chapstick. Push the drive in on top. Your USB drive must be quite narrow in order to fit.
4. Replace the spiral piece in the back, and twist to bring up your USB drive.
Eraser
1. Measure your drive on top of your eraser, and mark with a pencil where the opening will be.
2. Cut in half with an X-acto knife, and trace your drive on the inside.
3. Hollow out the inside of the eraser.
4. Glue your drive in one side, and use the other as the cap.
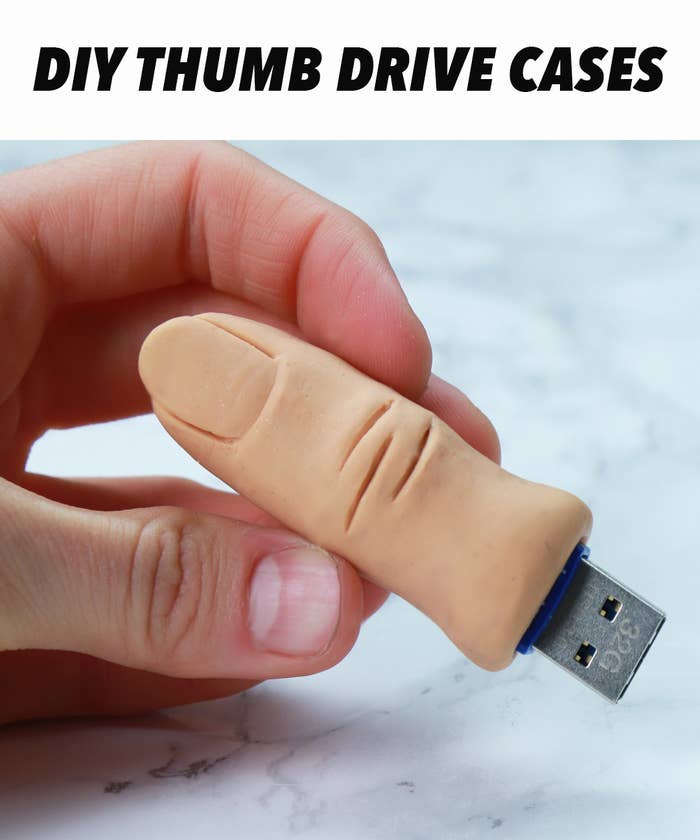
Thumb
1. With a small lump of polymer clay, mold a thumb. You can use a coffee stir to create lines in the joint, and outline the nail.
2. Press your drive into the clay, or use the stir to create an opening for the drive.
3. Bake for 5 minutes. (Do not bake the USB drive!)
4. Once cool, glue the drive into the opening. Enjoy your “thumbdrive”!