
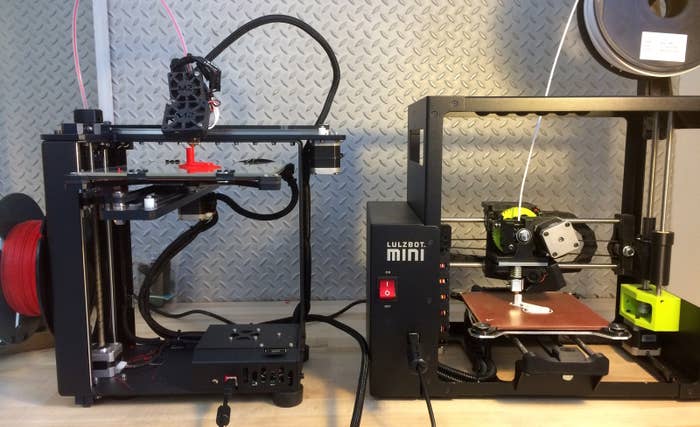
No R&D Lab or maker space is complete without at least one 3D printer. Most 3D printers operate on the same basic principle: successive layers of material are layered onto a build surface to create an object. Given the options available in July 2015, I selected the MakerGear M2 ($1825) and LulzBot Mini ($1250) when I was kitting out the Open Lab. If you only want or need one printer then I recommend the LulzBot Mini, especially if your users are new to 3D printing.
I selected two printers for a few reasons.
1. Making 3D prints is time consuming. Palm-sized prints can take 14 hours or longer. Two printers means you can get more printing done.
2. Having more than one printer also means you’ll spend less time swapping out filament types, some of which require special extruders.
3. Different 3D printers have different strengths and weaknesses. In this case, the M2 and Mini have complementary strengths and weaknesses. Together they will handle most of the Open Lab’s 3D printing needs.
Below is a comparison of the two printers.
Setup

LulzBot Mini
Follow the clear instructions in the included booklet and you’ll be printing your own creations in minutes with Cura LulzBot Edition, which both controls your printer and slices your files for printing. It is amazingly easy to use, and it is free and open source. Over on the M2 I struggled to print successfully using Printrun, the free and open source program MakerGear lists as compatible with its printer. I quickly purchased Simplify 3D ($149) which MakerGear recommends for the M2. If you’re new to 3D printing, I definitely recommend the LulzBot Mini. Out of the box it’s a turnkey 3D printer. On the other hand, if you go the M2 route I highly recommend purchasing Simplify 3D before you turn on the printer.
Printing Area

MakerGear M2
With an 8″ x 10″ x 10″ build platform, the M2 (on the left) beats the 6" x 6" x 6.2" bed of the Mini (on the right).
Noise

MakerGear M2
Printing in 3D is loud, but the M2 is a much quieter machine than the LulzBot Mini. We’ve been joking in the lab about composing music.using the dynamic range of electronic sounds produced by the Mini. By contrast, the M2’s subtle song has not once elicited any noise related commentary. You will make enemies if you run the Mini in an office space. It’s that loud. Your colleagues might not even notice the M2.
Filament Compatibility

LulzBot Mini
LulzBot says the Mini can print with an impressive range of materials: ABS, PLA, conductive PLA and ABS, HIPS, PVA, wood filled filaments, polyester (Tritan), PETT, bronze and copper filled filaments, polycarbonate, nylon, PETG, UV luminescent filaments, and that’s not even the whole list. The LulzBot Mini is a great printer for creative prototyping with different kinds of filaments. The MakerGear M2 officially only prints PLA and ABS, but with some tinkering the M2 can print other filaments as well. Users on the MakerGear forum keep a running list of other filaments that they’ve successfully used with the M2.
Printer Preparation

LulzBot Mini
Every time you print on the Mini it automatically levels its bed and cleans the extruder. It is up to the user to manually level the bed and clean the extruder on the MakerGear M2. All it takes is a paper towel, but it is still handy that the LulzBot does it for you.
Bed Adhesion

Lulzbot Mini
Both printers have heated beds made of borosilicate glass. When I print with PLA on the MakerGear M2 I always include a raft layer to ensure my print will stick to the bed throughout the print. With the raft layer,prints stick every time. Without it, they never stick. Users have solved the bed stick issue using different methods: hairspray, tape, Elmer’s Glue, glue sticks, and Windex. The Mini doesn’t need any such creativity. Not once have we needed a raft layer on the Mini. Prints stick every time thanks to its PEI (Polyetherimide) sheet on the glass bed. PEI sheets are available from Amazon if you want to hack your M2 printer bed.
Printing Resolution

MakerGear M2
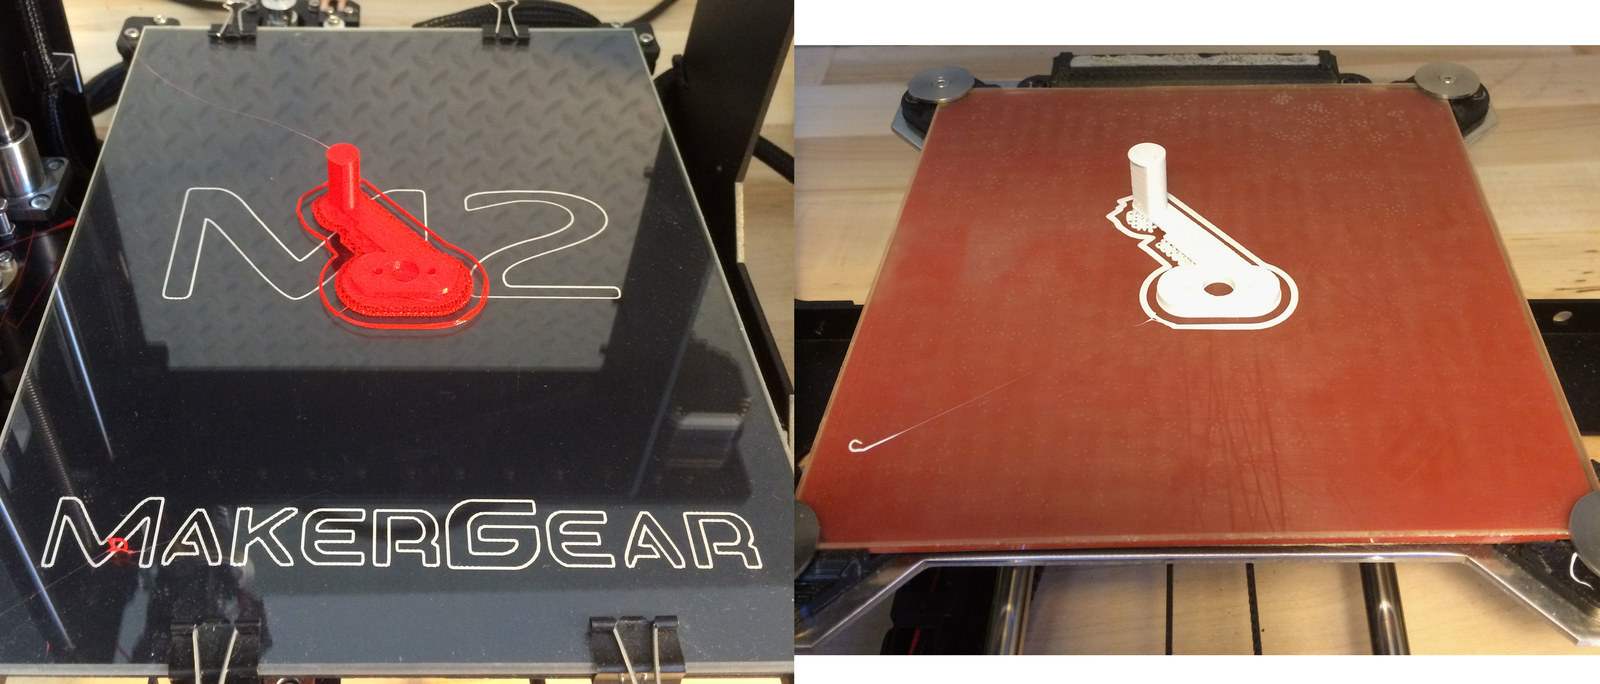
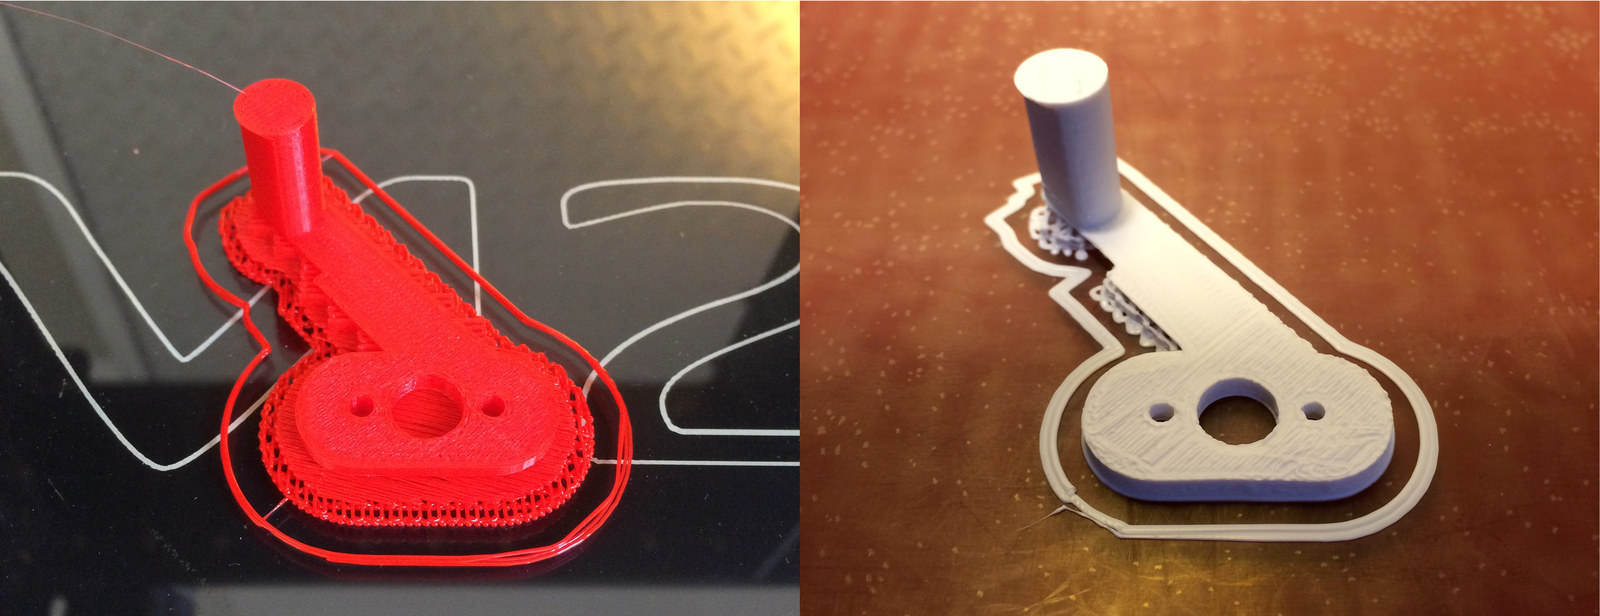
The M2 prints on its Z-axis accurate to 25 Microns. The Mini can do 50 microns. Numbers aside, set to run the same settings, the output quality is similar, but the M2 prints look slightly more detailed.
Computer-Free Operation

MakerGear M2
Once you start a print on the MakerGear M2 you can unplug your computer without interrupting the print. The LulzBot Mini requires you to keep Cura running and connected until the print is finished. Printing can take hours, so it is nice to be able to walk away from the printer and take your computer with you.
To let the M2 print while disconnected from a computer, first put the SD card in the machine, open up the printer control panel on your computer, connect to the printer via USB and in the software, then select the file on the SD card. Once the machine begins working do not disconnect from the printer inside the software. A software disconnect will stop the printer. Instead, with the computer and software still connected to the printer, simply pull the USB cable out of the computer.
Conclusion
Both printers are well reviewed by the 3D printing community. I also have had only positive experiences with both machines. They are easy to maintain, and haven’t yet broken down or failed during a print.
Open Lab fellow Westley Hennigh had never used a 3D printer before, and with 10 minutes of instruction he has been using the LulzBot Mini without any problems.
Before I settled on the MakerGear M2 and LulzBot Mini, I also looked at some much more expensive small business options priced in the $10,000 to $25,000 range. A printoff between the $20,000 uPrint SE Pro and a $599 Printrbot took the uPrint out of contention -- the cups came out identical!
Ultimately, spending $10,000 or more on a 3d printer seemed to be inconsistent with the Open Lab spirit. We want to develop tools that anyone can use. If you can only follow our lead if you can afford a $24,000 machine, we’re seriously restricting who can build on our tools.
One sales rep for a high-end machine warned me that if I go the consumer route my machines would breakdown and I’d be stymied by the learning curve. Given the results I’ve had with the MakerGear M2 and LulzBot Mini I’m happy to say I’ve had no such issues.