
MATERIALS:
Paper grocery bag
Wrapping paper
Butcher paper
Paint
Scissors
Scotch® Super-Hold Tape
Scotch® Expressions Tape
INSTRUCTIONS:
Paper Bag Cover
1. Cut the bottom and side of a brown paper grocery bag so it becomes one large piece of paper.
2. Open a textbook and lay the cover flat on the brown paper. Outline the edge of the book.
3. Add 4 inches to the top, bottom, and sides of the outline. Cut out this larger piece of paper.
4. Fold in the additional 4 inches of paper on the top and bottom.
5. Set the book down on the paper and now fold the additional paper on the sides over the front and back cover of the book. Tape the top edges of the sides using Scotch® Super-Hold Tape.
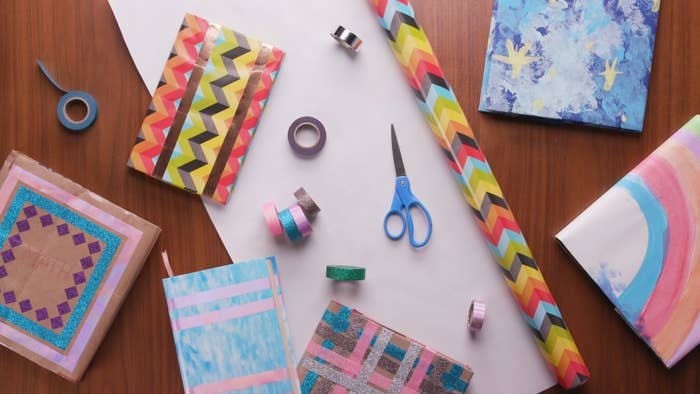
6. Decorate the front and back of the book cover using Scotch® Expressions Tape to make patterns.
Wrapping Paper Cover
1. Roll out some fun wrapping paper and lay an open textbook onto it. Outline the edge of the book.
2. Add 4 inches to the top, bottom, and sides of the outline. Cut out this larger piece of paper.
3. Fold in the additional 4 inches of paper on the top and bottom.
4. Set the book down on the paper and now fold the additional paper on the sides over the front and back cover of the book. Tape the top edges of the sides using Scotch® Super-Hold Tape.
Painted Cover
1. Roll out a large piece of butcher paper for your kids to paint on and let dry.
2. Flip the painting over and lay an open textbook onto it. Outline the edge of the book.
3. Add 4 inches to the top, bottom, and sides of the outline. Cut out this piece of paper.
4. Fold in the additional 4 inches of paper on the top and bottom.
5. Set the book down on the paper and now fold the additional paper on the sides over the front and back cover of the book. Tape the top edges of the sides using Scotch® Super-Hold Tape.
6. Let your kids’ artwork shine on the covers of their books!
