
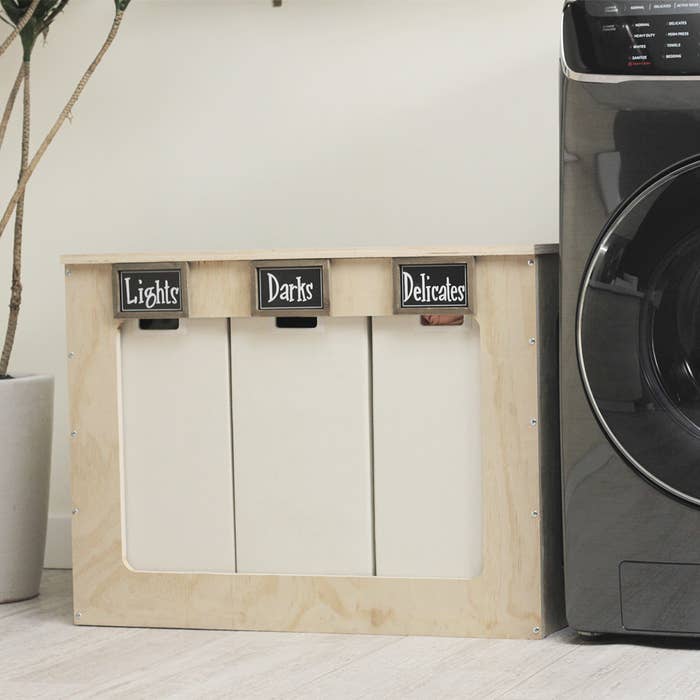
DIY Pre-Sorter Hamper
MATERIALS
4x4 plywood and 4x8 plywood
(You can get them pre-cut at your local hardware store into:
2 pieces that are 36x26.5 inches, which will be the front and back.
2 side pieces are 26.5x20 inches
1 lid is 21.5x36 inches)
1⅝-inch #8 self-drilling Lath screws (optional: screw with a nice head like buttonheads)
¼-inch semi-wrap overlay hinges
Drill with ⅛-inch drill bit and ⅜-inch drill bit
Jigsaw
Straight edge
Paper cup (or something round)
Sandpaper
Goggles
Ear plugs
Wood glue
Wood stain in color of your choice
INSTRUCTIONS
1. Measure out 4 inches from the edge inward to make the window. Mark with pencil.
2. Use a paper cup to mark the round corners.
3. Put on your goggles and earplugs for the next 3 steps!
4. Drill one hole into a mark as your starting point for the jigsaw.
5. Using the jigsaw, cut the plywood following your drawn design.
6. Repeat steps 1 to 4 with the 2 side pieces (the ones that are 26.5x20 inches).
7. Line up the front piece to the one of the side pieces.
8. Pre-drill a hole every 6 inches. This will prevent the wood from splitting. You may need a friend to hold the wood up for you while you do this.
9. Drill the screws into every hole.
10. Repeat Steps 6 to 8 with the other side and back pieces.
11. Place the 2 hinges on the top of the back piece. Screw the bottom parts of the hinges on the back piece.
12. Have a friend hold up the lid to align with the top of the hinges.
13. Screw the top part of the hinge onto the lid side.
14. Sand down any rough edges.
15. Insert the 3 cubby boxes into your customized hamper sorter.
16. Optional: If you want, label the 3 cubby boxes pre-sorted to “Whites,” “Colors,” and “Darks.” We hand wrote our signs with chalkboard markers.