This post has not been vetted or endorsed by BuzzFeed's editorial staff. BuzzFeed Community is a place where anyone can create a post or quiz. Try making your own!

So my boyfriend (of over 2 yrs) bought a house. He had been looking for a multi-unit home for months and months, and then suddenly he had bought one. I had given up on accompanying him to countless showings months before. It was frustrating as it always seemed what he was looking for was changing. First he wanted a single family home so he could have roommates, then it ended up that he was looking for a multi-unit building. So no, I did not know he had put in an offer, and no I hadn’t had the privilege of hearing or seeing the place. This told me all I needed to know about it. In other words, it couldn’t be good.
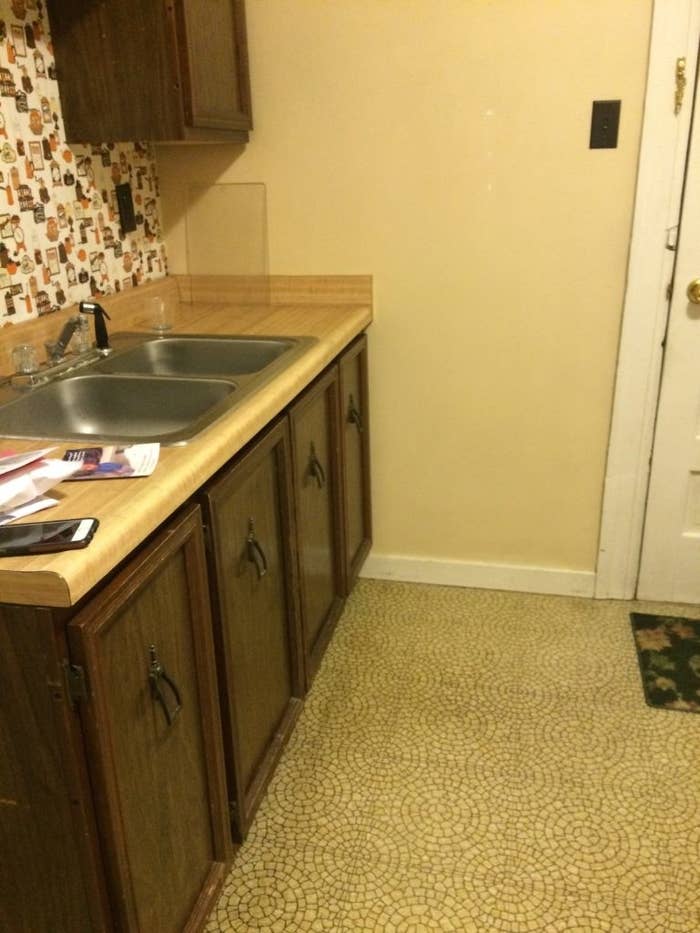
It was too late to share my opinion or change his mind, so when he finally took me to see it I decided I had to be positive, supportive, grin and bear it. That took restraint. Here are some pics of the place from the first time I saw it. This is one of the three apartments in the multi-unit home in a neighborhood North of Pittsburgh.

The feeling I had walking through here for the first time may have been disappointment, and my outlook may have been dismal, but looking back this is the moment I first seriously thought of starting a blog. I felt the challenge ahead of us and saw the potential to share the process. This isn’t a family home it’s an investment project.

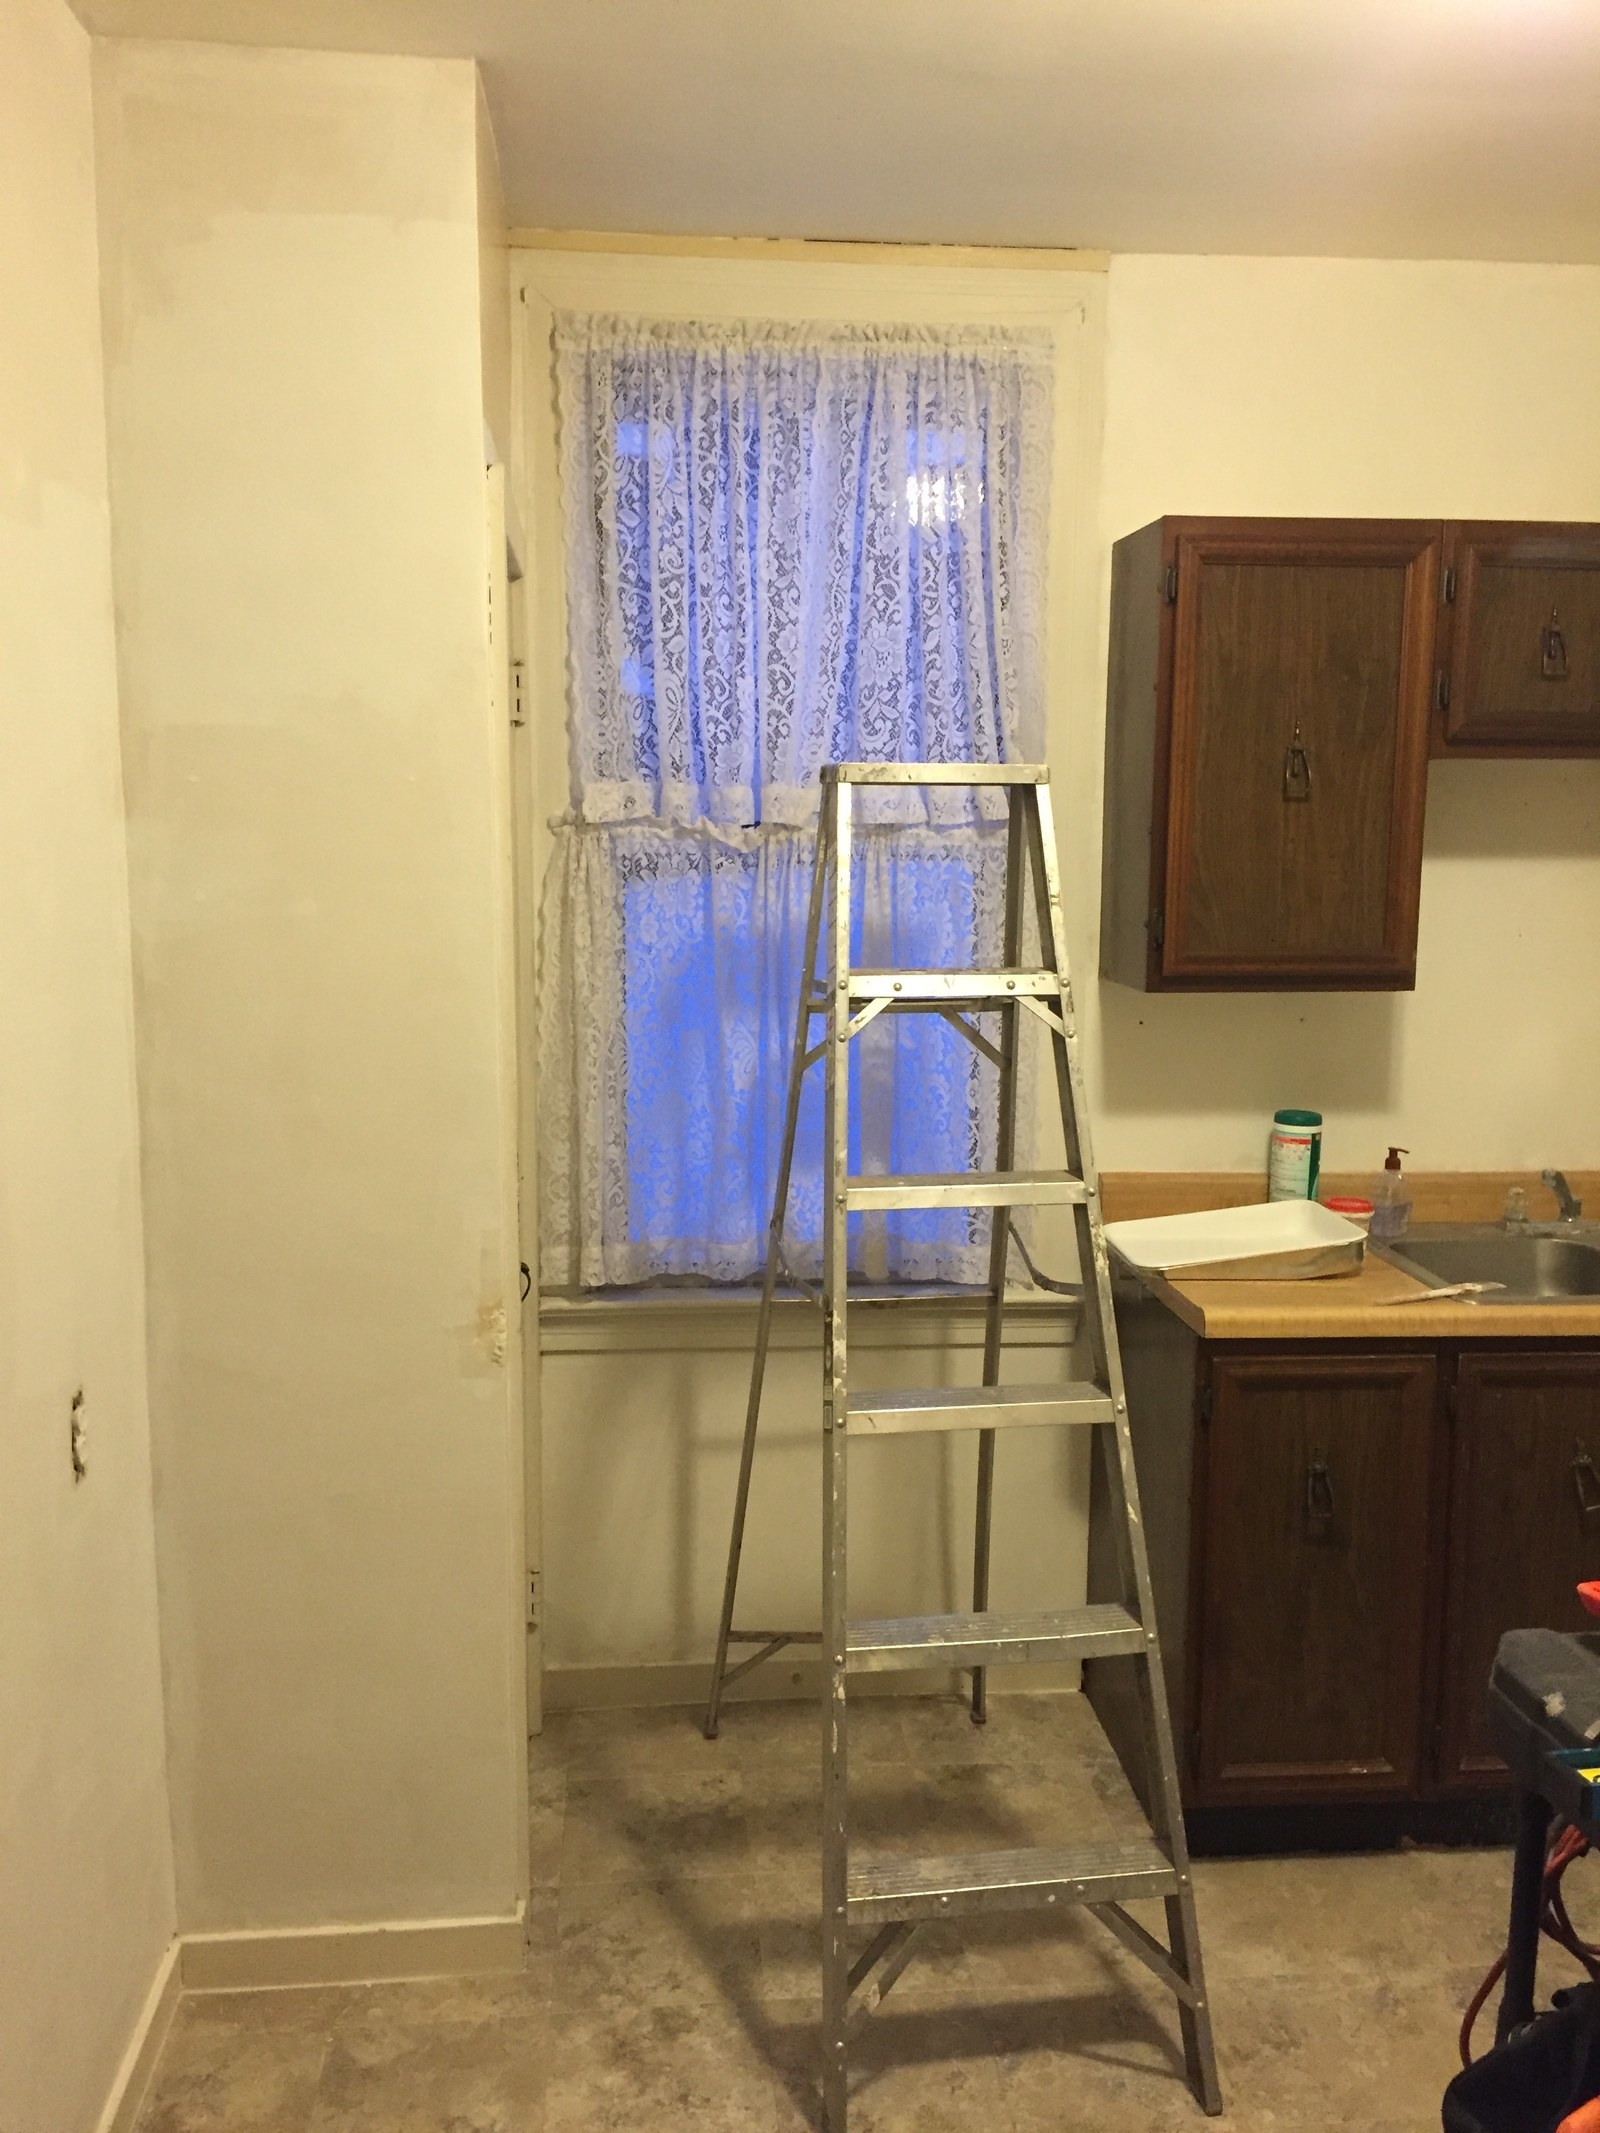
To get started on the DIY kitchen update, for the kitchen flooring we used a solid vinyl stick tile. A simple, neutral pattern from The Home Depot. Cheap and easy to install, does the job quite well. Probably about $60 total in tile was all it took to make a difference!

After tirelessly spending days on end removing wallpaper by hand, I've concluded that there’s a special place in hell for people that decide to install wallpaper. Four weeks of free time spent attempting to remove layers of paper by scrapper, steamer and chemical stripping later, I had successfully destroyed by hands and skin and will to live – but barely made a mark on removing the disgusting bathroom and kitchen 70’s wall paper. Seriously I will NEVER EVER choose to install wallpaper into any future project I am a part of and encourage you all to do the same. Simply for the sake of karma. No one should be subjected to stripping wall paper.
For the walls I choose a paint color inspired by what else other than an episode of Fixer Upper of course! I picked a PPG Voice of Color paint color called Silent Storm, a pale green gray 6 months before I realized it actually truly is the PPG crossover for Joanna’s color Americana Egg in the Magnolia Homes paint line! A crossover means that Silent Storm is the closest tint formula in the PPG Paints color palette, to the other brand’s color Americana Egg. This is discovered based on tint and formula data. I had PPG Paint color Silent Storm tinted into Olympic One at Lowe’s. The paint is of great quality, after a coat of primer, Olympic One less than $25, went on the wall easily and covered well. We used a satin sheen to brighten up the space with a slight bit of reflectance and for easy clean-up in the kitchen.
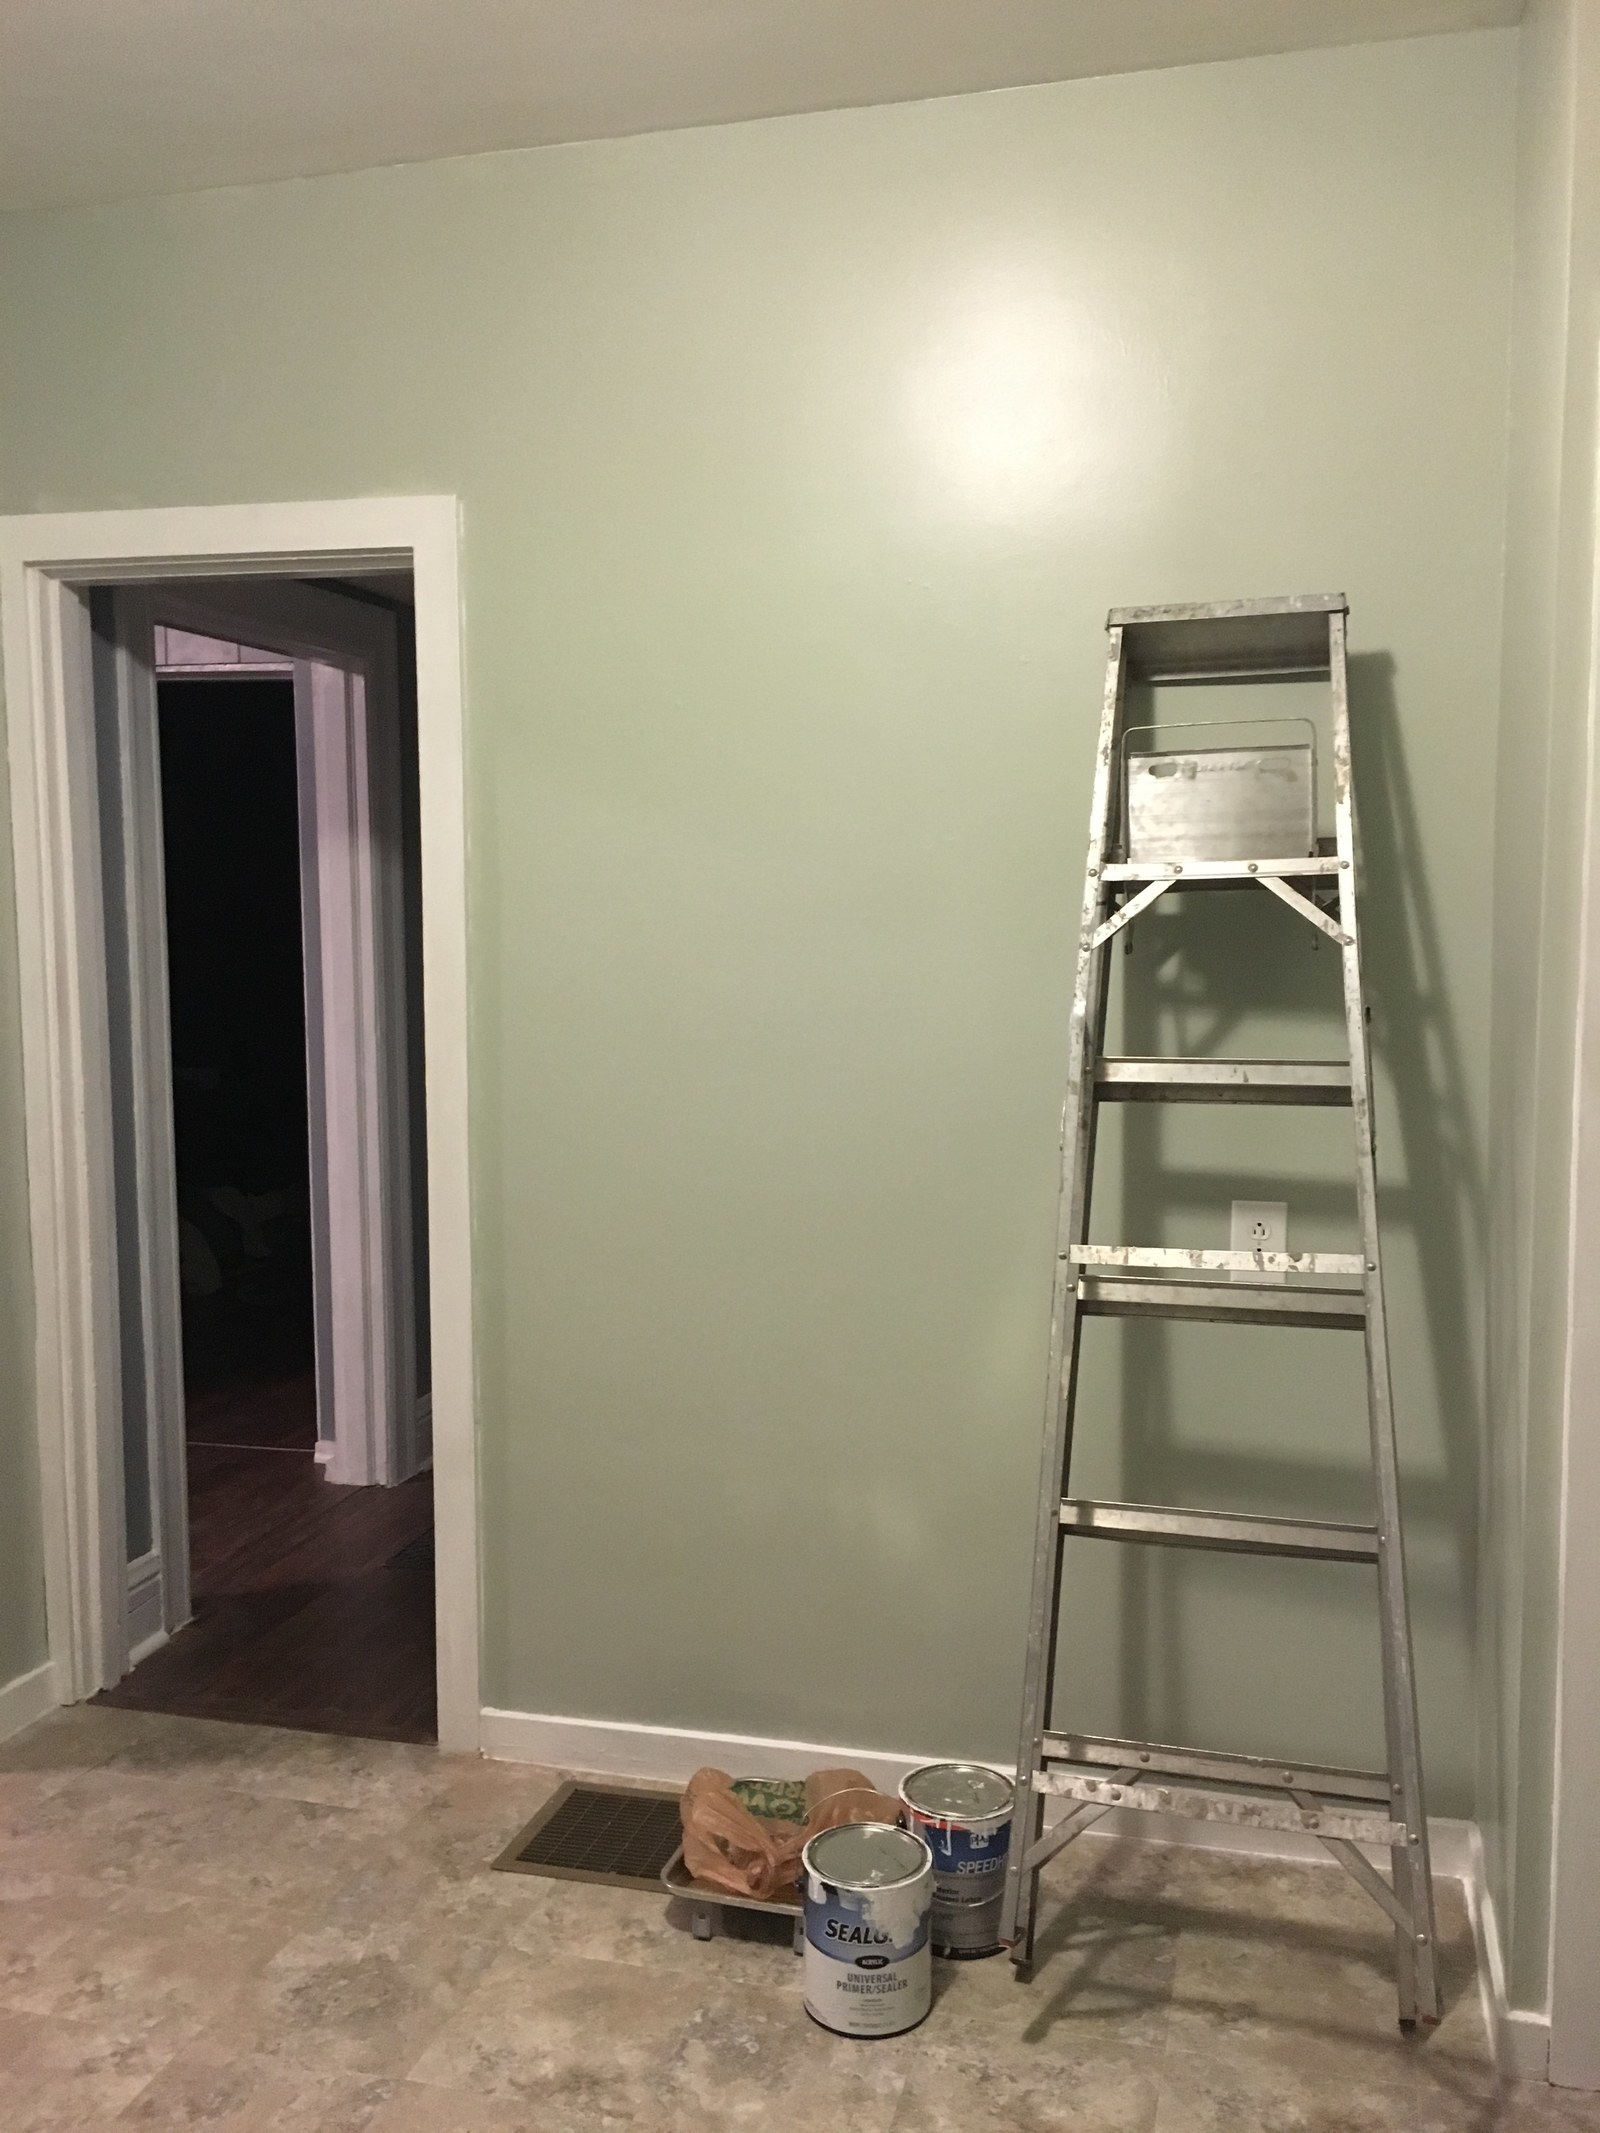
Olympic Paint in Silent Storm Gray-Green Color

Here is the after, with a fresh coat of paint and new flooring, we haven’t even changed the lighting yet. The goal was just quick, simple, easy and CHEAP refresh. Yes we are having to store all my wine on top of the cabinets classy college style. We simply don’t have a ton of storage space in this tiny apartment. I’ve had to cleanse a lot of my kitchen items, flatware and etc..

The AFTER DIY Kitchen Refresh
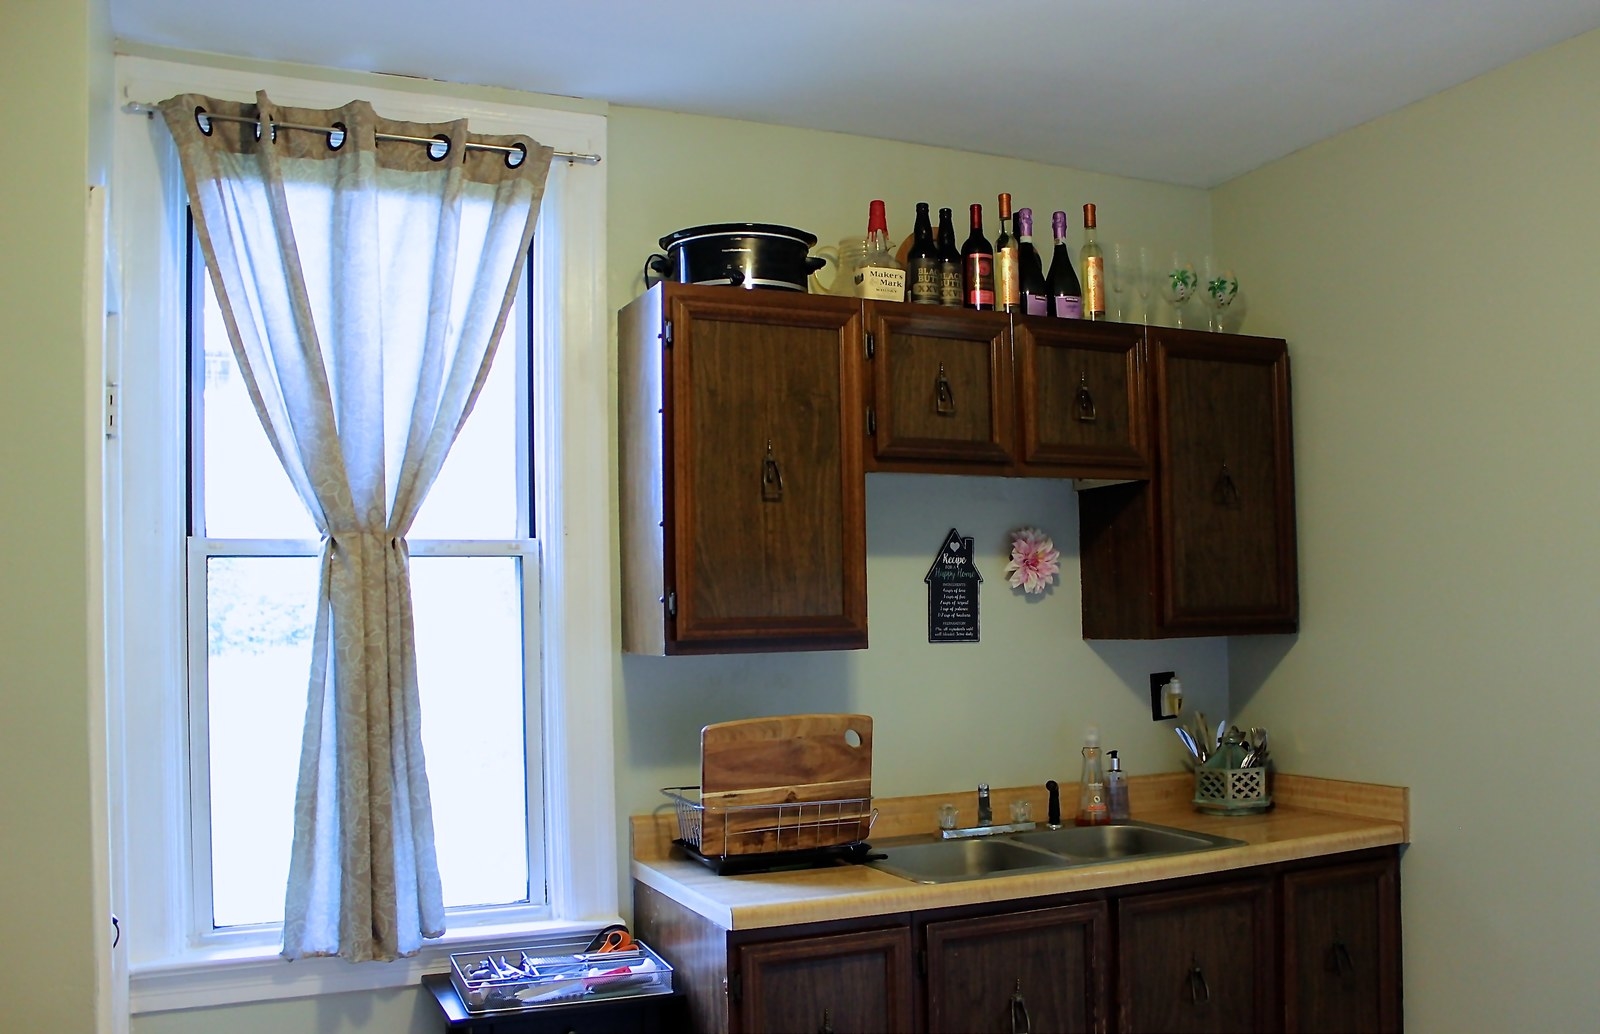
Yes that’s my Keurig, espresso machine and fancy Kitchen Aid Architect all stacked on top of the fridge… again there’s no counter space here to sacrifice. We created a much needed over the stove shelf with a random piece of wood we had and brackets for about $10.
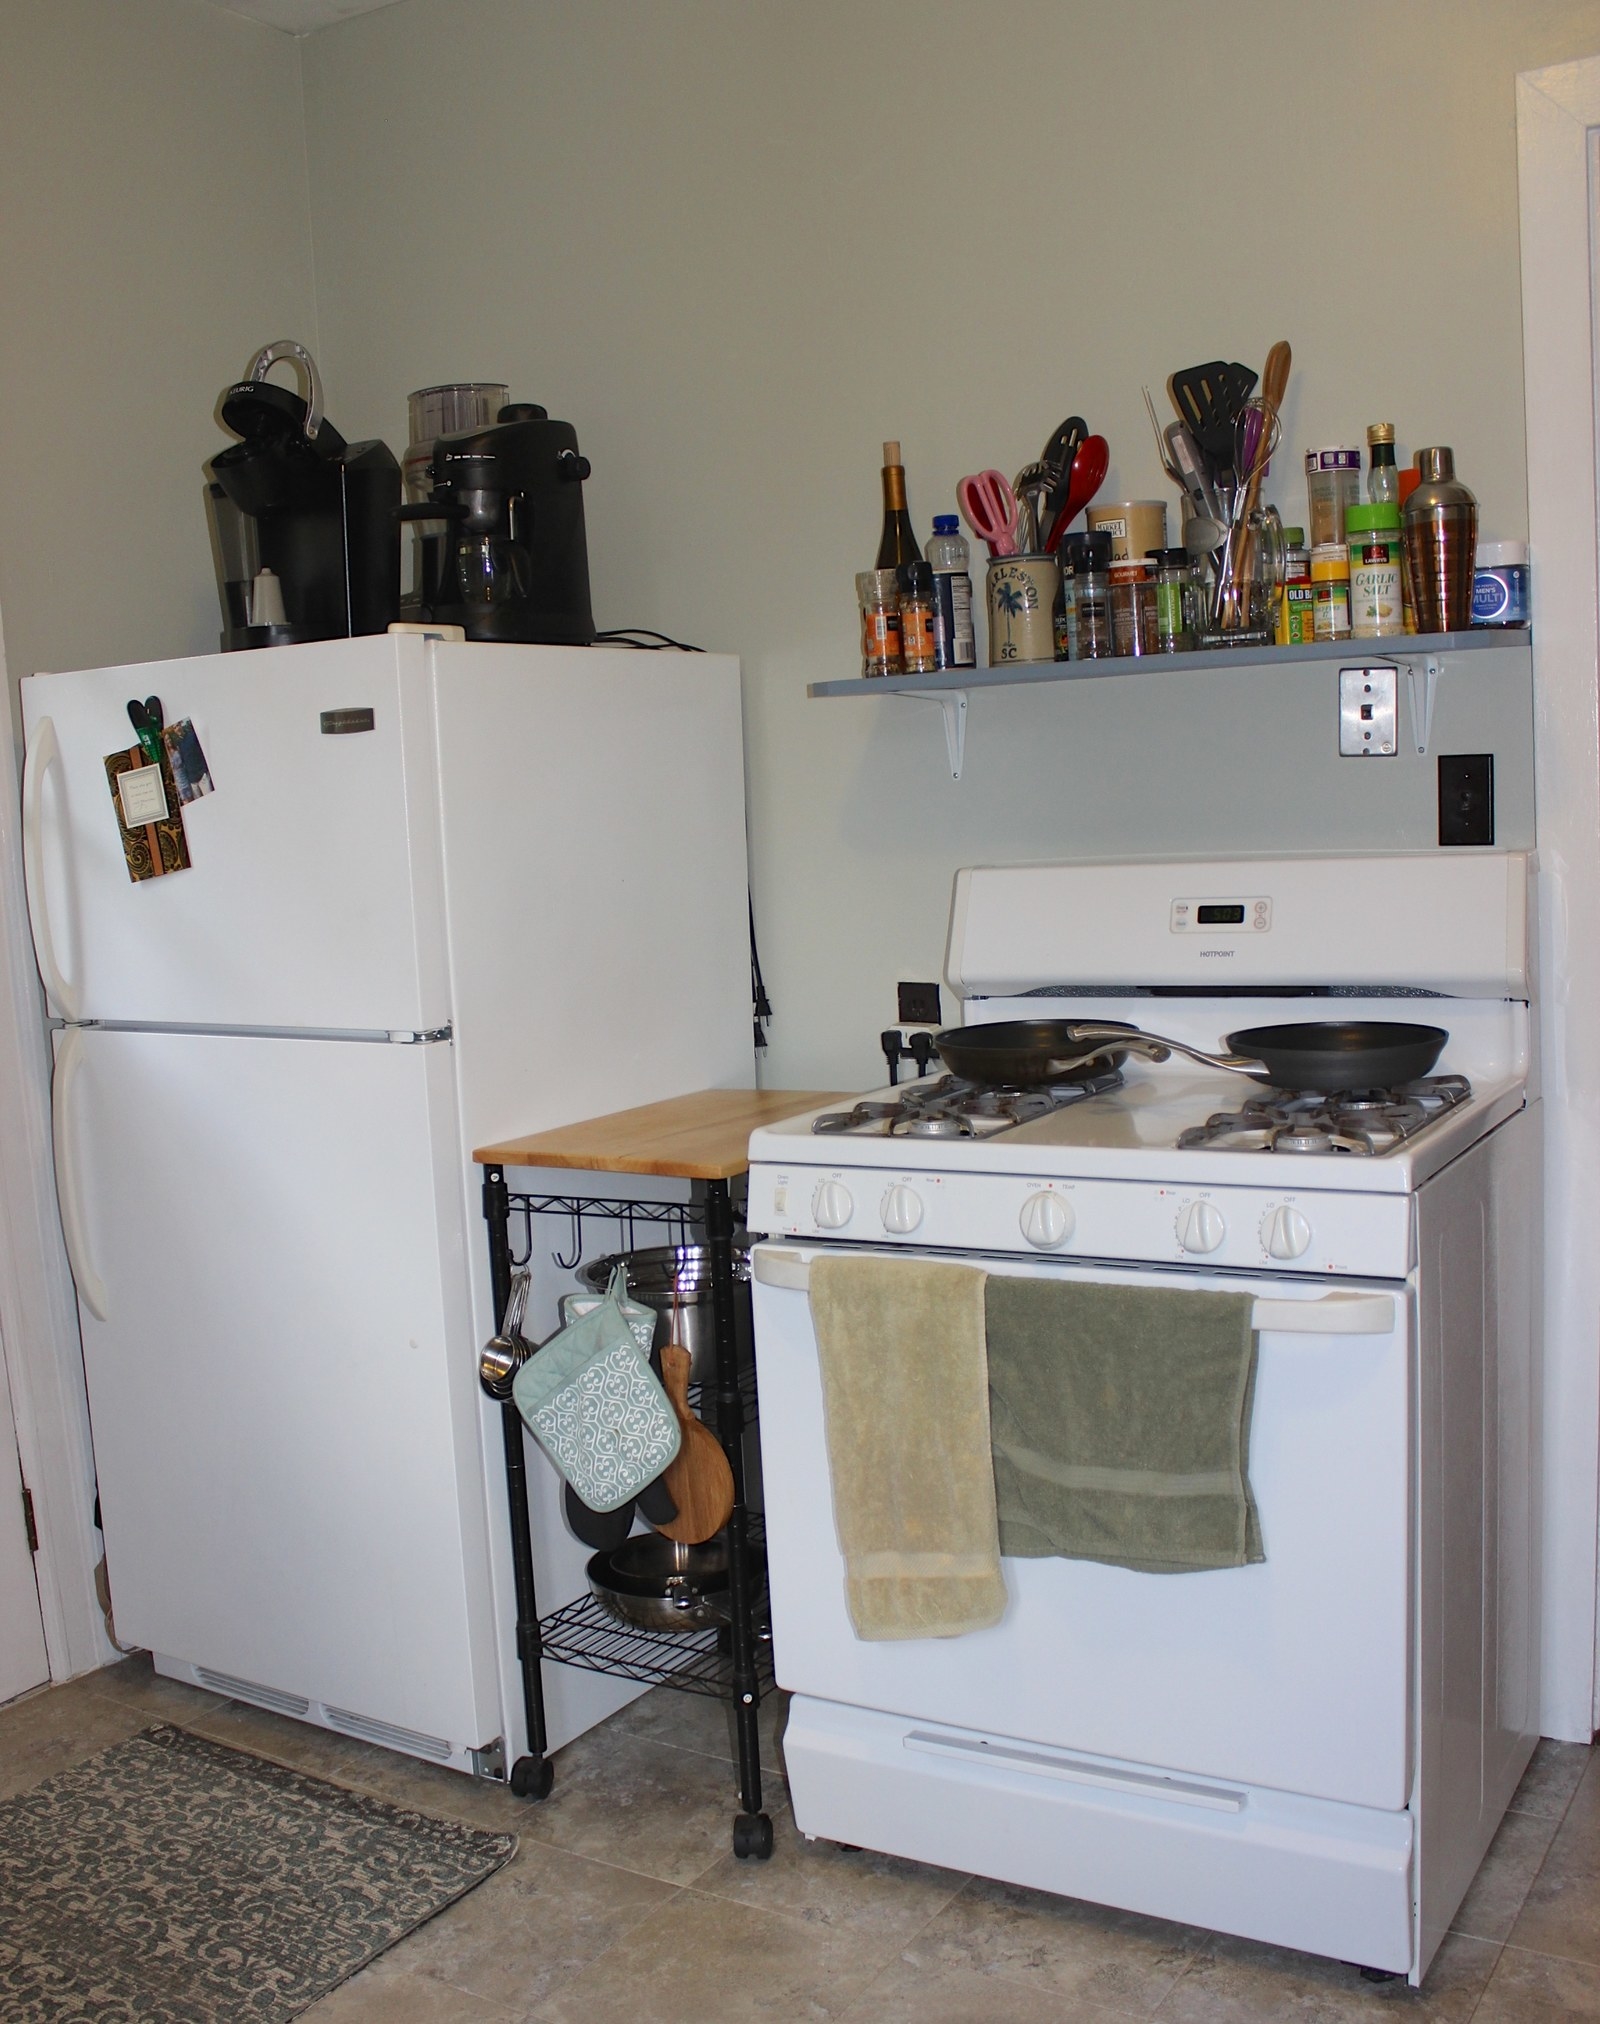
We thought about painting the cabinets, but decided not to as they are not real wood and in bad condition. Just not worth the effort or cost of painting the damaged veneer. My BF’s aka the owner’s plan is to actually renovate the kitchen before it is rented out. As in do all the real work after we move out, so that someone else can benefit. Not my idea, but hey this isn’t my investment project. I'm just helping to make the space livable in the time being.
Anyways, I am very happy with the paint color and the flooring choice. They really do serve the purpose of updating and freshening the space. On the positive side this kitchen does have a gas stove, which I have never worked with before. I know now why house hunters on HGTV insist on a gas stove, the difference in heat time is amazing.
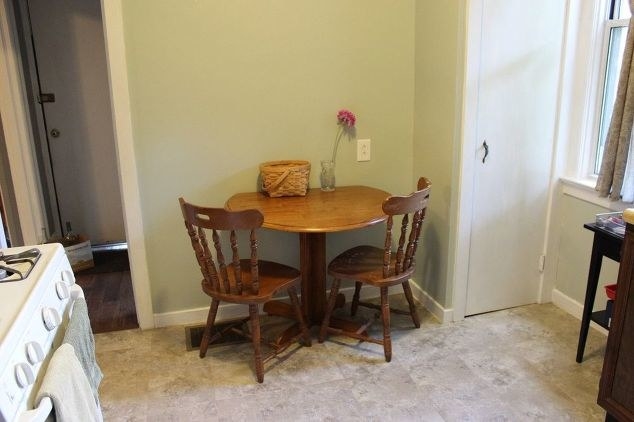
In the area above the kitchen sink I've hung a sweet reminder for us to know that no matter how frustrating standing at that sink and attempting to clean dishes without causing a flood throughout the kitchen is, this is the kitchen we share together. No matter the functionally of this kitchen, its our home for the time being, our first space together. Oh and that flower is sitting in a random inch wide hole in the wall, covering the eyesore :) Materials I used for this project: OLYMPIC ONE Interior Paint (Lowe's Home Improvement) Trafficmaster Ceramica (The Home Depot)

Share This Article