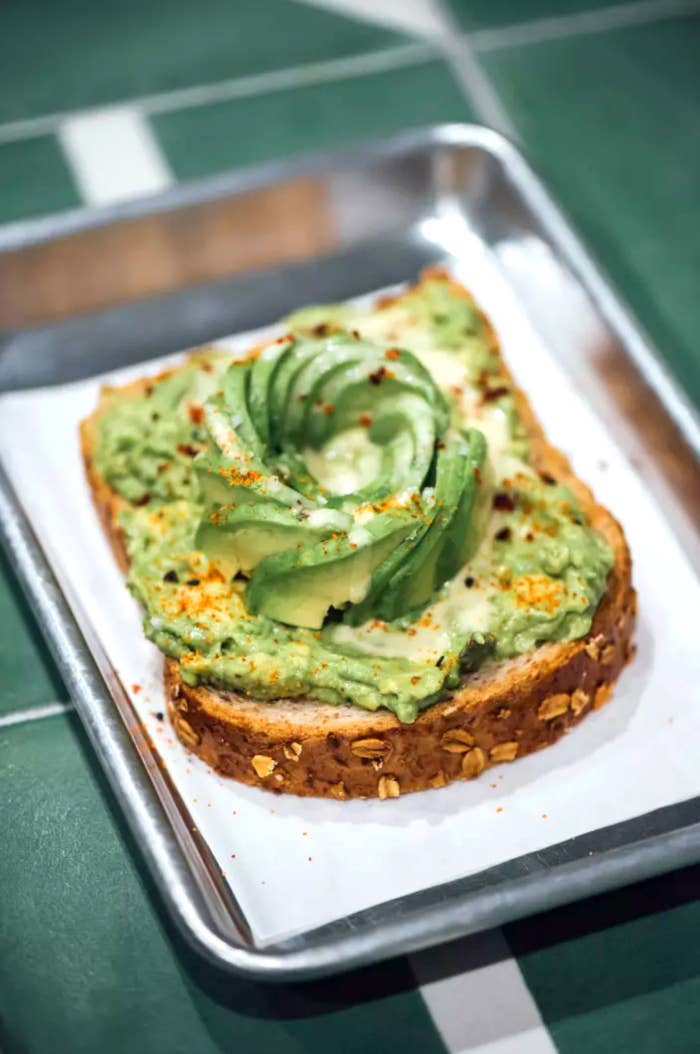
Let's face it: you're never going to own a home because you keep blowing all your money on fancy avocado toasts and extra guac.
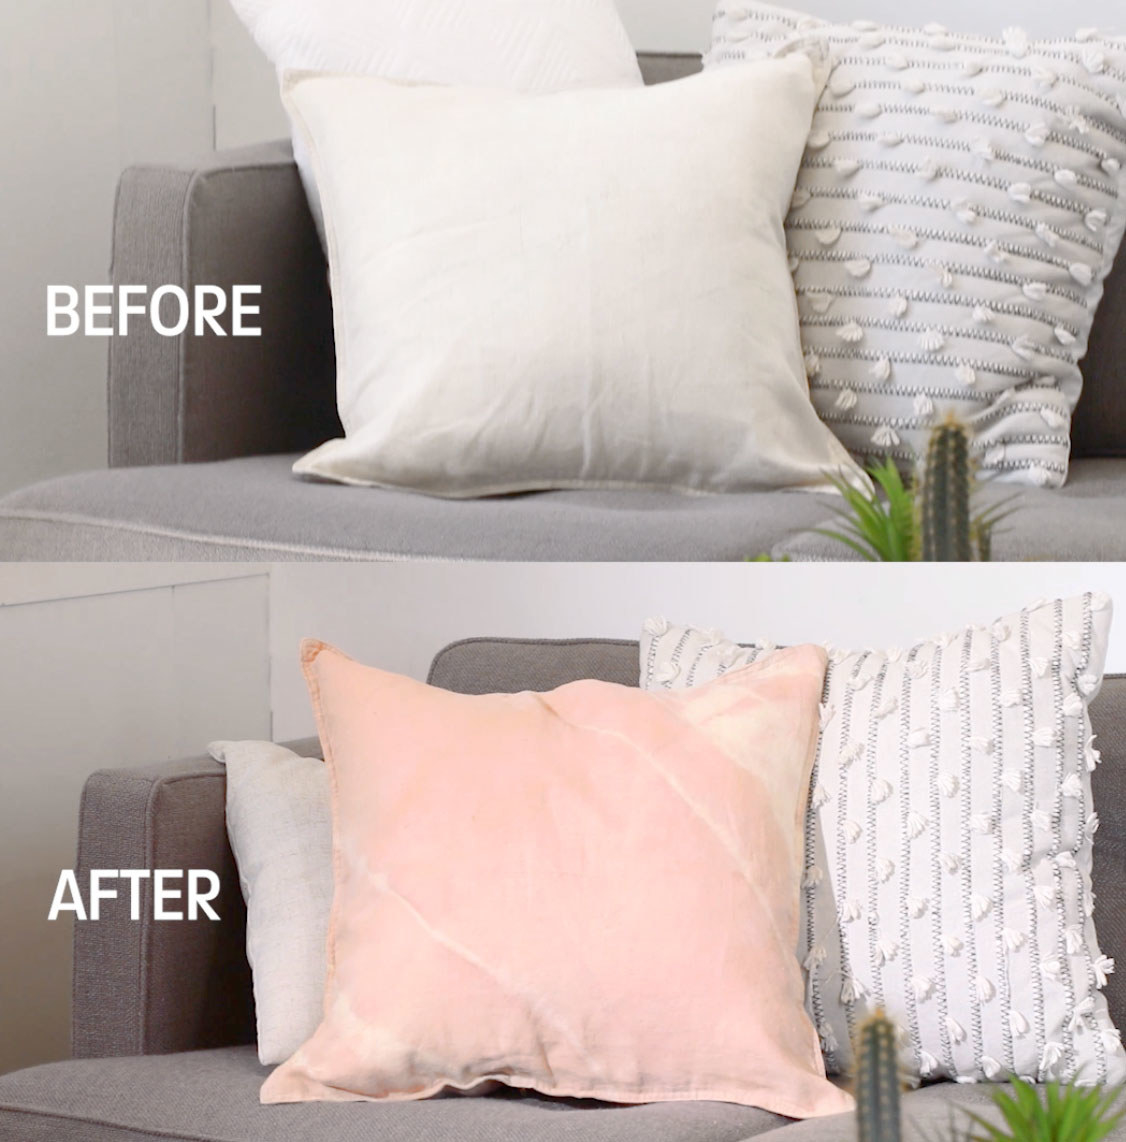
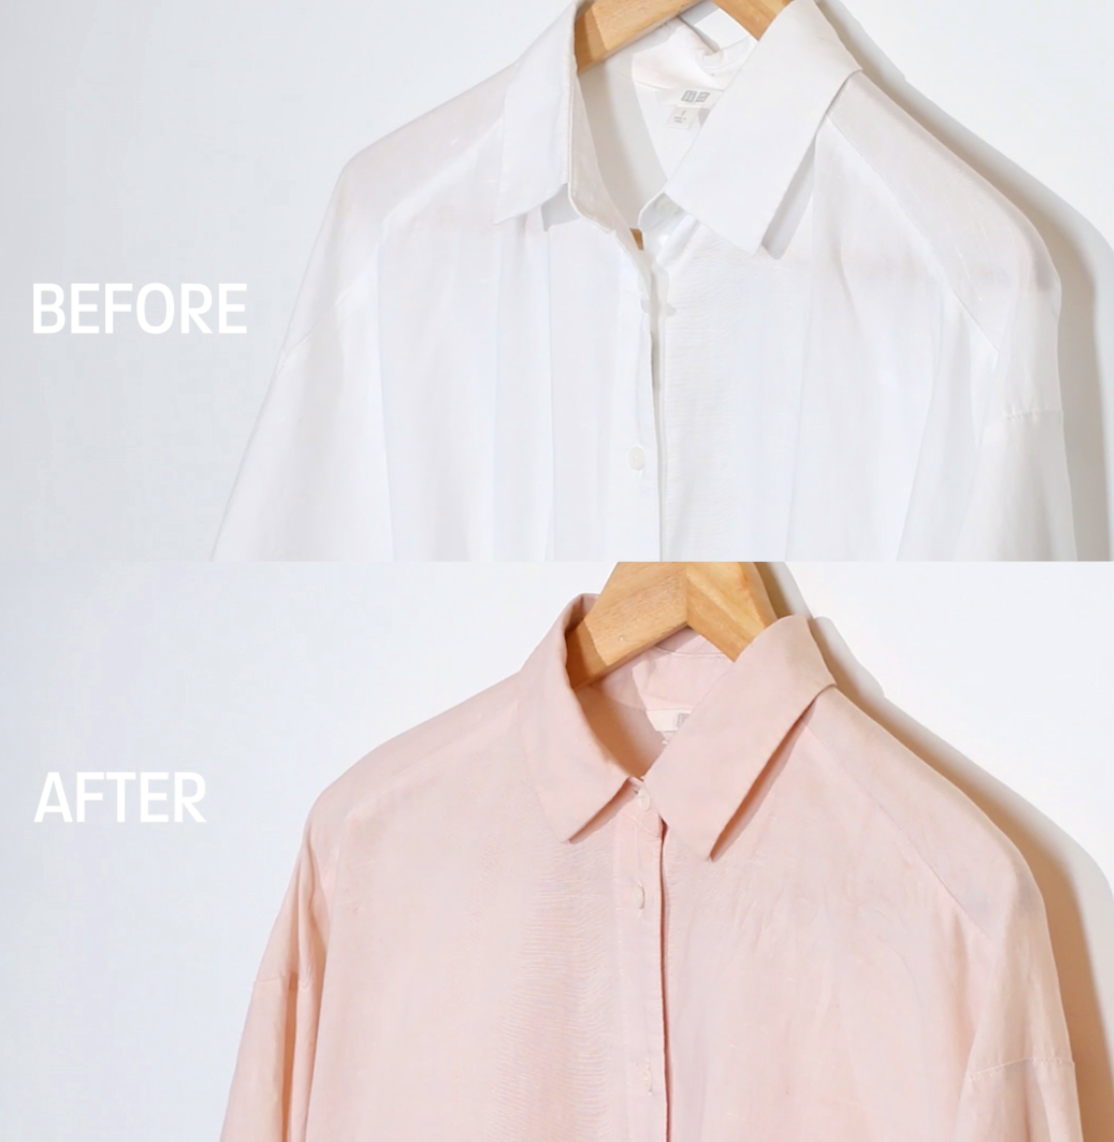
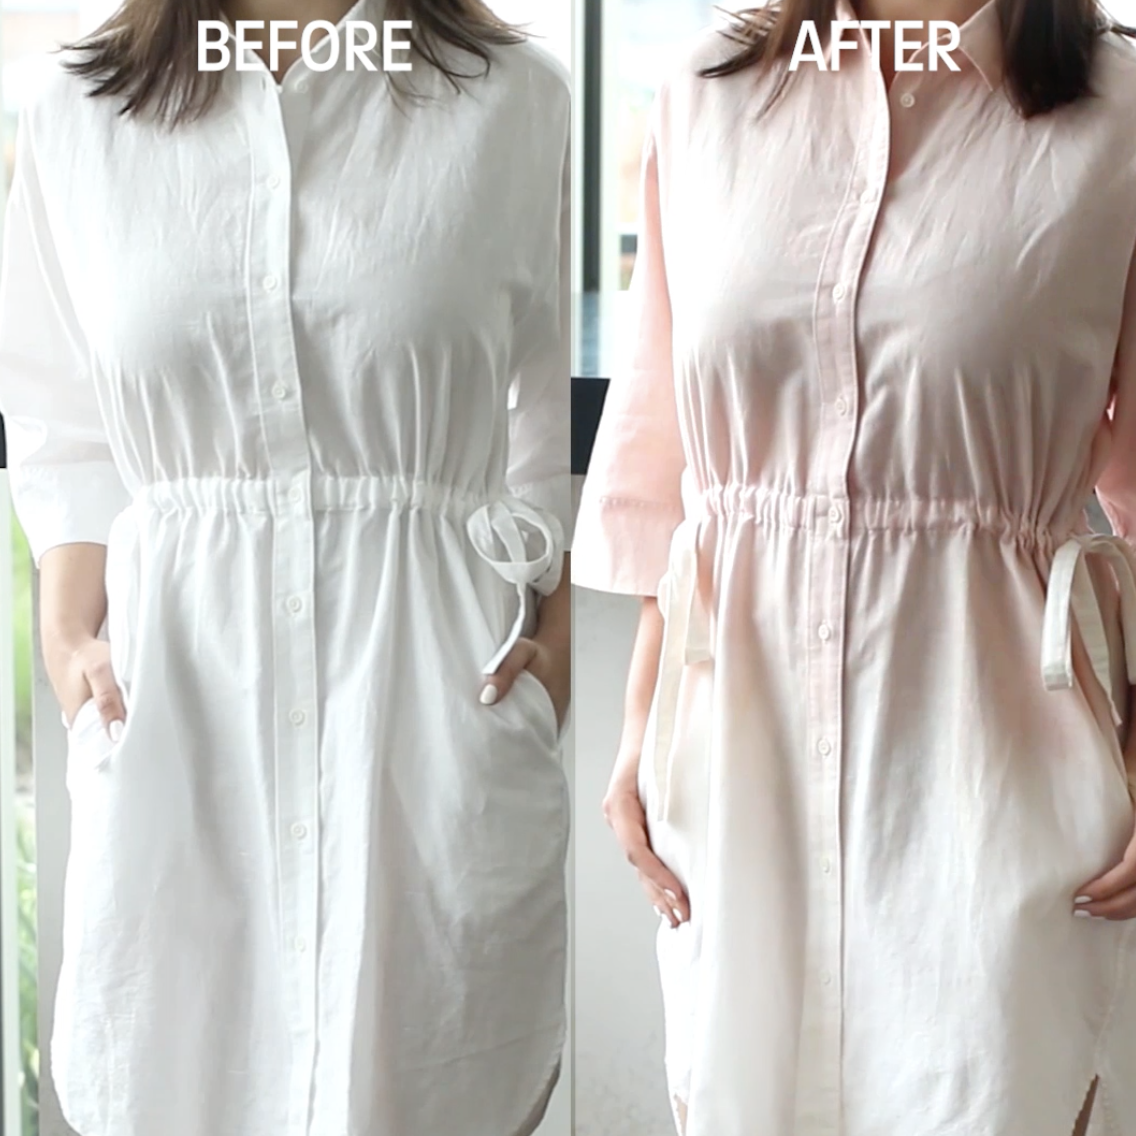
The least you can do is take your avocado trash and use it to turn your boring whites into millennial pink conversation starters.
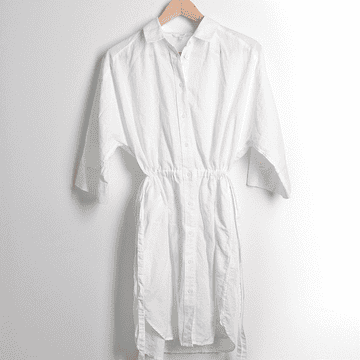
"This? Why yes I dyed it myself... from avocado trash!"

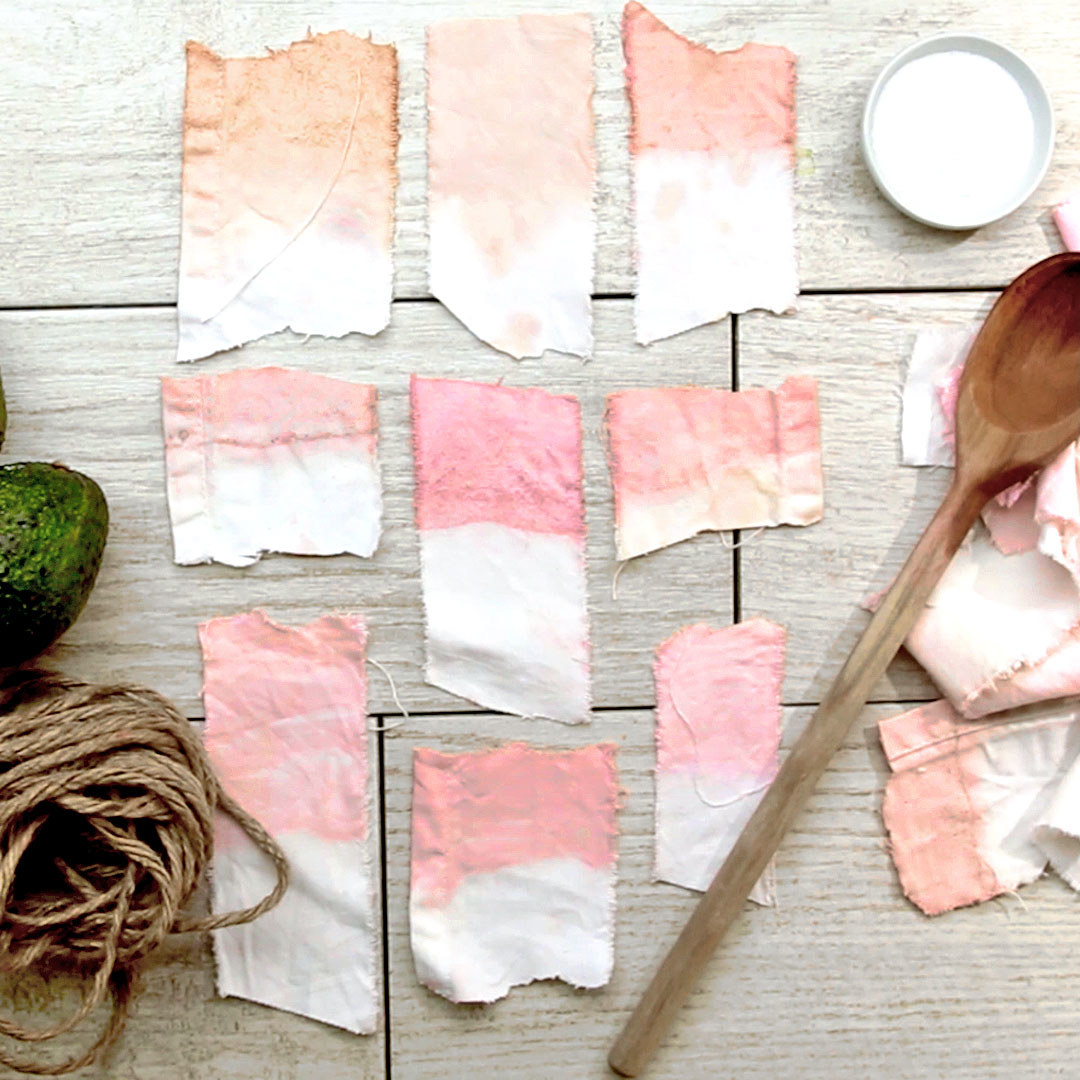
By just using the pits and skins of the avocado you can make a whole spectrum of beautiful colors. The end results will range from peach/coral colors to soft pinks depending on how you make your dye bath.
Here's how to do it:
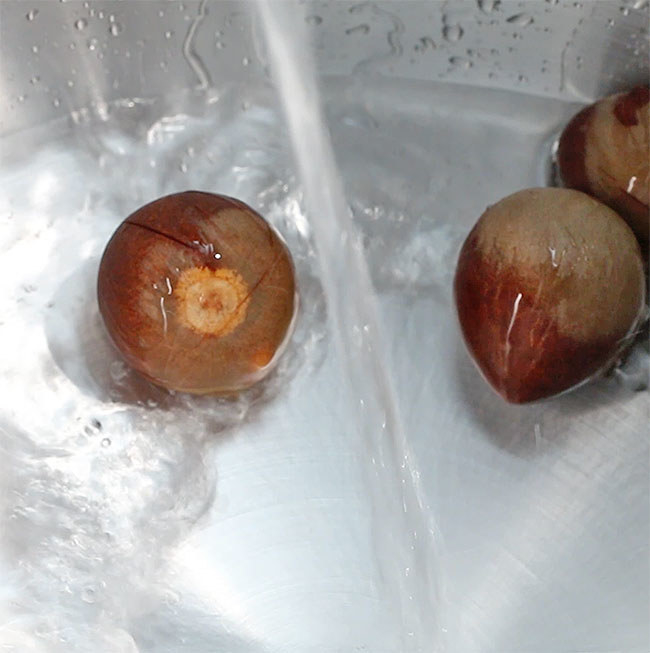
1. Gather your avocado pits.
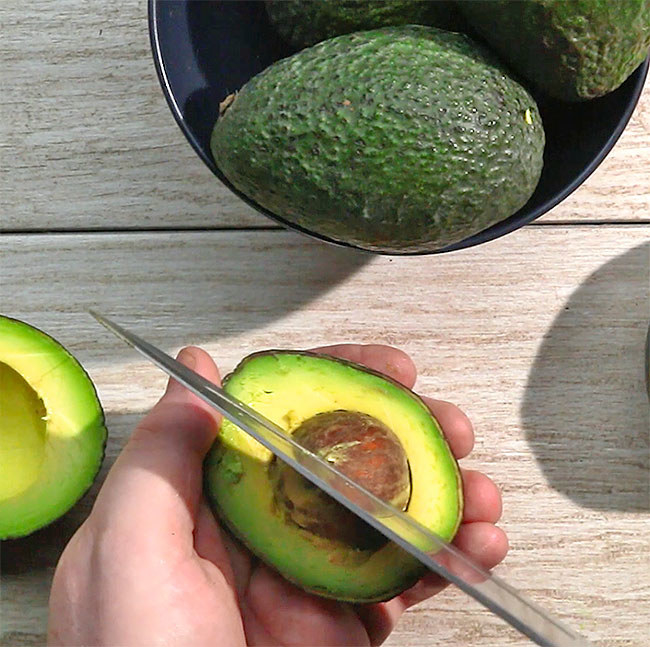
According to Botanical Colour At Your Fingertips by Rebecca Desnos, you should start by weighing the fabrics you're dyeing. You'll need enough pits to equal half the weight of the items you want to dye. You can save the pits in the freezer until you save up enough to make your dye. (Just make sure you clean any green avocado flesh off the pits before freezing.)
You can also use skins along with the pits to make the dye. I added skins to my dye bath but it took a really long time to clean off all the green flesh so I relied more on the pits. On top of that the skins provide half the amount of color as the pits, so you'll need more. If you want to make a dye using just the skins, you'll need enough skins to equal the total weight of the fabric you are dyeing.
2. Gather your tools.
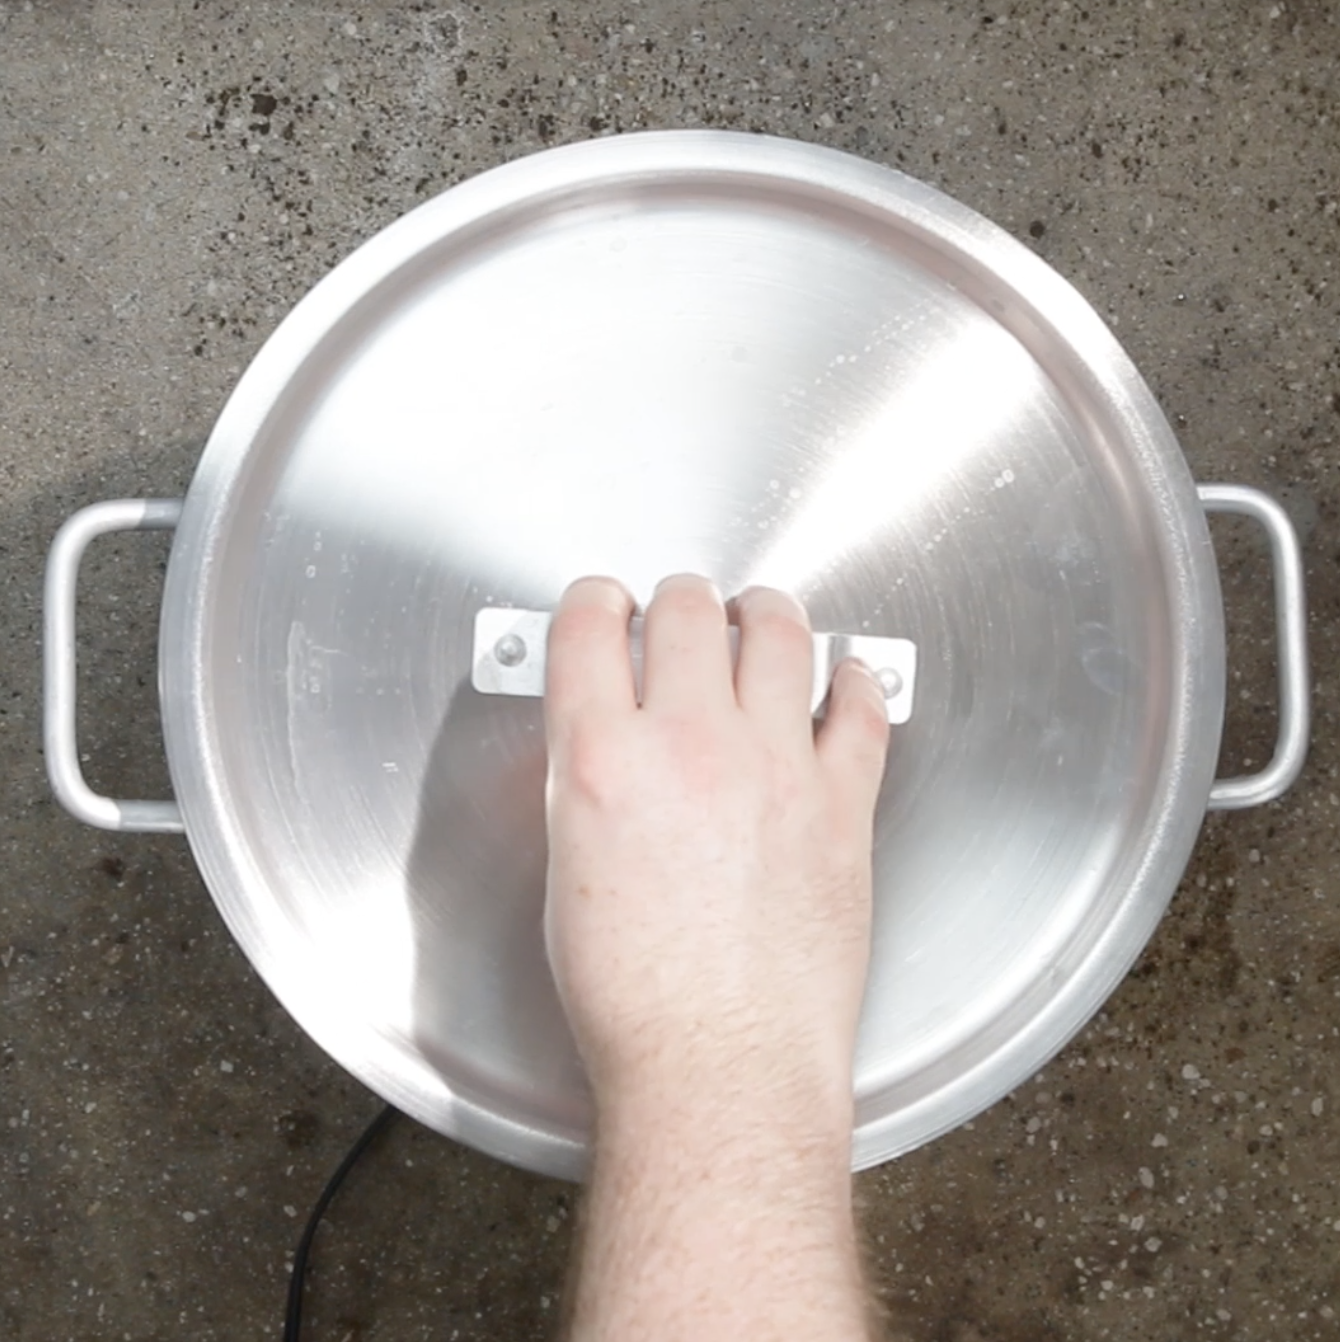
Choose a pot and spoons that you don't plan to use for cooking later on. Desnos recommends using an aluminum pot. The aluminum will help act as a mordant, which is a fancy term for something that helps dye stick to fabrics so they won't wash out later.
3. Add your avocado pits to the pot with just enough water to cover. Heat for 1.5 hours on a low-medium heat with the lid on.
4. After simmering for 1.5 hours, the water will turn a deep red color. Remove from heat and allow the mixture to cool.
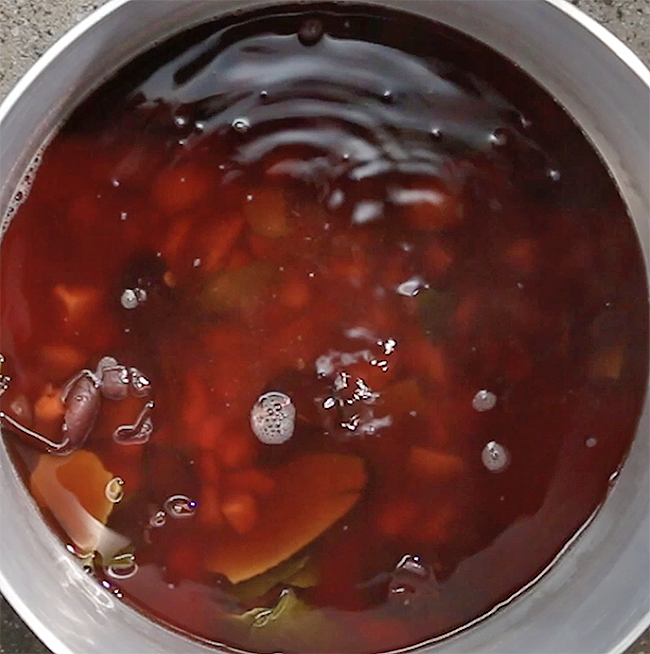
5. Strain the mixture through a fine cheesecloth. Squeeze out all the liquid and then return the liquid to the pot.
You'll definitely want to wear gloves for this part so you don't stain your hands, and be sure let it cool all the way before straining. At this point, Desnos suggests letting the dye bath sit in the pot for at least 24 hours, allowing the aluminum from the pot to mix with the dye. I have no patience and needed my life turned pink ASAP so instead I added alum powder that I ordered online to make sure the dye stuck to my fabrics without having to wait super long.
6. Prepare your fabrics.
Wash your fabrics with a mild detergent, and make sure all the soap is rinsed out, giving them an extra rinse cycle if needed. You'll want to make sure you use natural fibers like cotton or linen. I used all linen fabrics in this dye bath. If you can afford silk or wool, they work even better because they absorb the dye really well.
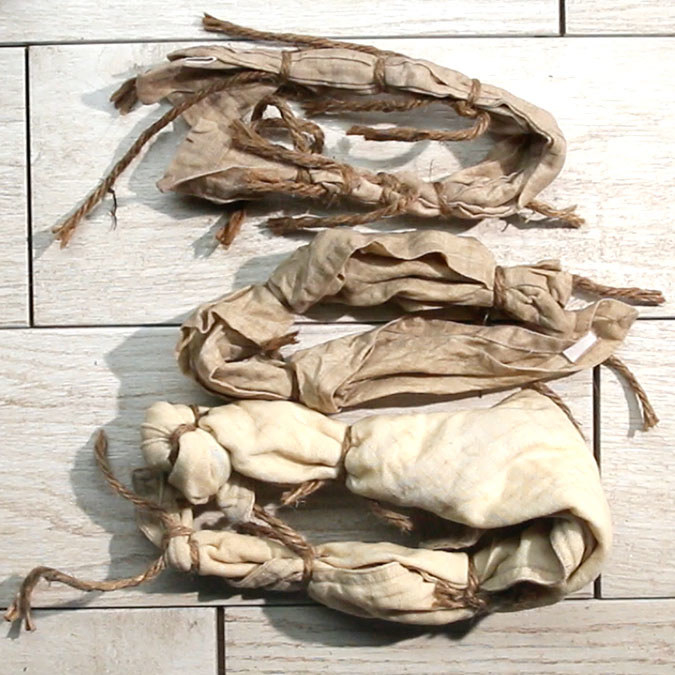
Once they're clean you can fold, tie, and twist the fabrics which will make different patterns once dyed. I tied my fabrics up using some of these shibori tying techniques.
7. Dye your fabrics.
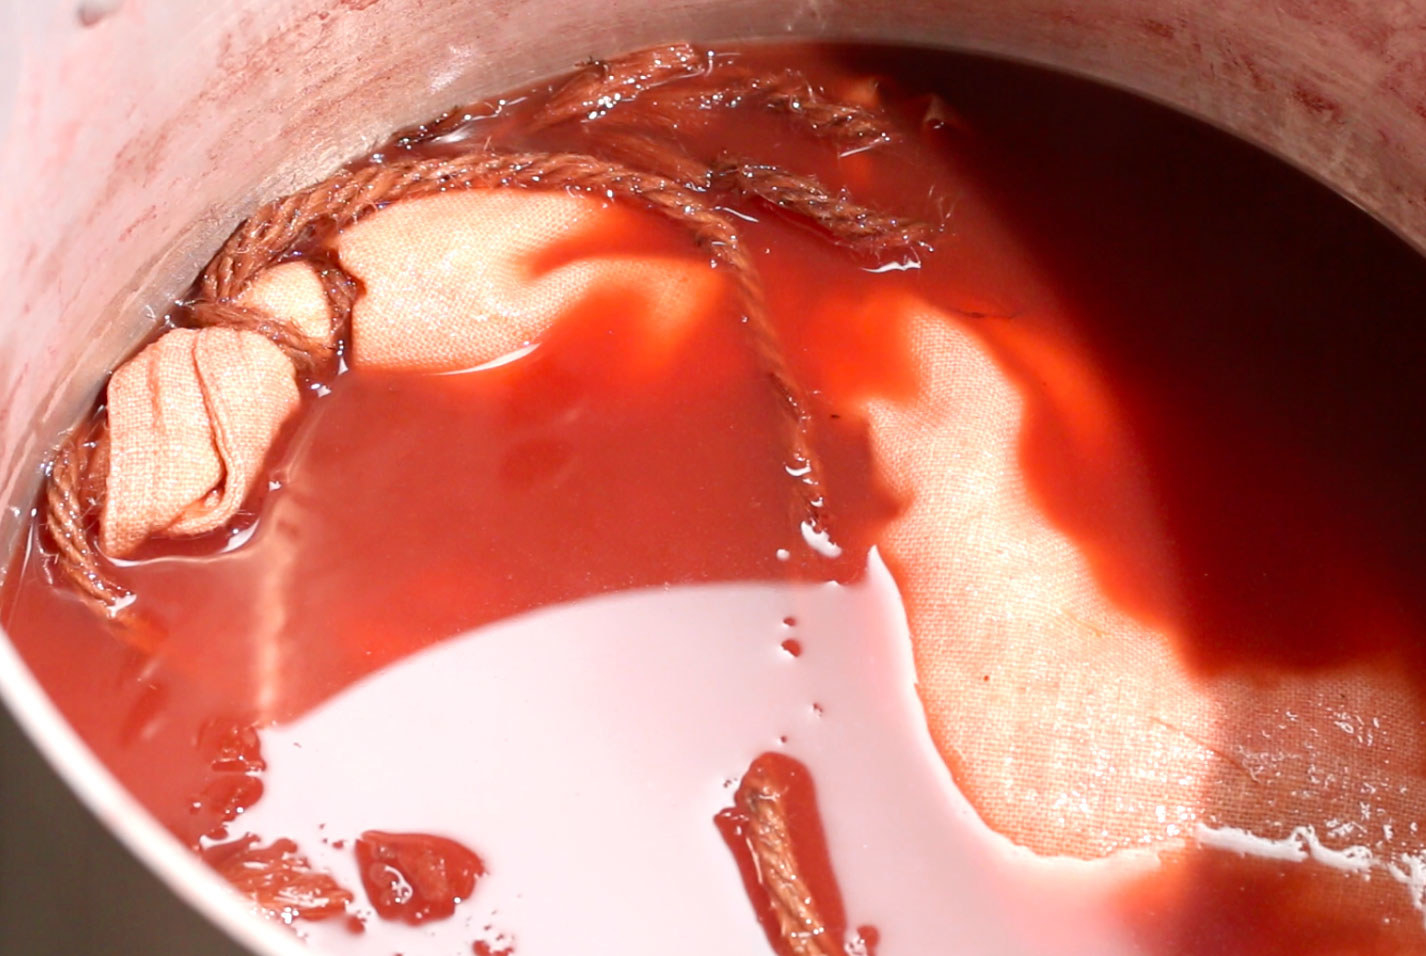
Heat the dye bath on a low heat. Wet your fabrics with water and add them to the dye bath. Add more water to the dye bath to make sure the fabrics are fully submerged and can move freely. The longer the fabrics sit in the dye, the more opportunity they have to absorb the color. Experiment with dyeing times for different color results. The longer they soak, the deeper the color will be. Since I used a mordant (the alum powder) I let my fabrics soak for about two hours.

Remove your fabrics from the dye bath, squeeze out the excess dye, and allow them to dry. If you added a mordant like alum powder you can leave them overnight and unwrap them the following day. Patience is key here! This is the part that's the hardest for me. You really have to let them sit overnight if you want the dye to really stick to the fabrics. Don't rush it! If you're super patient and brave and you're using the slower method, using the pot's natural mordant properties, allow them to dry for at least a week before unwrapping.
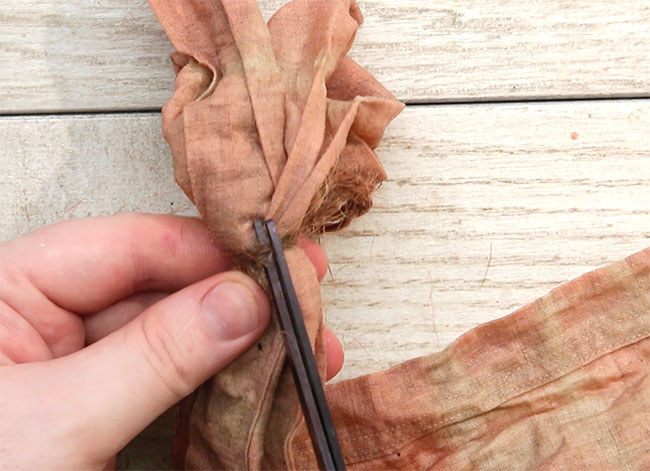
8. After you've allowed them to dry, cut the ties to reveal the dye patterns. Rinse the fabrics in warm water and allow them to dry away from sunlight.
Each dye bath will produce different colors depending on the types of avocados you use.
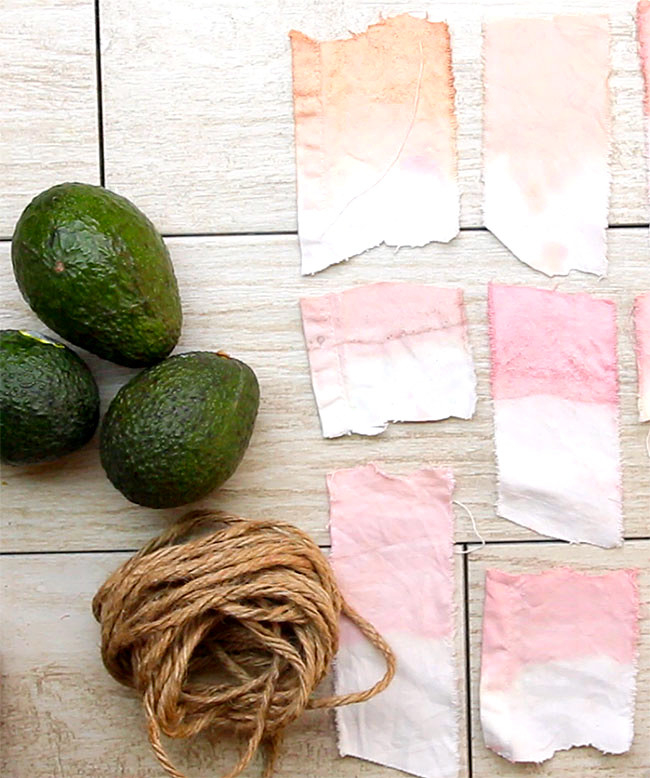
Making a dye bath with just the avocado pits typically makes a more peach and coral toned dye (top). You can also throw in avocado skins with the pits to make pinker shades (middle). Adding some baking soda to the dye bath before dyeing will also make pinker hues (bottom). Experiment and do test strips until you get the color you're looking for.

Now make some guac, save those pits, and start dyeing!