Watch how to make it here:

SUPPLIES
5 1x8 pine pieces, cut to the width of your bed
2 1x4 pine pieces, cut to desired headboard height
2 1x4 pine pieces, for support
Sandpaper
Cotton rag
Wood stain
Paintbrush
1½-inch wood screws
Power drill (with Phillips screwdriver attachment and small spade bit)
2 round electrical (pancake) plates
2 wall lights
2 power supply cords
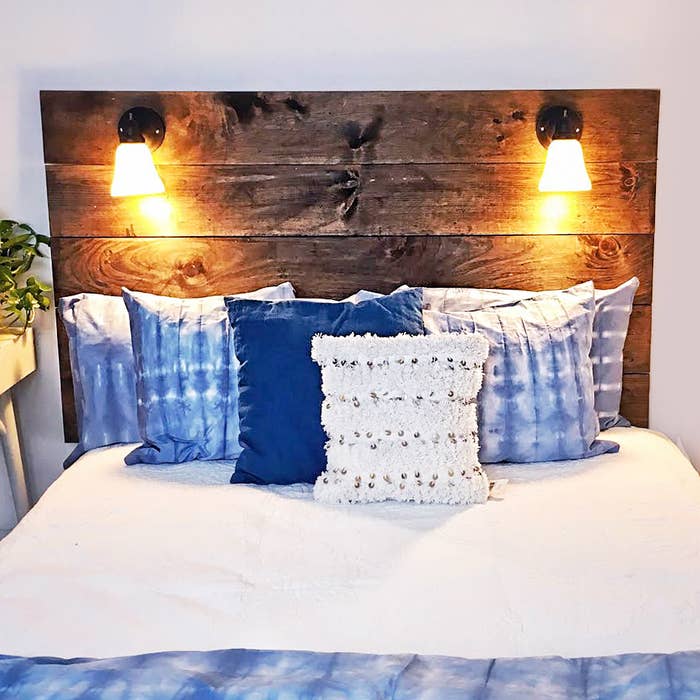
INSTRUCTIONS
1. Lay out the 1x8s and arrange so they’re even. This will be the body of your headboard.
2. Place 2 1x4s, cut to the height of your headboard, on either side of the 1x8 pieces. These will be your headboard legs.
3. Place 2 smaller 1x4s along the 1x8 pieces for more support.
4. Sand all sides of all pieces of wood until smooth. Wipe away any dust with a rag.
5. Coat with wood stain using a paint brush, rubbing away any excess with the rag to create a rustic, “reclaimed” wood look. Let dry as the stain label directs.
6. Arrange wood pieces once again. Attach the 1x4 pieces to the 1x8 pieces using wood screws and a powder drill.
7. Attach 2 “pancake” plates to the front of the headboard using the same wood screws. This will anchor your wall light.
8. Change the attachment on the power drill to the spade bit. Drill a hole through the headboard where there’s a hole in the pancake plate. This will be for your cords.
9. Thread to wire end of the power supply cords through the holes. Match the white cord of your wall light to the white cord of the power supply cord. Secure using an electrical cap (usually supplied with the wall light). Match the black cord of the wall light to the black cord of the power supply cord; secure with electrical cap.
10. Screw the wall light to the pancake plate to secure. Plug the plug end of the power supply cords into a surge protector or a wall socket.