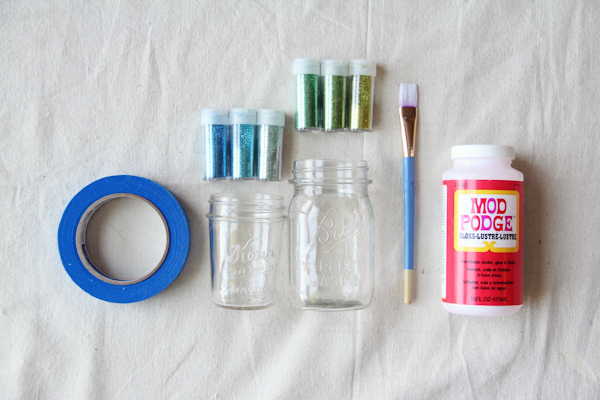
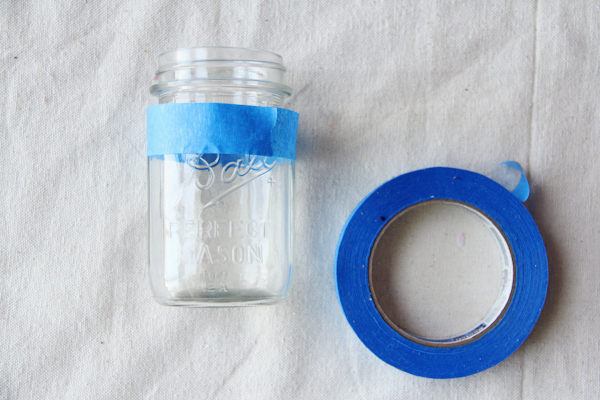
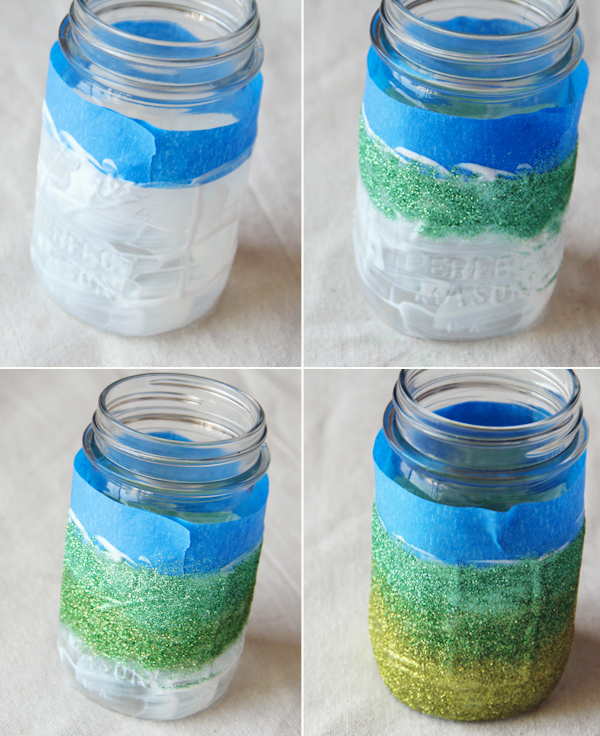
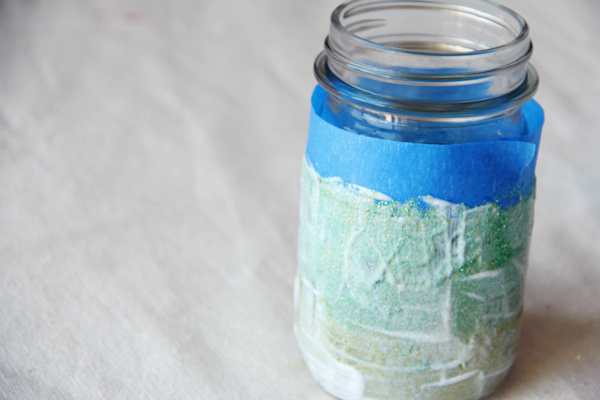
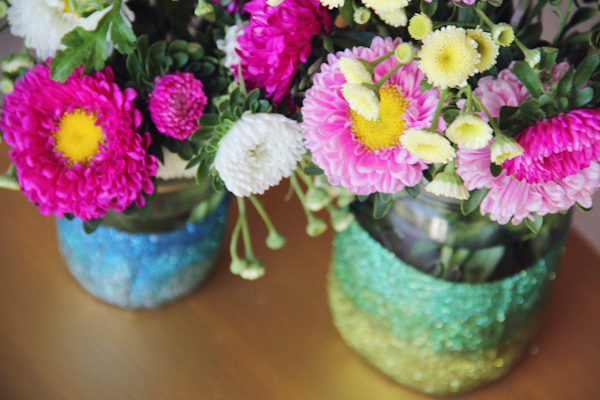
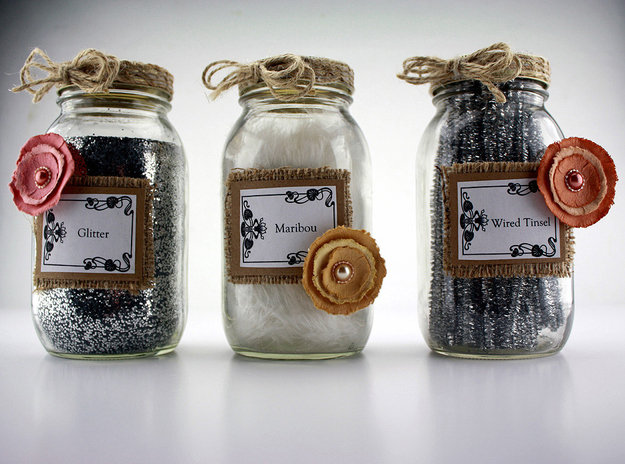
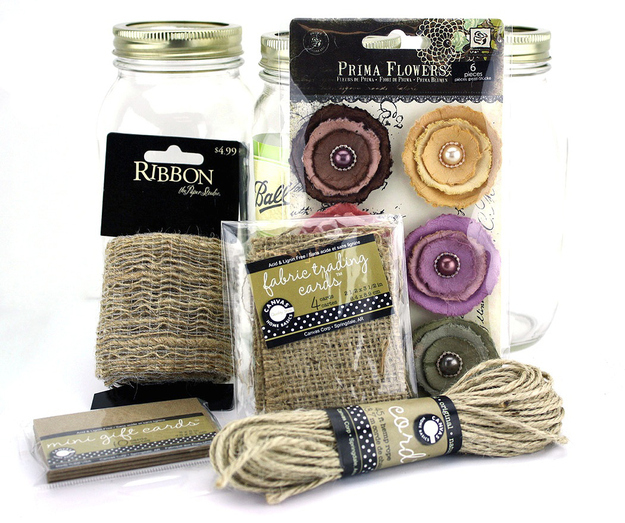
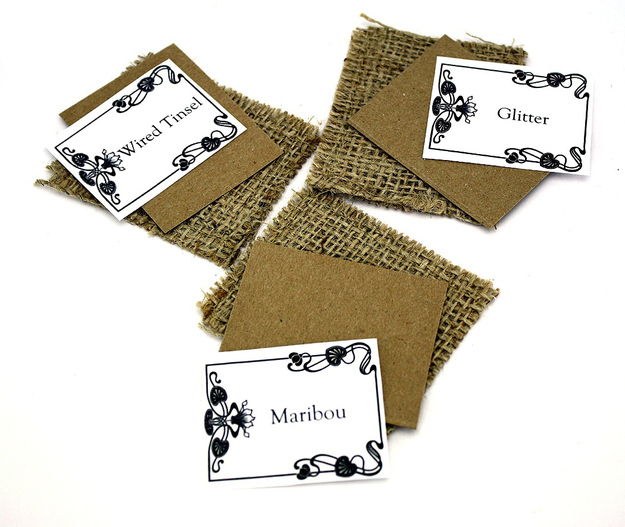
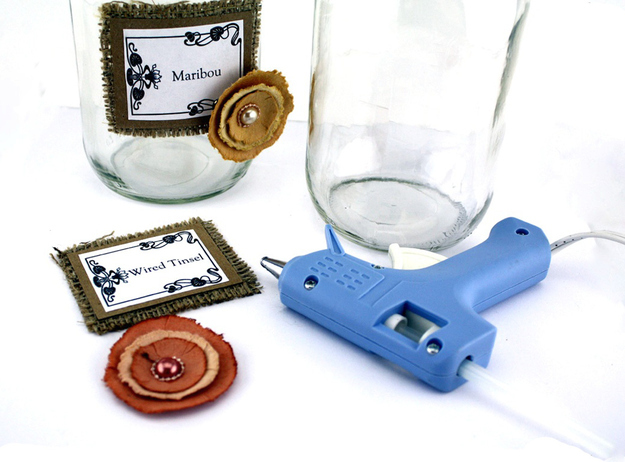
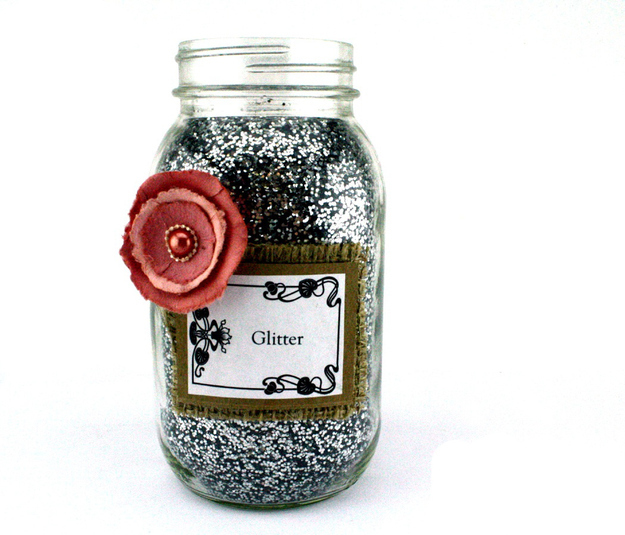
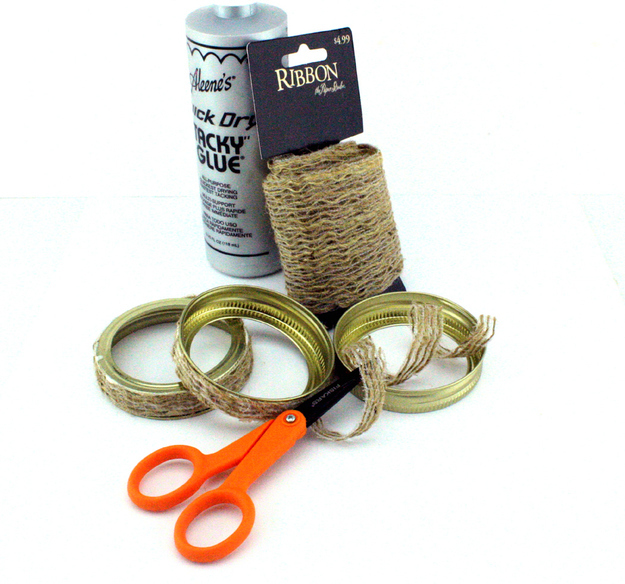
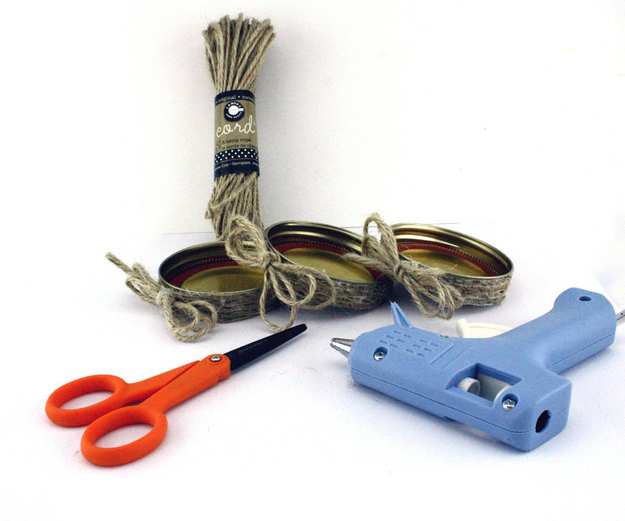
Mason jars are are like the It Bag of DIY right now. And just when you think you’ve seen every mason jar DIY anyone could possibly come up with ever, three craft bloggers share NEW mason jar DIY ideas with us.
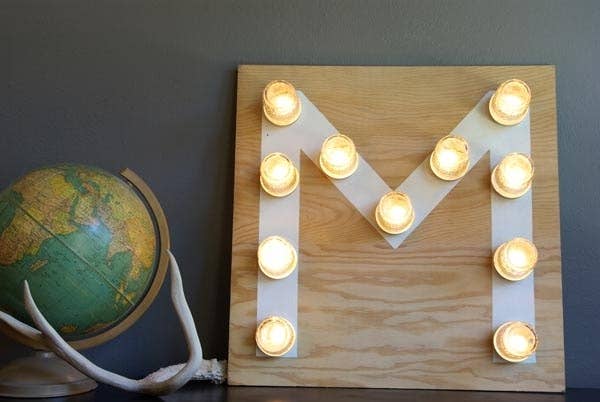
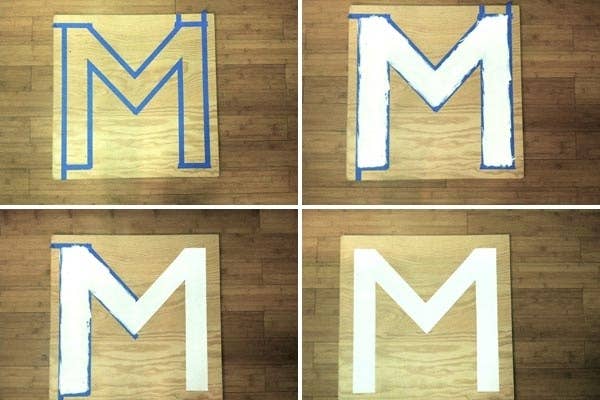
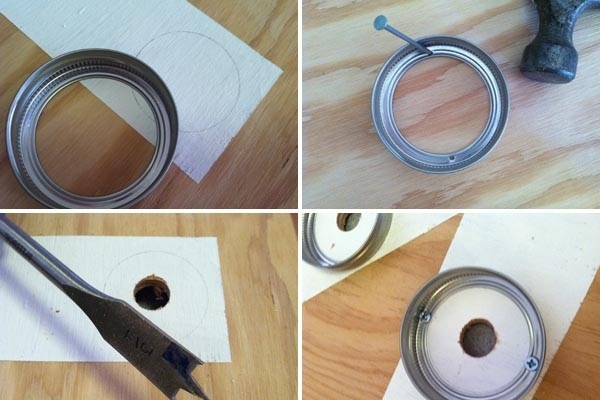
First up, Jeran from Oleander and Palm creates a monogramed light.
It’s not as hard as it looks! Here’s how she did it.
Gather your supplies. You’ll need a 2’ x 2’ piece of 1/2” plywoo, 11 quilted canning jars and rims (you may need more or less depending on your letter), 1/2” wood screws, white paint, blue painters tape, a power drill with a 3/4” bit, a string of outdoor lights, a hammer and nail, and measuring tape.
Tape the outline of your monogram. Paint white inside the tape line, allow the paint to dry, then remove the tape.
Lay out the jar rims on your monogram where you would like the lights to be, then trace the center of each. Using a nail and hammer, punch two holes in the center of each jar rim. This will make it much easier for you to put in the screws. Using a 3/4” bit, drill out the center of each marked circle on your board. Secure the rims to the board using the 1/2” wood screws.
Insert the light sockets into the holes and then screw in the light bulbs. Screw down a jar over each light bulb. Plug it in and you are done!
How’s that for unique living room decal?
Next up, Chelsea from Lovely Indeed jazzes up jars to make glittery ombre flower vases.
You can do it too!
First, gather your supplies. You’ll need mason jars in various sizes, glitter in various shades (three per color family), Mod Podge, painters tape, and a paintbrush.
Tape off your mason jar where you’d like the glitter to start.
Cover the lower portion of the mason jar with Mod Podge and quickly begin sprinkling your glitter. Start with a band of the darkest color at the top, then a lighter color around the middle, and the lightest color on the bottom.
Let the glitter dry for a few minutes and then gently cover it with another coat of Mod Podge to seal in the glitter. Do any touching up as necessary.
Peel off the tape and admire your handiwork. Then do it again! Try making a collection in different shades.
Way more glamorous than your average vase.
Last but not least, Margot Potter turns jars into practical and pretty organizing containers.
Need to get organized? You can do the same.
Start by getting together your supplies (you’ll probably need a trip to the craft supplies tore). These containers require a vintage atlas page or coordinating decorative paper, 3 smooth-surfaced mason jars, burlap ribbon, burlap fabric trading cards, mini gift cards, printable labels, paper flowers, hemp cord, tacky glue, tacky transparent tape, scissors, pen or pencil, and a hot glue gun.
Decide on the contents of your jars and print out your labels using any decorating software and font that you like. Cut the gift cards in half, and trim the label to fit on top of the gift card. Trim the burlap trading cards to fit beneath the gift cards. Each layer should form a thin border around the last.
Stack the three layers: label, gift card, and burlap trading card. Use tape to adhere the label to the gift card, and the gift card to the burlap. Use hot glue to secure the burlap to the jar and add the paper flowers, altering the flower placement on each jar.
Fill up your jars with their assigned content.
Cut ribbon to fit around the jar lid and use tacky glue to adhere the ribbon to the lid edge. Allow to dry.
Make three loop bows with hemp twine. Adhere the bows to right side of each jar lid with hot glue. (Screw the lids on the jars to find proper placement of the bows before gluing.)
Trace the jar lids onto your vintage or decorative paper. Cut out the paper and adhere it to the lid tops with tacky tape.
And you’re done! A nifty way to store craft or kitchen supplies.
Pippa Armbrester is a quilt maker and designer. Follow her adventures in quilting and life on her website.
HOT ON
- cindychau thinks 3 More DIYs With The Best Thing Ever is Win
- Noir thinks 3 More DIYs With The Best Thing Ever is Fail
- superbui 3 More DIYs With The Best Thing Ever
-
Nikki Jean 9 months agoOh my God I was wondering where I was gonna keep all that surplus wired tinsel until I found this handy post. Thanks Buzzfeed so much for this not-completely-useless post! We’ve come a long way.
-
- m0nsters3xual 3 More DIYs With The Best Thing Ever
- Cate B. thinks 3 More DIYs With The Best Thing Ever is Fail
- Victoria Dee 3 More DIYs With The Best Thing Ever
- MarHar 3 More DIYs With The Best Thing Ever
- patrciaabreuc thinks 3 More DIYs With The Best Thing Ever is Fail
- elphonine thinks 3 More DIYs With The Best Thing Ever is Cute
- Pranati225 3 More DIYs With The Best Thing Ever
- 3 More DIYs With The Best Thing Ever is starting to get hot on Twitter Tweet It
- pax84111 thinks 3 More DIYs With The Best Thing Ever is Fail
- Julianna95 3 More DIYs With The Best Thing Ever and thinks it’s Cute, LOL & Win
- karim6 thinks 3 More DIYs With The Best Thing Ever is Win
- missmoonriver 3 More DIYs With The Best Thing Ever
- haiiishannon thinks 3 More DIYs With The Best Thing Ever is Win & Cute
- tfoxy74 thinks 3 More DIYs With The Best Thing Ever is Fail
-
- oddee.com readers just made 3 More DIYs With The Best Thing Ever hotter
- MrJimmers 3 More DIYs With The Best Thing Ever and thinks it’s Cute
- ionicwalrus 3 More DIYs With The Best Thing Ever
- xlinzymmm thinks 3 More DIYs With The Best Thing Ever is Win
- mushabon thinks 3 More DIYs With The Best Thing Ever is Cute
- johannamichellegarciam 3 More DIYs With The Best Thing Ever
- sheep sound thinks 3 More DIYs With The Best Thing Ever is
- calli441 3 More DIYs With The Best Thing Ever and thinks it’s Win & Cute
- Summer Anne Burton 3 More DIYs With The Best Thing Ever and thinks it’s Cute
-
-
- 3 More DIYs With The Best Thing Ever is starting to get hot on Facebook Share It


Special Reactions
Your Reaction?
GET STARTED