


You'll need:
Square origami paper
Scotch® Double Sided Tape
Scotch® Magic™ Tape
String and hole punch (optional)
Scissors
Instructions:
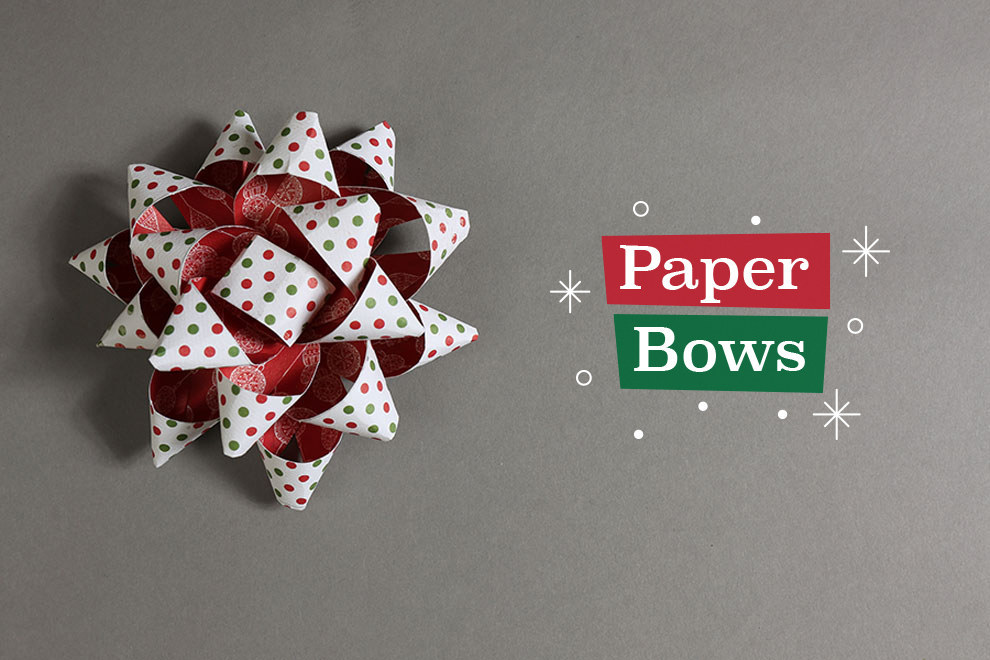
1. Fold a piece of square origami paper — with the colored side inward — in half like a book. Unfold and repeat down the other center. Unfold again.
2. Fold the paper down the diagonal once with the colored side outward. Unfold and flip the paper so the colored side is down.
3. Cut about halfway down the horizontal and vertical folds toward the center of the square.
4. Fold the newly-cut flaps inward to create four points of the star.
5. Add a piece of Scotch® Double Sided Tape to every other flap, and then pull the flaps without tape over the taped pieces and secure.
6. Use a piece of Scotch® Magic™ Tape to secure a loop of string to the back to hang the star if you desire!
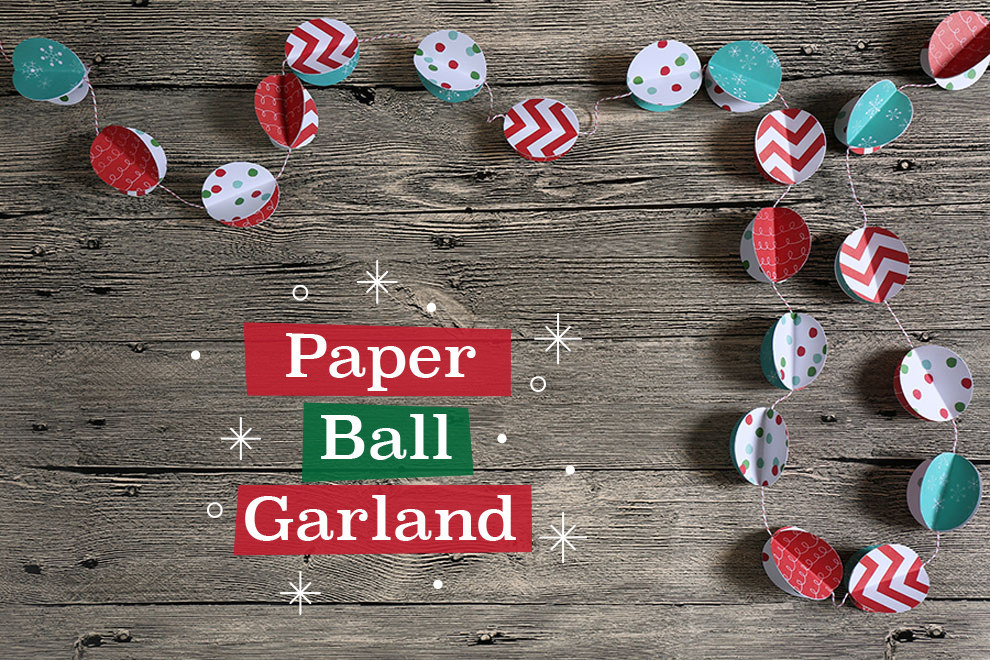

You'll need:
Scrapbooking paper, in four different patterns or colors
Scotch® Double Sided Tape
String
A circle paper punch (or you can cut out the circles by hand)
Scissors
Instructions:
1. Cut a bunch of circles from the paper.
2. Fold each circle in half with the color side facing inward.
3. Use Scotch® Double Sided Tape to attach two flaps of the balls together. The two circles should form a "T" shape when laid flat.
4. Repeat with two more circles. Attach the two "Ts" to form a 3D ball, with the string in the center.
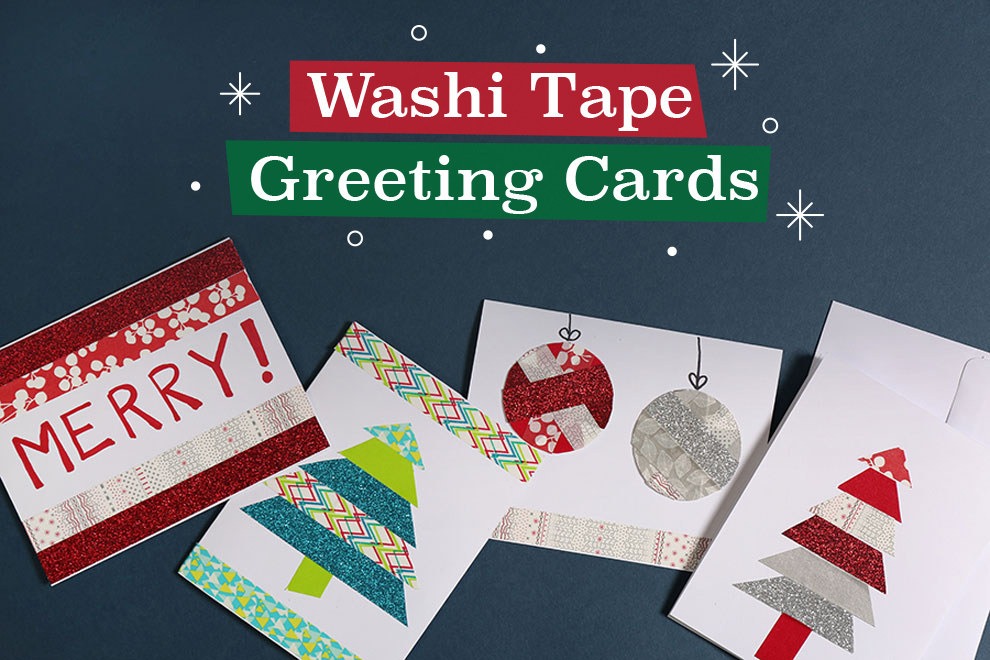
You'll need:
Card stock or blank cards
Scotch® Expressions Tape
Markers or pens
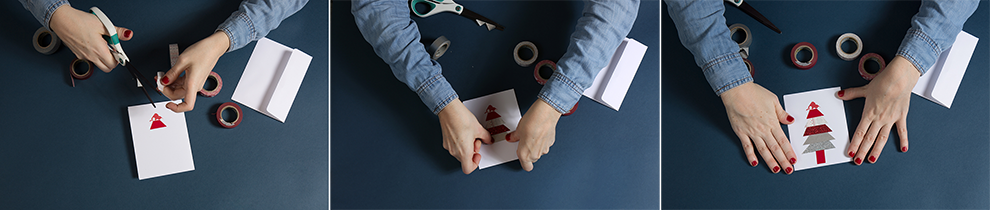
Instructions:
1. Cut 8.5x11 card stock in half crosswise, and fold each in half to create two cards. (You can also buy precut crafting cards.)
2. Cut or tear a triangular piece of Scotch® Expressions Washi Tape to serve as the top of the tree, and stick it horizontally a few inches from the top of the card.
3. Build the tree by cutting progressively longer pieces of tape and stacking them from the top down. Feel free to experiment with tape colors and the angles at which you're cutting the tape's edges.
4. Add a stump.
5. Write a personal message with markers!
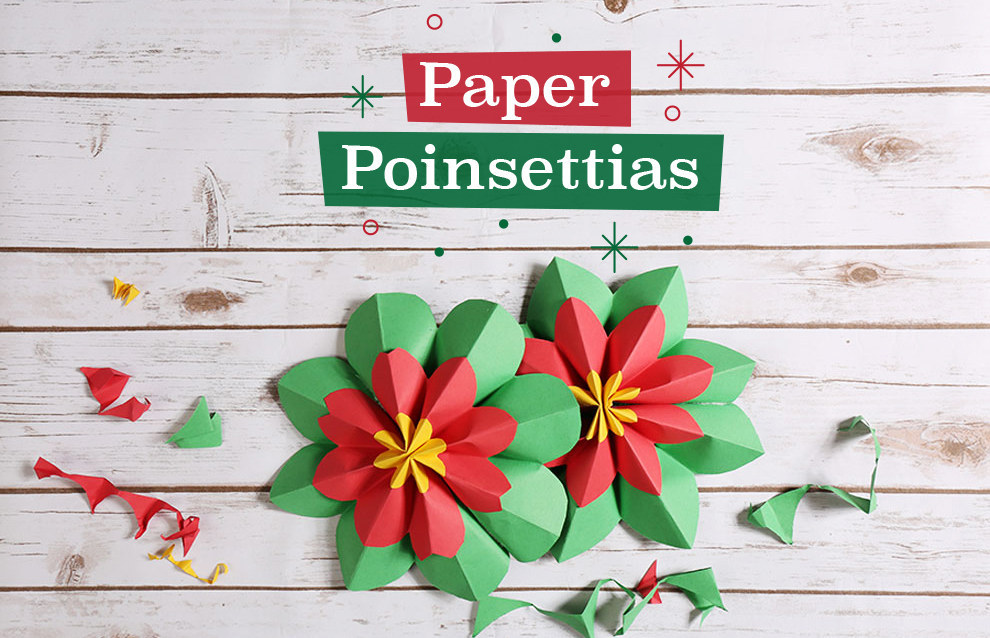

You'll need:
Red, green, and yellow construction paper
Scotch® Magic™ Tape
Scotch® Double Sided Tape
Scissors
Instructions:
1. Leave the green paper 8.5x11. Cut the red paper into 6x8 rectangles, and cut the yellow paper into 2x3 rectangles.
2. Fold each sheet of paper in half widthwise. Unfold and fold the edges into the center widthwise. Then fold the outer edges into the new folds.
3. Once all three pieces are folded like fans, with the edges facing up, cut the corners of each fan off in a curved shape.
4. With the fans closed, fold each in half to mark when the center is. Unfold each sheet of paper.
5. Using the folds and the center marking to line up the paper, stack the sheets from largest to smallest and refold. Add a small piece of Scotch® Magic™ Tape along each side to secure the three sheets of paper together.
6. Flip the flower over, bring the two raw edges of one side together, and secure with Scotch® Double Sided Tape. Repeat on the other two raw edges. Flip and enjoy!

You'll need:
Scrapbooking or construction paper
Scissors
Scotch® Double Sided Tape
String and hole punch
Scissors
Instructions:
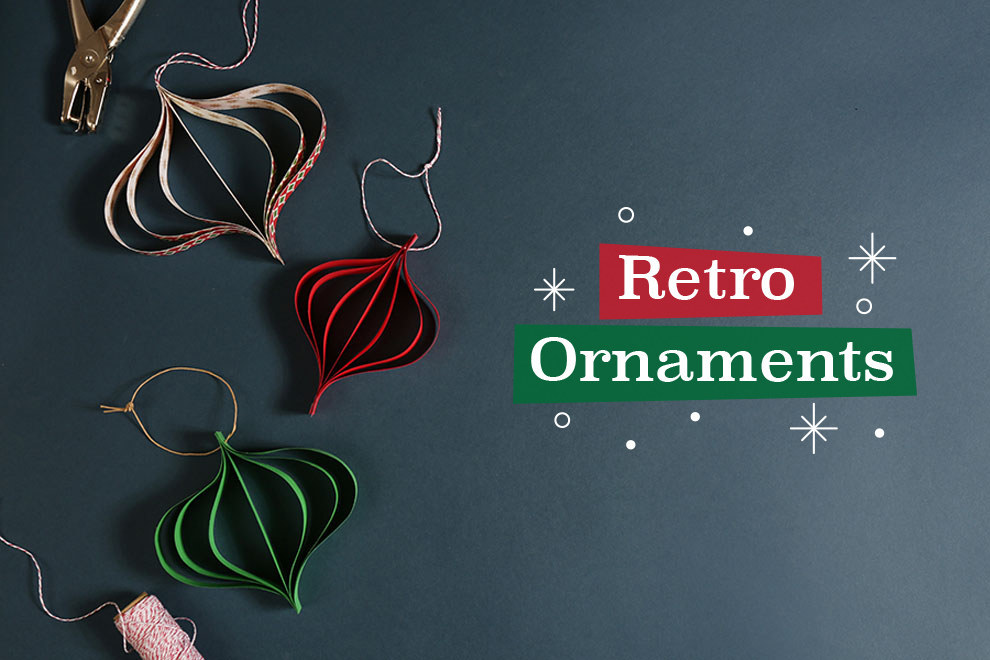
1. Cut seven strips of paper all of the same width (approximately 1 inch)
2. Cut one strip to the length you want the ornament to be. Cut the other six in pairs of varying length, but all should be longer than the first piece.
3. Arrange the strips so all the bottom edges align, with the smallest piece in the center and the pairs of larger pieces on either side of the smaller piece, getting progressively longer from the inside out.
4. Use Scotch® Double Sided Tape to secure the ends together.
5. On the other side of the ornament, pull back the ends so they are also even. The outer pieces will curl to create the ornament's shape. Secure this end with tape too.
6. Punch a hole in this end, and loop the string through.

You'll need:
Colored scrapbooking paper
Scotch® Double Sided Tape
Scissors
Instructions:
1. Cut the paper into nine strips of equal width (around ½ inch to 1 inch). Leave three strips long, cut three about an inch shorter, cut three more an inch shorter than that, and cut small strip about half the size of the previous strip.
2. Twist each strip (except the smallest) to form loops at both ends, and secure with Scotch® Double Sided Tape.
3. Make a loop out of the smallest piece.
4. Layer the three largest loops, securing with Scotch® Double Sided Tape again.
5. Add rest of the loops following the same pattern, big to small. Add the small loop in the center.

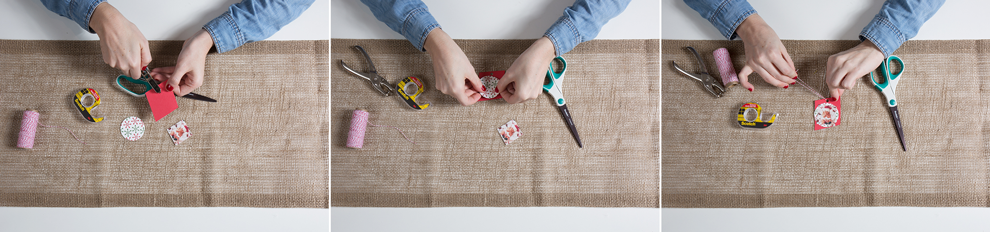
You'll need:
Paper gift tags
Scotch® Double Sided Tape
Glitter
Markers or pens
String
Instructions:
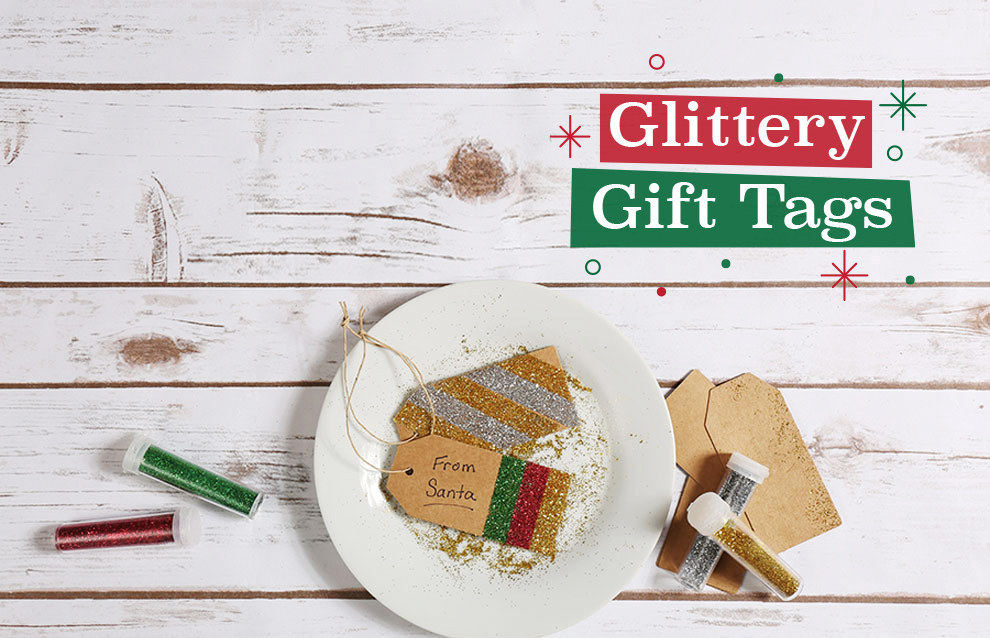
1. Start by and arranging any pieces of the Scotch® Double Sided Tape that will be the same color however you want on the gift tags.
2. Once all of your tape is arranged, sprinkle glitter over the exposed piece of tape and shake off the excess.
3. Continue to add tape, and then different colors of glitter until all of the pieces of tape are shimmering.
4. Write a note on the other side!
You'll need:
Scrapbooking paper
Scotch® Double Sided Tape
Scissors
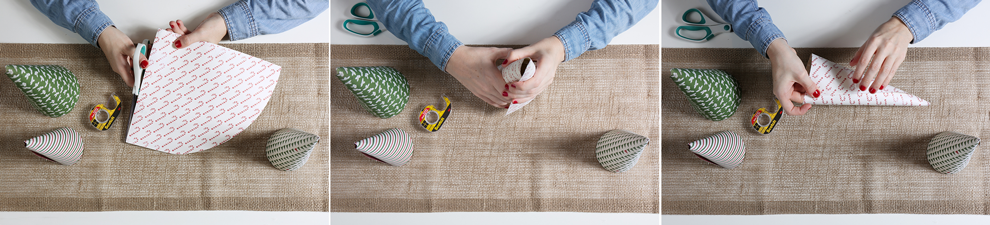
Instructions:
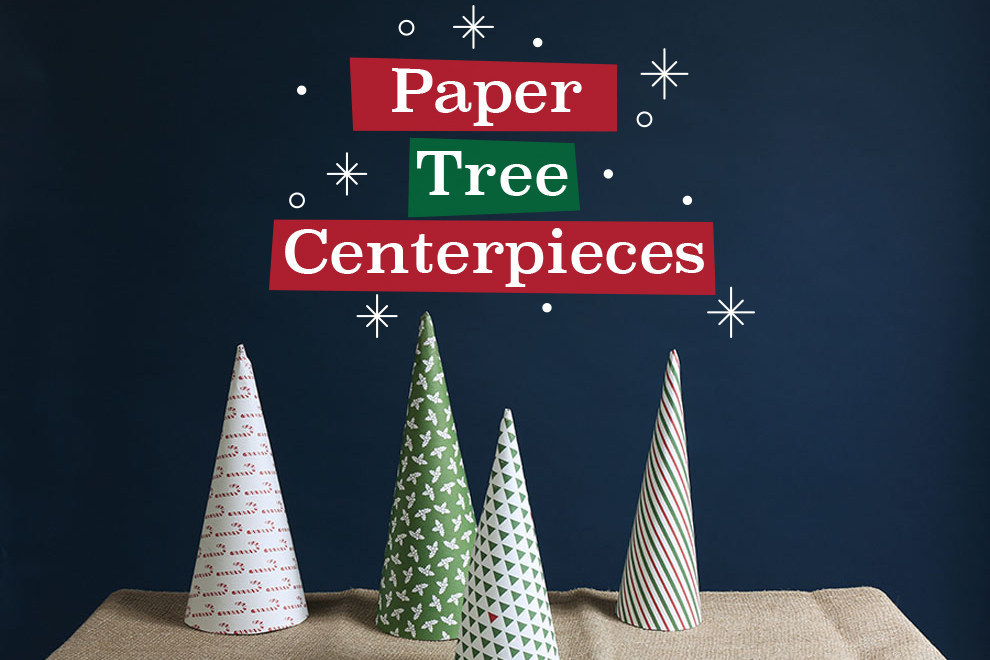
1. Cut a large wedge with a rounded edge. (Like a piece of pie!)
2. Fold the wedge into a cone, bringing the two edges of the missing wedge together.
3. Secure with Scotch® Double Sided Tape.
4. Repeat until you have an entire paper tree forest.
You'll need:
Acrylic box frame in whatever size you'd like
Scotch® Double Sided Tape
Gift wrap
Instructions:
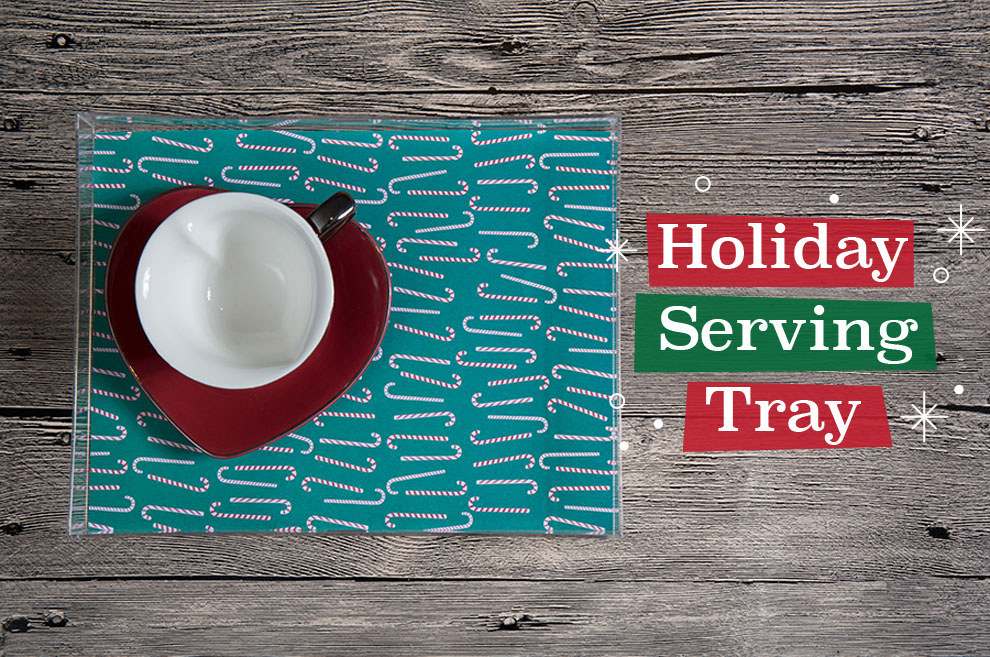
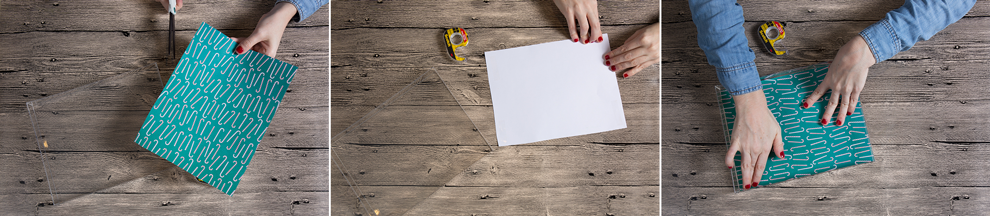
1. Remove the cardboard from the frame and flip it so it becomes a tray.
2. Cut a piece of gift wrap in the same dimensions as the tray.
3. Place the paper inside the tray and secure with Scotch® Double Sided Tape. Now the tray is ready to serve Santa's cookies!

You'll need:
White square paper
Scotch® Magic™ Tape
String
Scissors
Instructions:
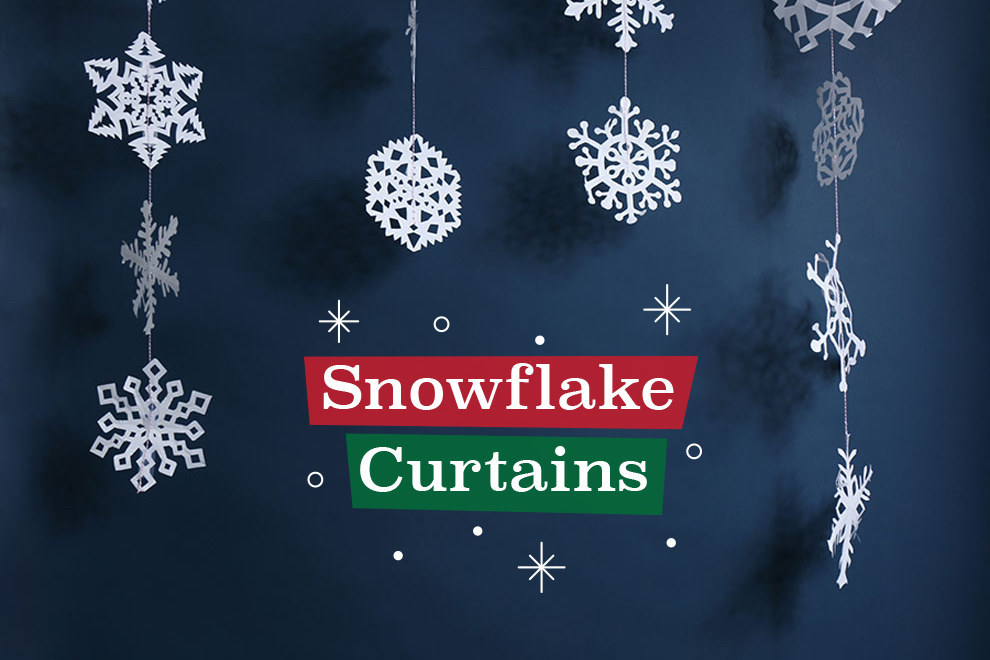
1. Fold the square of paper diagonally to make a triangle and then in half to make a smaller triangle.
2. Imagine the triangle in thirds, and fold the right third over and then the left third over.
3. Cut a pattern to make a paper snowflake.
4. Repeat until you have a bunch of snowflakes.
5. Using Scotch® Magic™ Tape, attach a variety of snowflakes from to the string to create a short garland. Repeat until you have a few garlands.
6. Hang the garlands from the ceiling to form a sort of curtain.
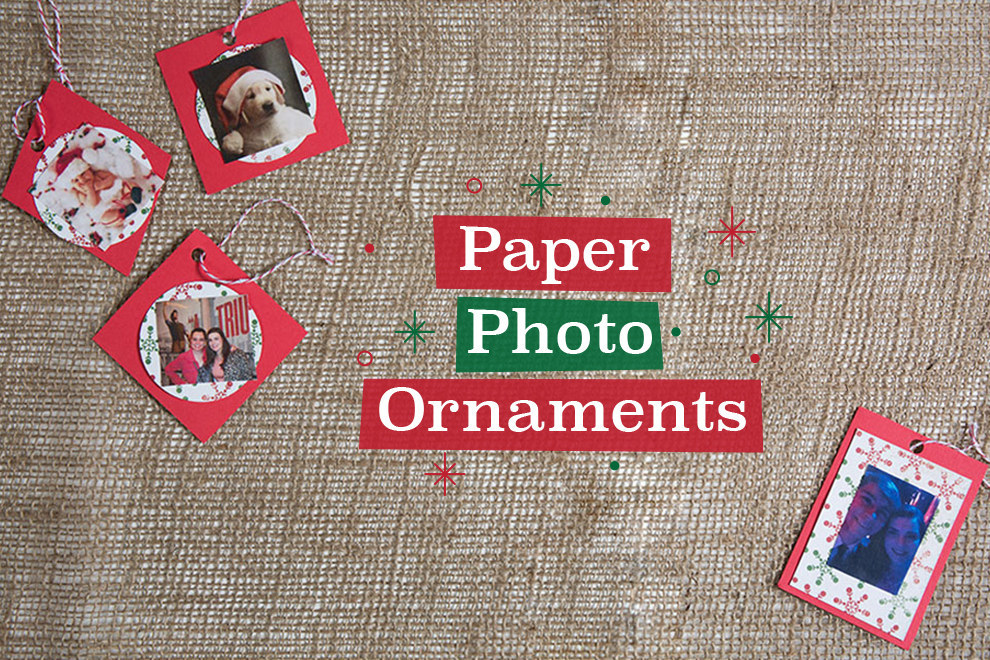
You'll need:
Colored card stock
Scrapbook paper
Printed photos
Scotch® Double Sided Tape
String and hole punch
Scissors
Instructions:
1. Cut the card stock into whatever size or shape you want your ornament to be.
2. Cut a smaller piece of scrapbook paper that will go overtop the card stock.
3. Attach the scrapbook paper to the card stock with Scotch® Double Sided Tape, and then attach the photo over that.
4. Punch hole and loop the string through.

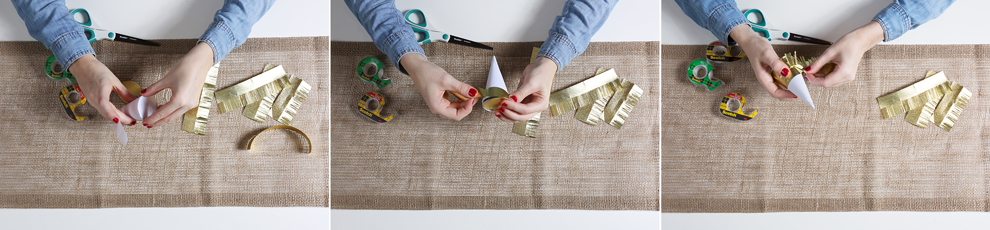
You'll need:
Card stock
Metallic or crepe paper
Scotch® Double Sided Tape
Scotch® Magic™ Tape
Scissors
Instructions:
1. Cut a wedge with a rounded edge from the card stock. (Like a piece of pie!)
2. Fold the circle into a cone, bringing the two edges of the wedge together, and securing with Scotch® Double Sided Tape.
3. Trace the base of the cone on the leftover paper, cut, and attach to the bottom of the cone with Scotch® Magic™ Tape. (Tip: If you want to fill the piñata or use as a gift box, don't forget to add a treat here!)
4. Cover the base and bottom inch of the tree with metallic streamer first.
5. Then, make tiny, even cuts along a long strip of metallic streamer, up to the middle of the strip. Use Scotch® Double Sided Tape to secure this to the tree!
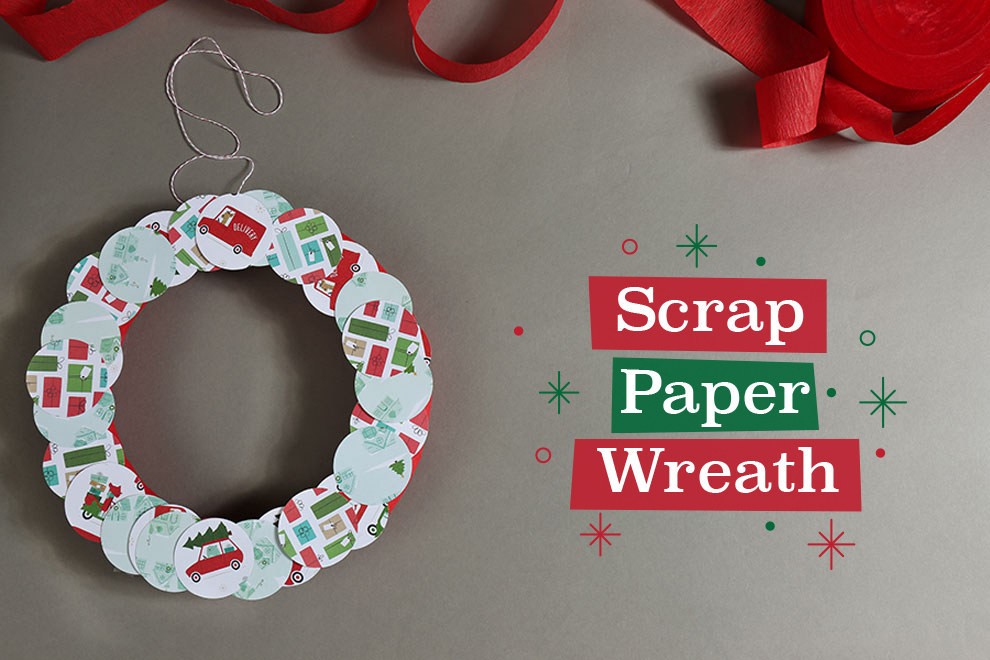
You'll need:
Scrapbook paper or gift wrap
A foam wreath
Streamer or ribbon
Scotch® Double Sided Tape
A circle paper punch (or you can cut out the circles by hand)
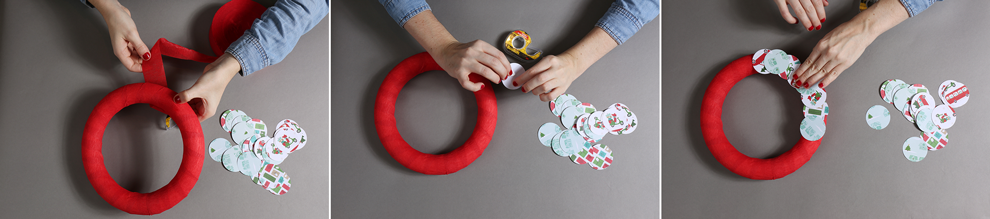
Instructions:
1. Wrap the foam wreath with ribbon or streamer, and secure with Scotch® Double Sided Tape.
2. Cut circles from the paper. You'll need between 25 and 30.
3. Secure each circle to the wreath with Scotch® Double Sided Tape, overlapping and layering as you go.


You'll need:
Card stock
String
Scotch® Expressions Tape
Scotch® Magic™ Tape
Scissors
Pencil
Instructions:
1. Cover a portion of the card stock with Scotch® Expressions Tape.
2. Draw the word "Be Merry" in bubble letters over the tape. Cut these out, making sure to cut inside your pen marks.
3. Flip the letters over, and use Scotch® Magic™ Tape to secure the string along the backs.
4. Hang!


You'll need:
Card stock paper
Scotch® Expressions Washi Tape
String
A hole punch
Scissors
Instructions:
1. Cut a number of pennants from the card stock. (Large pennants should be about 6 inches across the top and 7 inches on each side.)
2. Decorate each pennant however you wish with Scotch® Expressions Washi Tape.
3. Punch holes in the top two corners of each pennant.
4. Attach each of the pennants with the string, knotting the string around each hole to secure the pennants.
5. Hang!
All images Sarah Stone / © BuzzFeed