

Here are the tools you'll need:
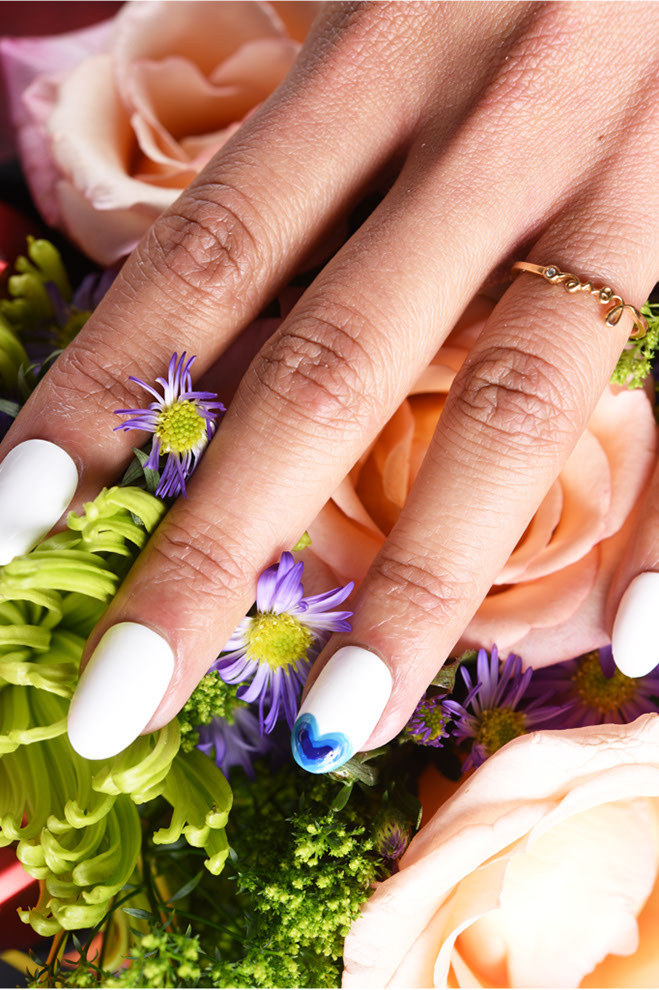
- Base coat
- White nail polish (we used OPI Alpine Snow)
- Light blue nail polish (we used Deborah Lippman On The Beach)
- Medium blue nail polish (we used CoverGirl On The Beach)
- Dark blue nail polish (we used OPI Eurso Euro)
- Nail polish remover
- Cotton ball
- (Optional) Pre-glued nails (we used Patricia Inspire nails)
You can paint directly on your natural nail, or you can use pre-glued nails, which can make art much easier. Follow these instructions if you're going to use pre-glued nails.
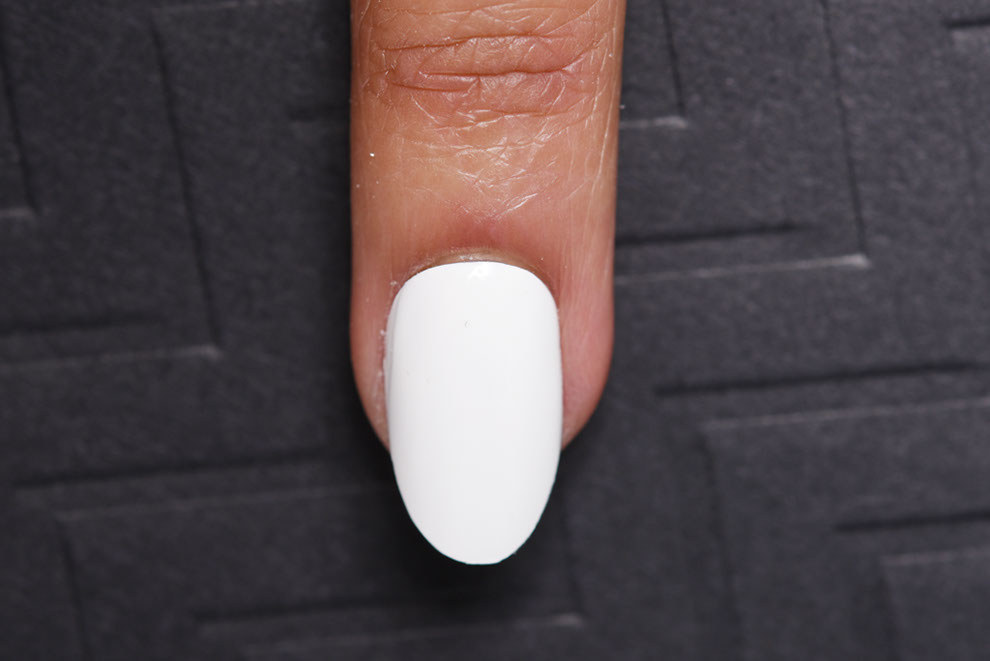
Step 1: After painting a clear base coat, use two coats of white polish on your nails.
Step 2: With the lightest blue polish, swipe from the top left side of the nail over to the center.
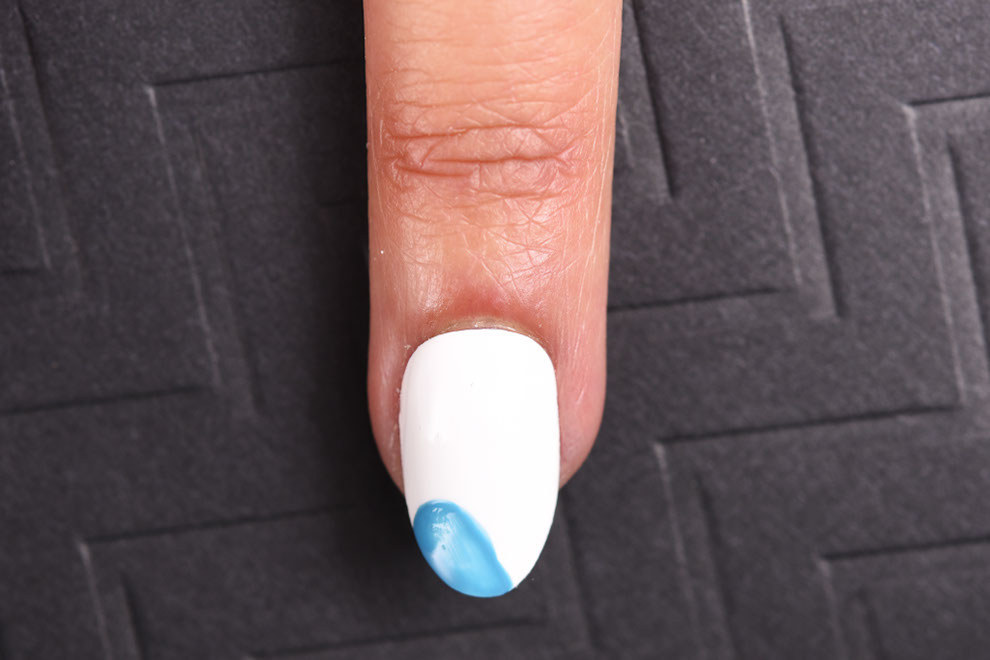
Step 3: Repeat Step 2 on the right side of the nail.

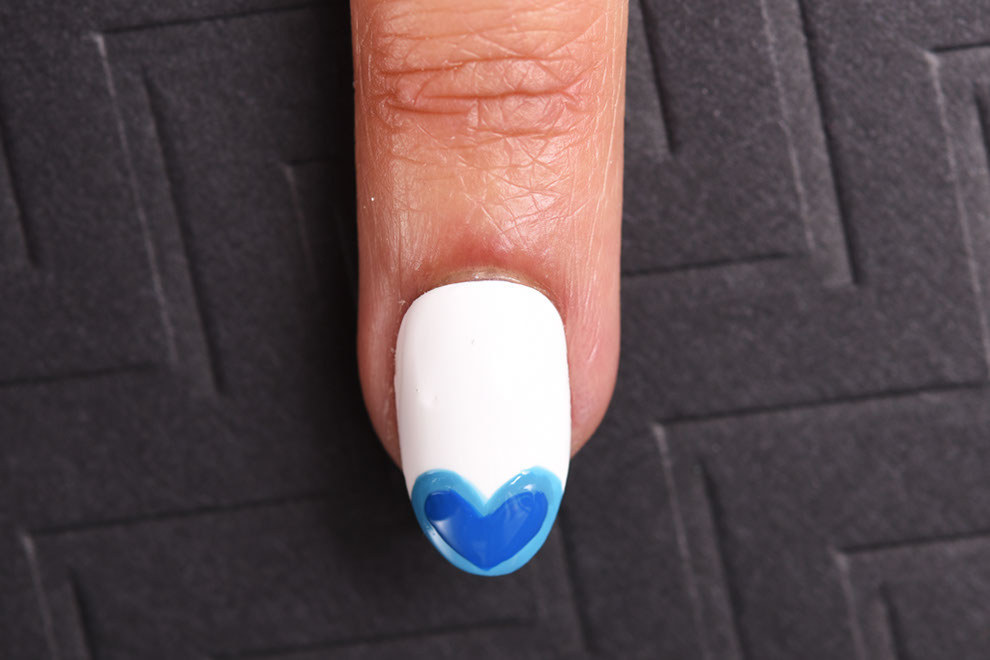
Step 4: Dip the striper brush into the medium blue color. Inside of the first heart, paint a smaller blue heart.
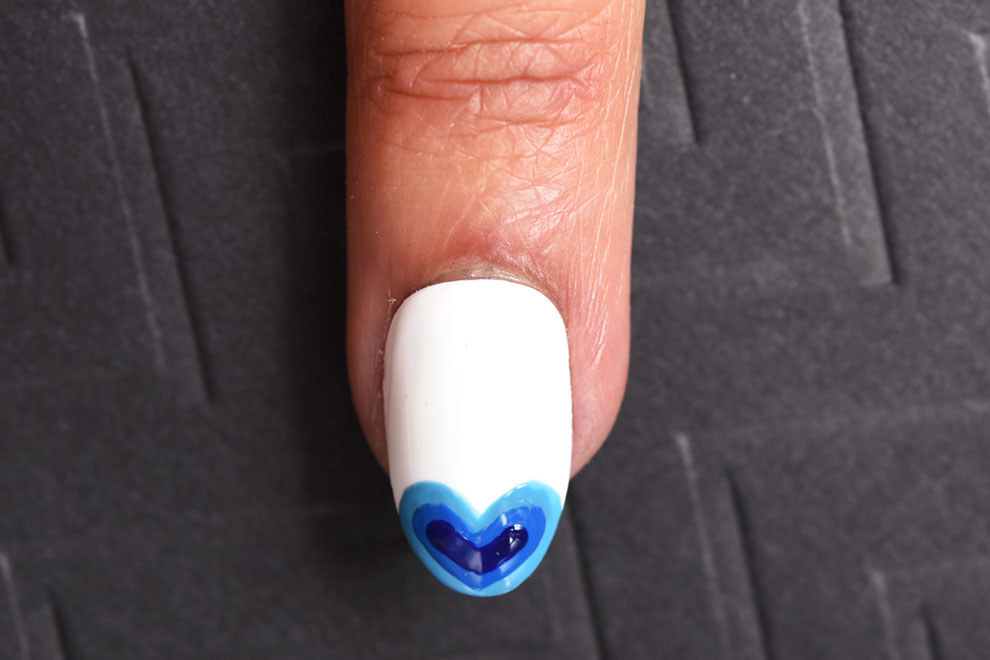
Step 5: Dip the striper brush into the darkest blue polish and paint a third, even smaller heart inside of the first two hearts.
Your ombré nails are fly AF.
Find more wedding nail art ideas here.
Nail Artist: Miss Pop Nails
Patricia Inspire Nails were provided to BuzzFeed Life free of charge.