
I've always thought of beer can chicken as a supremely laid-back thing to grill.
And for the most part, that's true. As I found out, grilling it on a charcoal grill, specifically, ~does~ take a bit of prep work — most of which, for me, was learning how to light charcoals and keep the grill going — but the end result (smoky flavor, super tender meat) was worth it.
But, if you have a small charcoal grill, fitting an entire chicken on the lower rack turns out to be kind of a hassle.


To fit the lid on while the chicken grills, you have to place it on the lower rack, which means lifting the chicken off the lower grate to add new coals, which you'll have to do two or three times as the chicken cooks. This was frustrating and hard to manage with the hot chicken and beer.
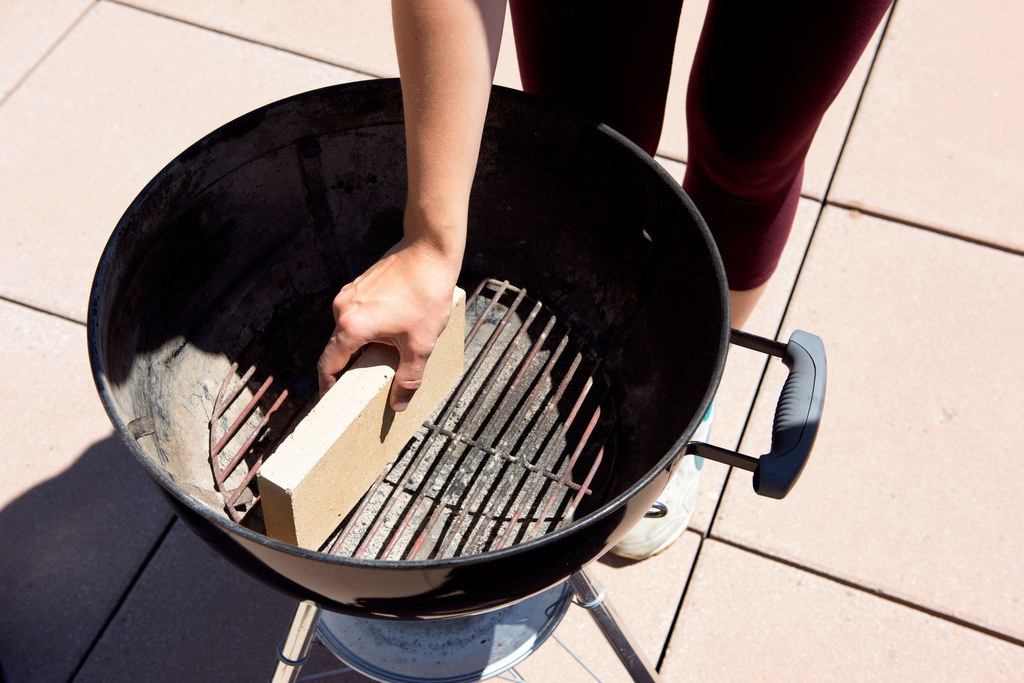
Since the taste of slow-roasted, smoky chicken is so delicious, I wanted to figure out how to make this work with less hassle. Fair warning, it does involve buying an extra tool, but it's a reusable and helpful addition if you are committed to a small grill: Fire-safe bricks.
Fire bricks are usually used to build things like wood-burning ovens, ceramic kilns, or fire pits, so if you happen to have a few extra lying around they can be repurposed here. You can buy similar bricks here.
BTW, if you have a large charcoal grill, just put the chicken on the top grate. As long as the lid fits with the chicken on the top rack, you're good to go. Pile the coals on one side and cook the chicken on the warm (not hot) side of the grates. Start checking the chicken at 1 hour 15 minutes.
Or, if you want to just get it done, you can make beer can chicken in the oven, too.
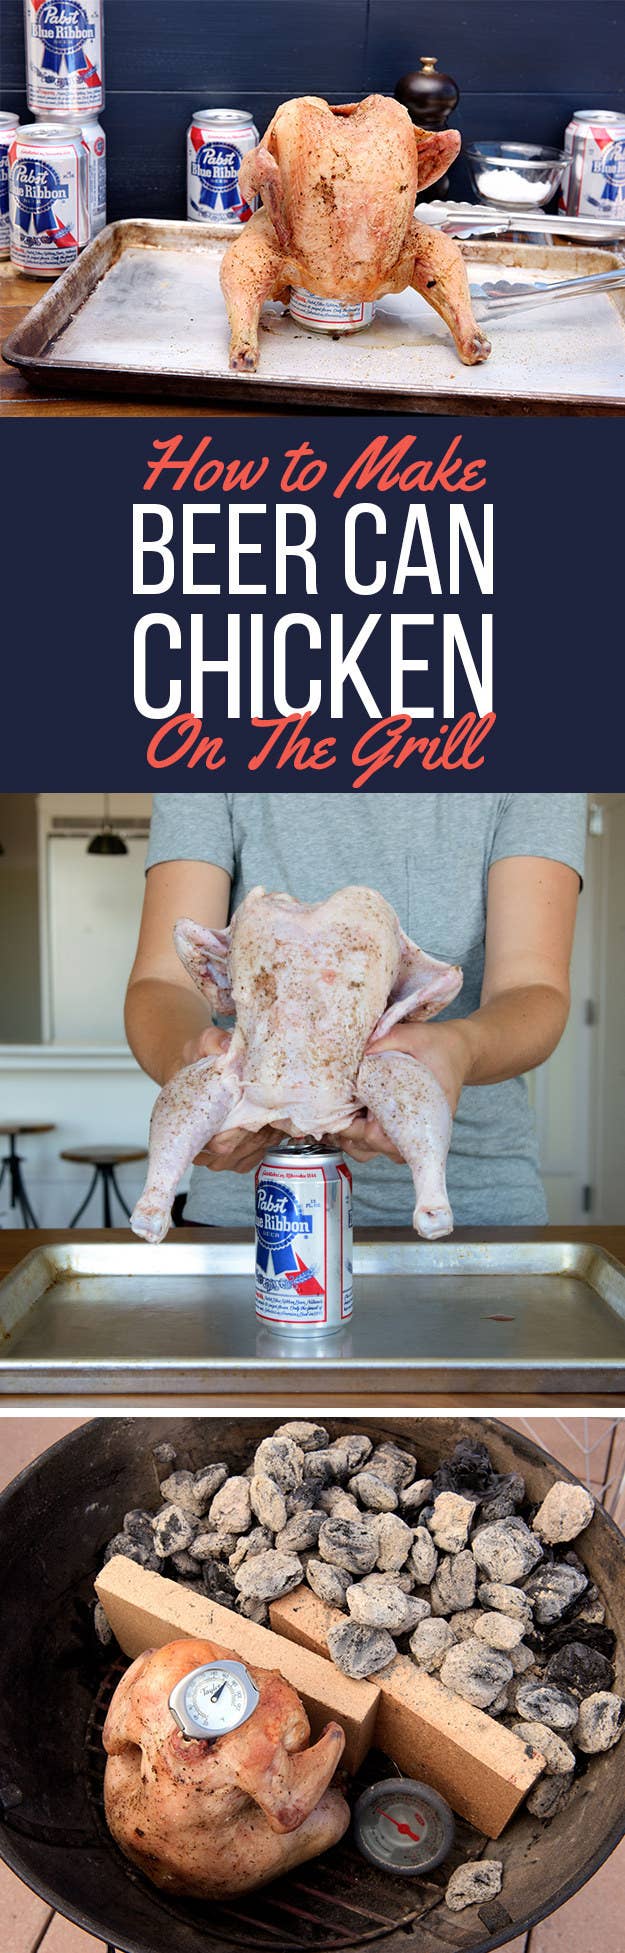
1. First, pour out about a third of the beer (or drink it).

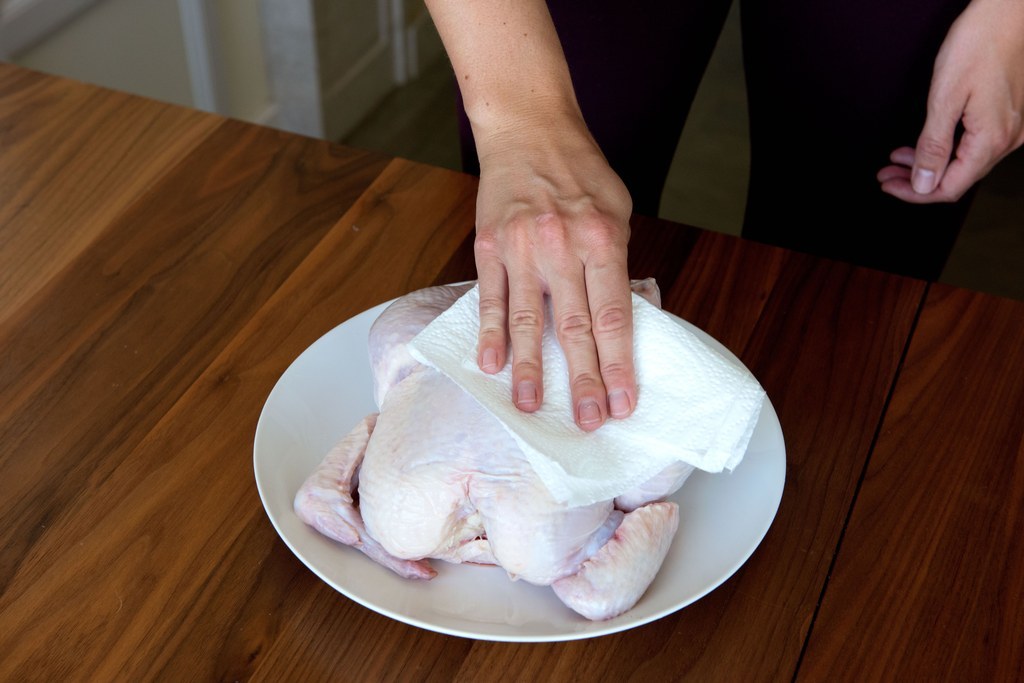
2. Pat the chicken dry with paper towels to remove any chicken juices.
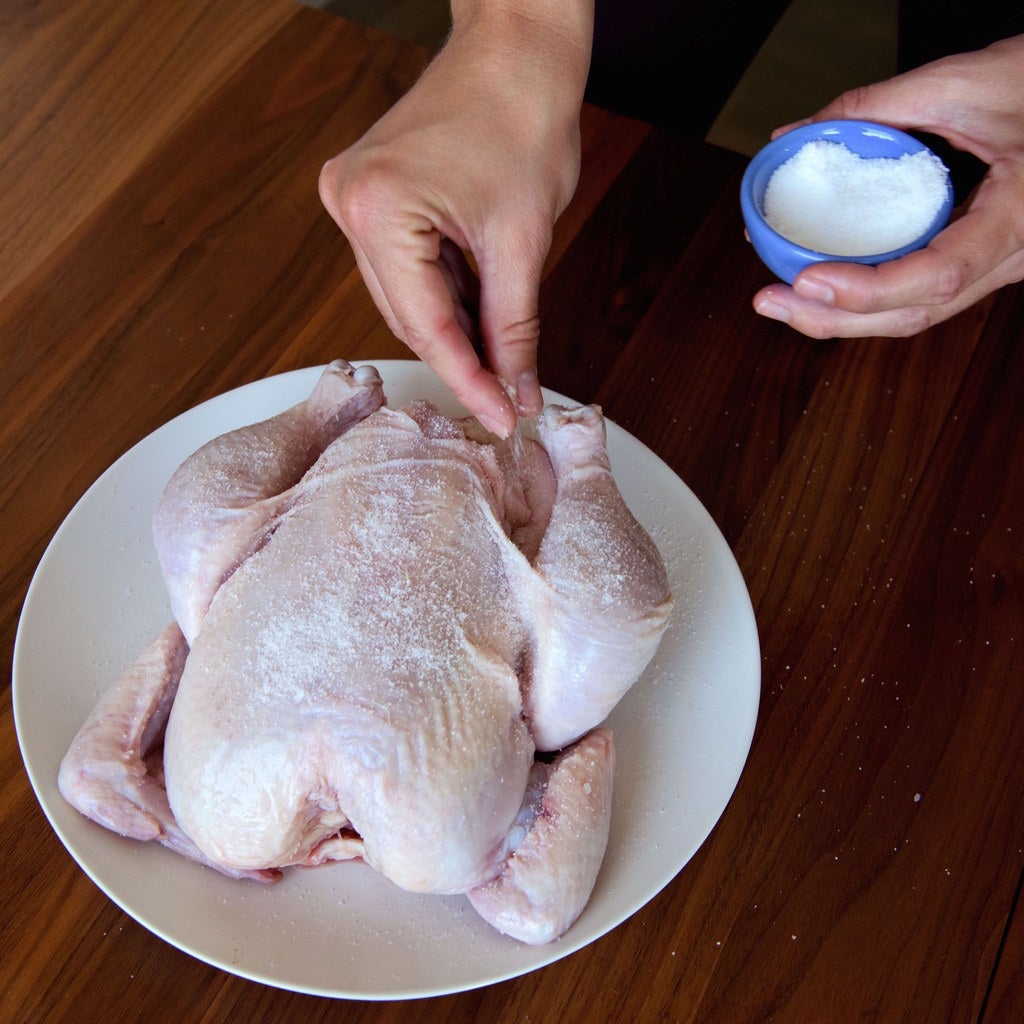
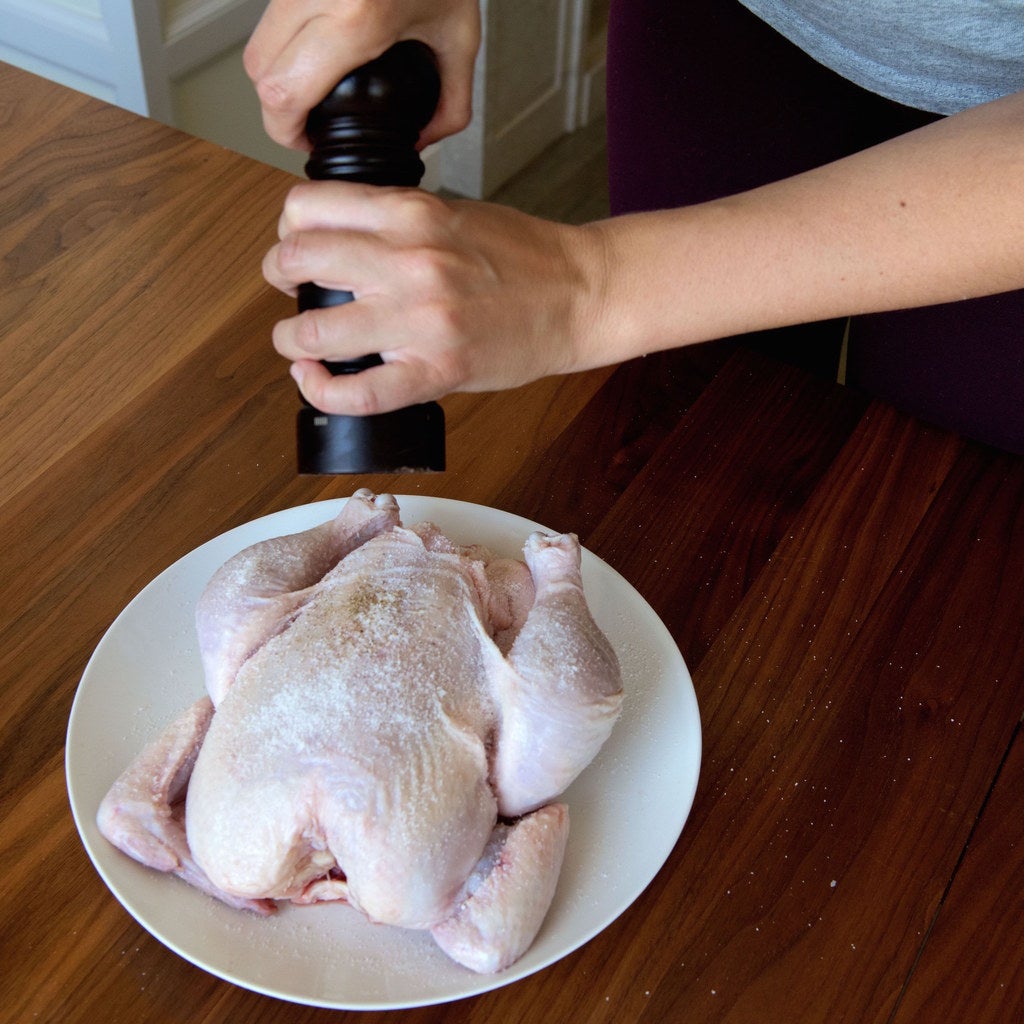
3. Then, season the chicken liberally on both sides and inside the cavity with salt and pepper.
4. Place the beer on a sheet tray on a stable surface. Keeping a firm grip on the chicken, line up the cavity with the top of the beer can.
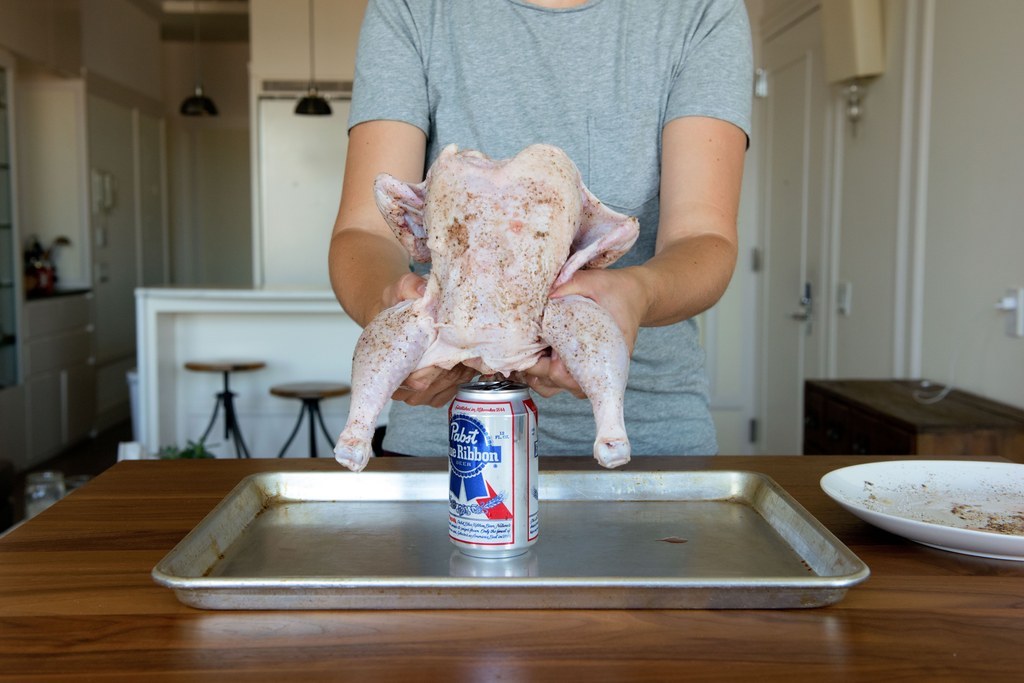
5. Press the chicken down firmly until it is as far down on the can as possible. This will help it stay upright on the grill.

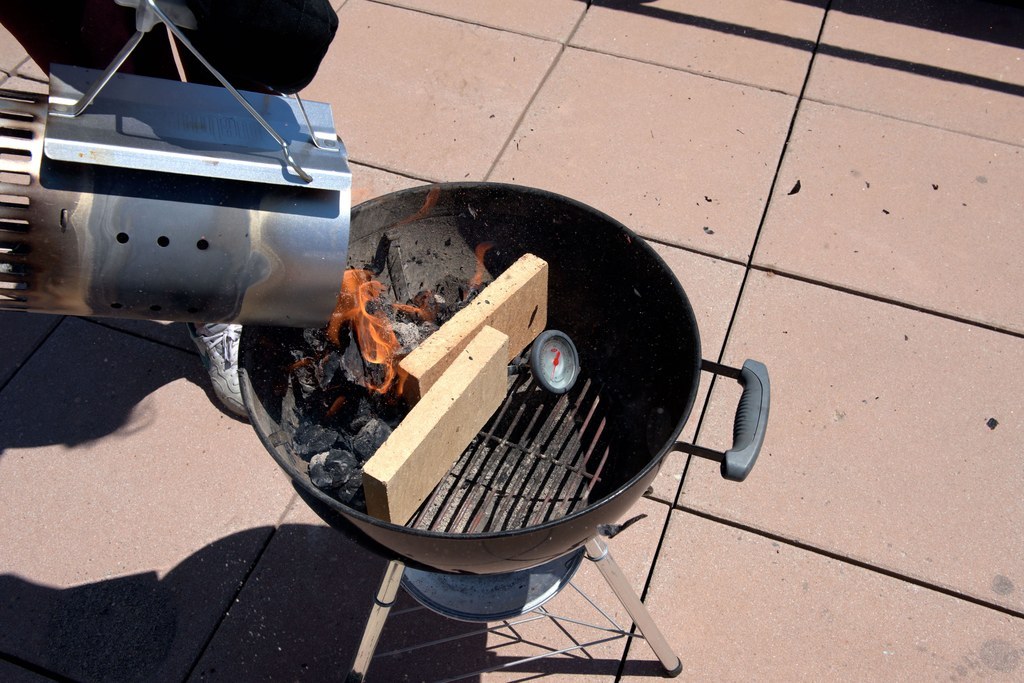
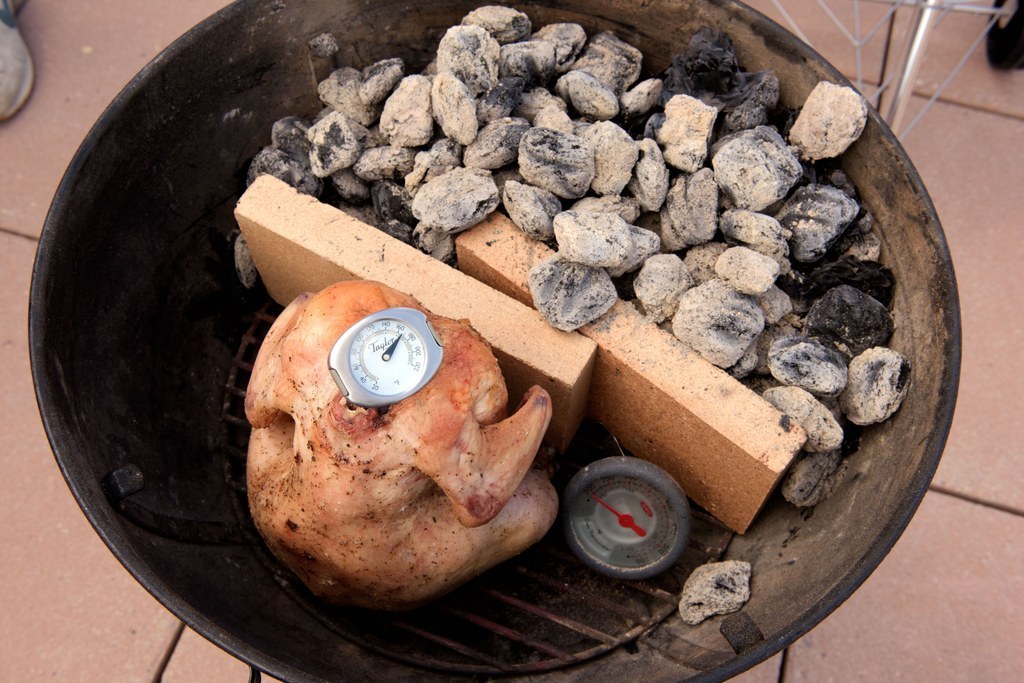
6. Next, heat your coals. (Here's how.) Place two fire-safe bricks across the center of the grill on the lowest rack.
7. When the coals are red-hot, pour them on one side of the fire bricks.
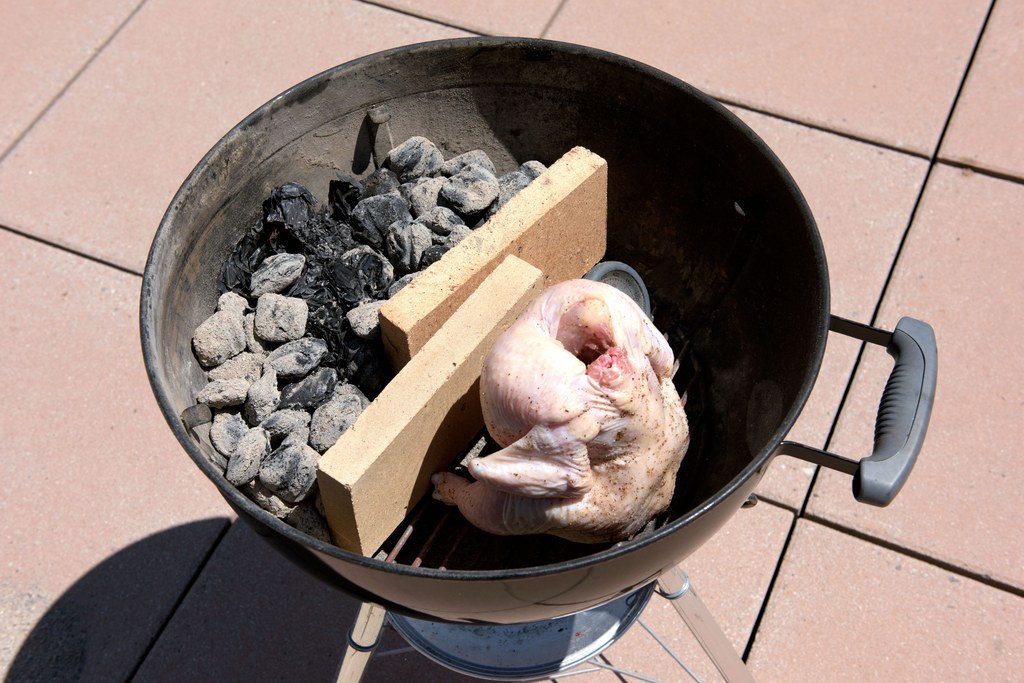
8. Place the chicken on the empty side of the grill, breasts facing towards the bricks. Cover and cook, adding coals once or twice, until the chicken is cooked through, somewhere between 1 1/2 to 2 hours.
9. The chicken is done when an instant-read thermometer inserted into the thickest part (usually the breast) reads 165 degrees F.
How to Make Beer Can Chicken on a Small Charcoal Grill
Makes 4 Servings
Recipe by Lindsay Hunt
Ingredients
1 3- to 4-pound whole chicken, neck and giblets removed
Kosher salt and freshly ground black pepper
1 12-ounce beer
Preparation
Pat the chicken dry with paper towels, then season it liberally on both sides and in the cavity with salt and pepper. Pour out about a third of the beer and on a sheet tray or another stable surface.
Keeping a firm grip on the chicken, place the cavity onto the beer can. Press the chicken down firmly until it is as far down on the can as possible. This will help it stay stable on the grill.
Heat the grill: Place two fire-safe bricks across the center of the lowest grill grate. Pile hot coals on one side of the bricks and the chicken on the other side of the bricks. Use the two legs to prop the chicken upright, like a tripod.
Cover and cook the chicken, adding coals one or two more times, until an instant-read thermometer inserted in the thickest part of the chicken reads 165º F, about 1 1/2 to 2 hours.
Remove the chicken from the grill and transfer to a cutting board. Carefully remove the beer can from the chicken. Let rest 5 minutes, then serve.
