
We recommend wearing disposable gloves when working with Krazy Glue. Be sure not to use more glue than is necessary to avoid white residue.
1. This adorable card is surprisingly quick and easy.

Supplies:
Blank card
Green pipe cleaners
Gold star stickers
Merry Christmas stamp
Instructions:
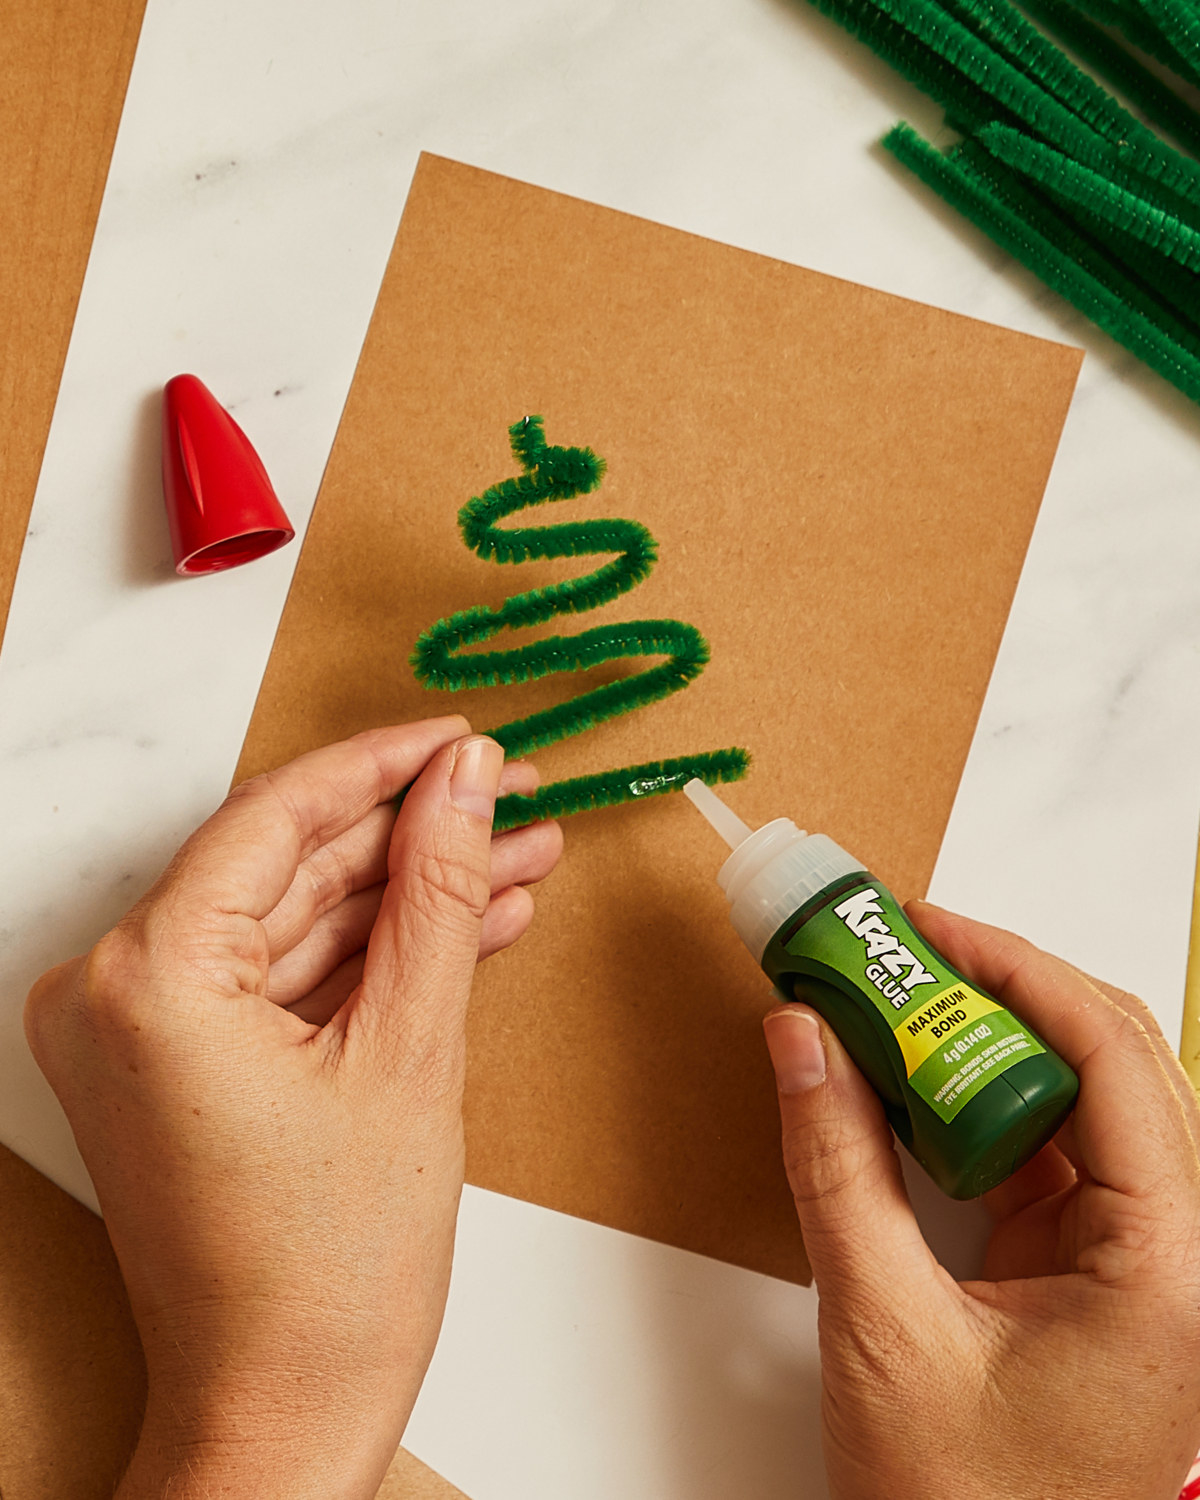
1. Start with a blank card. Hold the bottom of your pipe cleaner and bend into a zigzag shape.
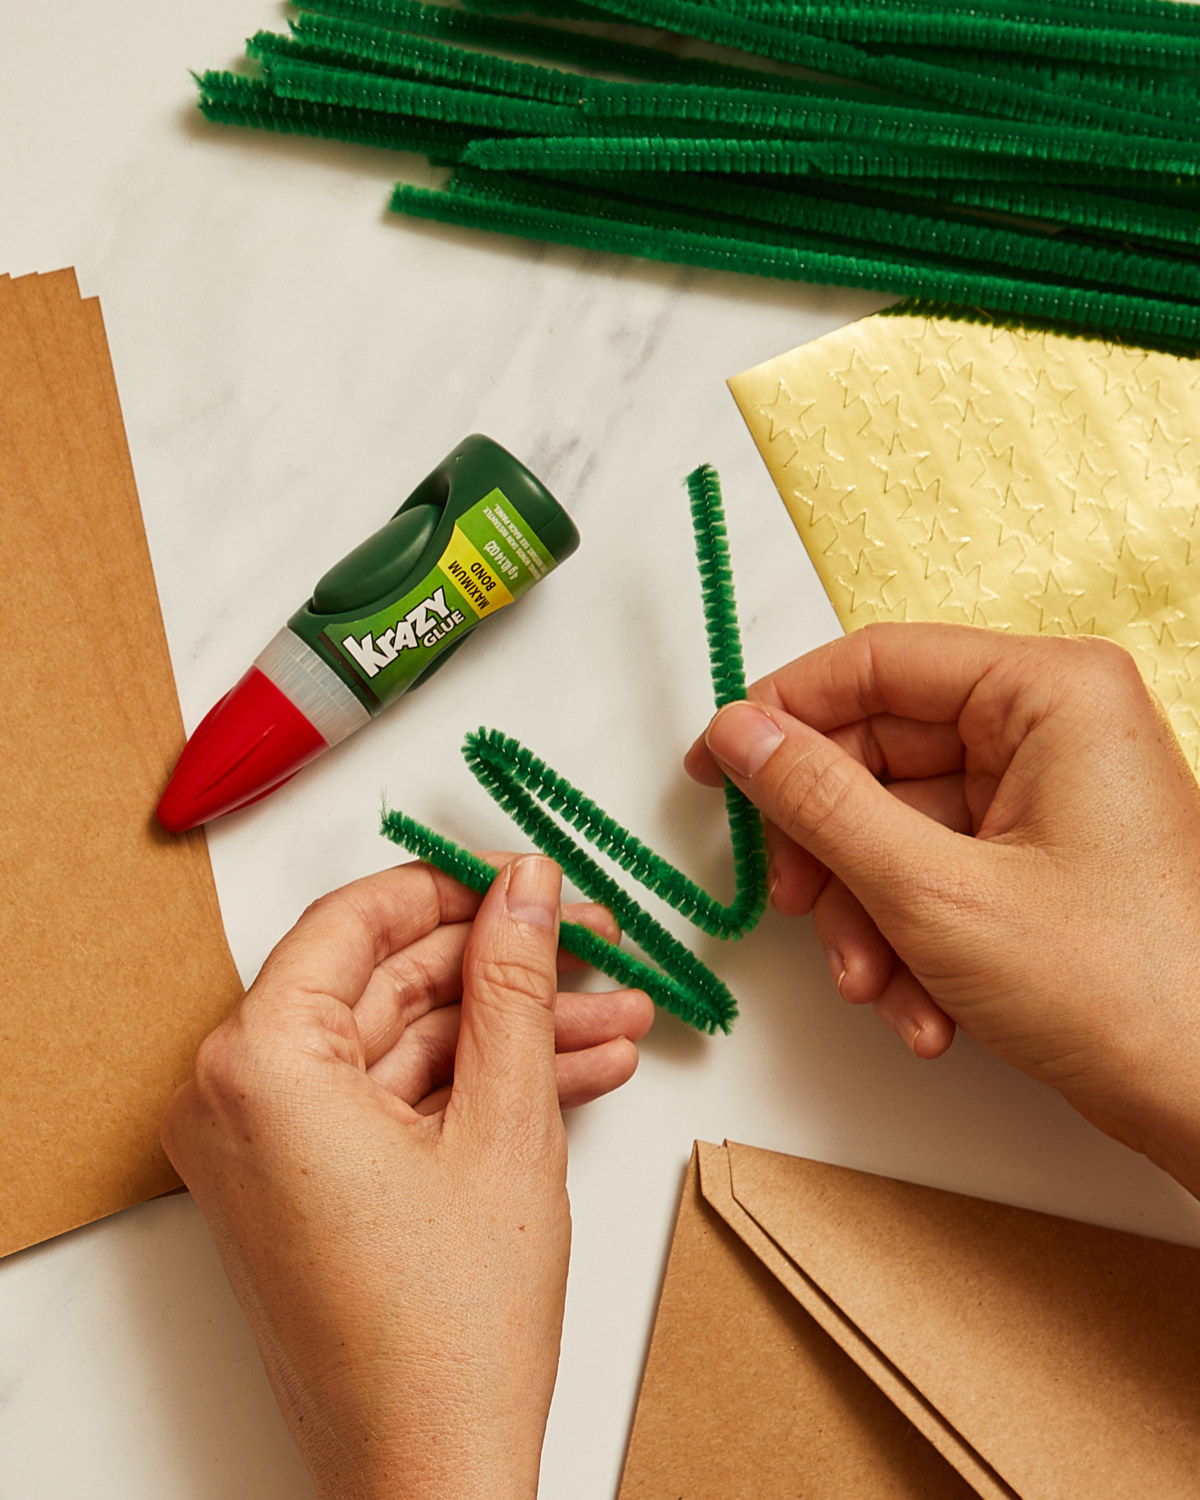
2. Secure the pipe cleaner to the front of the card with Krazy Glue Max Bond Gel. Let dry for a couple of minutes. Place a gold star sticker at the top. Stamp Merry Christmas at the bottom of the card. Let dry.
2. A cotton ball snowman is sure to put a smile on anyone's face.
Supplies:
Blank card
Cotton balls
Small buttons or beads (black)
Small buttons or beads (festive colors)
Thin holiday ribbon
Instructions:
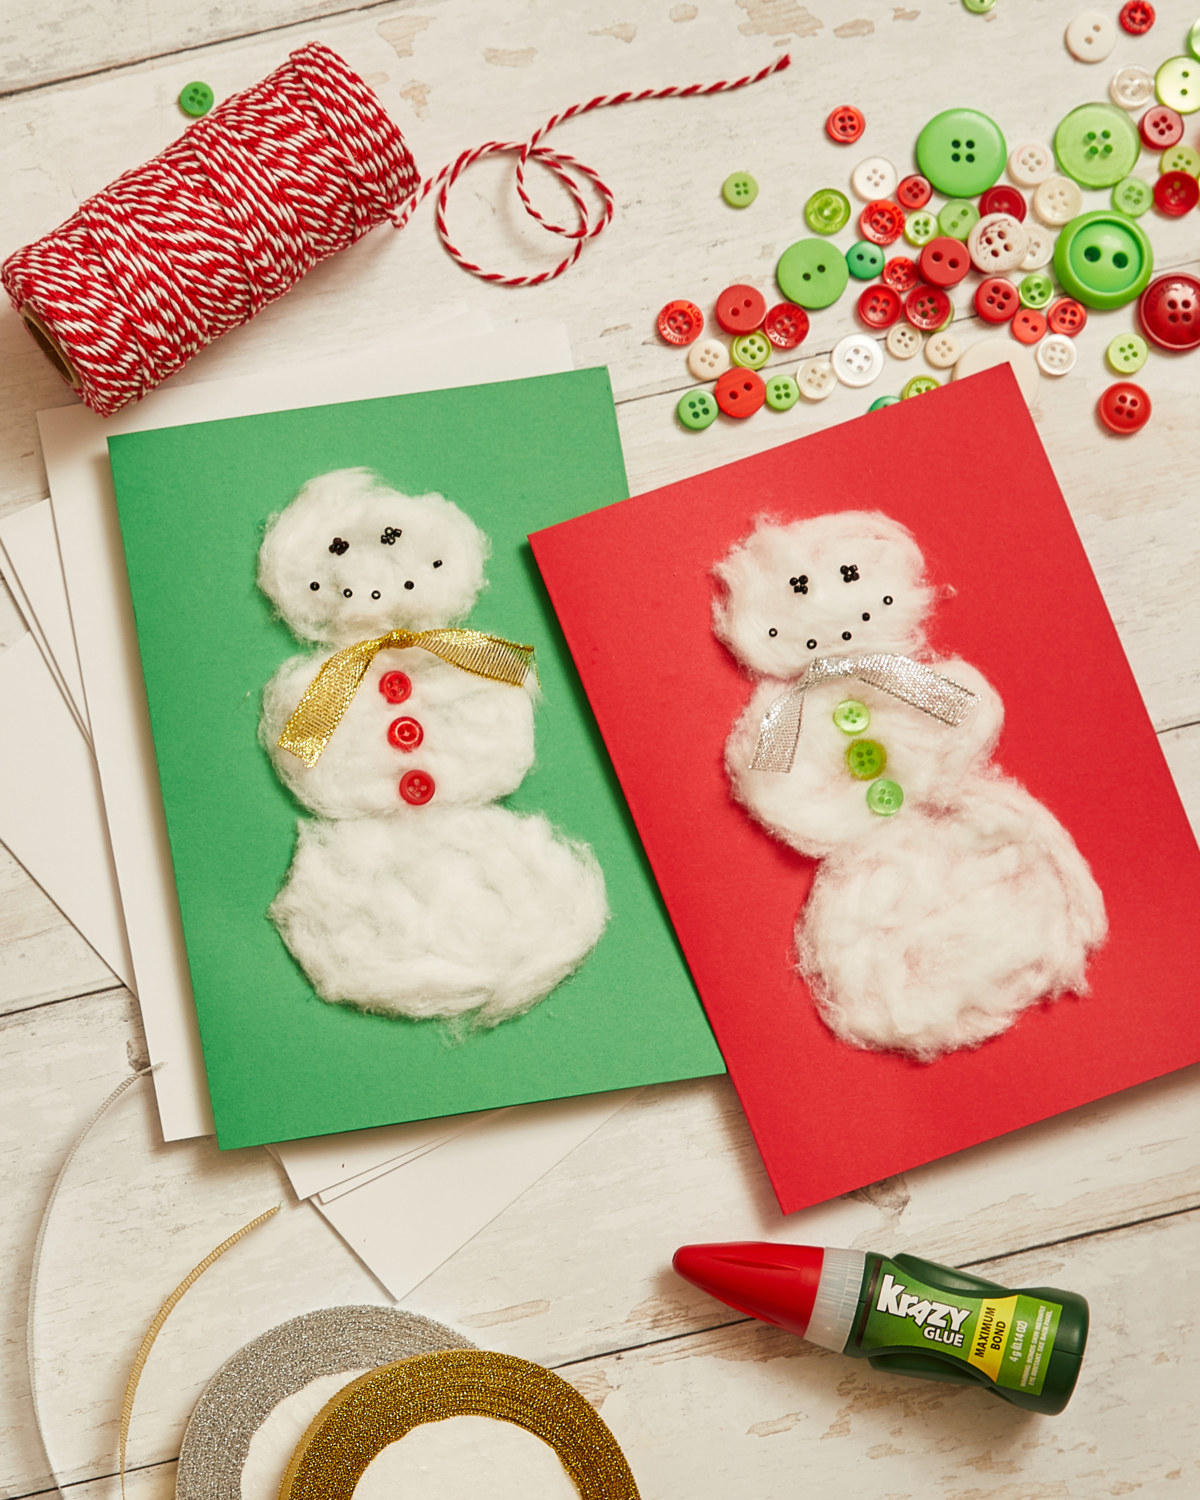
1. Start with a blank card. Draw the outline of a snowman by drawing a large circle at the bottom of the card, a medium-sized circle on top, and a small circle on top of that.
2. Shred the cotton balls into wisps and wet them just a little bit to make bonding easier. Use Krazy Glue to glue the cotton wisps to the outline of the snowman.
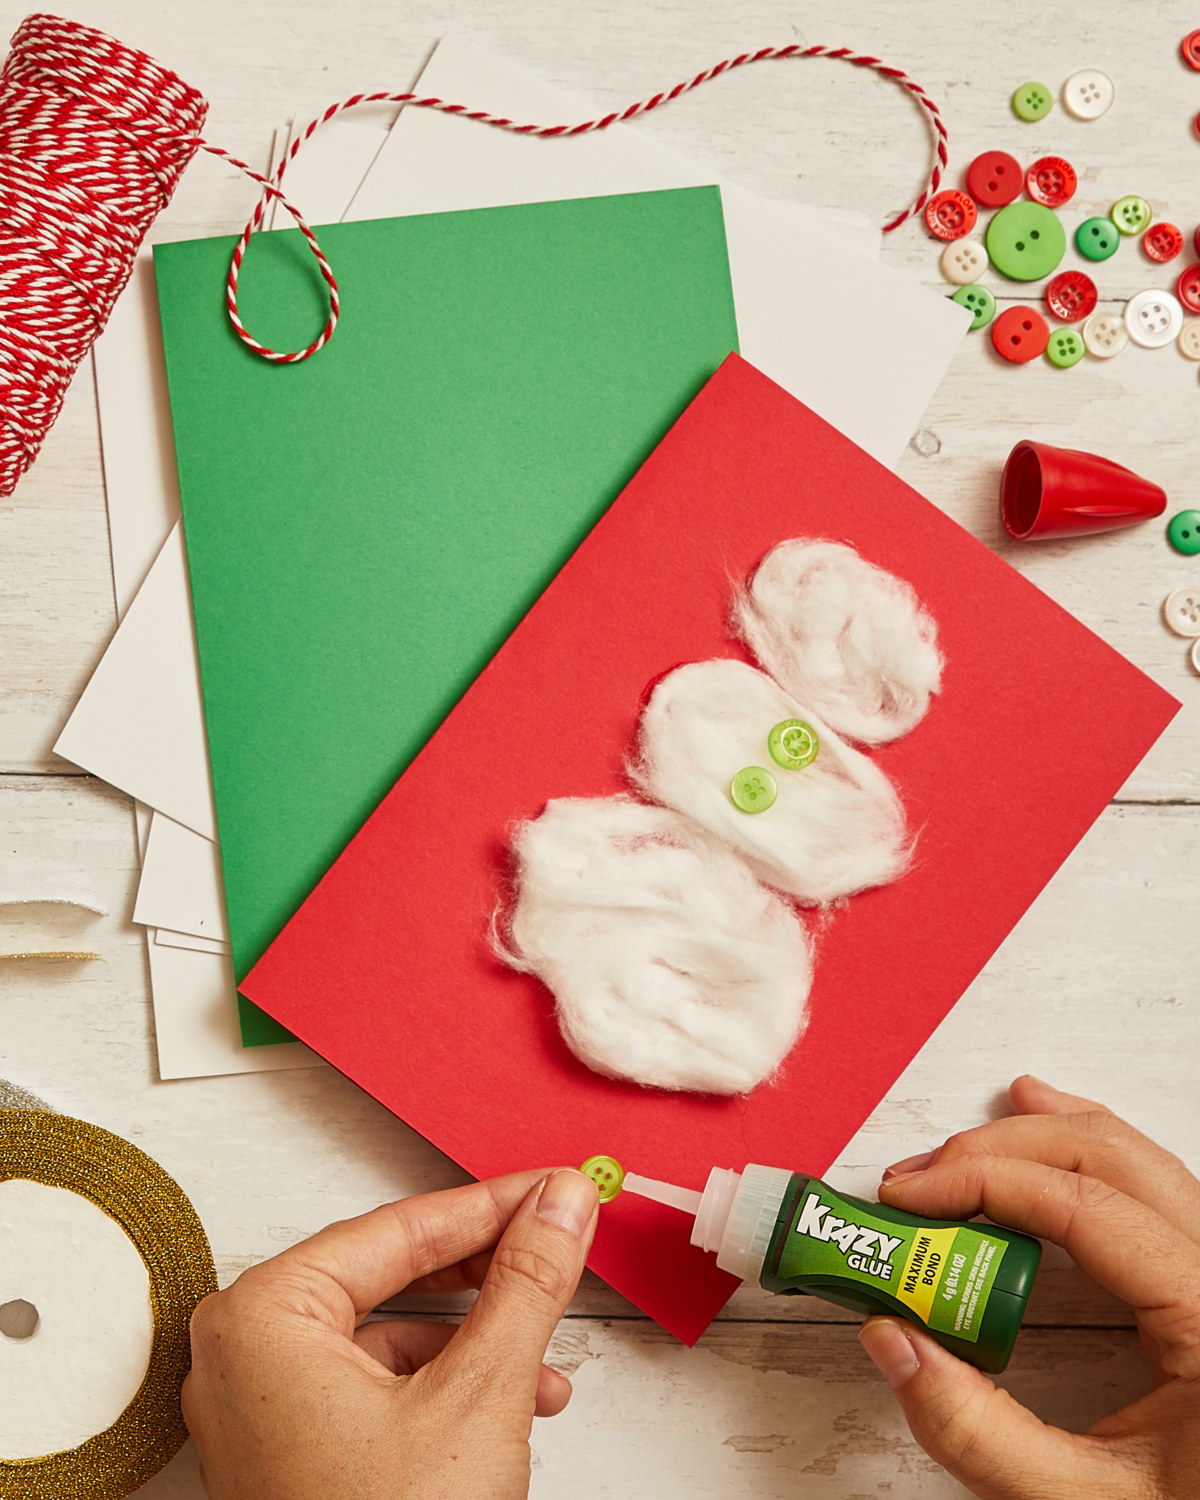
3. Once you have your snowman outline, let dry for a couple of minutes. Take 2 small beads or buttons and use Krazy Glue to glue them to the snowman’s head where eyes would be.
4. Then use Krazy Glue to glue several more beads/buttons in the shape of a smile. Use Krazy Glue to secure the festive-colored beads to the front of the snowman. These will be his buttons.
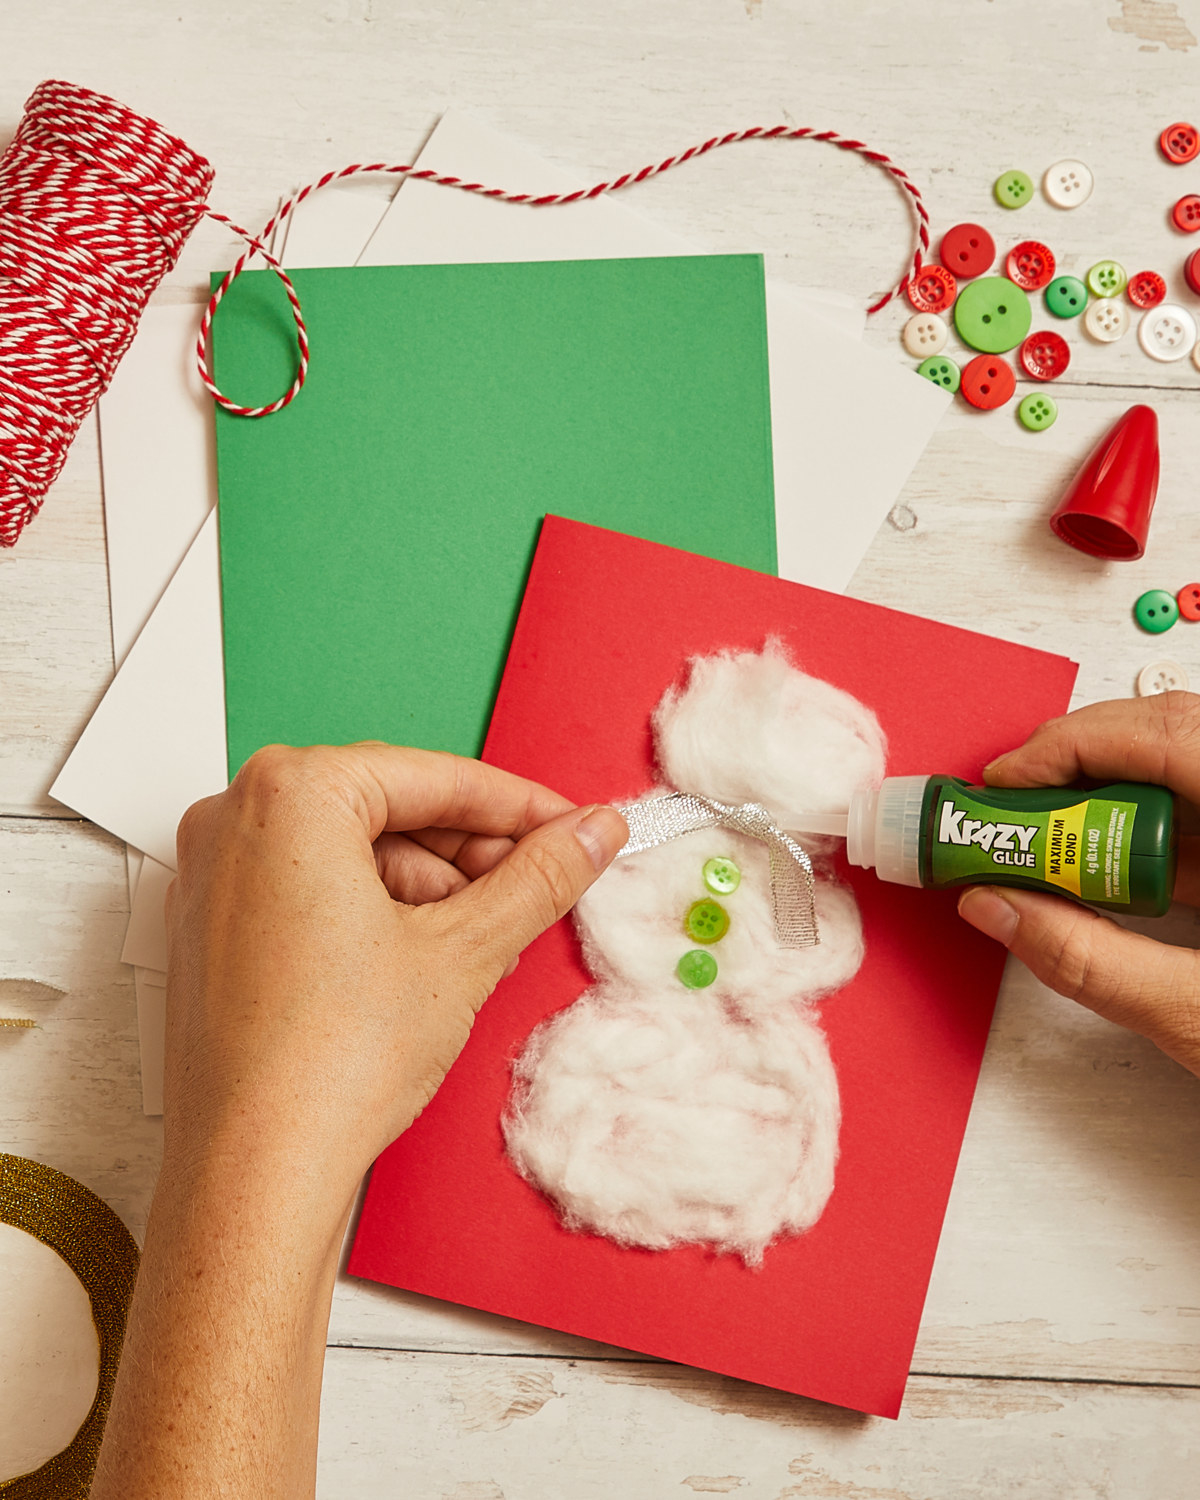
5. Tie a bow with your thin holiday ribbon and glue the ribbon to the snowman’s neck like a scarf. Let dry for a couple of minutes.
Supplies:
Blank card
Holiday-themed washi tape
Circle cutter
Plastic wrap
Holiday-themed glitter
Cardstock
2 colors of holiday ribbon
Pencil
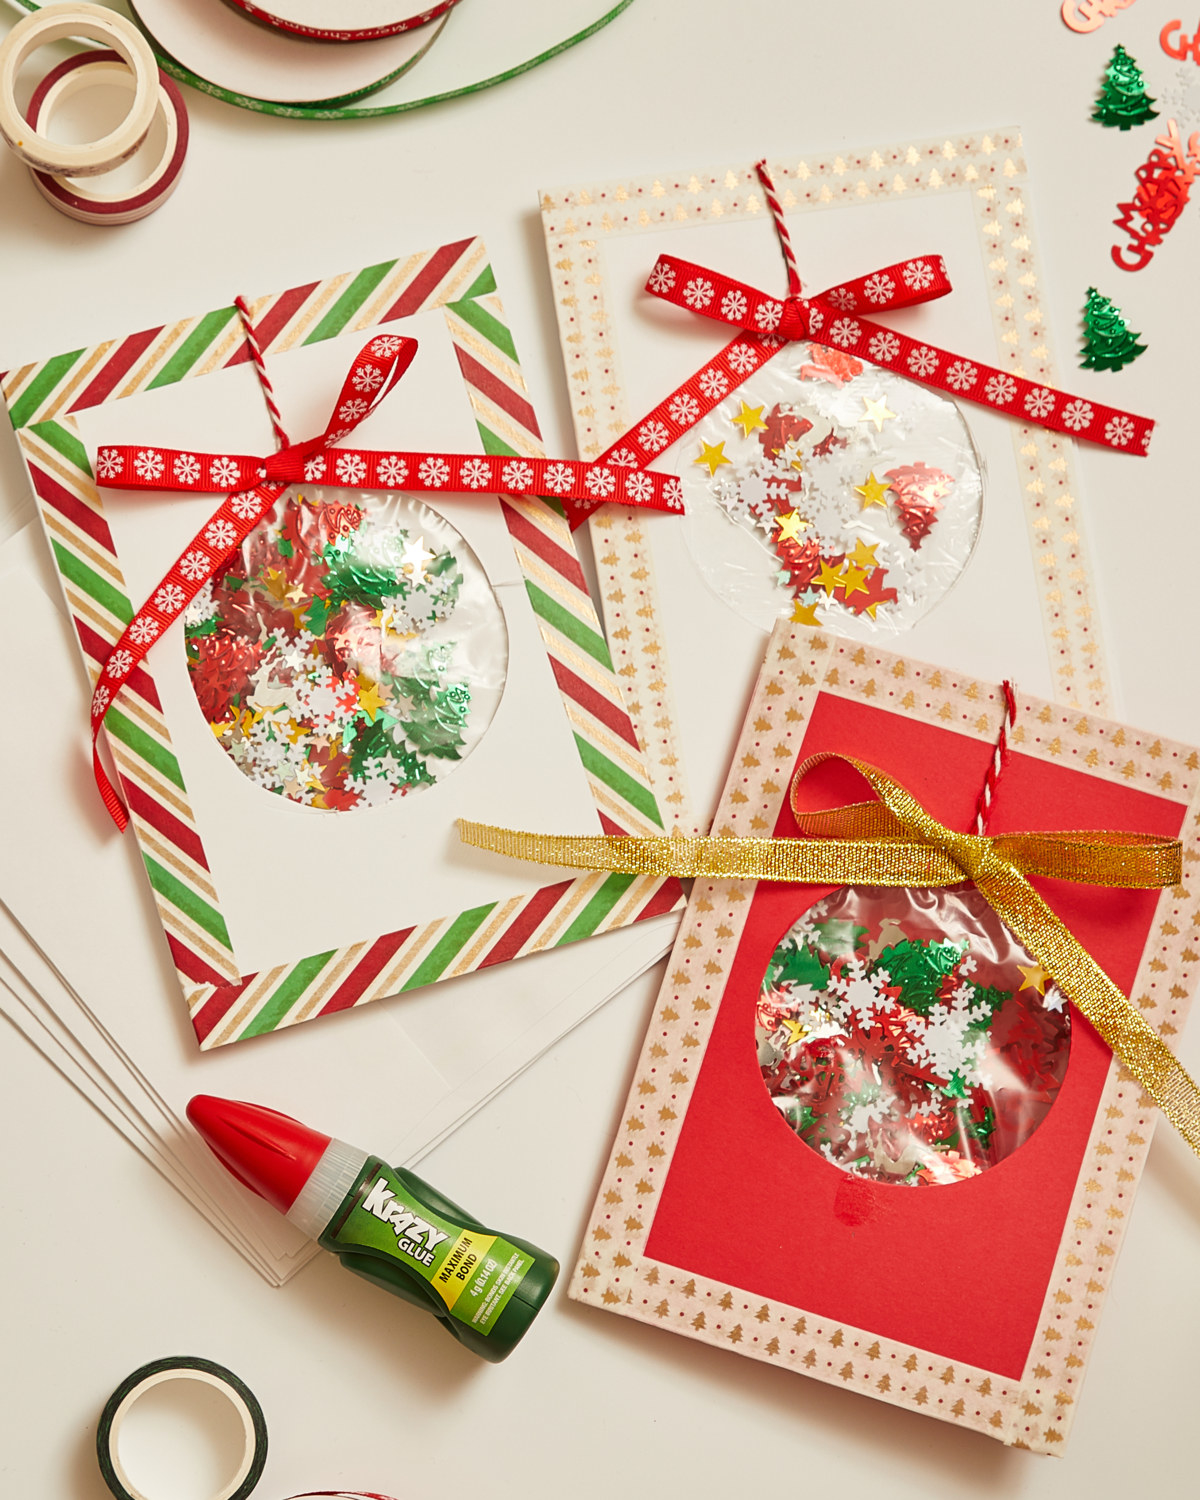
3. This lovely ornament card may look difficult but it's actually pretty easy.
Instructions:
1. Start with a blank card. Use holiday-themed washi tape to create a festive border around the outside of the card.
2. Use a circle cutter to cut a circle in the middle of the front card flap.
3. Open the card. Stretch a piece of plastic wrap over the back of the circle cut out. Secure with Krazy Glue. Be sure not to use too much glue so the glitter can still move around within the ornament. Let dry for a couple of minutes.
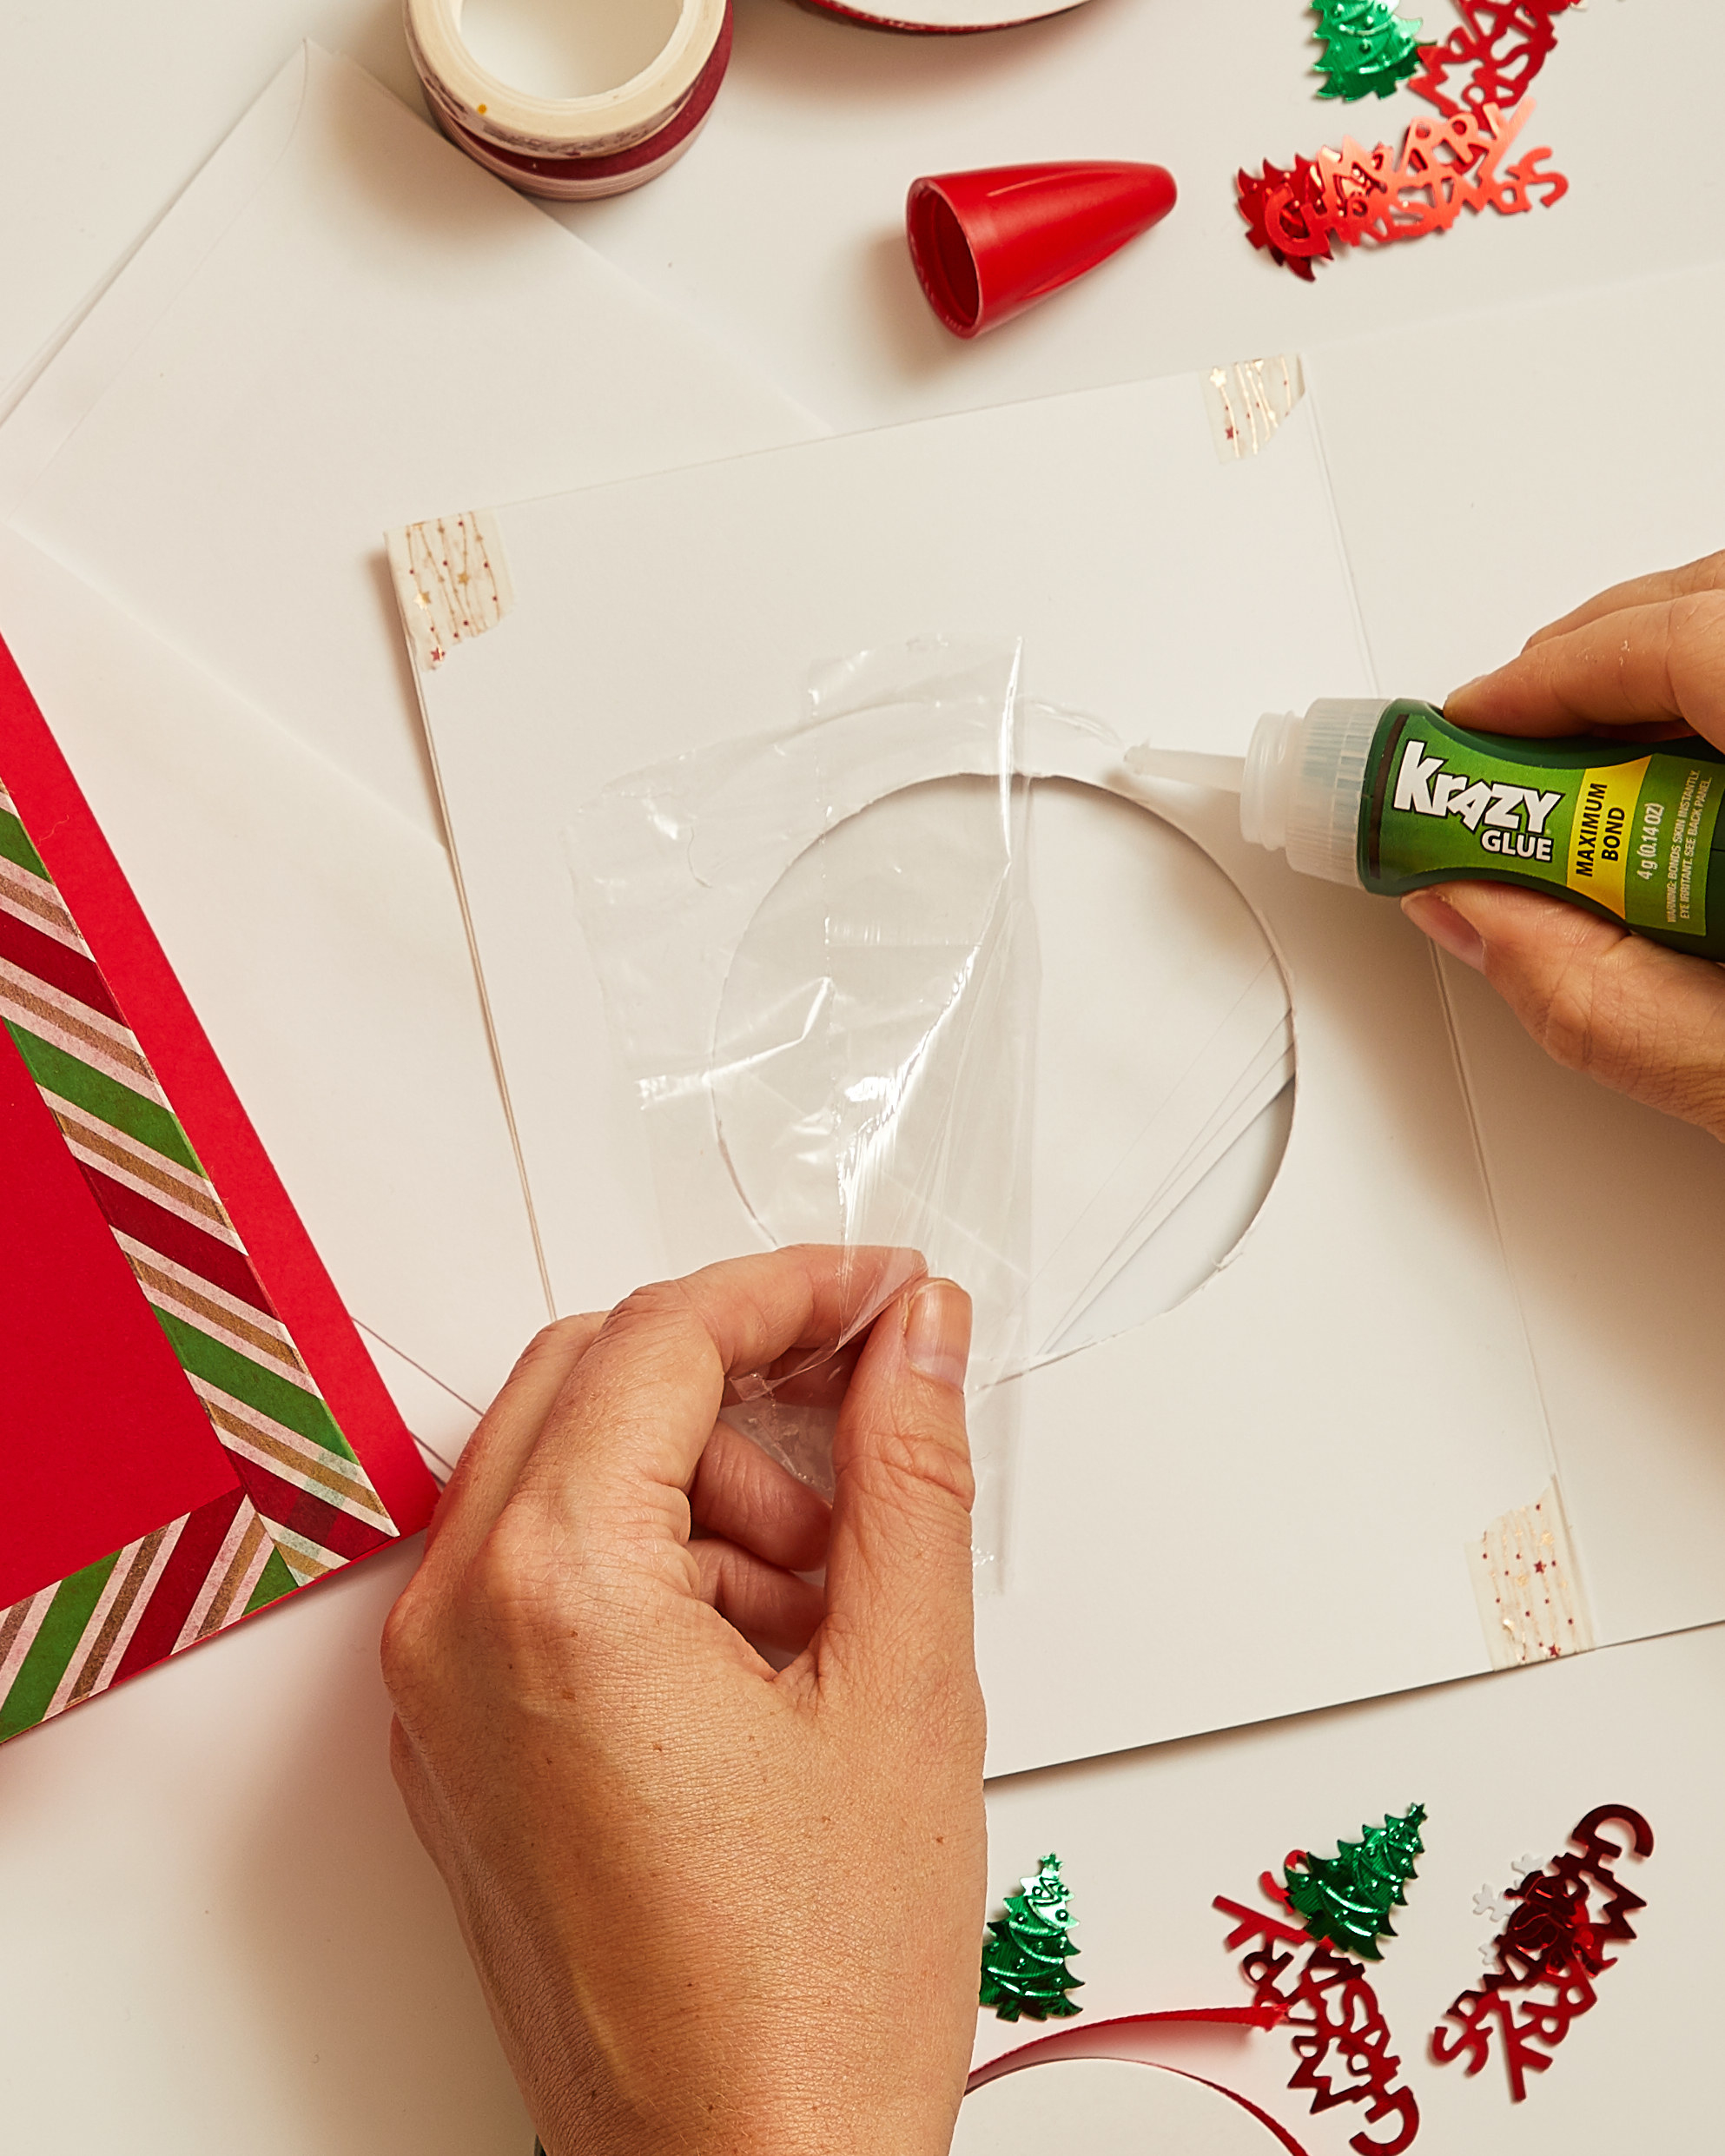
4. Place holiday-themed glitter on the surface of the plastic wrap.
5. Use Krazy Glue to glue a piece of cardstock over the back of the cellophane and glitter, holding it in place. Let dry again.
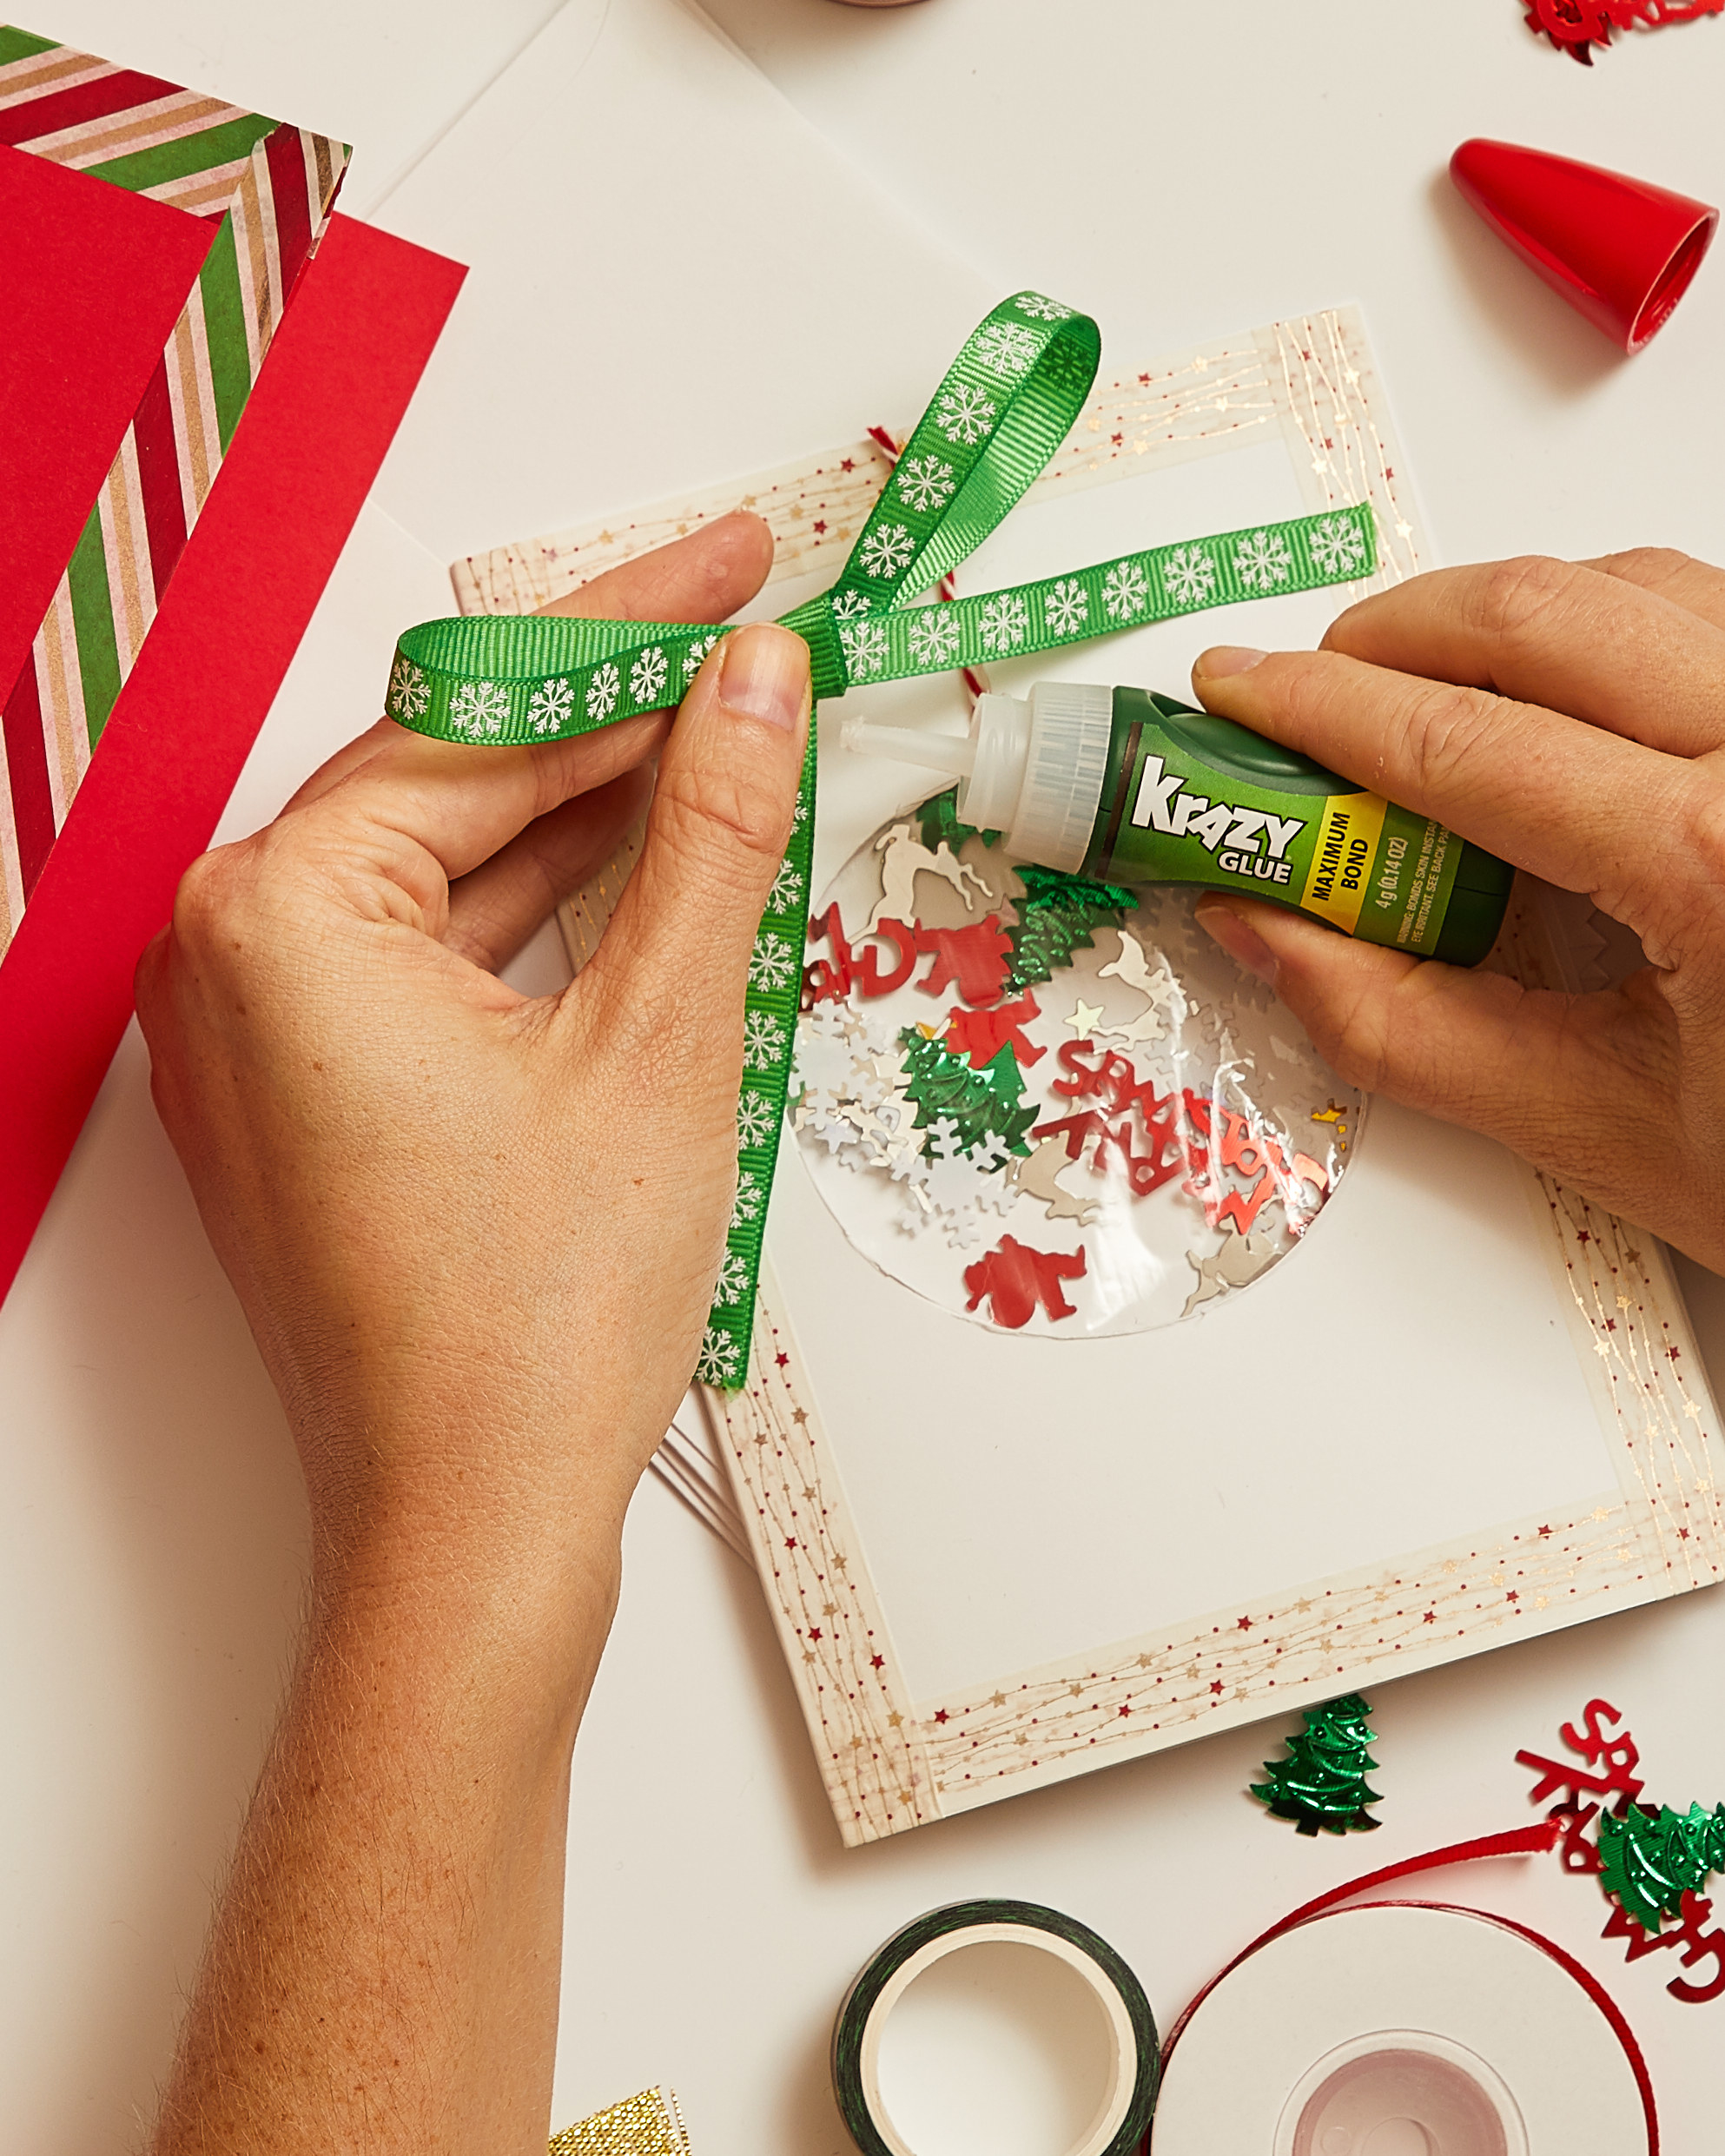
6. Cut a piece of holiday ribbon and tie it in a bow. Krazy Glue to the top of the ornament.
7. Cut a small piece of your second color of holiday ribbon. Use Krazy Glue to secure it from the top of the bow to the top of the card so it looks like it's hanging. Let dry for a couple minutes.