The idea of cooking Thanksgiving can be so intimidating.
First of all, it's supposed to be The Best Meal of the Year! No pressure or anything. Then, there's the annoying fact that roasting a turkey will take up your entire oven for at least three hours. Beyond that, there are all those side dishes to consider.
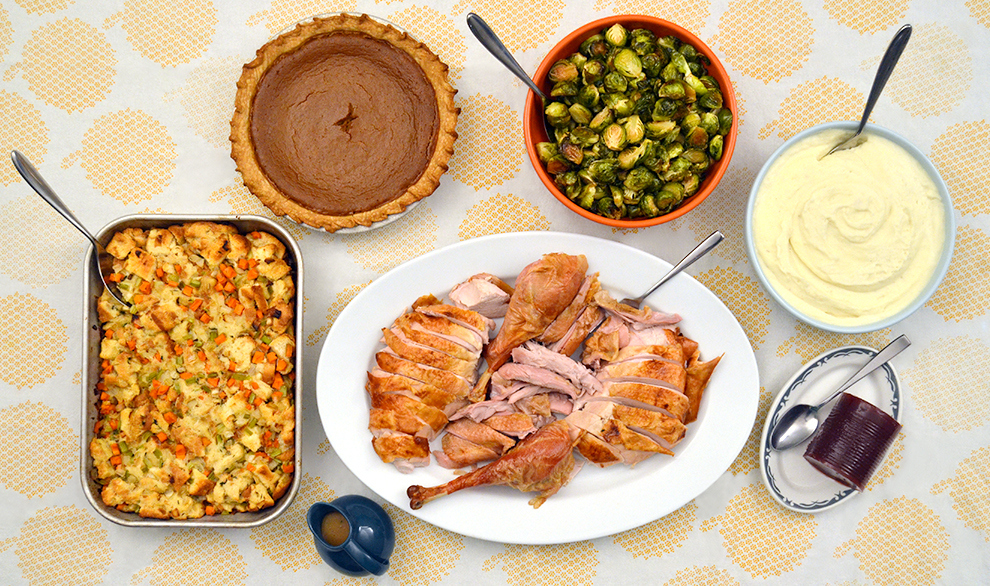
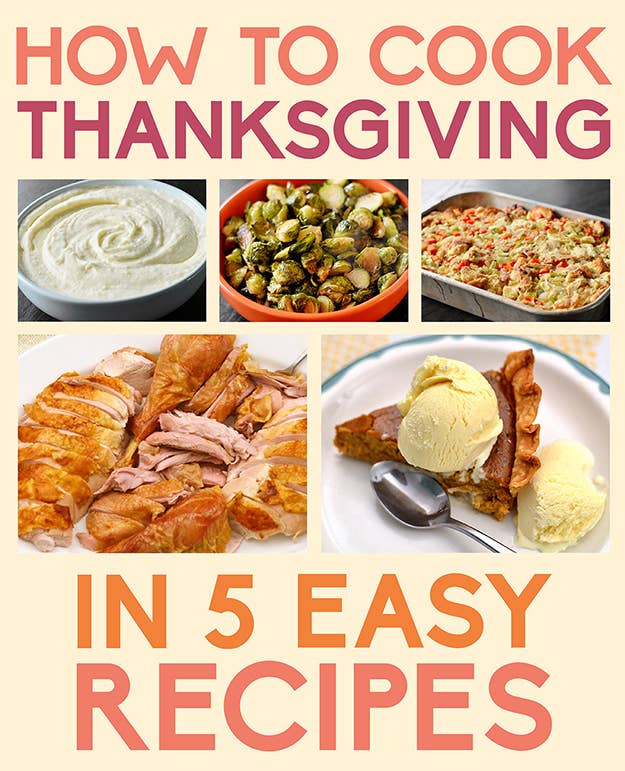
It doesn't have to be so hard, though. If you find yourself in charge of Thanksgiving dinner but really have no idea what you're doing, here are five very simple recipes that will please all of your guests without driving you crazy.
For a step-by-step guide on exactly how to serve a super simple Thanksgiving — everything from buying a turkey to setting the table — click here.
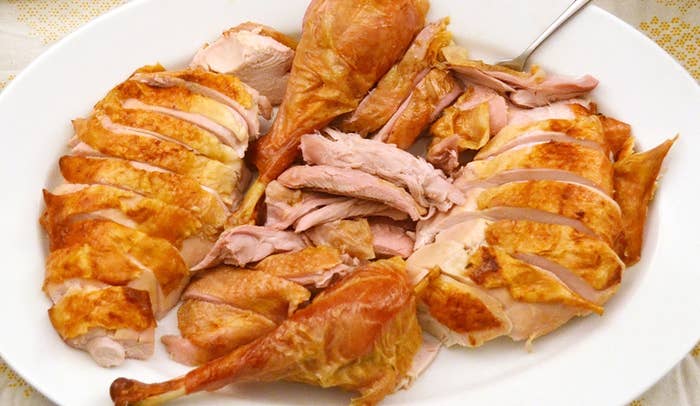
EASIEST ROAST TURKEY AND GRAVY
Serves 10-12
Recipe by Christine Byrne
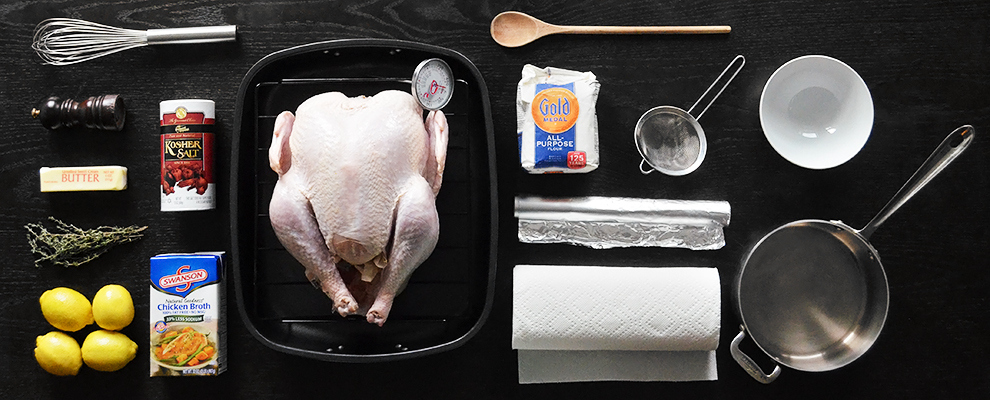
INGREDIENTS
For the turkey:
One 14-16 lb turkey
4 lemons, halved
½ cup (1 stick) unsalted butter, at room temperature
3 tablespoons kosher salt
freshly ground pepper, to taste
2 cups low sodium chicken broth
For the gravy:
½ cup pan drippings from the turkey
⅓ cup all-purpose flour
4 cups low-sodium chicken broth
1 teaspoon salt
5 sprigs thyme
Equipment
Roasting rack and pan large enough for turkey
Paper towels
Meat thermometer
Wooden spoon
Aluminum foil
Oven
Small strainer
Small bowl
Whisk
Medium sauce pot
INSTRUCTIONS
For the turkey:
1. If you're using a frozen turkey, you'll need to thaw it in advance, and the easiest way to do this is in the refrigerator. How long it will take to thaw depends on weight: Whole turkeys thaw at a rate of 4 lbs per day, so a 16 pound turkey will take 4 days to thaw, and a 20 pound turkey will take 5 days, etc.
2. When you're ready to roast your turkey, take it out of the fridge and let it sit on the counter, in its packaging, about an hour — until it is room temperature. Also take out the stick of butter; you'll need that to be room temperature, too. Preheat oven to 450°F and put one of your oven racks on the lowest rung. You only need a single rack for the turkey, so take any other racks out of the oven and set them aside.
3. When the turkey is room temperature, take it out of its packaging, preferably over the sink because all kinds of raw turkey juices will come pouring out. You'll probably find a plastic bag inside the cavity of the turkey filled with tiny organs (called the "giblets") and a turkey neck; some people use these for gravy, but you can throw the whole bag away.
4. Put the turkey on a large cutting board, and dry it really, really well with paper towels. Be sure to dry the inside of the cavity really well, as well as the outside of the turkey. When turkey is completely dry, sprinkle two tablespoons of salt evenly all over the outside of the turkey, along with some freshly ground pepper. Sprinkle the remaining tablespoon of salt inside the cavity of the turkey.
5. Now you're going to put butter UNDERNEATH the skin on the turkey breast meat: Entering from the neck, slide your hand between the skin and breast meat, then crawl your hand along the surface of both breasts underneath the skin, separating the skin from the meat as you move along. Be careful not to rip the skin. Once you've got the skin separated from the meat, rub the stick of soft butter underneath the skin on top of the breast meat. It should be spread out to cover both breasts.
6. Put the roasting rack inside the roasting pan, and place the turkey — breast side up (meaning, the legs will be in the air, not down on the rack) — on the roasting rack. Stuff the lemon halves inside the cavity of the turkey. Pour 2 cups of chicken broth and 1 cup of water into the bottom of the roasting pan. (Fat will drip down from the turkey during cooking; the liquid in the pan will keep that fat from burning and filling your kitchen with smoke.)
7. Roast turkey at 450°F for 45 minutes, then turn the oven temperature down to 375°F and continue roasting for another 2-2 ½ hours. If the skin of your turkey starts to get dark brown before the rest of the turkey is done, take a piece of aluminum foil and lay it gently over whatever parts of the skin are burning. Also, if the liquid in the bottom of the roasting pan evaporates and the fat in the pan starts burning, just pour more water in. The exact roasting time will depend on the weight of your turkey and your oven, and the only way to tell if the bird is cooked is by taking its temperature with meat thermometer. After the turkey has been roasting for 2 hours and 45 minutes, take it out of the oven and insert a meat thermometer into the thickest part of the thigh (right where the thigh meets the breast). When the thermometer reads 165°F, your turkey is done. If not, put it back in the oven and check the temperature every 20 minutes.
8. Once the thigh meat temperature reaches 165°F, take it out of the oven and let it sit on the rack in the roasting pan for about five minutes, just to let it cool a little bit so that it's easier to handle. After five minutes, stick a meat fork or a wooden spoon inside the cavity of the turkey so you can lift it out of the roasting pan onto a large cutting board. Let it rest on the cutting board for another 20 minutes before you start carving; this way, the juices inside the turkey will absorb into the meat and won't just gush out when you cut into it.
9. The easiest way to carve a turkey is to quarter it first — meaning you cut the legs off first, then cut each breast off of the turkey carcass — then slice it into pieces. See how to carve a turkey here.
For the gravy:
1. When the turkey is done and you take it out of the roasting pan, it's time to make gravy! First, take the rack out of the roasting pan and put it aside — you can put it in the sink to be washed, you won't need it again. There will be a pool of fat and some liquid in the roasting pan, and maybe some burnt bits stuck to the bottom. Set up a small strainer over a medium bowl, and pour the fat/liquid (these are the pan drippings) through the strainer and into the bowl. No need to scrape the bottom of the pan, just pour whatever comes out easily. When your pan drippings are strained, measure out ½ cup and throw the rest away.
2. In a medium saucepan, heat the ½ cup of pan drippings over medium heat until it is hot but not quite bubbling. Add ⅓ cup of flour and whisk the mixture together vigorously, so that the flour doesn't get lumpy. Keep whisking for about 3 minutes (it's important that you whisk quickly!), and watch as the mixture gets smoother and thicker. It should also start to smell slightly toasted. After 3 minutes, the mixture should be the consistency of paste (this cooked fat/flour mixture is called a roux).
3. Keep whisking, and start to SLOWLY pour the 4 cups chicken stock into the saucepan with the roux. Pour very slowly — it should take at least 45 seconds to pour all of the liquid in. As soon as all of the stock is in, add the thyme. You don't have to whisk as quickly now, just enough so that the gravy doesn't get lumpy.
4. Bring the gravy to a boil, then lower your heat so that the gravy is barely simmering (there should be a few little bubbles around the side of the pot). Add salt, stop whisking, and let the gravy simmer for about 10 minutes, at which point it should be thickened. If it's not thick enough, keep simmering for another minute or so. Pull the sprigs of thyme out with a spoon.
5. Taste to see if the gravy needs more salt, and add as necessary. Then pour the gravy into a gravy boat or small bowl, and serve immediately (if you let the gravy sit too long before serving, it will get too thick and a skin will form on the top).
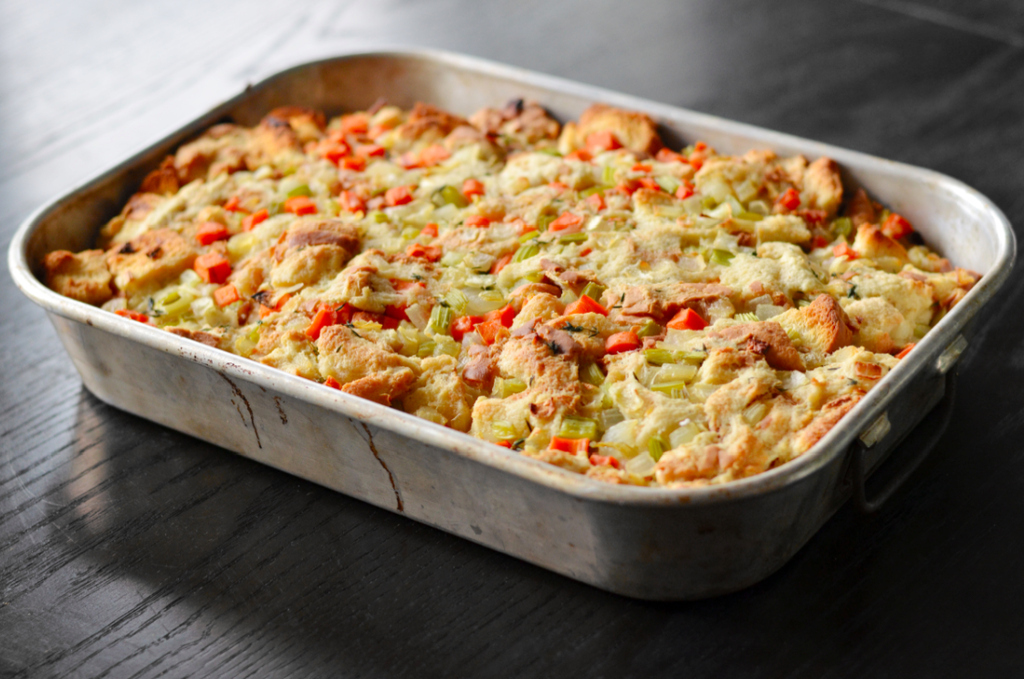
EASY THANKSGIVING STUFFING
Serves 8-10
Recipe by Christine Byrne
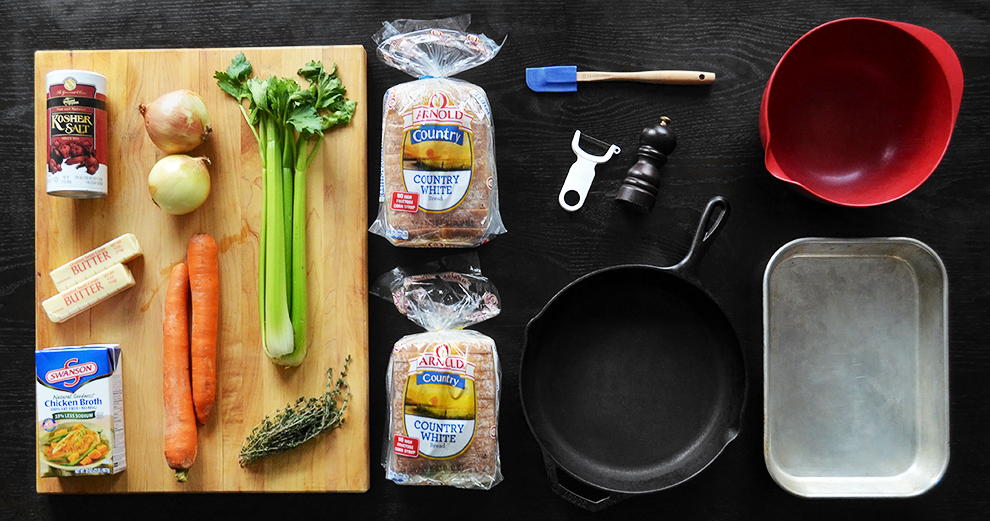
INGREDIENTS
Two 1-lb loaves of store-bought, sliced white bread
1 cup unsalted butter (2 sticks)
2 medium onions
4 stalks celery
2 large (or 4 small) carrots
10 sprigs thyme
2 cups low-sodium chicken broth
1 tablespoon kosher salt
freshly ground pepper, to taste
Equipment
Very large mixing bowl (at least 5 quarts)
Vegetable peeler
Large skillet or saute pan
Large rubber spatula
9x13-inch baking dish
Oven
INSTRUCTIONS
1. Preheat oven to 375°F.
2. Cut bread into roughly 1-inch pieces, and put them in a large mixing bowl. Peel the carrots and onions, then chop the carrots, onions, and celery into ½-inch cubes. The size doesn't have to be super precise, but the cubes should be fairly consistent and not too big. Remove the leaves from the sprigs of thyme by running two fingers down each sprig and pushing the leaves off.
3. In a large skillet or saute pan, melt the butter over medium heat, then add the chopped vegetables and the thyme. Add kosher salt and some freshly ground pepper, and stir with a rubber spatula so that the butter and seasoning is coating all the vegetables evenly. Turn the heat down to medium-low and cook the vegetables for about 8 minutes, stirring them occasionally, until they are soft but not browned at all.
4. Next, add the hot vegetable mixture to the large mixing bowl full of bread cubes. Add the chicken broth, and mix with a rubber spatula until the bread has soaked up all the liquid. It's a lot of stuff and will probably fill the bowl, so you need to mix carefully at once. But, once the bread starts to soak up the liquid, it'll shrink and be easier to mix. The bread will be soggy, and the vegetables should be evenly mixed in. Press the mixture into a 9x13 inch baking dish and bake at 375°F for 50-60 minutes, until the top starts to get a little bit brown.
5. Let cool slightly before serving.
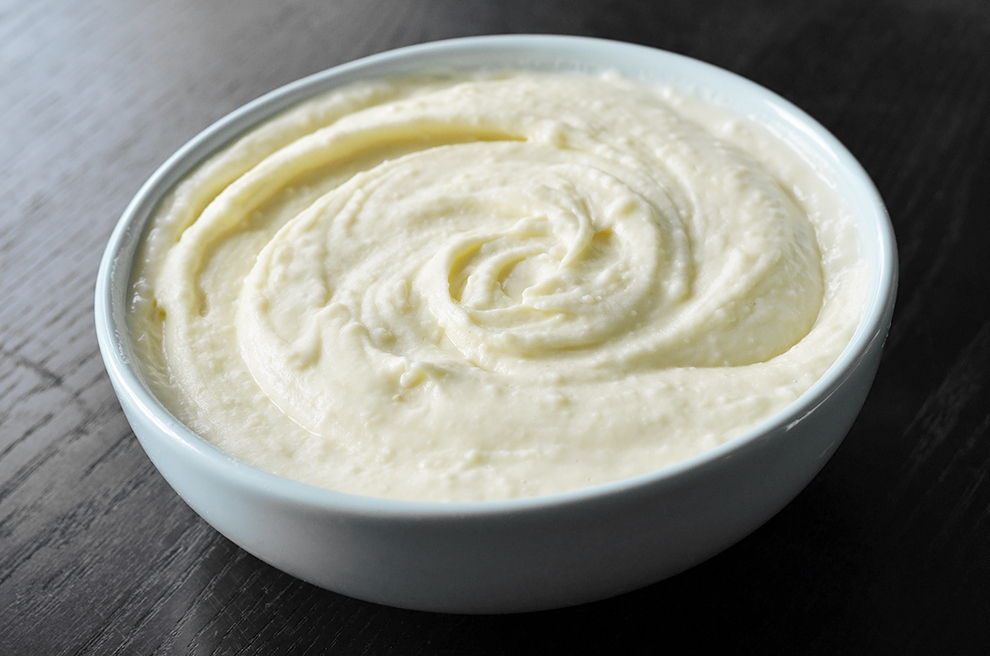

EASY WHIPPED MASHED POTATOES
Serves 6-8
Recipe by Christine Byrne
INGREDIENTS
3 pounds Russet or Yukon Gold potatoes
½ cup unsalted butter (1 stick)
1 cup heavy cream
3 teaspoons kosher salt
freshly ground pepper, to taste
Equipment
Vegetable peeler
Large sauce pot or stockpot
Colander
Stovetop or electric burner
Microwave (OR, a small skillet or saute pan)
Small microwavable bowl
Rubber spatula or wooden spoon
Electric hand mixer
INSTRUCTIONS
1. Peel the potatoes and cut them into roughly 1-inch cubes. The size doesn't have to be precise, but all the cubes should be about the same size so that they cook at the same rate, and if they are too big they'll take longer to cook.
2. Put the potato cubes into a large sauce pot or stock pot and cover them by about 2 inches with cold unsalted water. Too much water and your pot will take forever to boil, too little and the water evaporate too much and end up not covering your potatoes. Bring the pot to a boil over high heat, and continue to boil until the potatoes are fork tender, meaning that a potato cube will mash easily when you press it with the back of a fork. This should take 40-60 minutes.
3. While the potatoes are cooking, melt your butter. If you have a microwave, put the butter in a small microwavable bowl and heat it on low (if your microwave has heat settings) for 1 minute, until it is completely melted. If you don't have a microwave, melt the butter in a small skillet or saucepan over low heat.
4. As soon as the potatoes are cooked, put a colander in the sink and pour the potatoes into it to drain. Don't run cold water over the potatoes!!! You want them to be hot when you whip them with the other ingredients; that's how you get creamy, fluffy mashed potatoes.
5. While the potatoes are still hot, put them in a large mixing bowl and add the melted butter, cream, salt, and pepper. Beat the mixture with an electric hand mixer on low until the potatoes are mashed, which should take about a minute. Then, turn the mixer on high and beat for another 1-2 minutes. This will whip some air into your potatoes and make them completely smooth.
6. Taste to see if you need more salt, and add kosher salt as needed. Then, with a wooden spoon or rubber spatula, scrape the mashed potatoes into a serving bowl, and serve immediately.
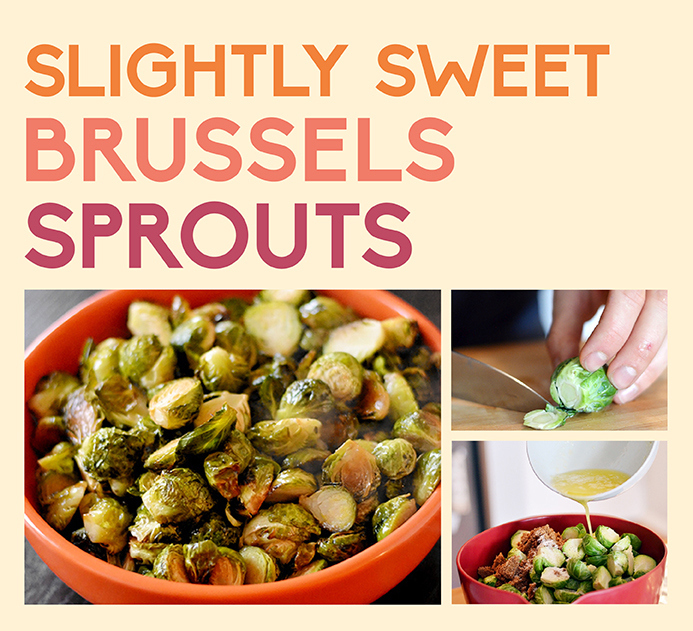
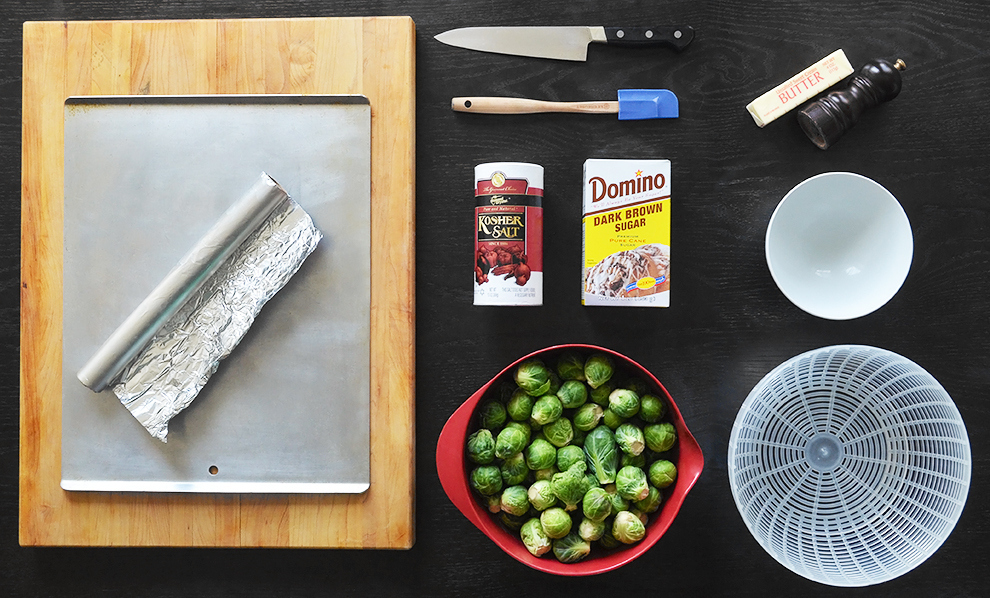
SLIGHTLY SWEET BRUSSELS SPROUTS
Serves 6-8
Recipe by Christine Byrne
INGREDIENTS
3 pounds Brussels sprouts
½ cup unsalted butter (1 stick)
⅓ cup dark brown sugar, packed
2 teaspoons kosher salt
freshly ground pepper, to taste
Equipment
Colander
Aluminum foil
Large baking sheet
Large mixing bowl
Microwave (OR, a small skillet or saute pan)
Small microwavable bowl
Rubber spatula or wooden spoon
Oven
INSTRUCTIONS
1. Preheat oven to 425°F. Line a large baking sheet with aluminum foil and set it aside.
2. Put the Brussels sprouts into a colander and rinse them under cold running water for about a minute. Shake the colander in the sink to get as much water off of the sprouts as possible. To cut the sprouts by, trim about a centimeter off of the root, then slice the sprouts in half. Put the halved sprouts in a large mixing bowl as you go.
3. If you have a microwave, put the butter in a small microwavable bowl and heat it on low (if your microwave has heat settings) for 1 minute, until it is completely melted. If you don't have a microwave, melt the butter in a small skillet or saucepan over low heat. Pour the melted butter over the Brussels sprouts in the mixing bowl, and add the brown sugar, salt and pepper. Mix the sprouts with a rubber spatula or wooden spoon so that they're coated evenly.
4. Spread the sprouts out over the foil-lined baking sheet, and roast at 425°F for 30 minutes, until they are cooked through but not mushy. Some of the leaves will turn dark brown and look almost burnt — that's fine, it means the sprouts will be crispy.
5. Take the sprouts out of the oven and slide them off the baking sheet into a serving bowl, and serve immediately.
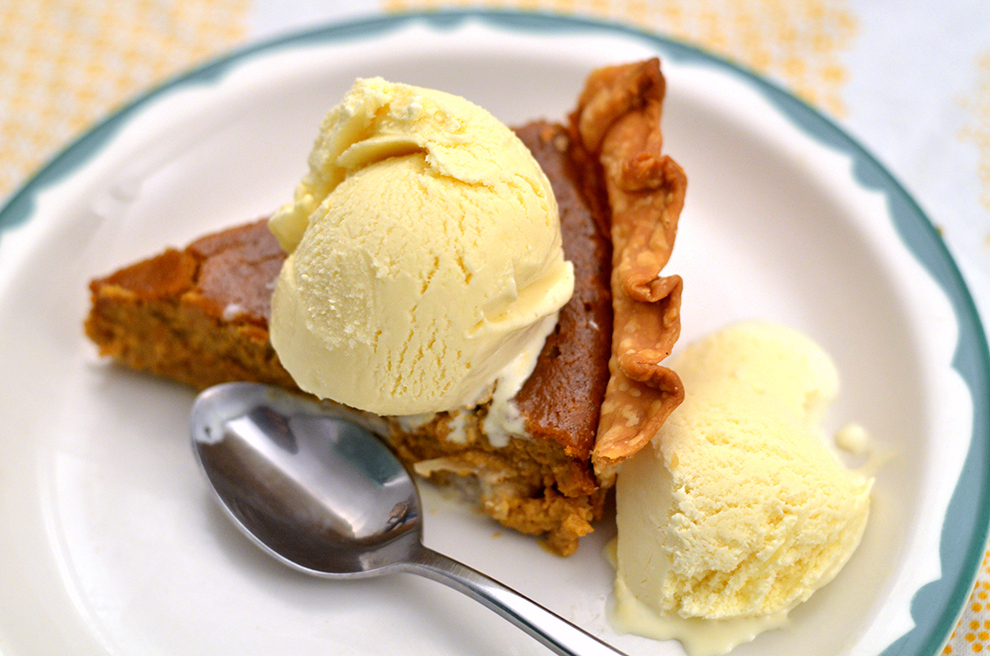
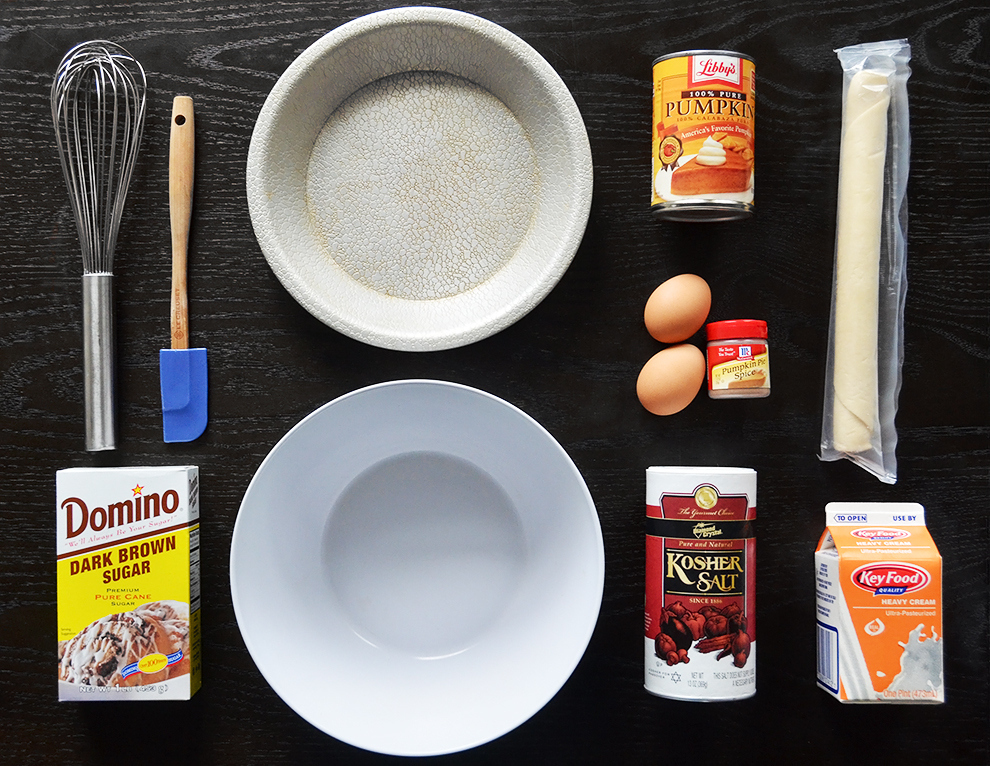
EASY PUMPKIN PIE
Serves 8
Recipe by Christine Byrne
INGREDIENTS
1 unbaked 9-inch (4-cup volume) pie shell, (found in the dairy case of the supermarket)
2 large eggs
¾ cup dark brown sugar, packed tightly
2 teaspoons pumpkin pie spice
1 15 oz. can pumpkin puree
1 ½ cups heavy cream
¼ teaspoon kosher salt
Vanilla ice cream or whipped cream (optional, for serving)
Equipment
1 9-inch pie dish (at least 2-inches deep, which equals a 4-cup volume)
Large mixing bowl
Large whisk
Oven
Pie cutter
INSTRUCTIONS
1. Preheat oven to 375°F.
2. Unroll the purchased pie crust and press it into an ungreased pie dish — you won't have to do any rolling, but make sure when you press the crust into the dish that the crust is centered and the sides of the crust are the same height all the way around. Crimp the edges of the crust by making little folds all the way around and pressing down. It doesn't have to be perfect, it just gives the pie a better shape.
3. In a large mixing bowl, beat the eggs with a whisk for about 20 seconds, until the whites and the yolk are completely combined. Add brown sugar, pumpkin pie spice, pumpkin puree, heavy cream, and salt, and whisk the mixture gently just until everything is combined and smooth. Pour the pumpkin mixture into the pie crust, making sure that the top of the pumpkin mixture is at least a centimeter below the top of the crust. Bake at 375°F for 50-60 minutes. The pie is done when a knife inserted in the center comes out clean, with no gooey pumpkin mixture sticking to it.
4. Let the pie cool completely before serving. Slice into eight equal slices with a pie cutter or a sharp knife, and serve each slice with a scoop of vanilla ice cream or whipped cream (optional).