

1. Fabric-Covered Flower Pots

You’ll need:
* Terra cotta flower pots
* Scraps of fabric to cover the pots
* Scissors
* Paint or foam brush
* Decoupage glue
* Washi tape
* Spray-on clear cover
* Potting soil
* Potting plants
Instructions:
1. For each, wrap fabric scrap around pot between the bottom and the rim.
2. Cut away excess fabric, leaving about 2 to 3 inches hanging from around the bottom. Set aside fabric.
3. Between the bottom and rim of each pot, apply a thin, even coat of decoupage glue about two inches wide.
4. Layer cut fabric onto the pot and smooth over the section of glue. Continue applying small even coats of decoupage and layering the fabric tautly over it until the pot is covered.
5. Fold down and glue excess fabric to the bottom of the pot.
6. Apply a top coat of decoupage glue on top of fabric and let dry completely.
7. Once dry, apply washi tape to the rim of each pot.
8. Spray clear cover on each pot to seal. Let dry.
9. Add soil and pot your new plants, then place them somewhere sunny that will make you happy!
See the inspiration here.
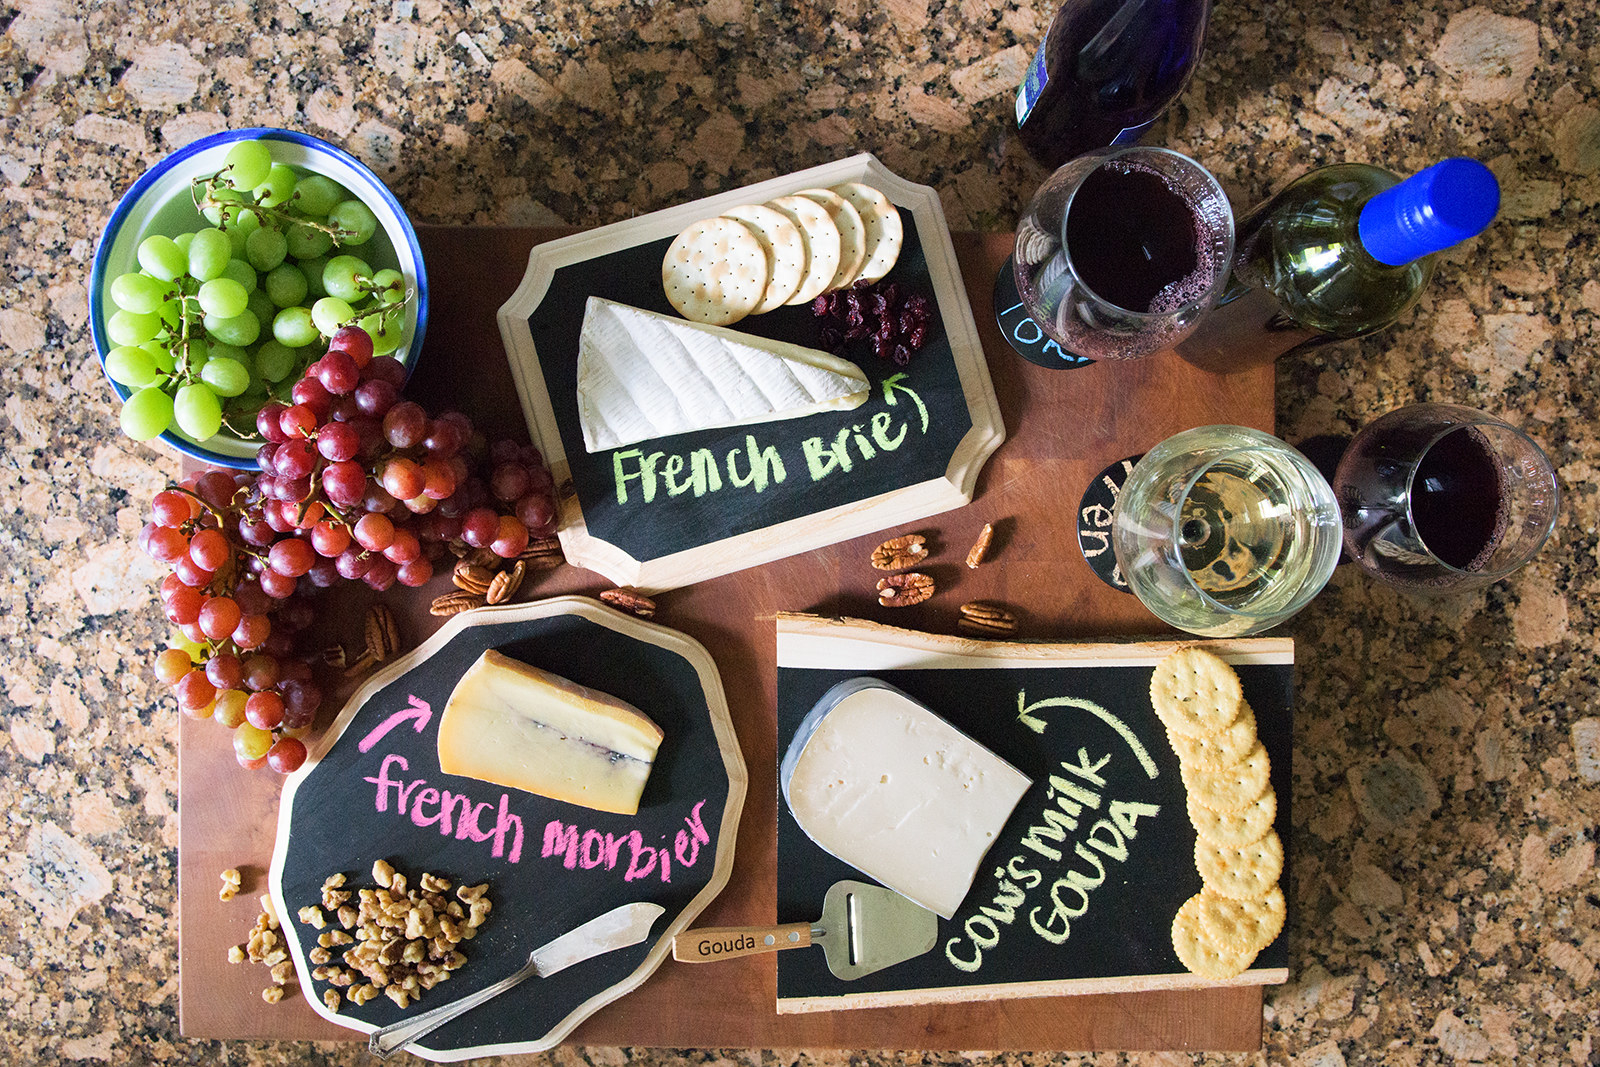
2. Chalkboard Cheese Trays and Wine Glasses
You’ll need:
* Paint and/or foam brush
* Black chalkboard paint
* Variety of wooden serving trays
* Wine glasses with stems
* Painter’s tape
* Colored chalk
Instructions:
1. Using paintbrush, apply an even layer of chalkboard paint to each tray and the bottom of each wine glass, using painter’s tape to ensure even borders around the edges.
2. Let dry and repeat with a second coat.
3. Once everything is dry, label the cheese trays and glasses with chalk.
4. Set the scene to practice for your next party!
See the inspiration here.
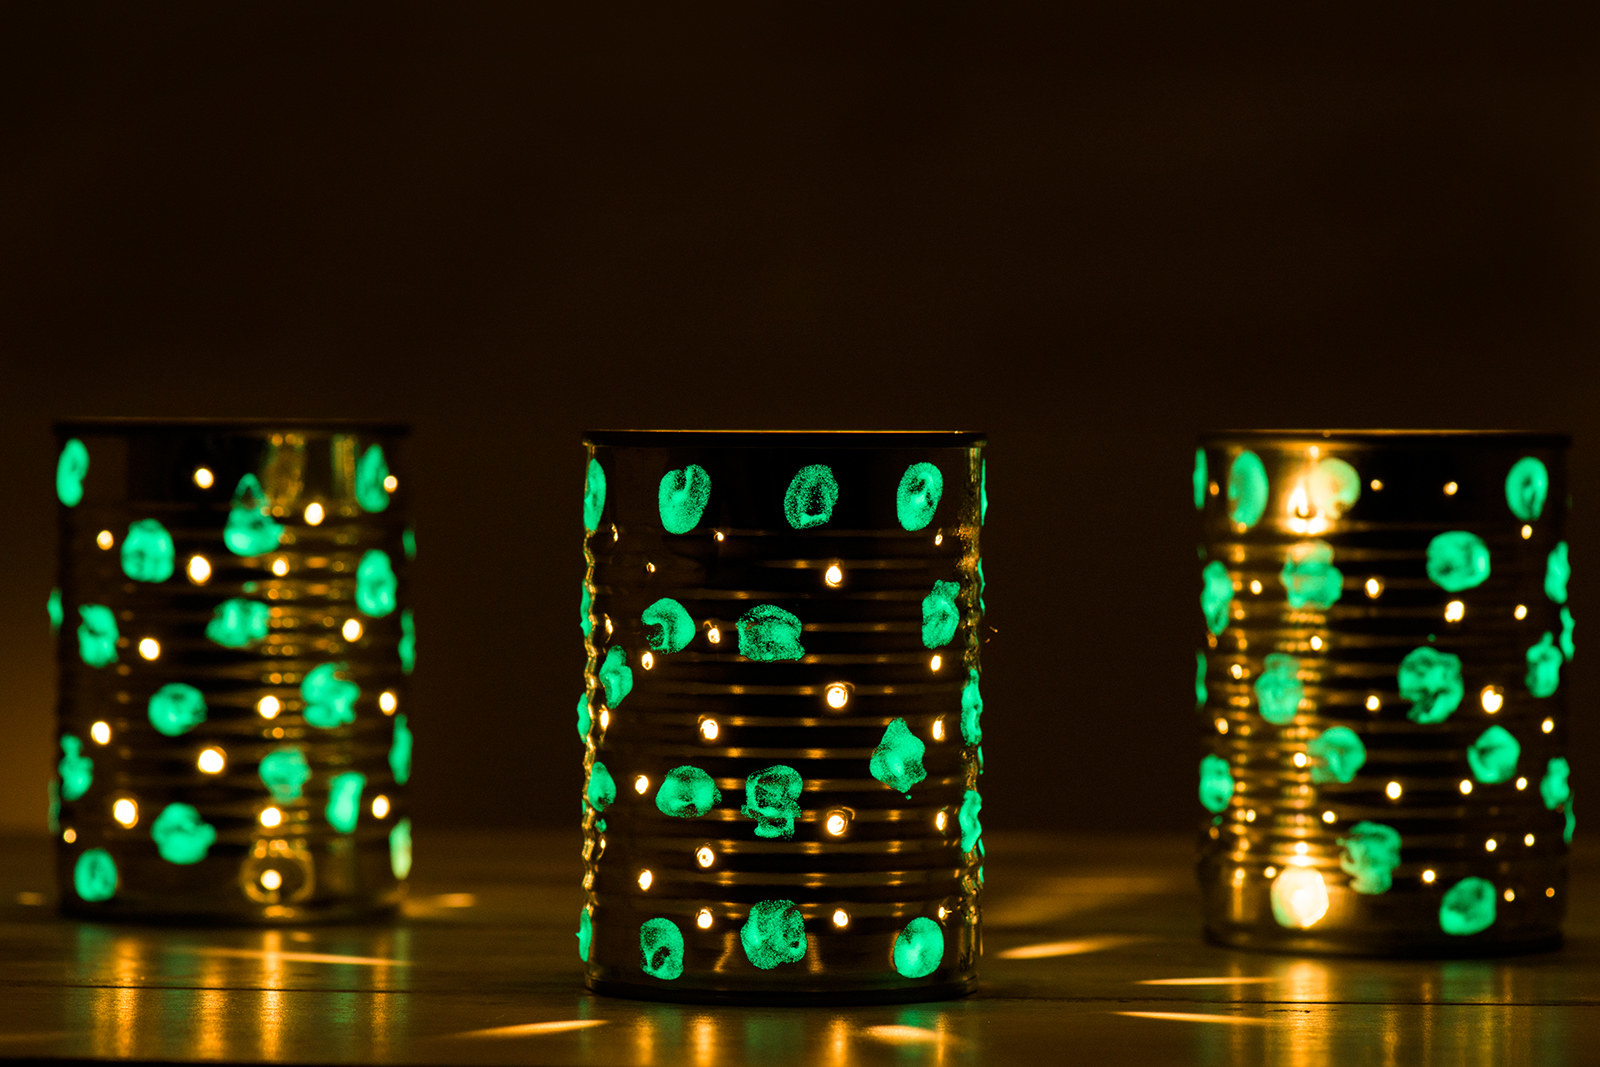
3. Glow-in-the-Dark Tin-Can Lanterns
You’ll need:
* Tin cans
* Water
* Towel
* Permanent marker
* Screw
* Hammer
* Pencil with eraser
* Fluorescent paint
* Small candles
Instructions:
1. Clean out cans (don’t forget to remove the labels!). Fill with water, then place in the freezer.
2. Once the water has frozen solid, remove cans from the freezer (do this one by one) and wrap the first can in a towel. (The ice and towel will help keep it steady while you work.)
3. If you want to create a pattern to follow, use a permanent marker to do so, marking on the can where you want holes to go.
4. Grip the screw and gently tap it with the hammer until it just goes through the can. Repeat until you’ve covered the full surface.
5. Run the can under warm to hot water to remove ice. Dry the can.
6. Dip the pencil eraser in fluorescent paint, then dab paint onto the can in between holes.
7. Place candle inside the can and set on a safe surface.
8. Repeat for each can and watch them glow!
See the inspiration here.
4. Painted Key Wind Chime

You’ll need:
* Keys (vintage, modern, big, small — your pick!)
* Spray paint in your choice of colors
* Wood embroidery hoop
* Lots of twine (we used a 300-foot roll and saved the leftovers)
* Small piece of wire
Instructions:
1. Clean and spray paint your keys. Use any one color you want, or mix it up (we’re using brushed metallic colors).
2. Wrap embroidery hoop with twine until completely covered.
3. Tie a new piece of twine to each key. You can choose to keep every piece the same length or alternate lengths.
4. Tie the other end of each key twine to the embroidery hoop.
5. Take at least three more pieces of twine (of the same length) and tie them around the embroidery hoop. Connect them at the top and wrap tightly with wire to create a point of hanging.
6. Hang your new wind chime somewhere fun!
See the inspiration here.
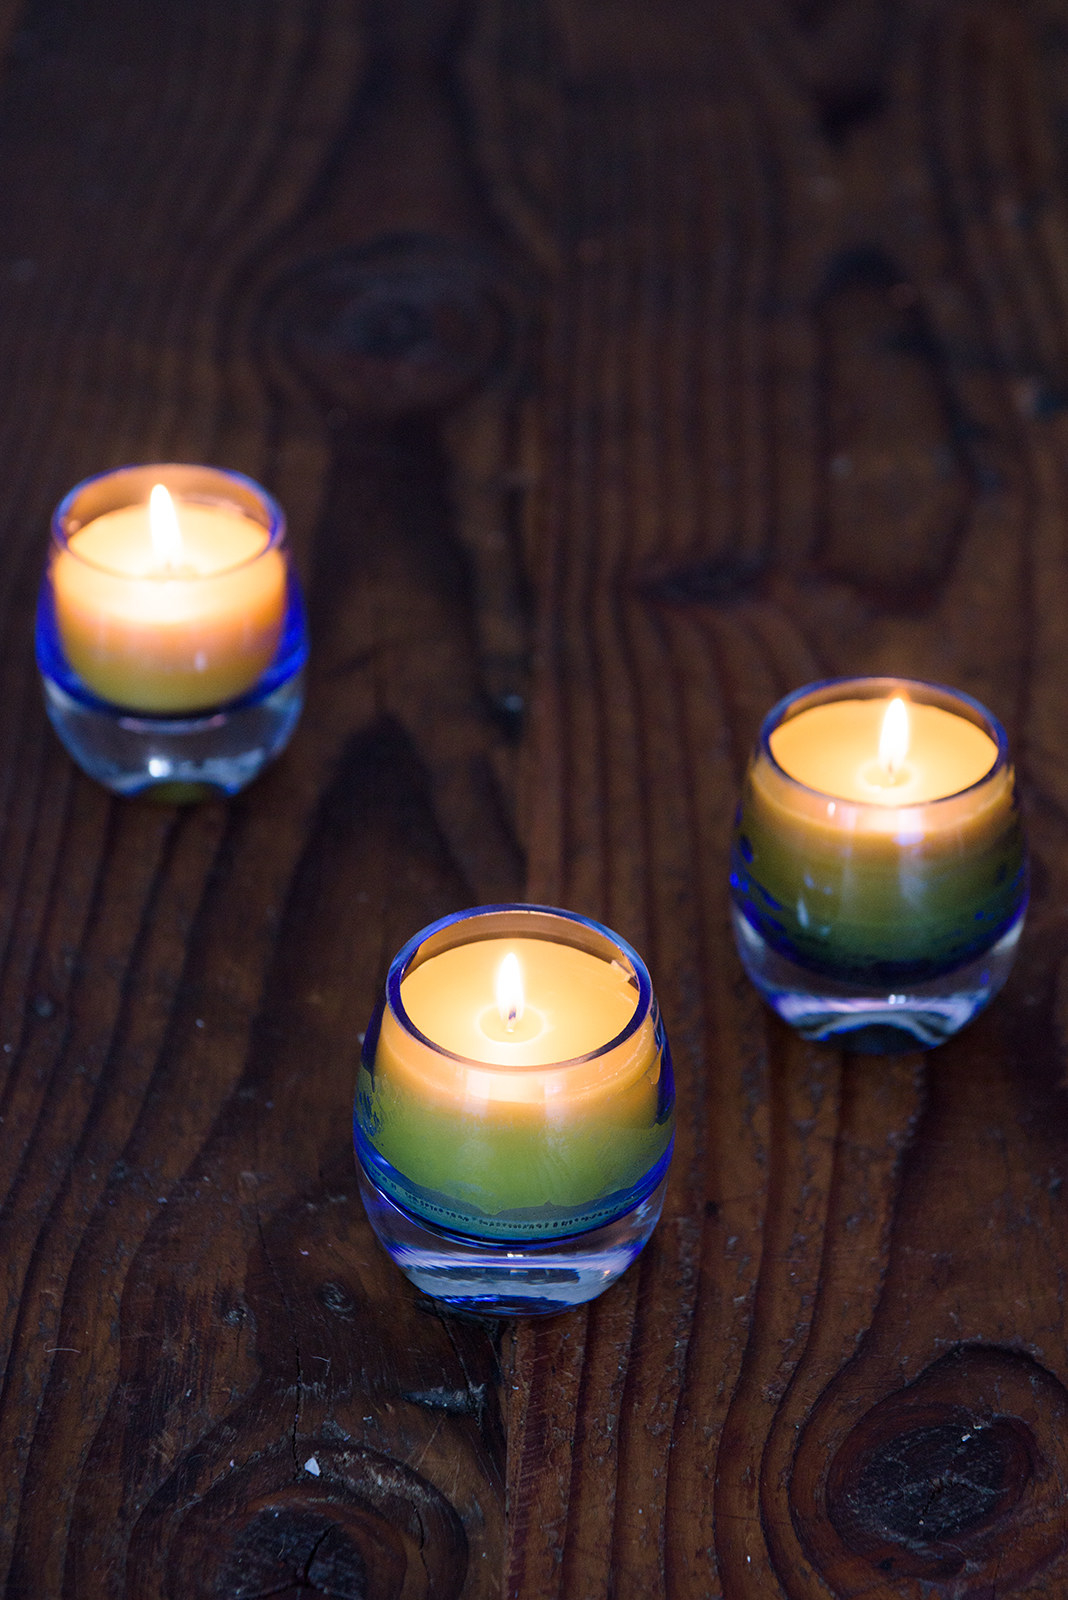
5. Bug-Repellant Candles
You’ll need:
* Knife
* 1 lb raw beeswax
* Double boiler (cooking pot + heat-safe bowl)
* Water
* Mix of insect-repelling essential oils (we’re using rosemary, basil, and lavender)
* Glass measuring cup with spout
* 4–6 votives
* Long, pre-waxed wicks
Instructions:
1. Use the knife to break beeswax into pieces (the smaller the better).
2. Place wax pieces in a heat-safe bowl, then place bowl in a pot of water.
3. Heat the water on low until the beeswax melts. Be careful to avoid getting any water in the beeswax.
4. Stir in drops of the essential oils — more than you suspect you should. (Make sure you can smell the oils over the beeswax.)
5. Pour the melted mixture into measuring cup. From there, pour it evenly and slowly (so the glass doesn’t break) into votives.
6. When the wax cools and a top layer of skin begins to take shape, place one of the pre-waxed wicks in the middle.
7. Once the wax has cooled and hardened completely, cut the wick to about ¼ inch.
8. Place your new candles outside and keep those bugs away!
See the inspiration here.
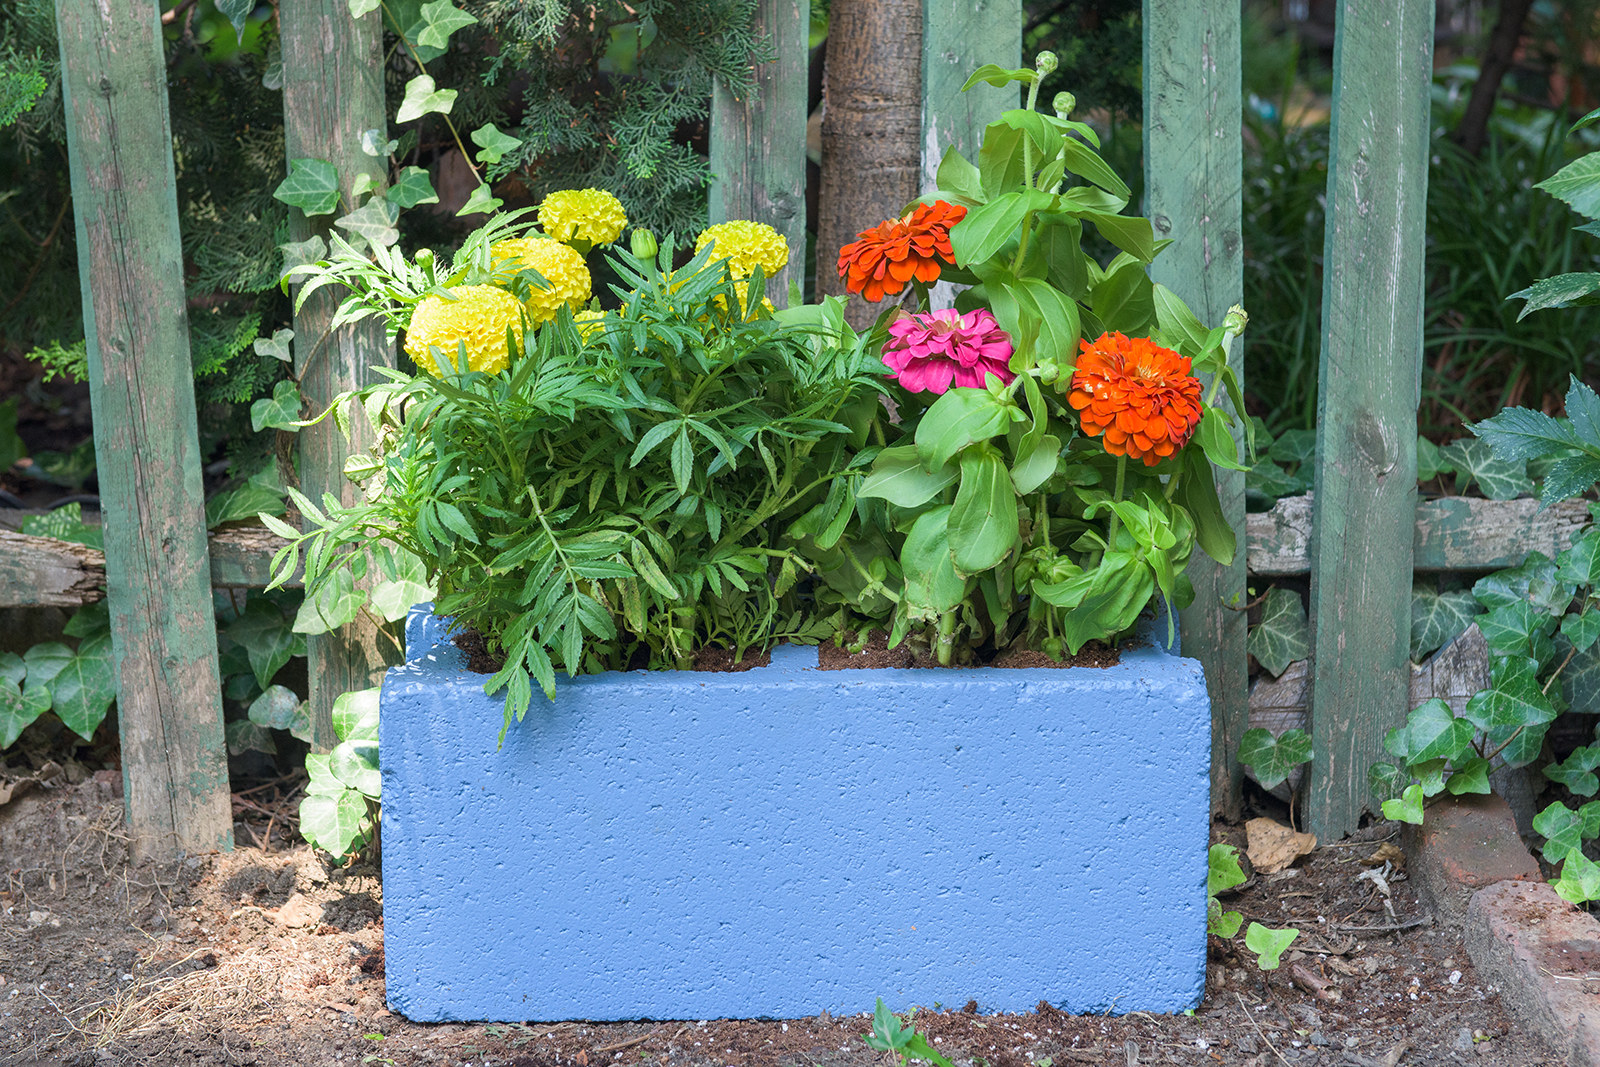
6. Painted Cinderblock Planter
You’ll need:
* Cinderblock
* Drop cloth or old newspaper
* Wire brush
* Concrete sealer or primer
* Exterior masonry paint
* Small paint roller and/or paint brush
* Potting soil
* Flowers or succulents
Instructions:
1. With the cinderblock on a drop cloth or old newspaper, use a wire brush to clean and smooth the surface. Afterward, discard any debris.
2. Apply concrete primer, and let it dry completely for however long the directions say (typically four hours, but maybe longer).
3. Once the primer is dry, paint your first layer of masonry paint. Let dry completely.
4. Paint a second layer and let dry. Repeat if necessary.
5. When paint is completely dry, place the cinderblock in your desired location.
6. Fill the open holes with potting soil, pot your plants, and take in the beauty!
See the inspiration here.
7. Summer-Themed Doormat

You’ll need:
* Printer
* Paper
* A summery image (we’re using an anchor, but you could try a beach ball, sunglasses, sun, etc.)
* Masking tape or push pins
* Manilla file folder
* Precision or hobby knife
* Doormat
* Foam brush
* Acrylic paint(s)
Instructions:
1. Print out your chosen image, then tape it to a manilla file folder.
2. Use your precision knife to cut out the image from the folder, not forgetting to remove any white or negative space existing within the image.
3. When your image is cut, use masking tape to secure the folder snug against the doormat, making sure to place the image where you’ll want it.
4. Use the foam brush to apply paint, and let it dry completely.
5. Welcome friends over for a summer party!
See the inspiration here.
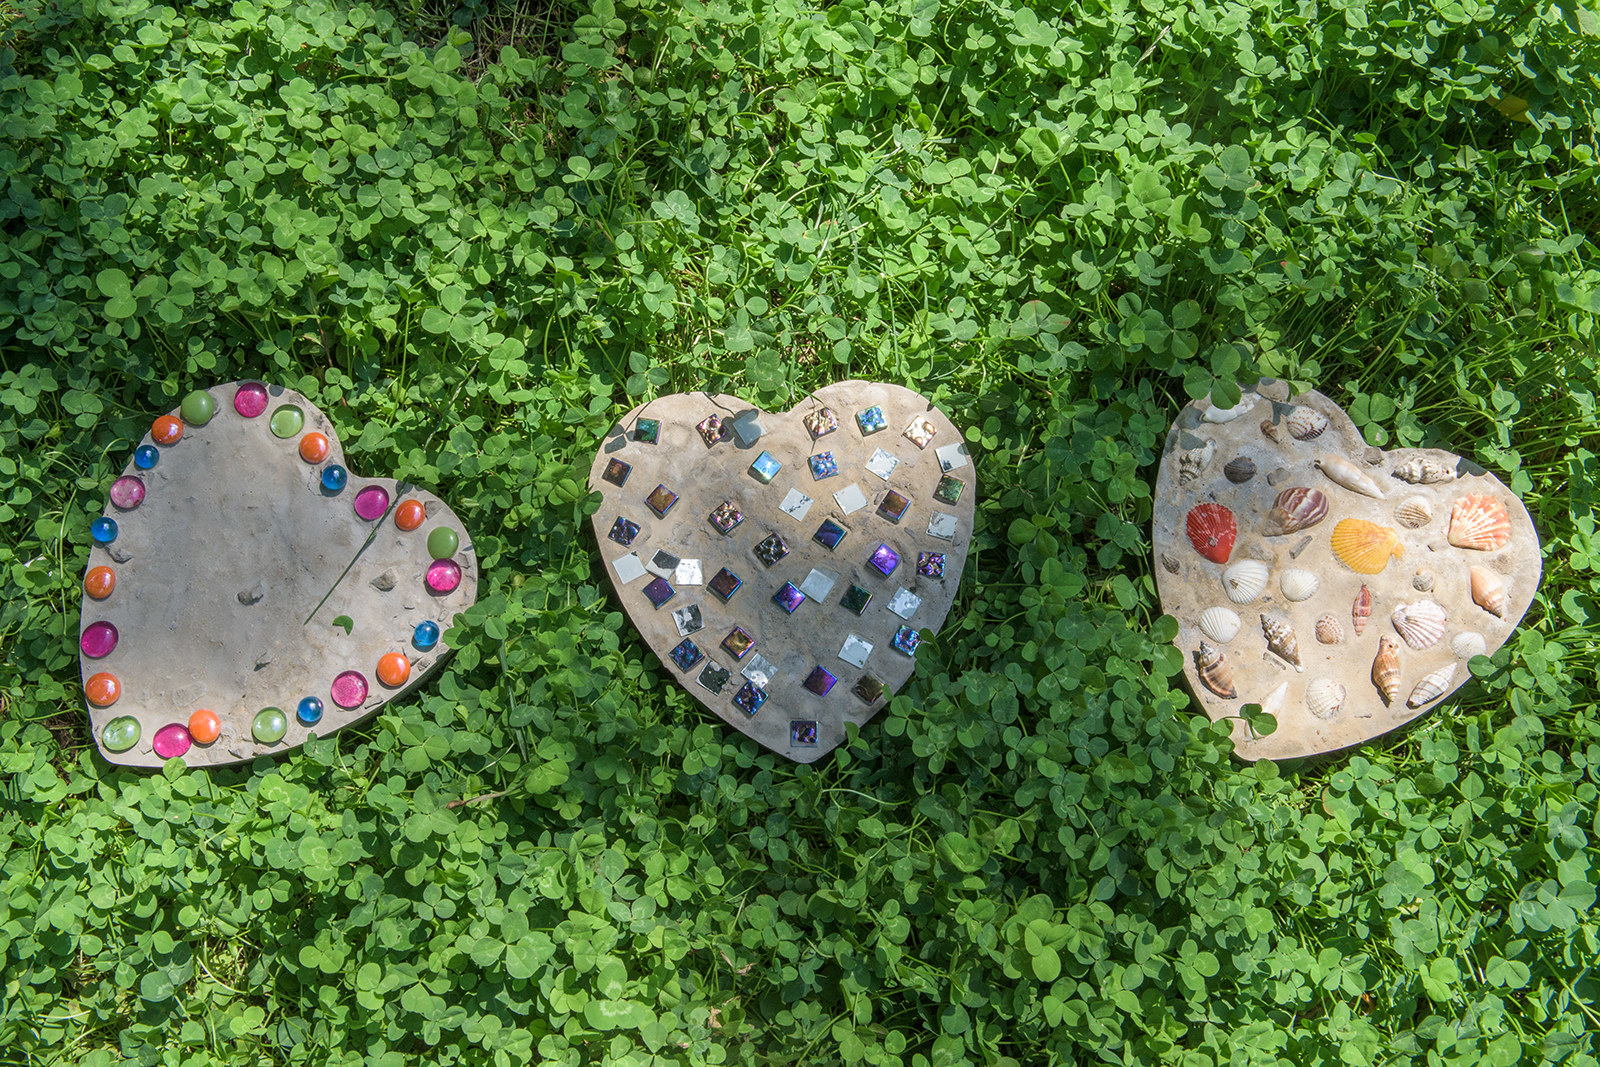
8. Garden Stepping Stones
You’ll need:
* Cake pans of any shape (circle, heart, paw print — whatever you have)
* Vegetable oil
* Cutting pliers
* Wire mesh
* Rubber gloves
* Quick-setting concrete
* Old bucket
* Water
* Decorative glass, marbles, broken decorative plates, etc.
Instructions:
1. Coat pans with vegetable oil. Use your hands to make sure the entire surface is covered.
2. Cut pieces of wire mesh so they will fit (with space leftover) in the pan.
3. Wearing rubber gloves, pour dry concrete mix into cake pan to fill it about halfway, then add water from bucket until it's like a very thick soup. (If in doubt, follow the instructions on the bag to mix your concrete.)
4. Place the piece of wire mesh into the concrete.
5. Add more concrete and water until the pan is full.
6. Place your decorative pieces into the concrete so they're flush with the surface.
7. Allow to cure for at least two days before removing stones from the pans.
8. Give your stepping stones a new home and enjoy your fancy garden!
See the inspiration here.
No DIY fails here — only wins! And the biggest win of all: When you use the Chase Freedom Unlimited℠ card to get your DIY supplies, you can earn unlimited 1.5% cash back on everything you buy.
All images by Lauren Zaser / © BuzzFeed
Header design via Thinkstock
Take this survey. It's almost like taking a quiz!