

Here are the tools you'll need:
- Base coat
- Black nail polish (we used Essie Licorice)
- Matte top coat (we used OPI Matte Top Coat)
- Metallic nail polish (we used Orly Rage)
- (optional) Pre-glued nails (we used Patricia Inspire nails)
You can paint directly on your natural nail, or you can use pre-glued nails, which can make art much easier. Follow these instructions if you're going to use pre-glued nails.
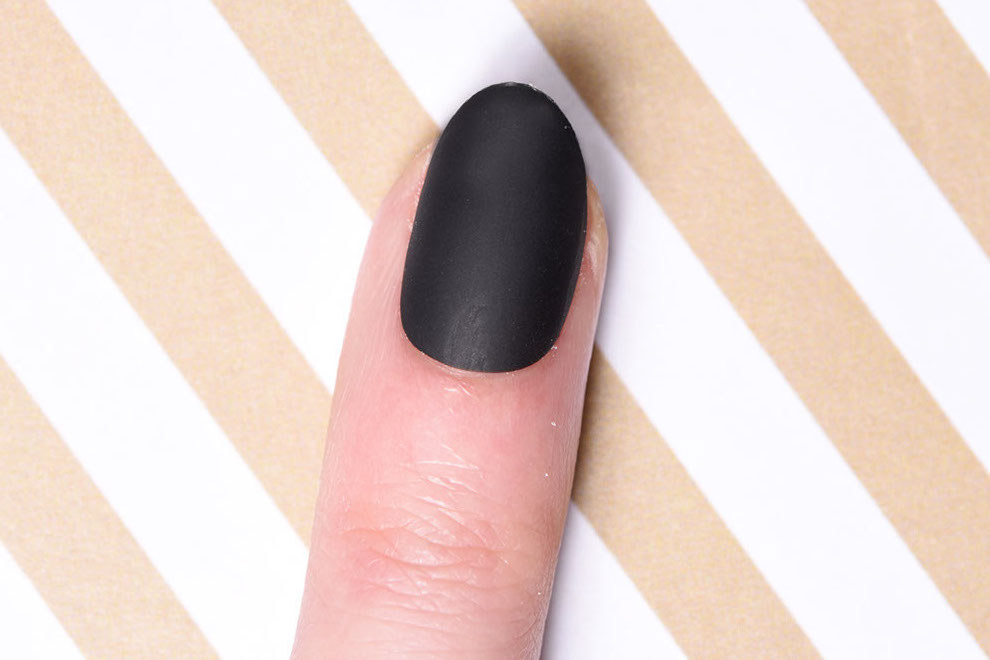
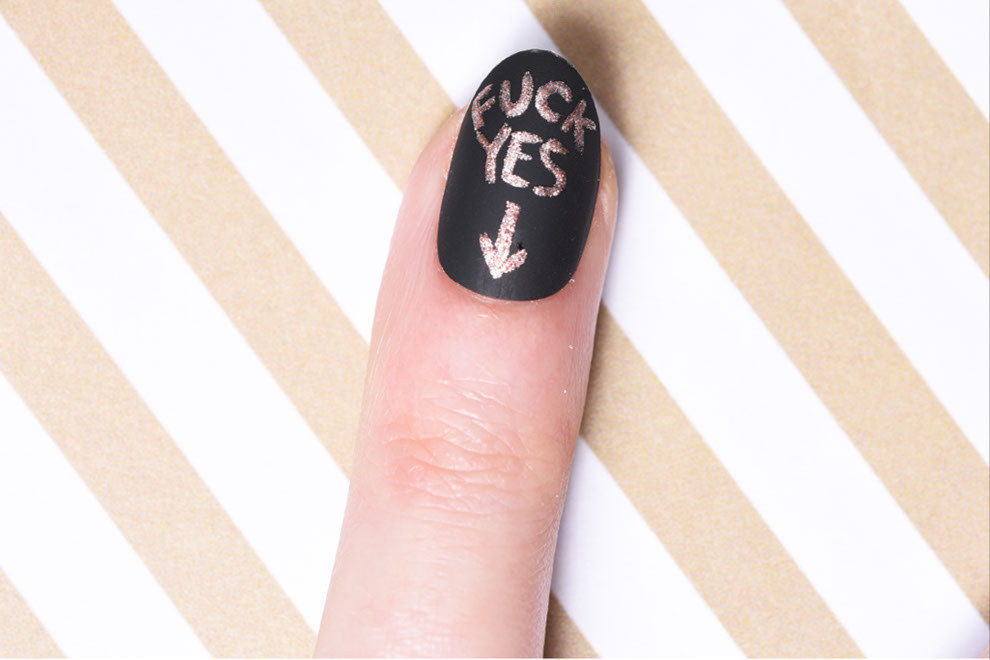
Step 1: Paint your nails with a clear base coat followed by two coats of black polish, then one coat of matte top coat.
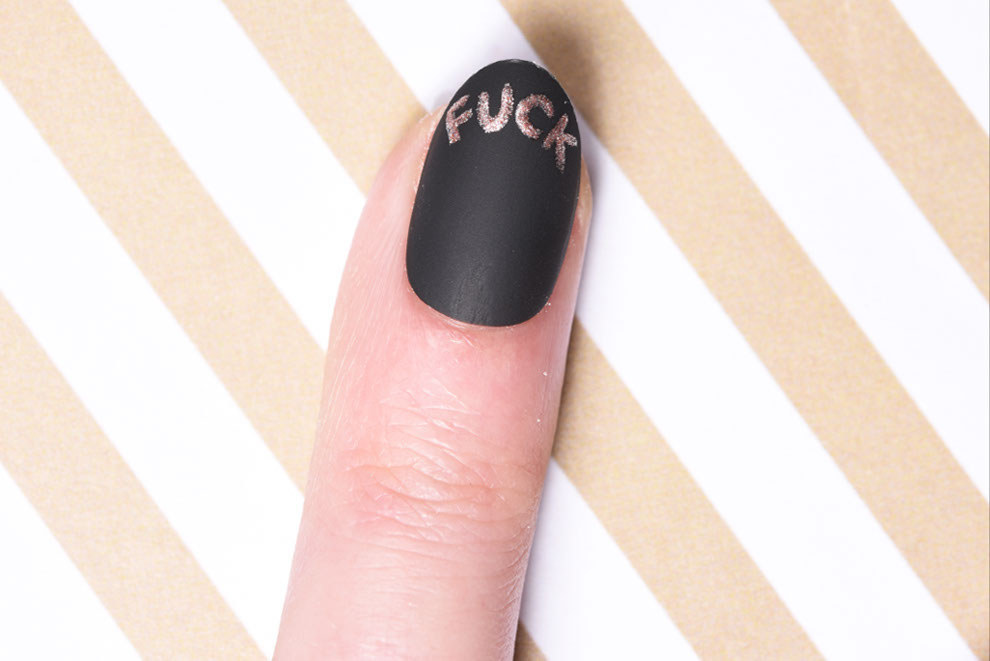
Step 2: Dip your striper brush into the metallic polish and start writing F-U-C-K on the top of your ring finger.
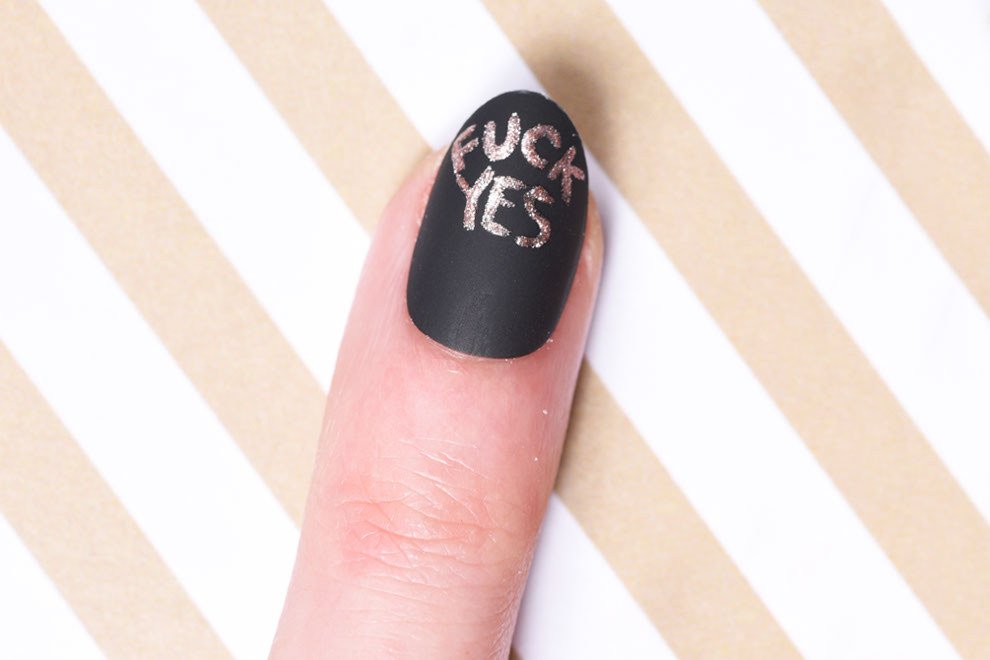
Step 3: Continuing with the metallic polish on the striper brush, paint the letters Y-E-S in the center of your ring finger nail.
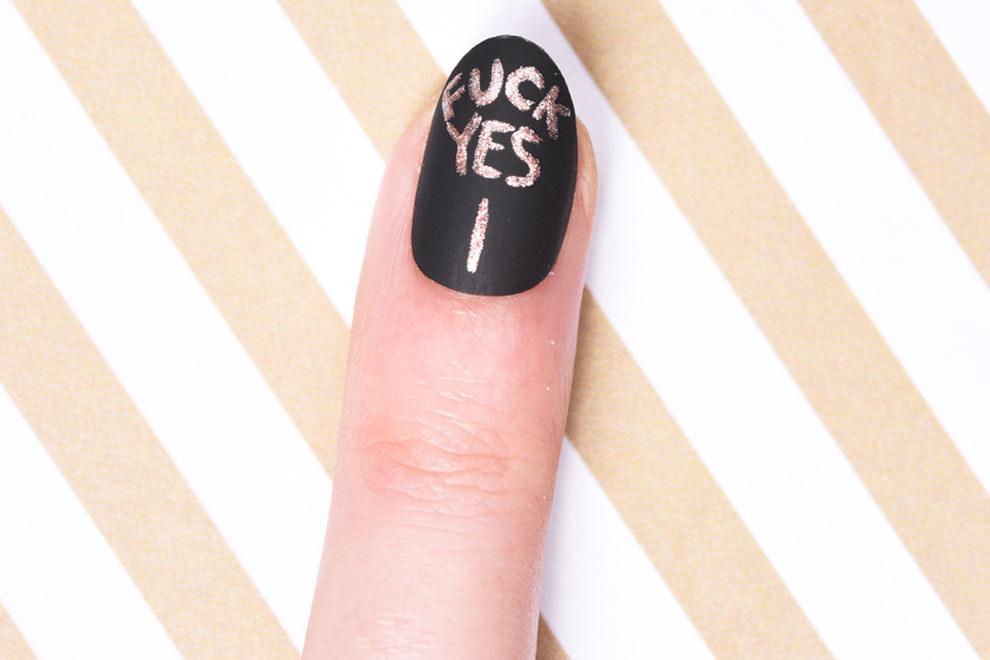
Step 4: Paint a vertical metallic line underneath the word "yes," stopping above the cuticle.
Step 5: Finish painting the arrow with one short line angling up from either side of the vertical line.
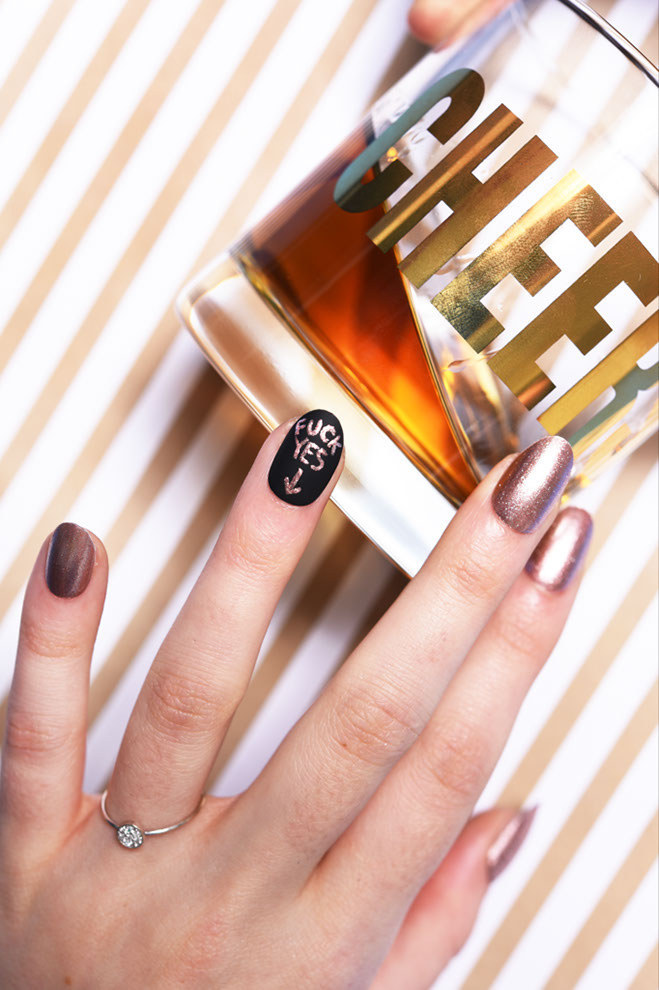
Step 6 (optional): Use your badass nail art to announce your engagement via social media.
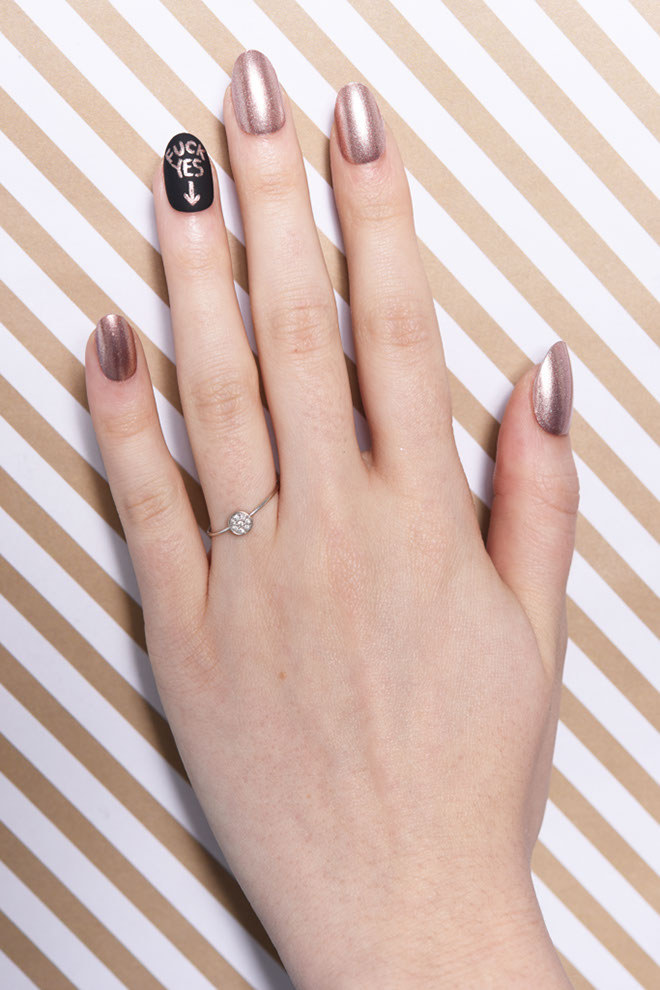
Then, celebrate your face off.
Find more wedding nail art ideas here.
Nail Artist: Miss Pop Nails
Patricia Inspire Nails were provided to BuzzFeed Life free of charge.
"Cheers" glass was provided to BuzzFeed Life free of charge