Here are two examples of Tap On Image quizzes that we love, for some ~inspo~:
➡️Only People Who Are Great At Remembering Characters Can Correctly Identify All 15 Of These Disney Siblings by Contributor saraspice
➡️Only An Expert In Geography And Food Will Ace This Quiz
➡️This "Spot The Difference" Disney Dress Quiz Is Almost Impossible To Beat
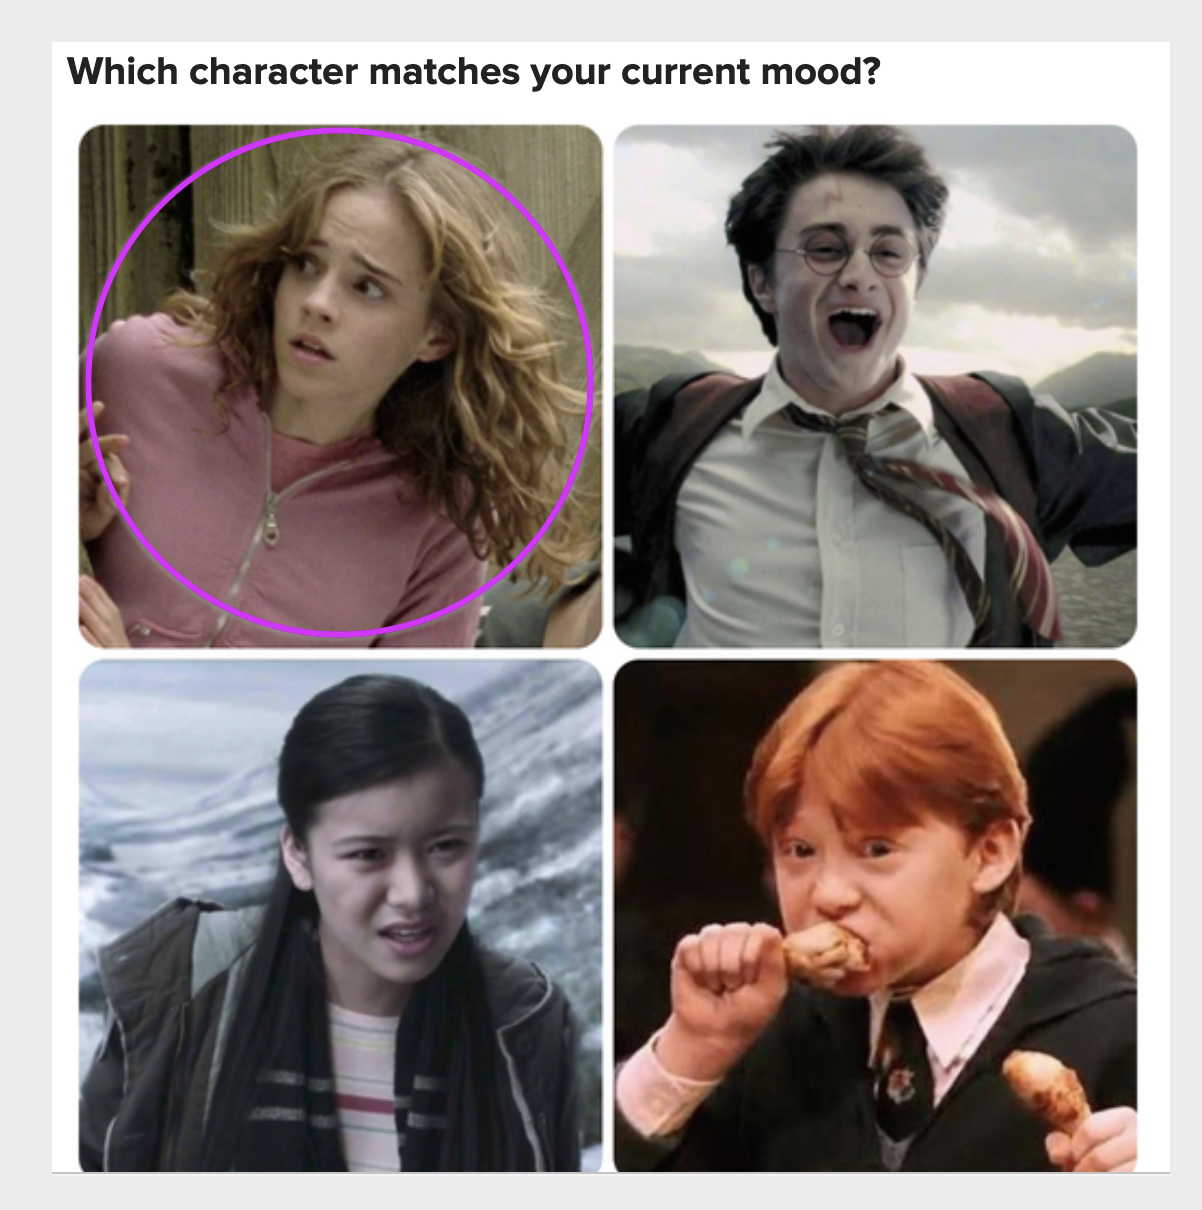
Here's an example of a Tap On Image quiz question, and we'll share all the deets about how to make this type of quiz below 🎉:

1. First, you'll pick the ⭐️type⭐️ of quiz you want to make. Open a draft, and in your first subbuzz hover over the "Quiz" button. Select "Tap On Image." Whether it's a trivia or personality quiz, we'll explain how to create both!
We'll begin with a step-by-step for Trivia Tap On Image quizzes. To start, you'll add your questions.
2. In the text box provided you'll add your question, and then upload your image by dropping it or clicking the image box and uploading it.
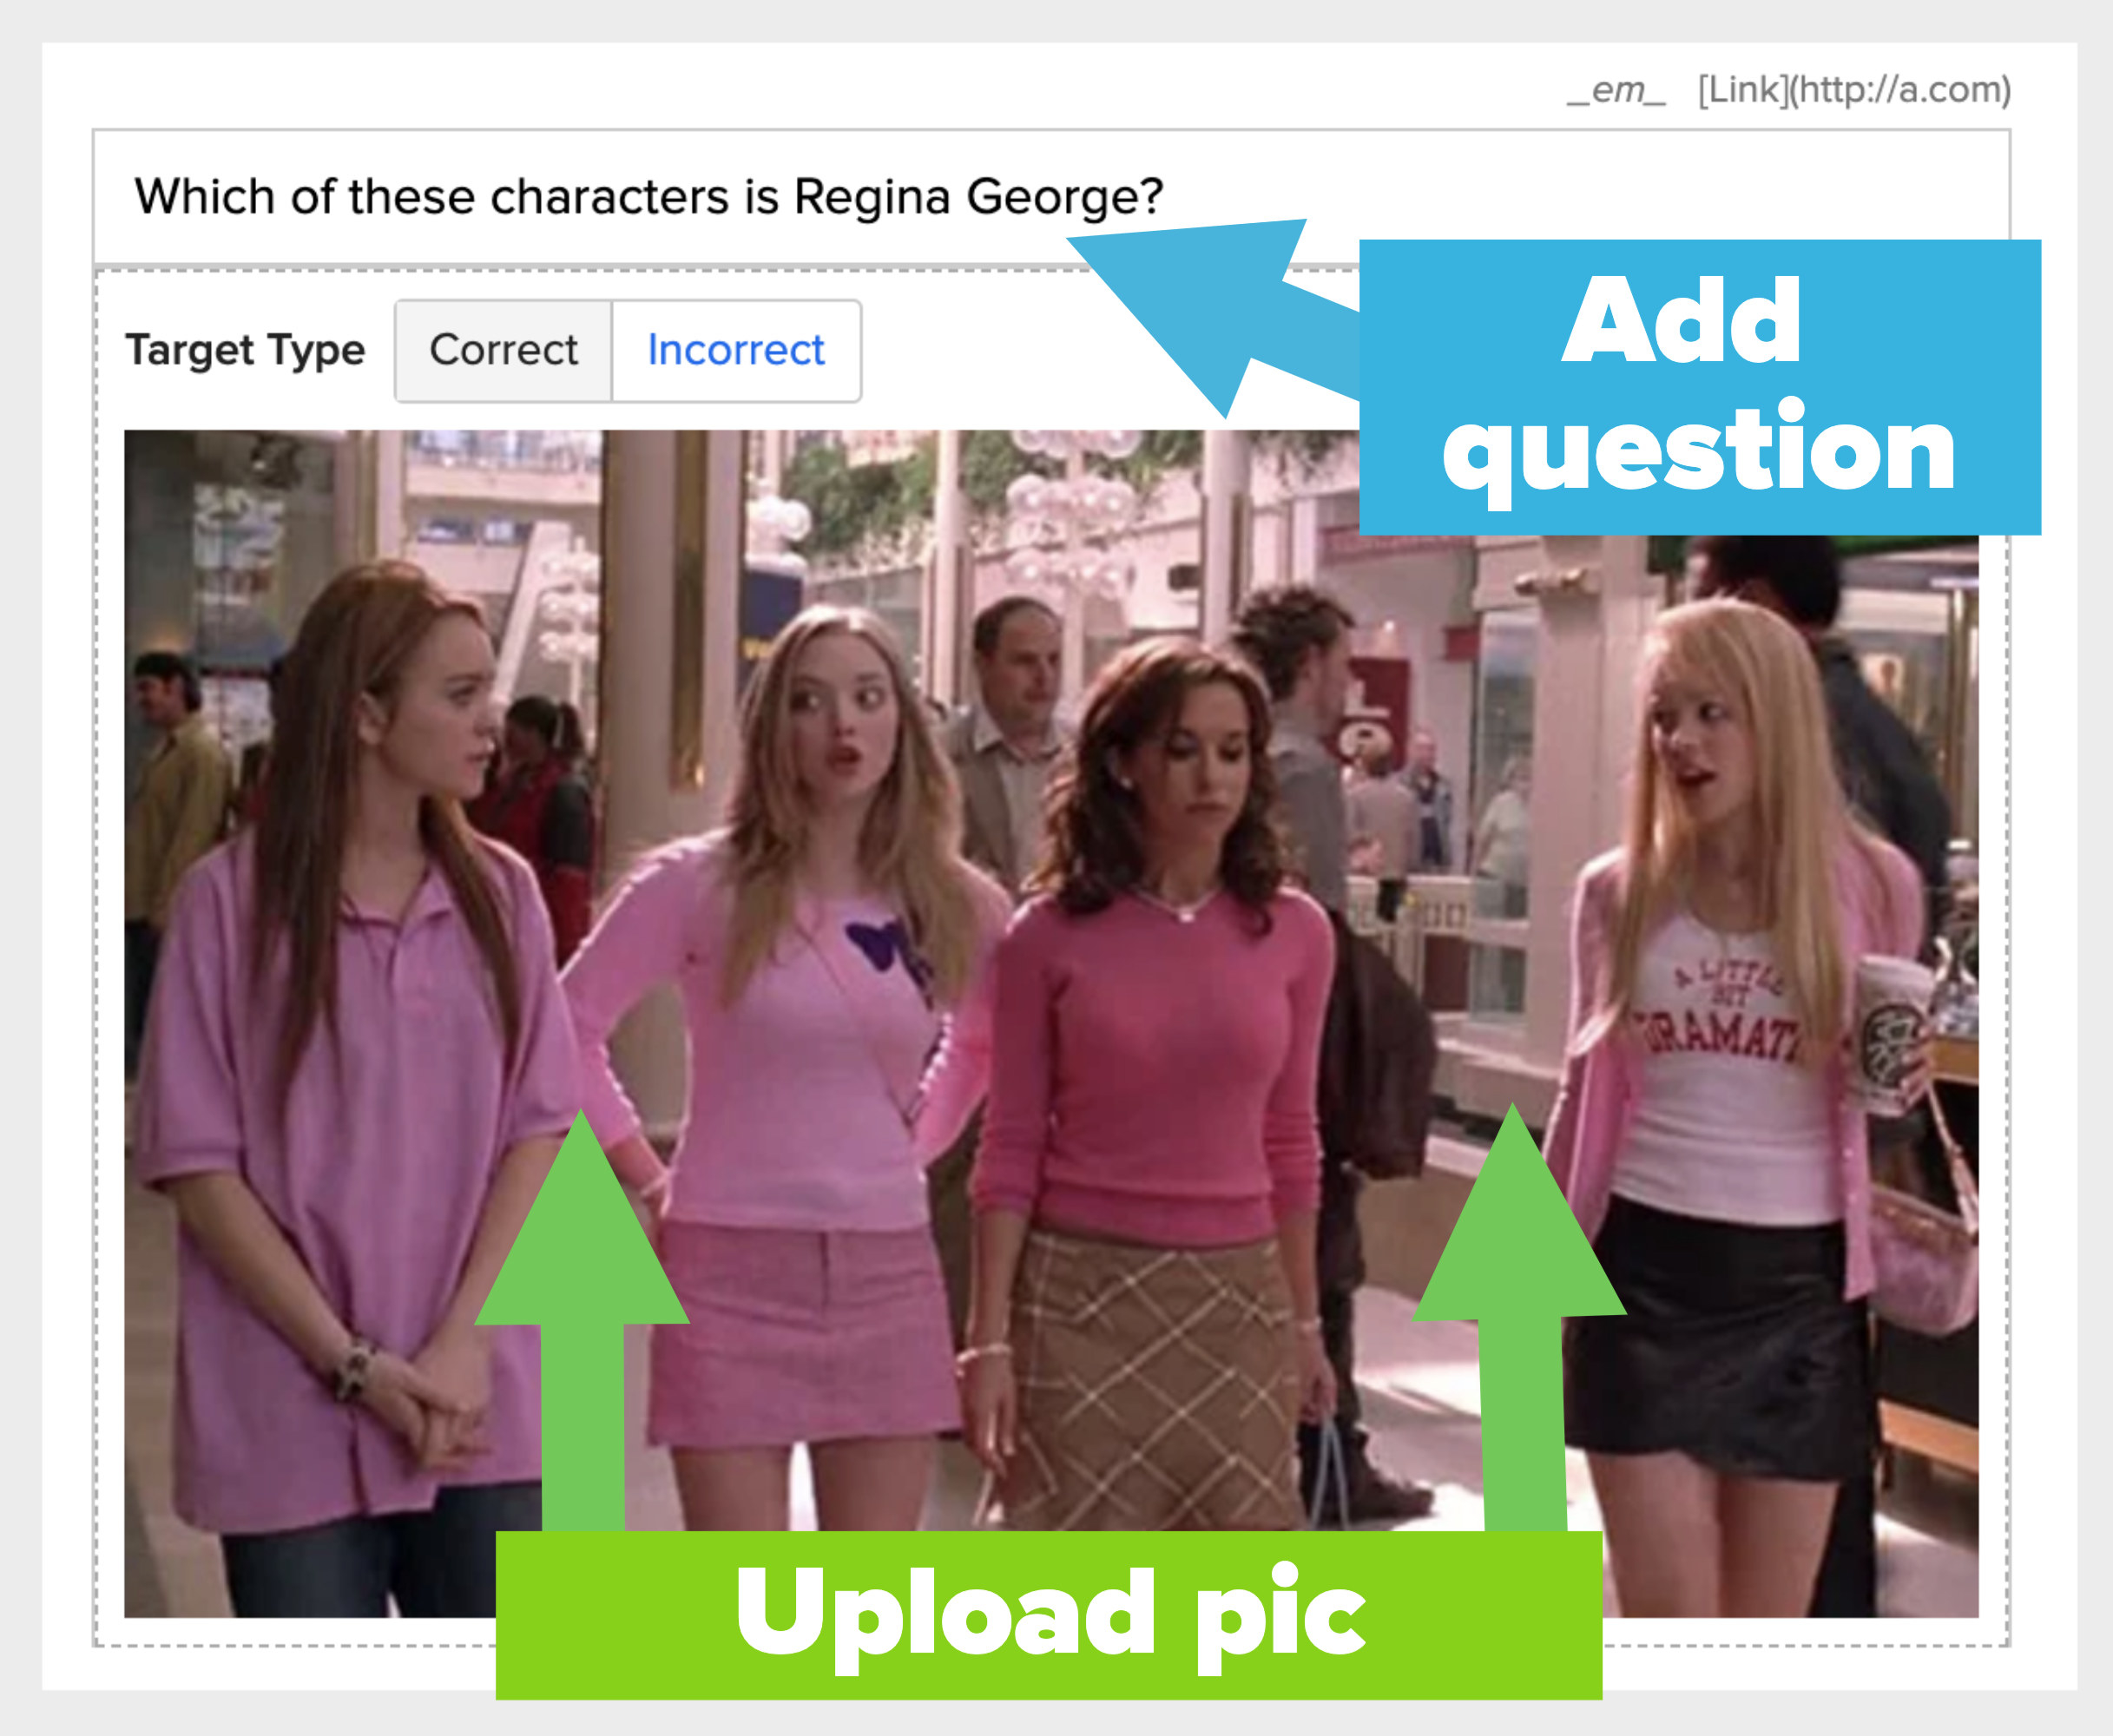
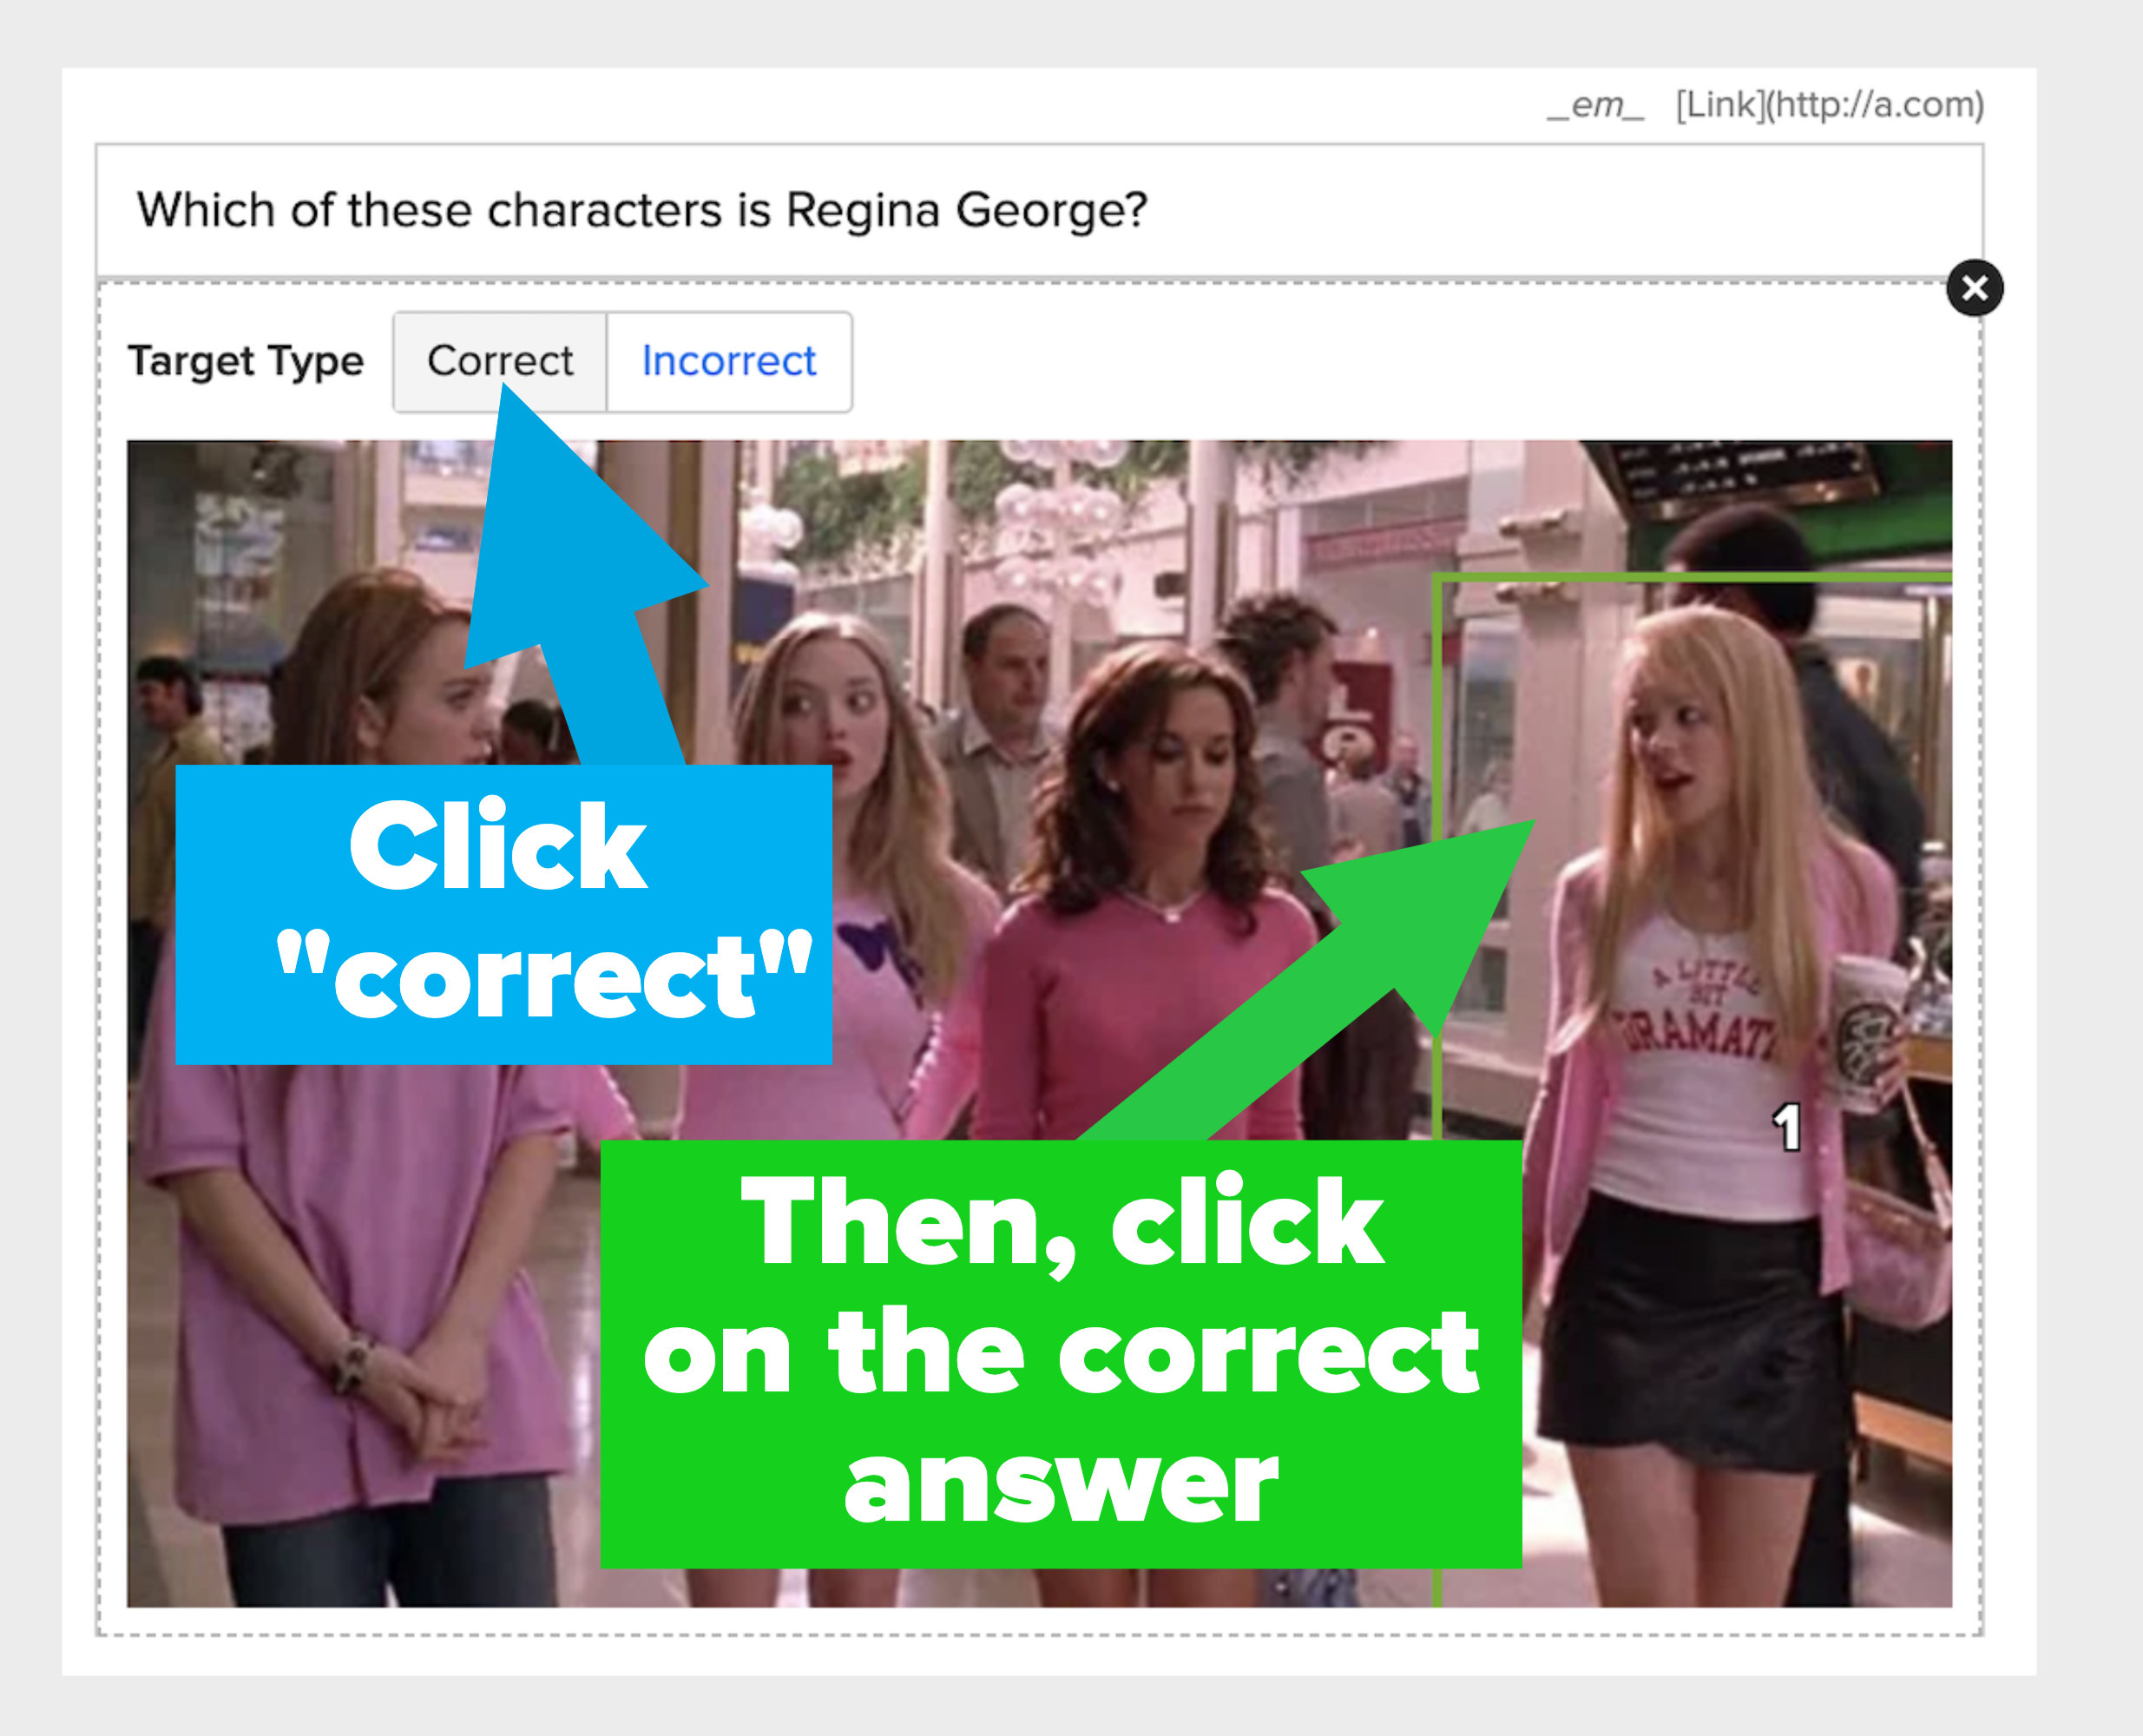
3. Click the "correct" box, then click on the correct answer. The box that pops up is called the "reveal." You can adjust this shape that automatically appears, and can also change the shape and color, which is further explained in Step 5.
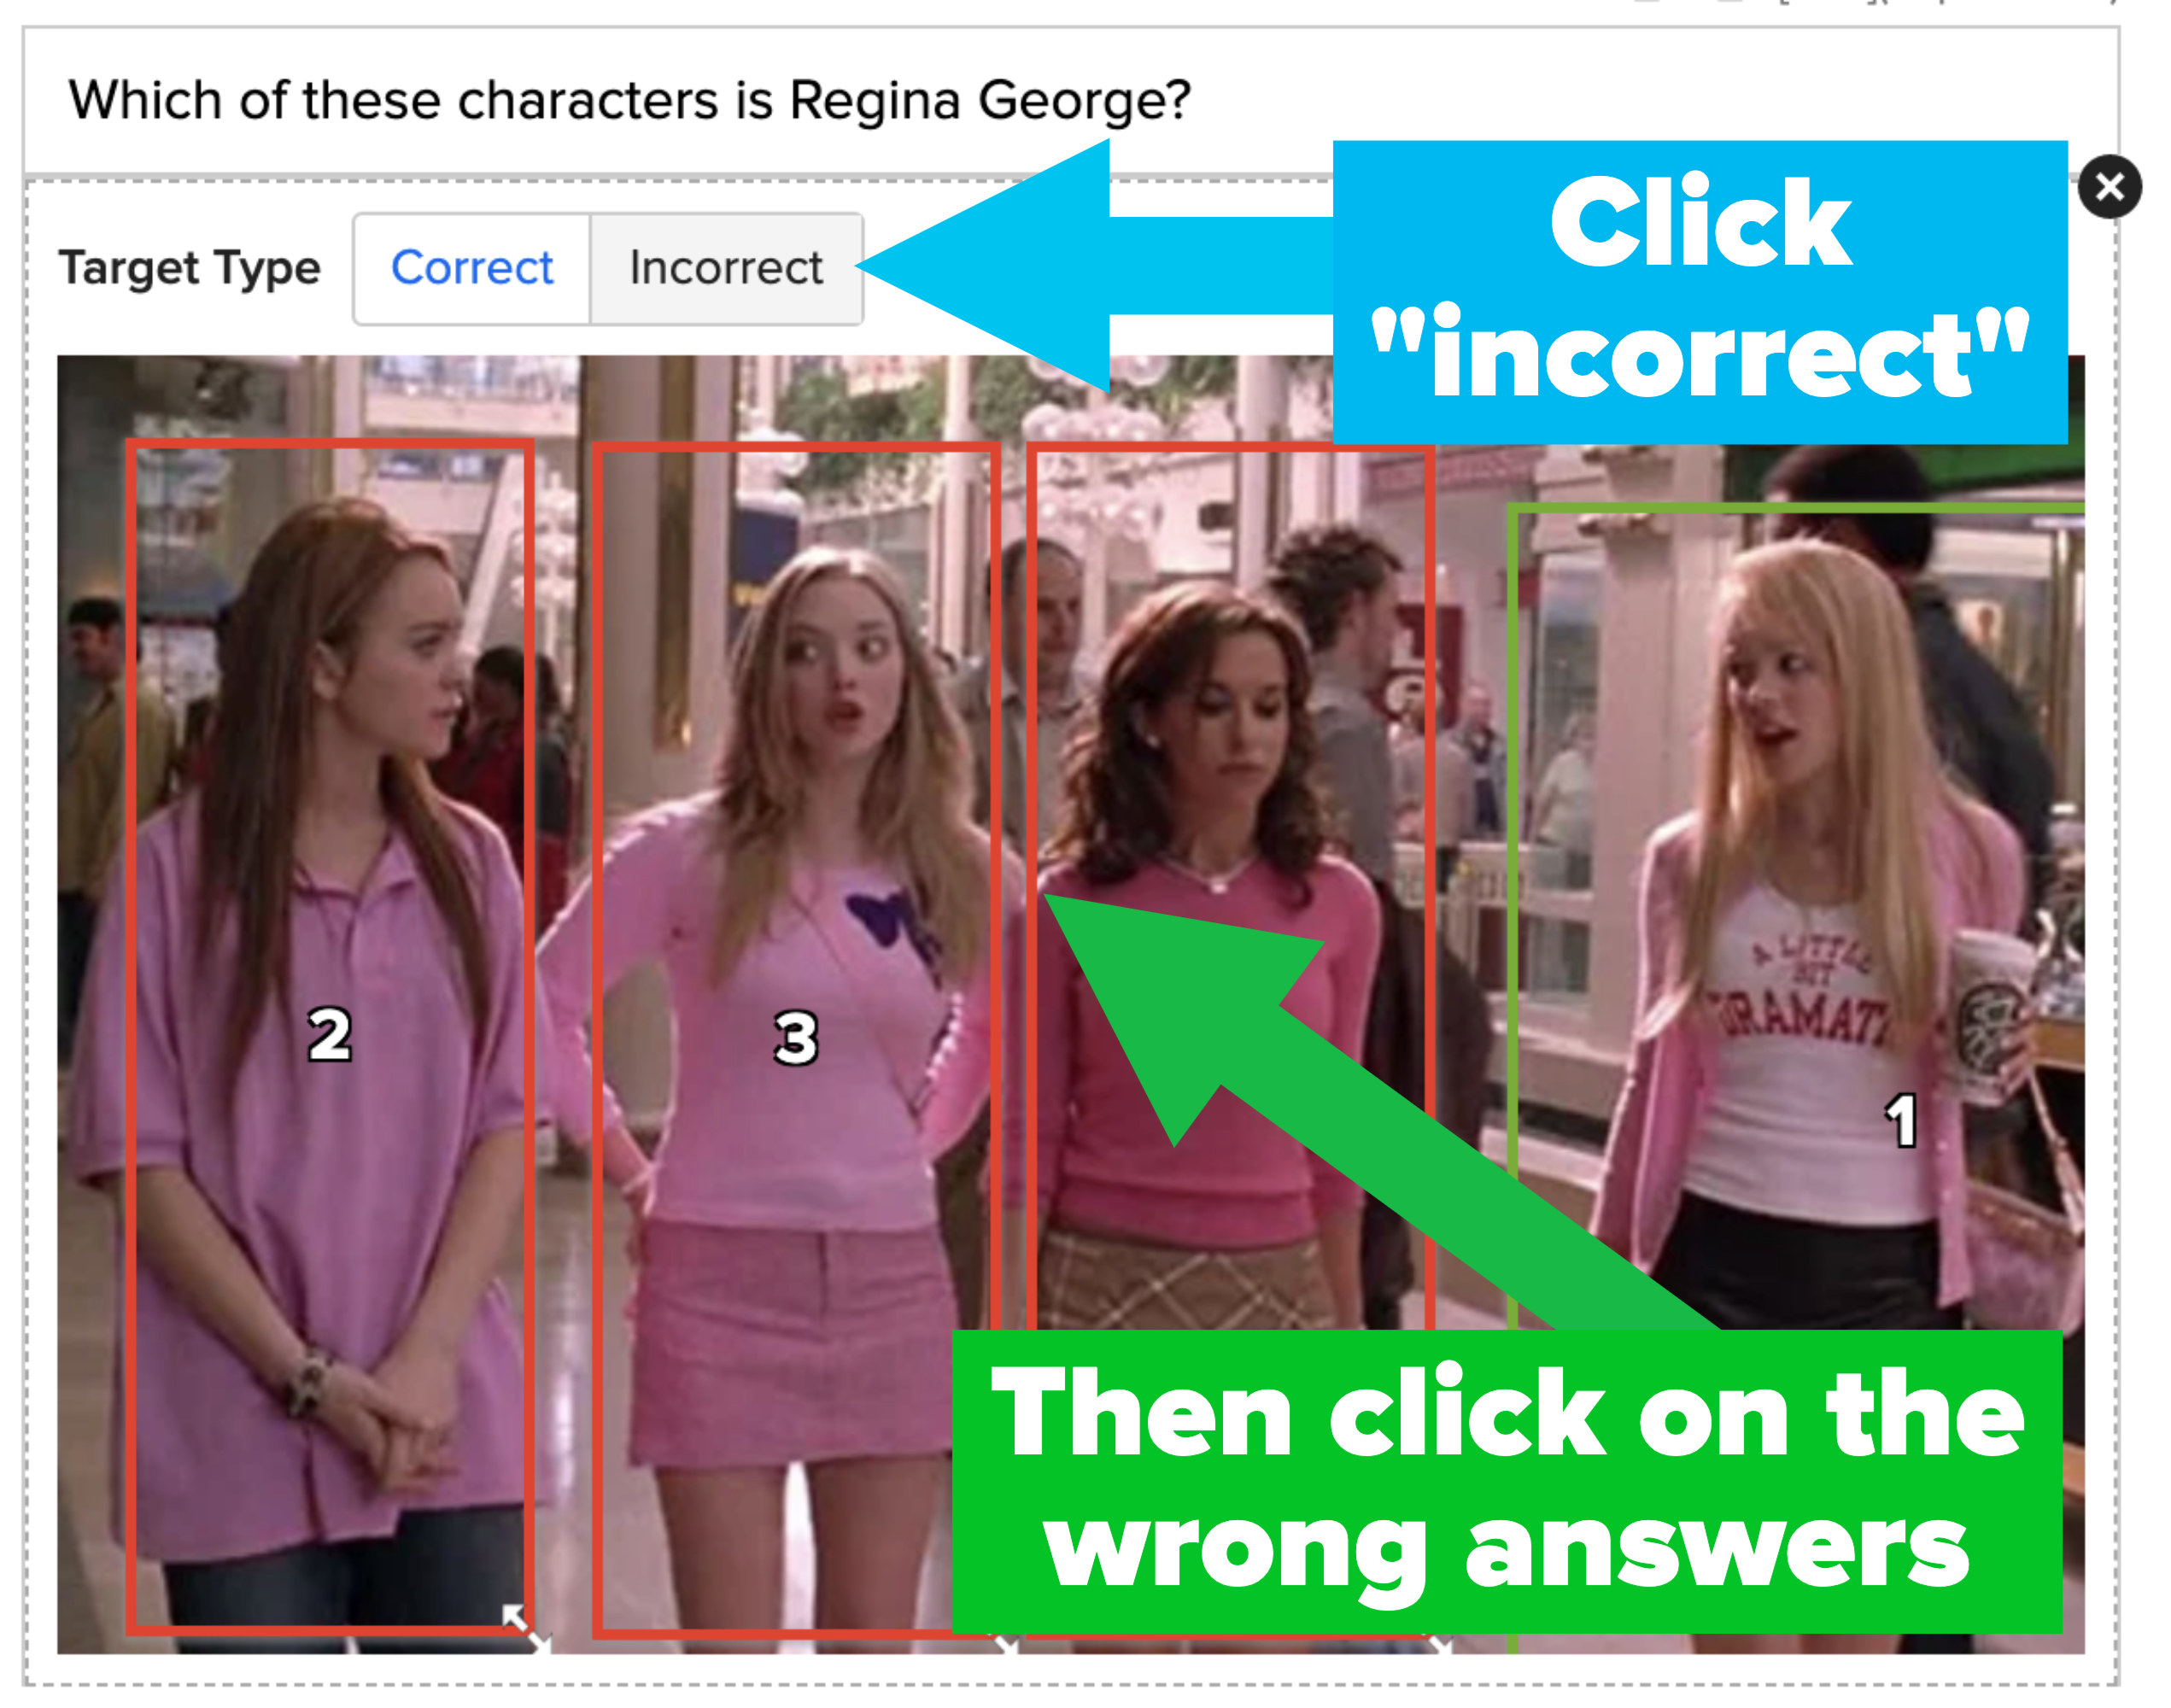
4. Then select "Incorrect" and click on each incorrect option. You can change the shape and color of these reveal shapes as well, as explained in the next step.
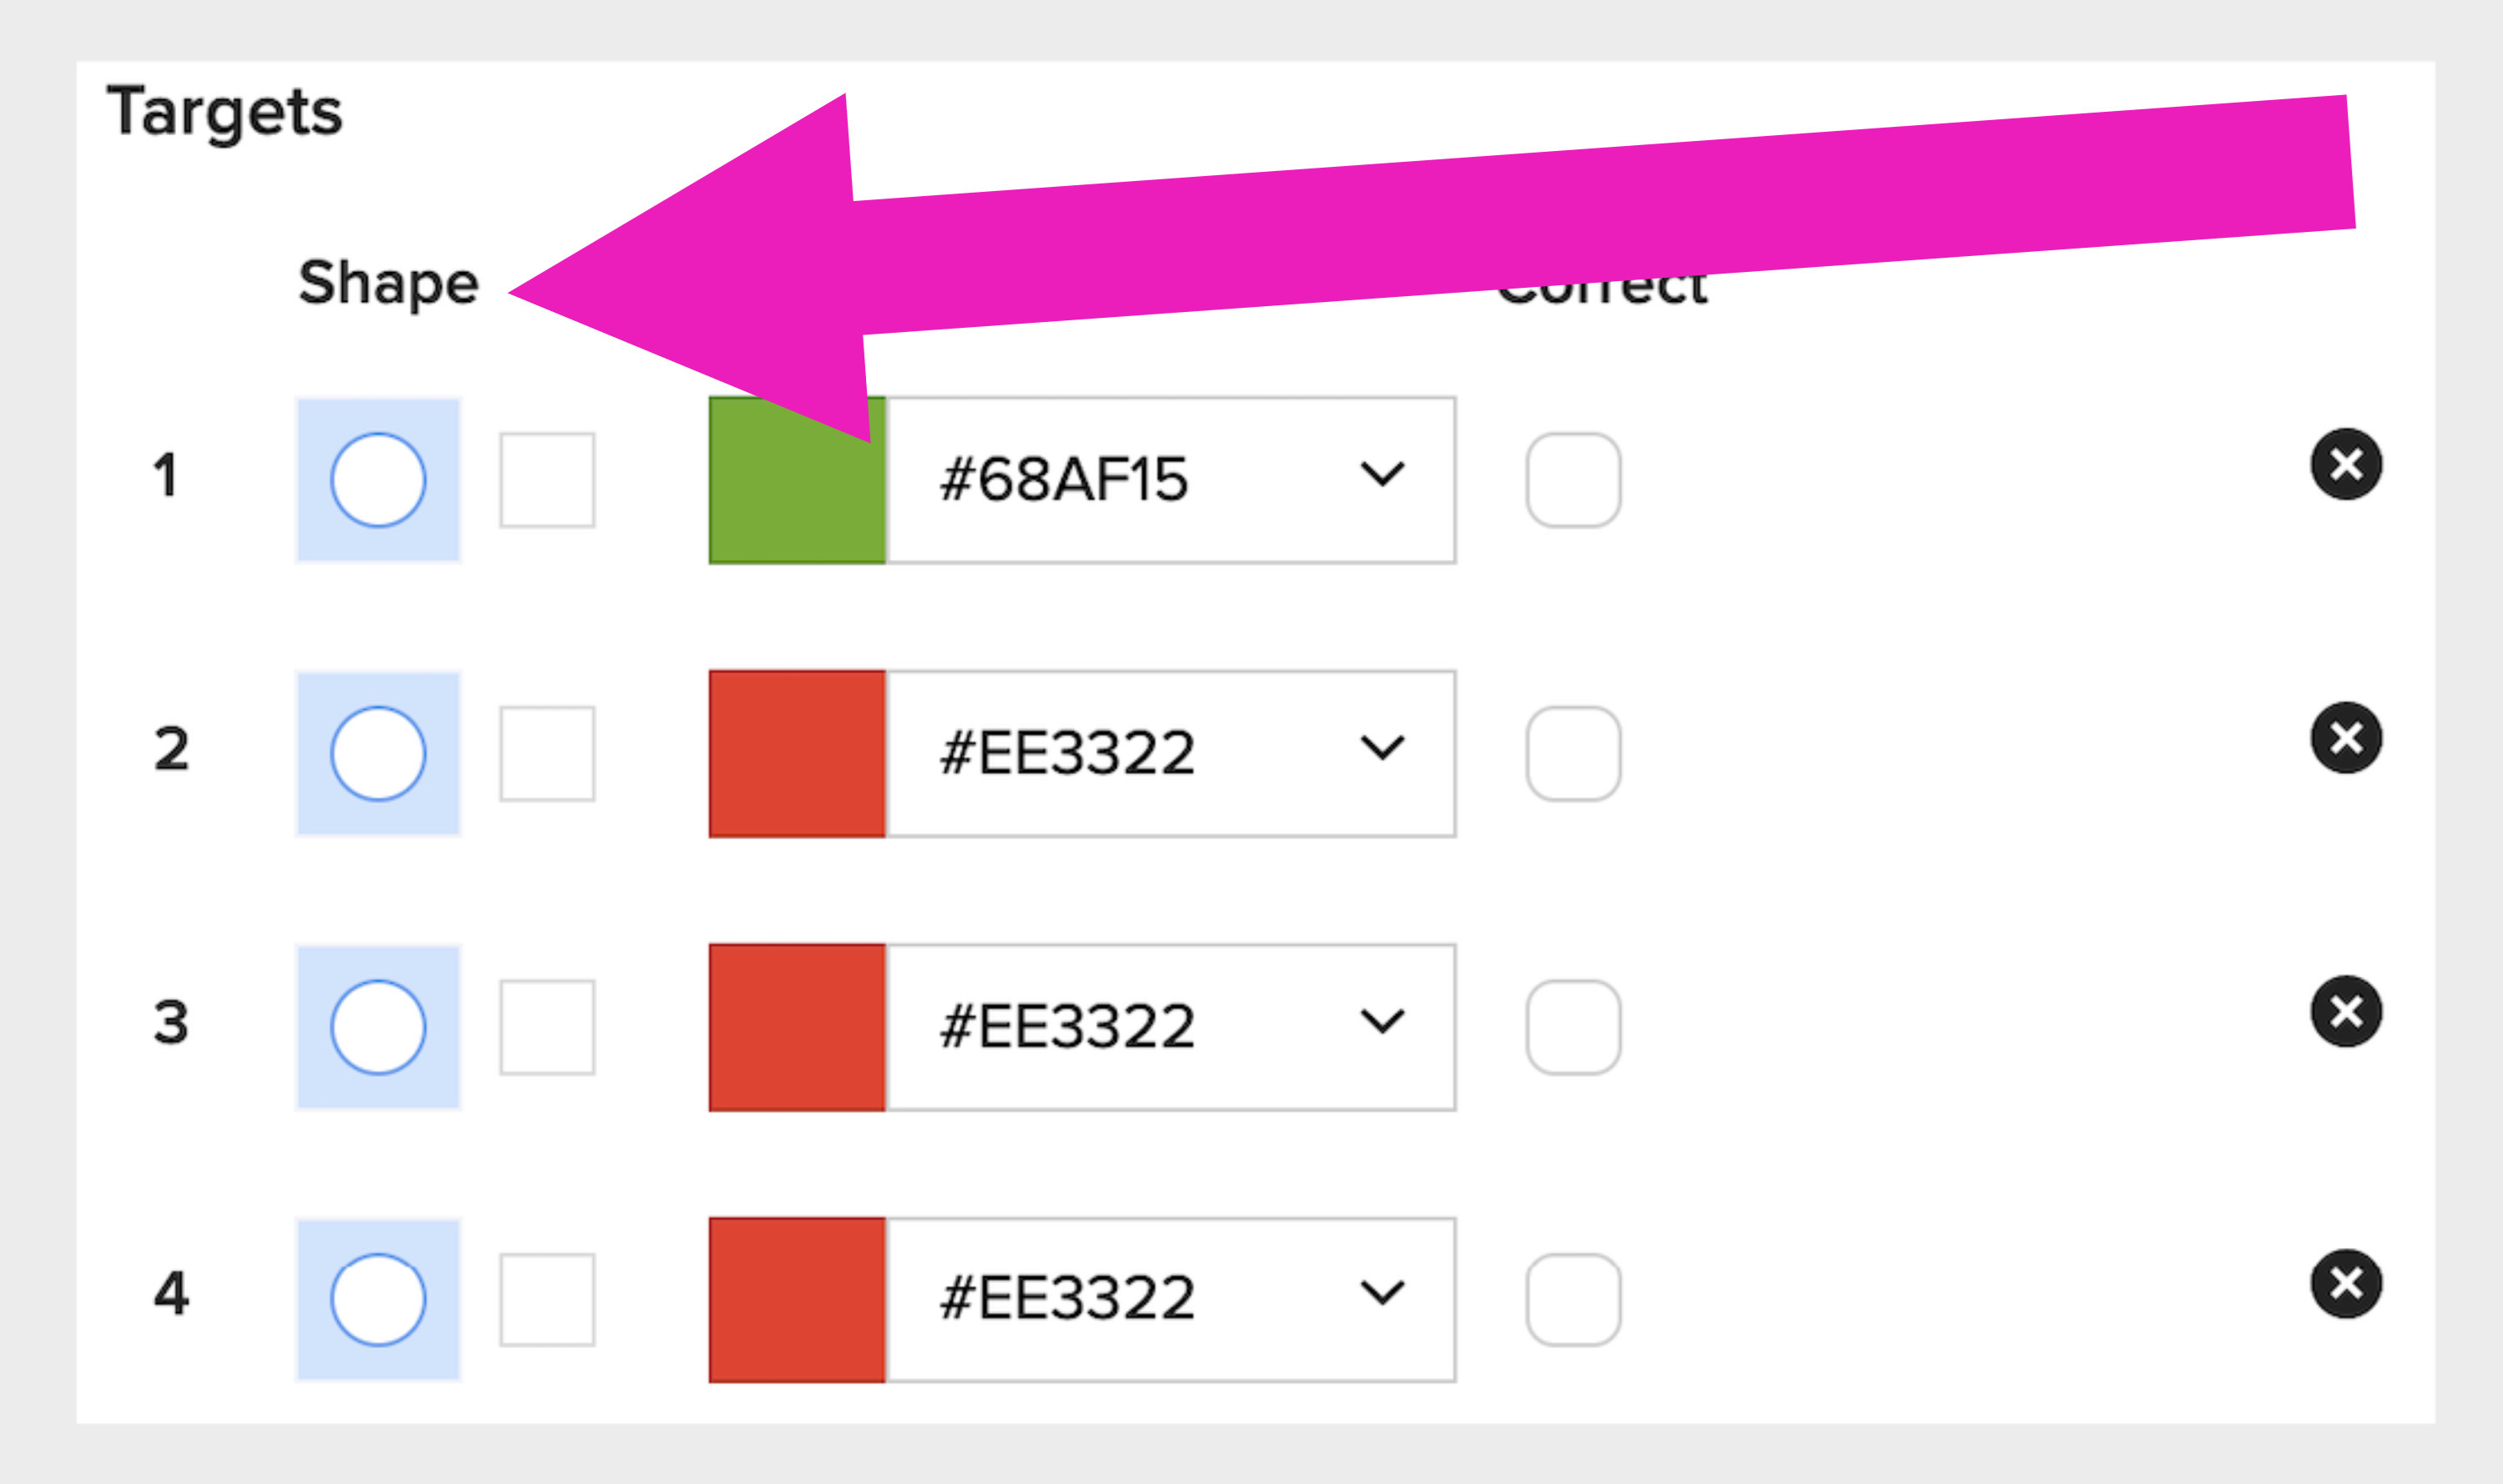
5. You can change the shape and color of the "Incorrect" and "Correct" reveals in the next section. You're welcome to make all colors and shapes uniform, or do a mix between the circle and rectangle shapes!
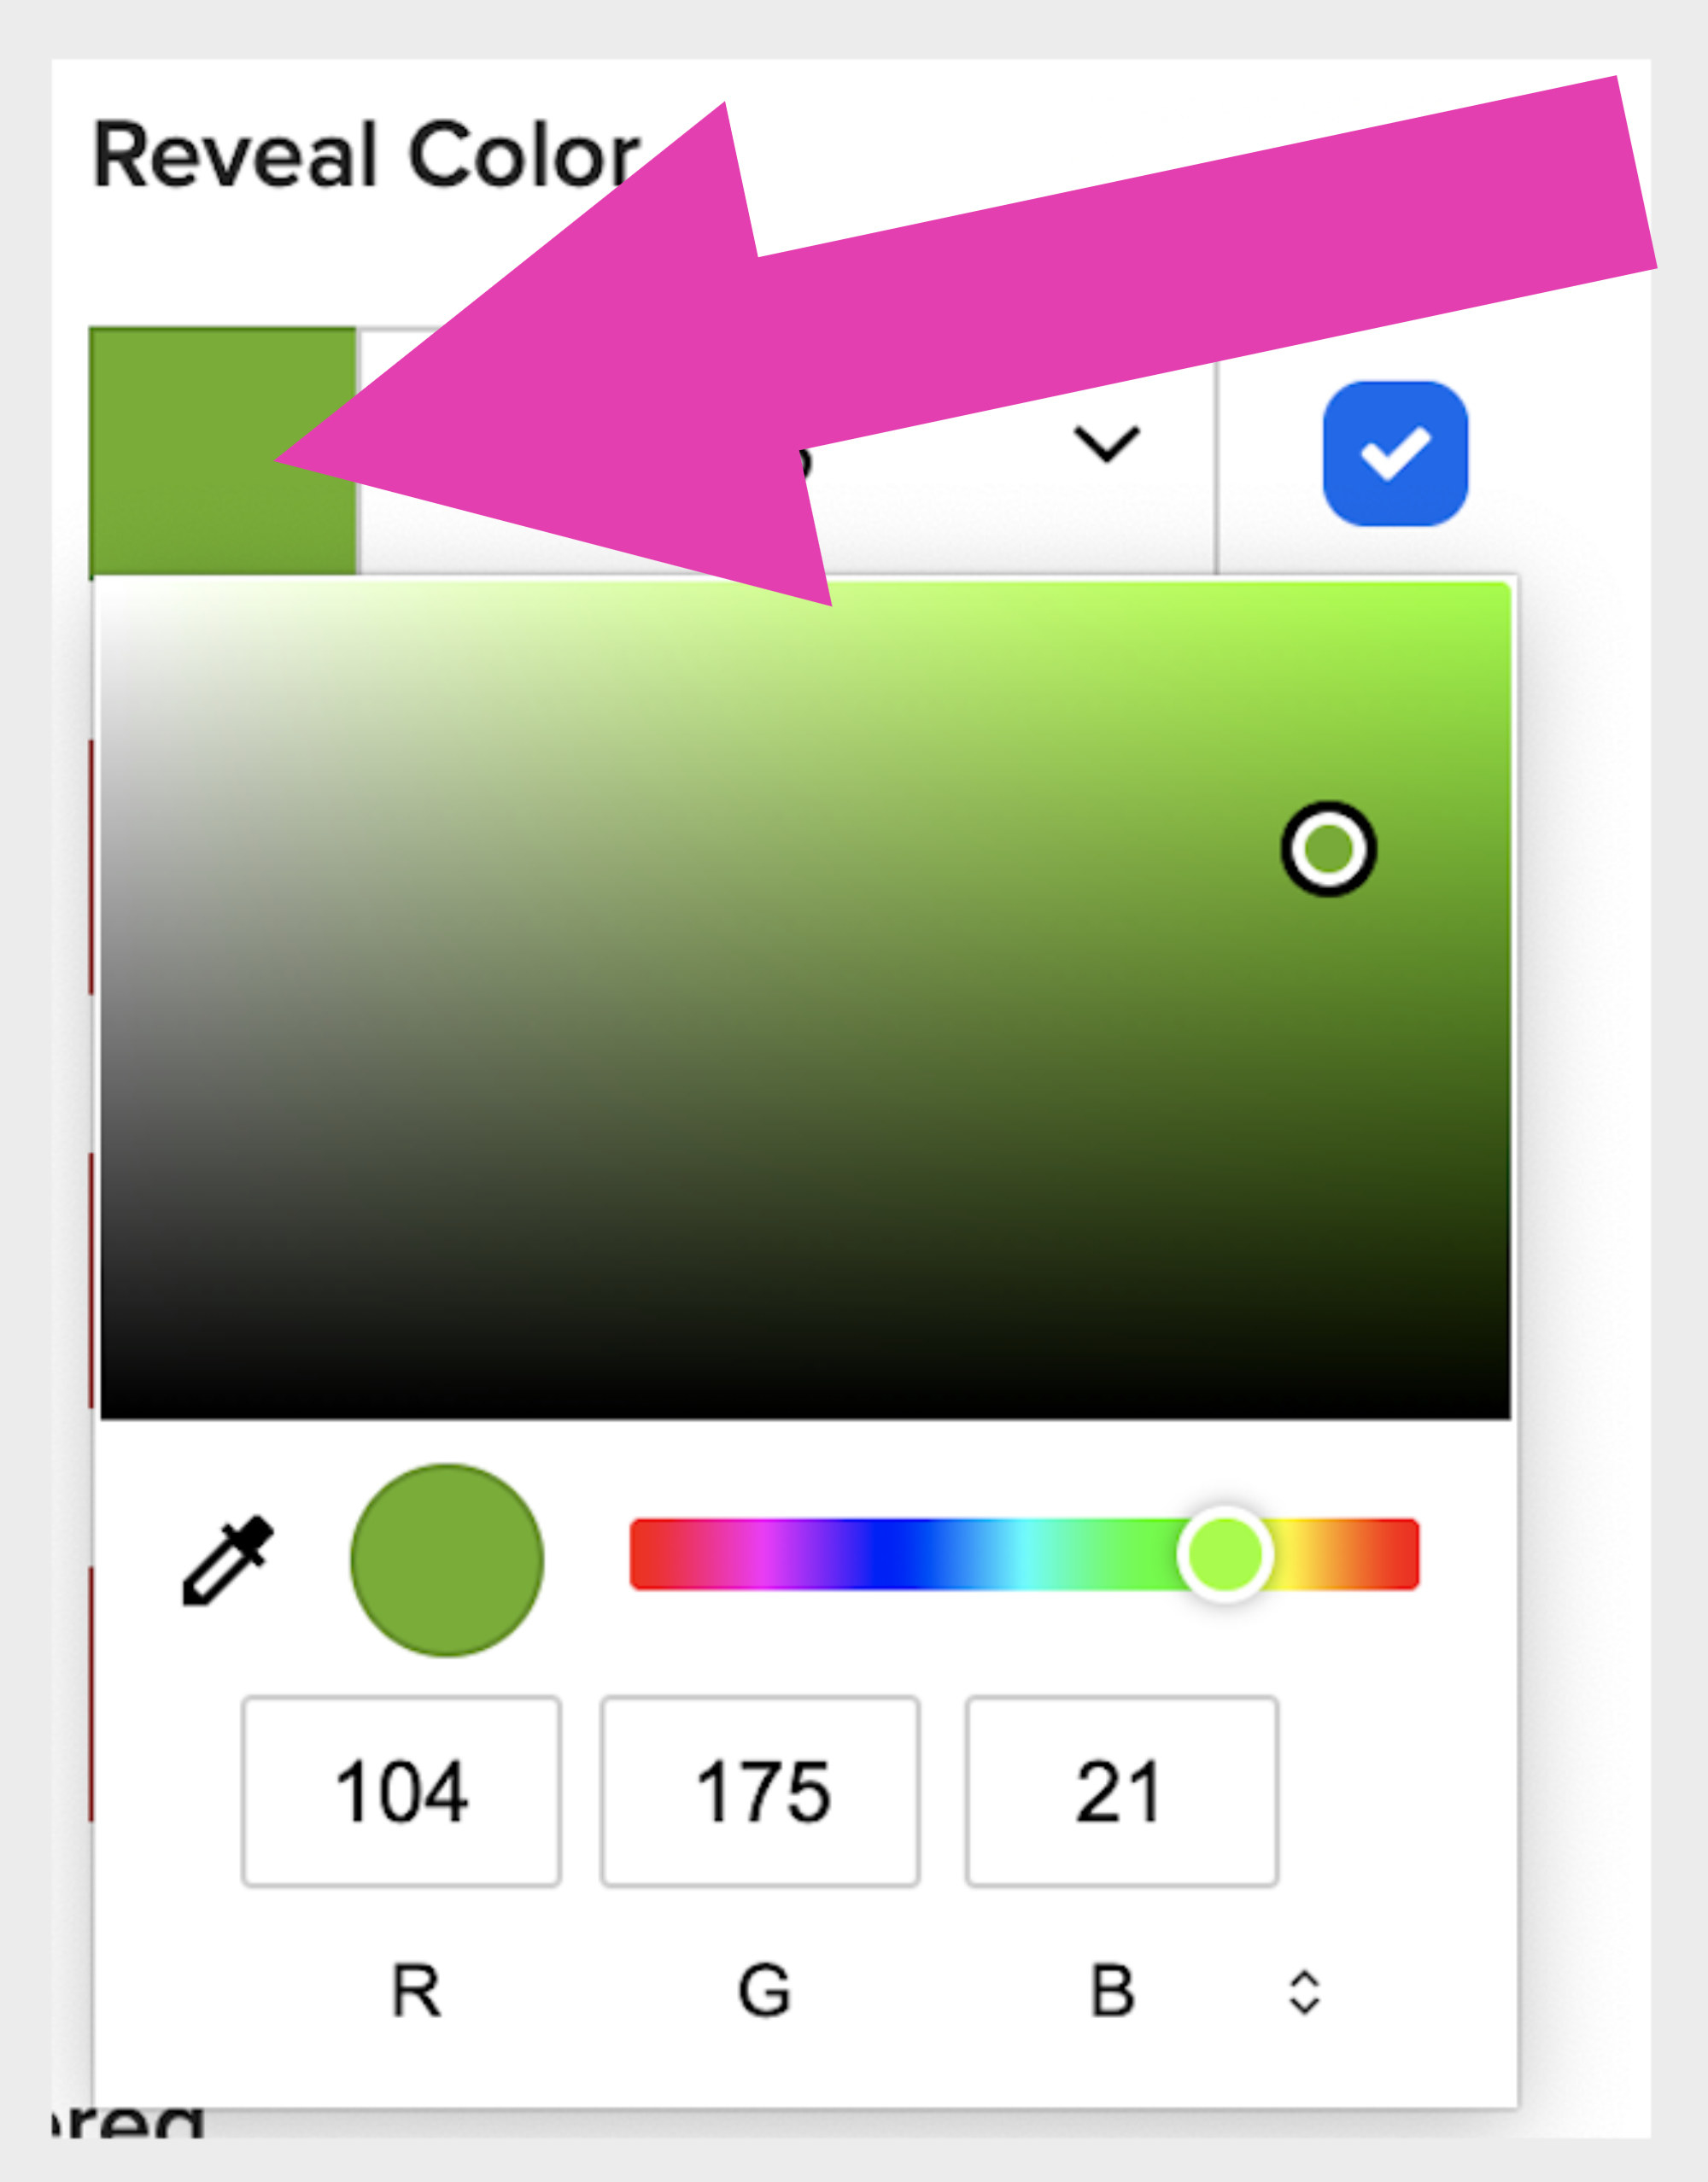
6. To change your reveal colors, hit the drop-down arrow under "Reveal Color" and select one of the 8 options...
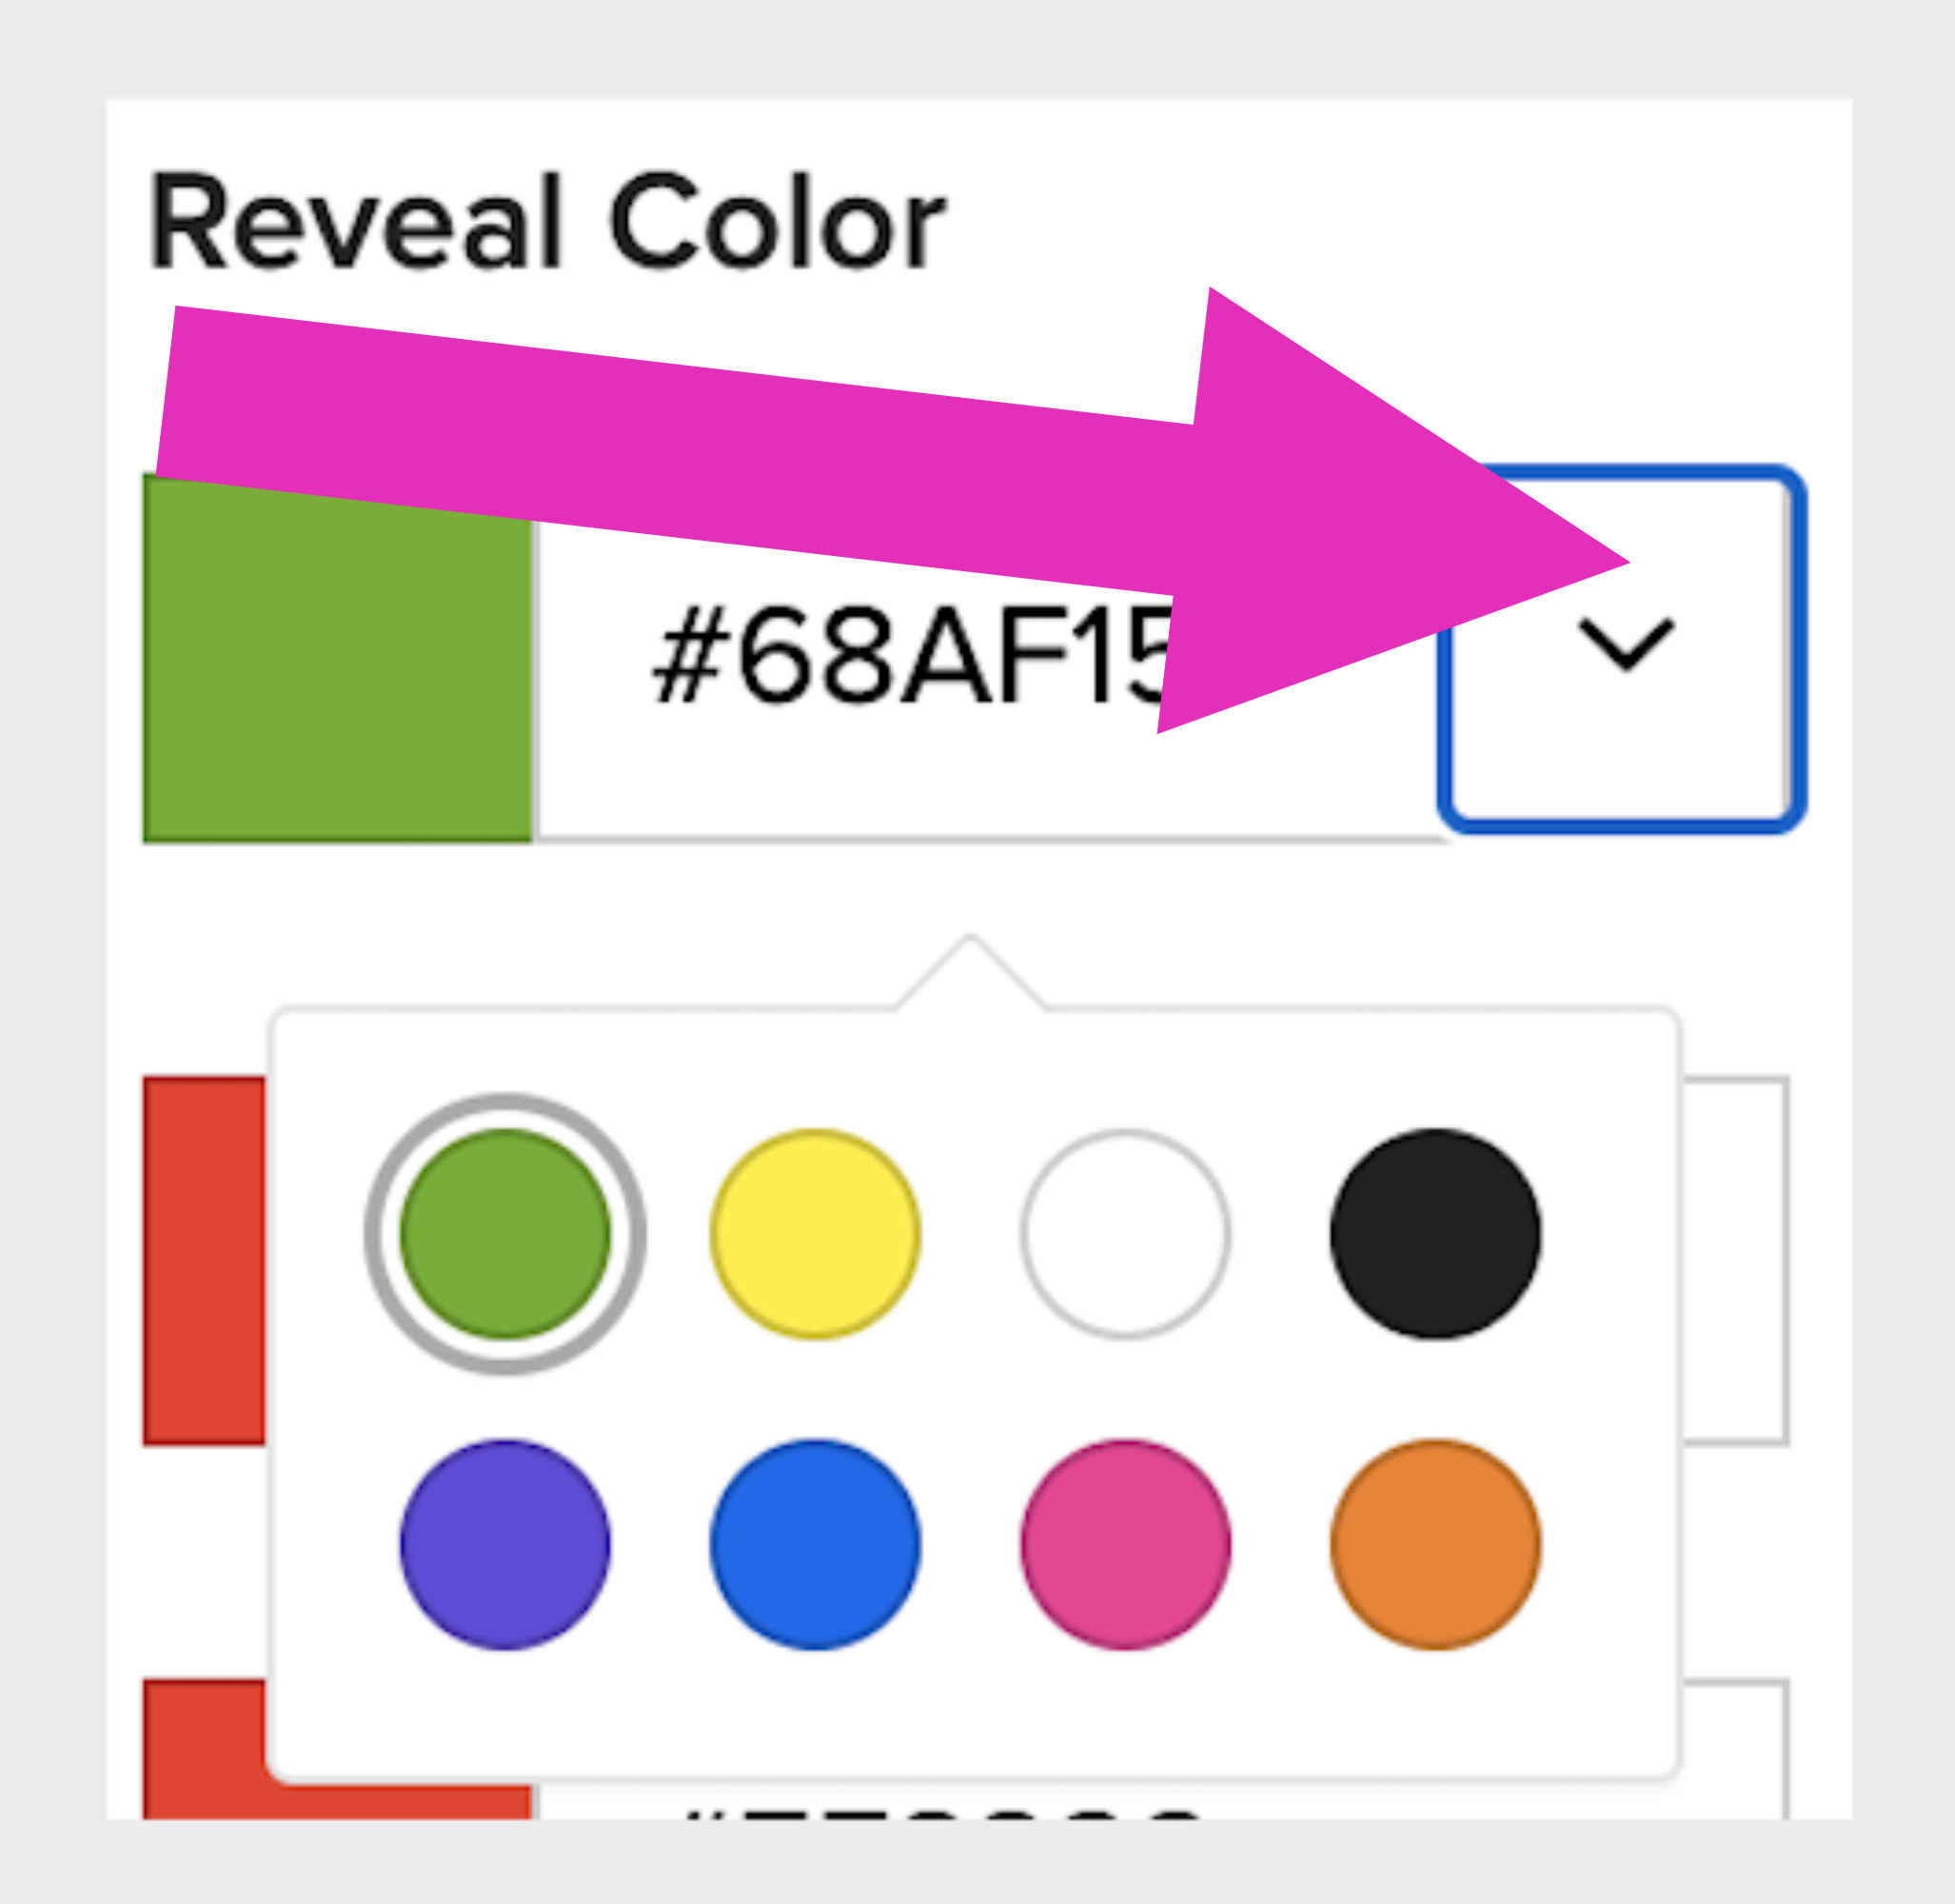
7. ...or click the colored box to customize your reveal colors.
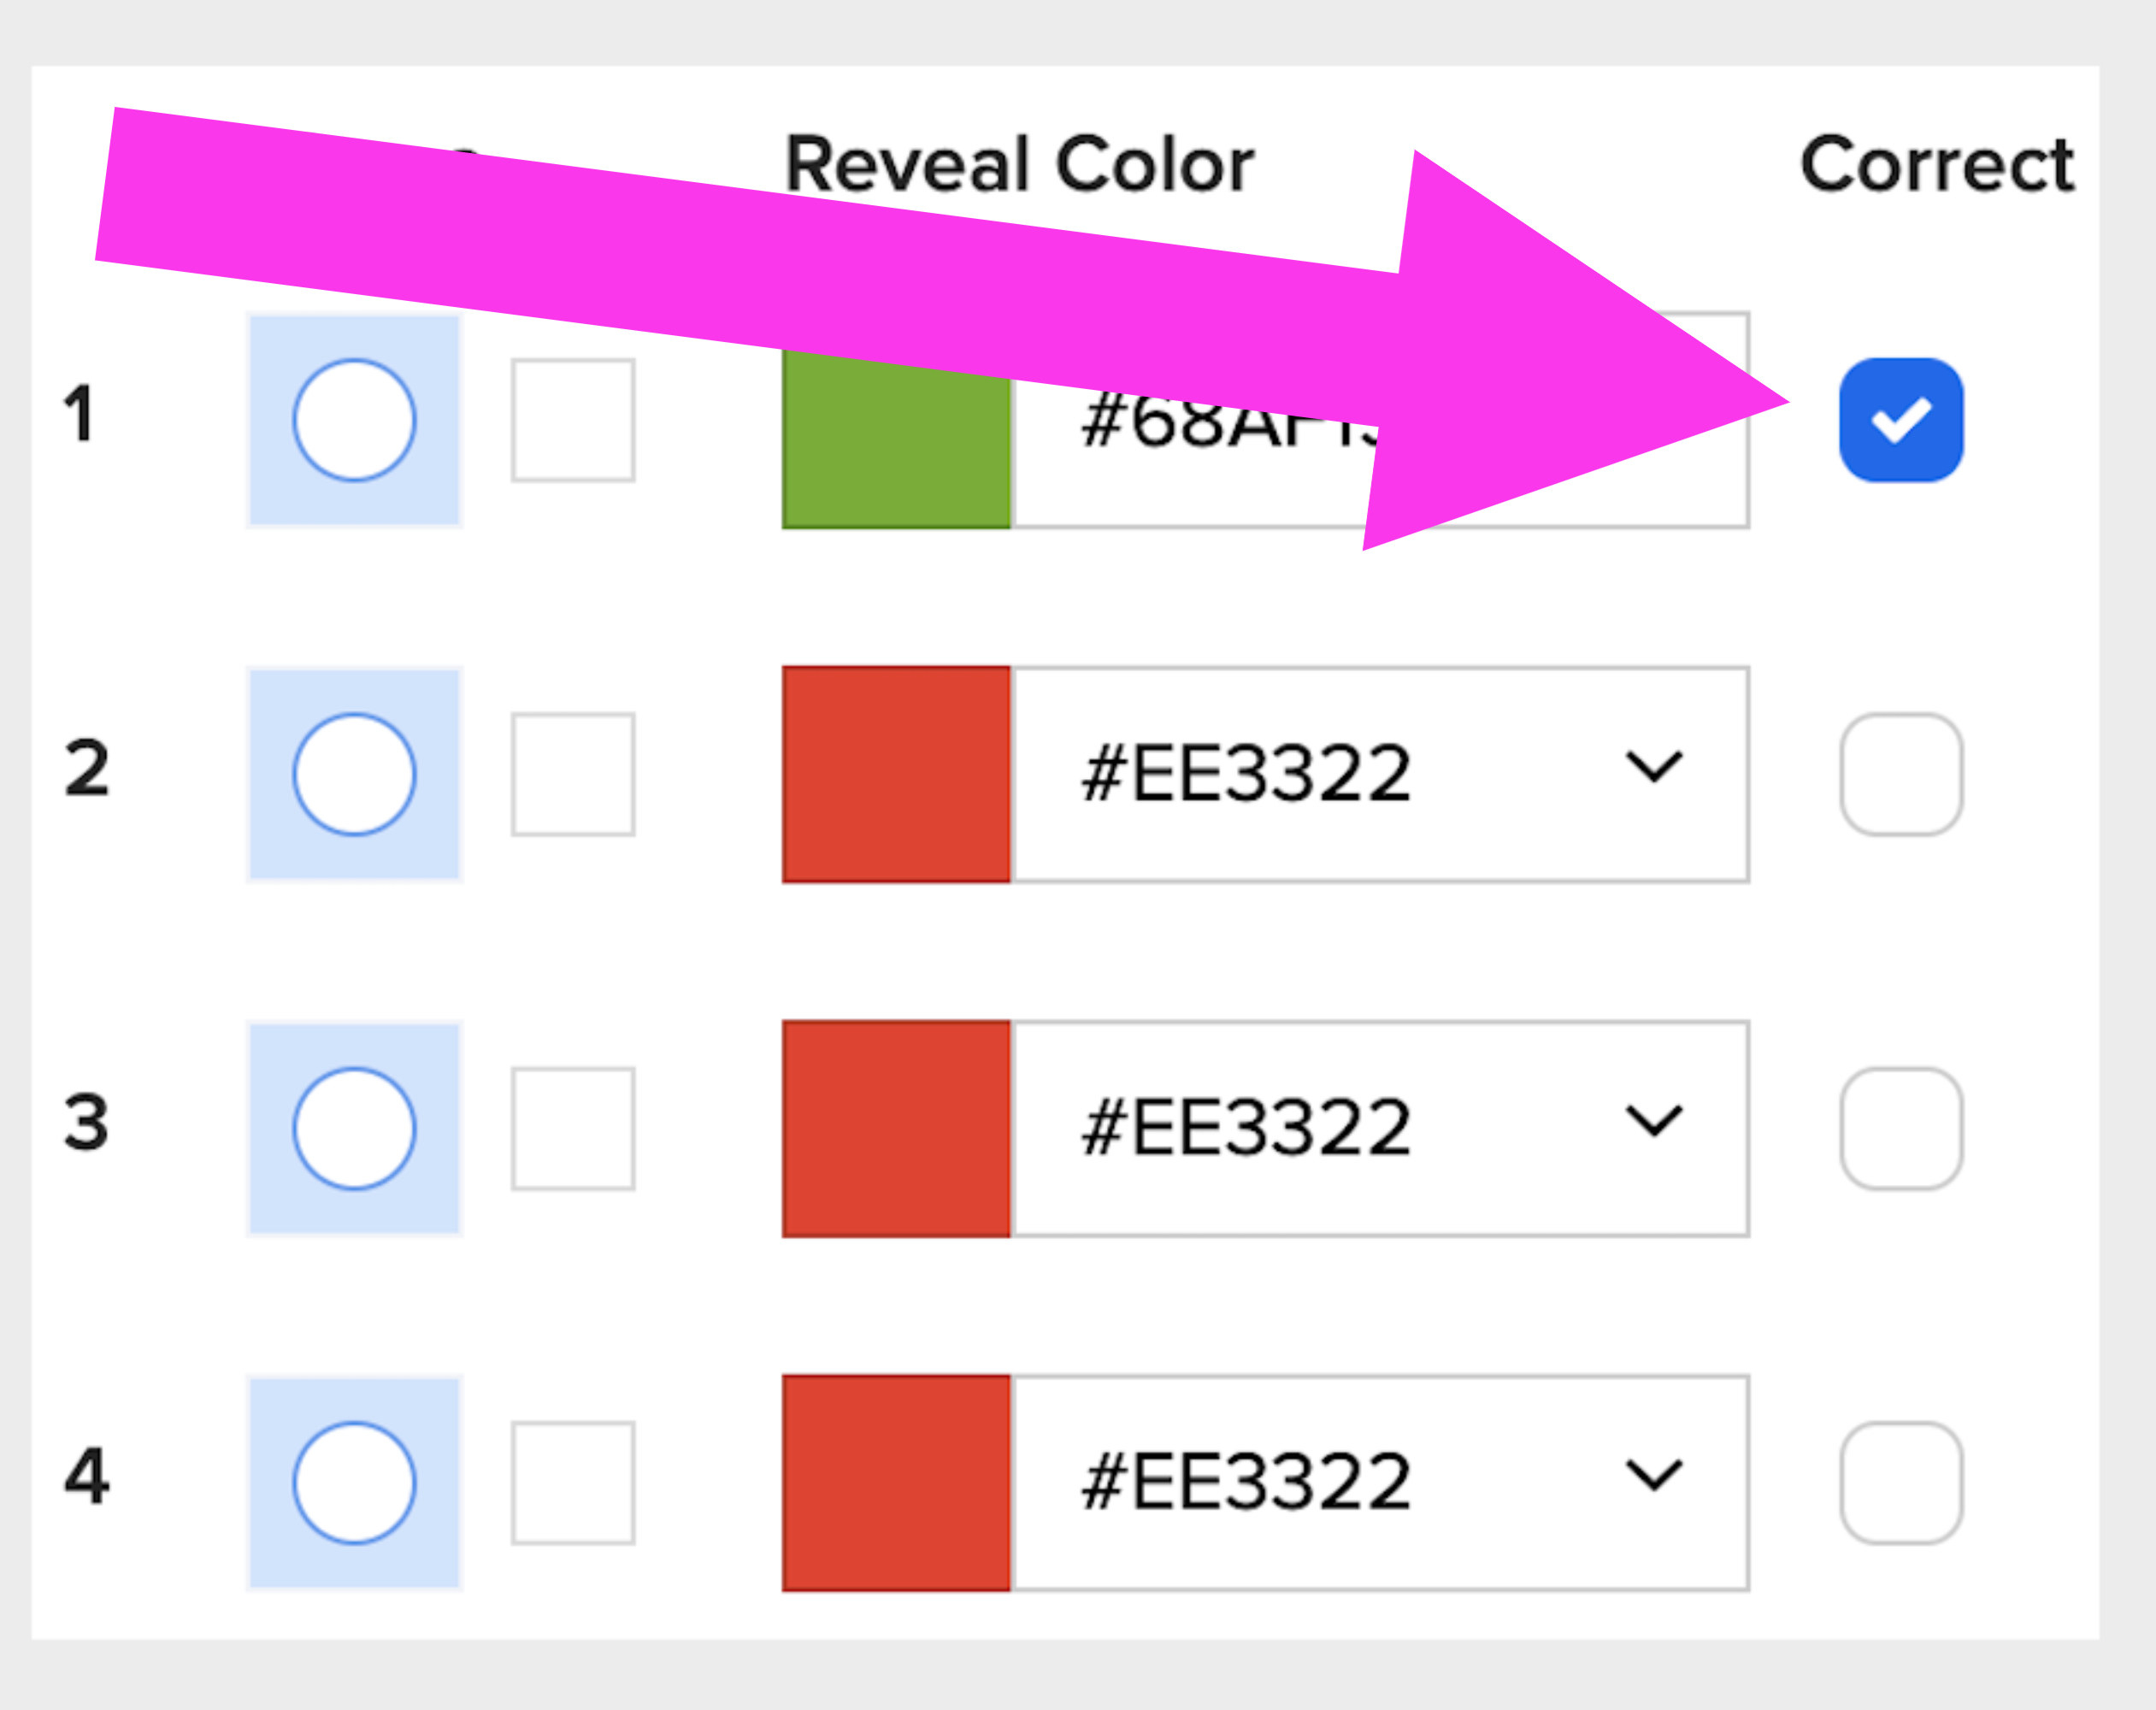
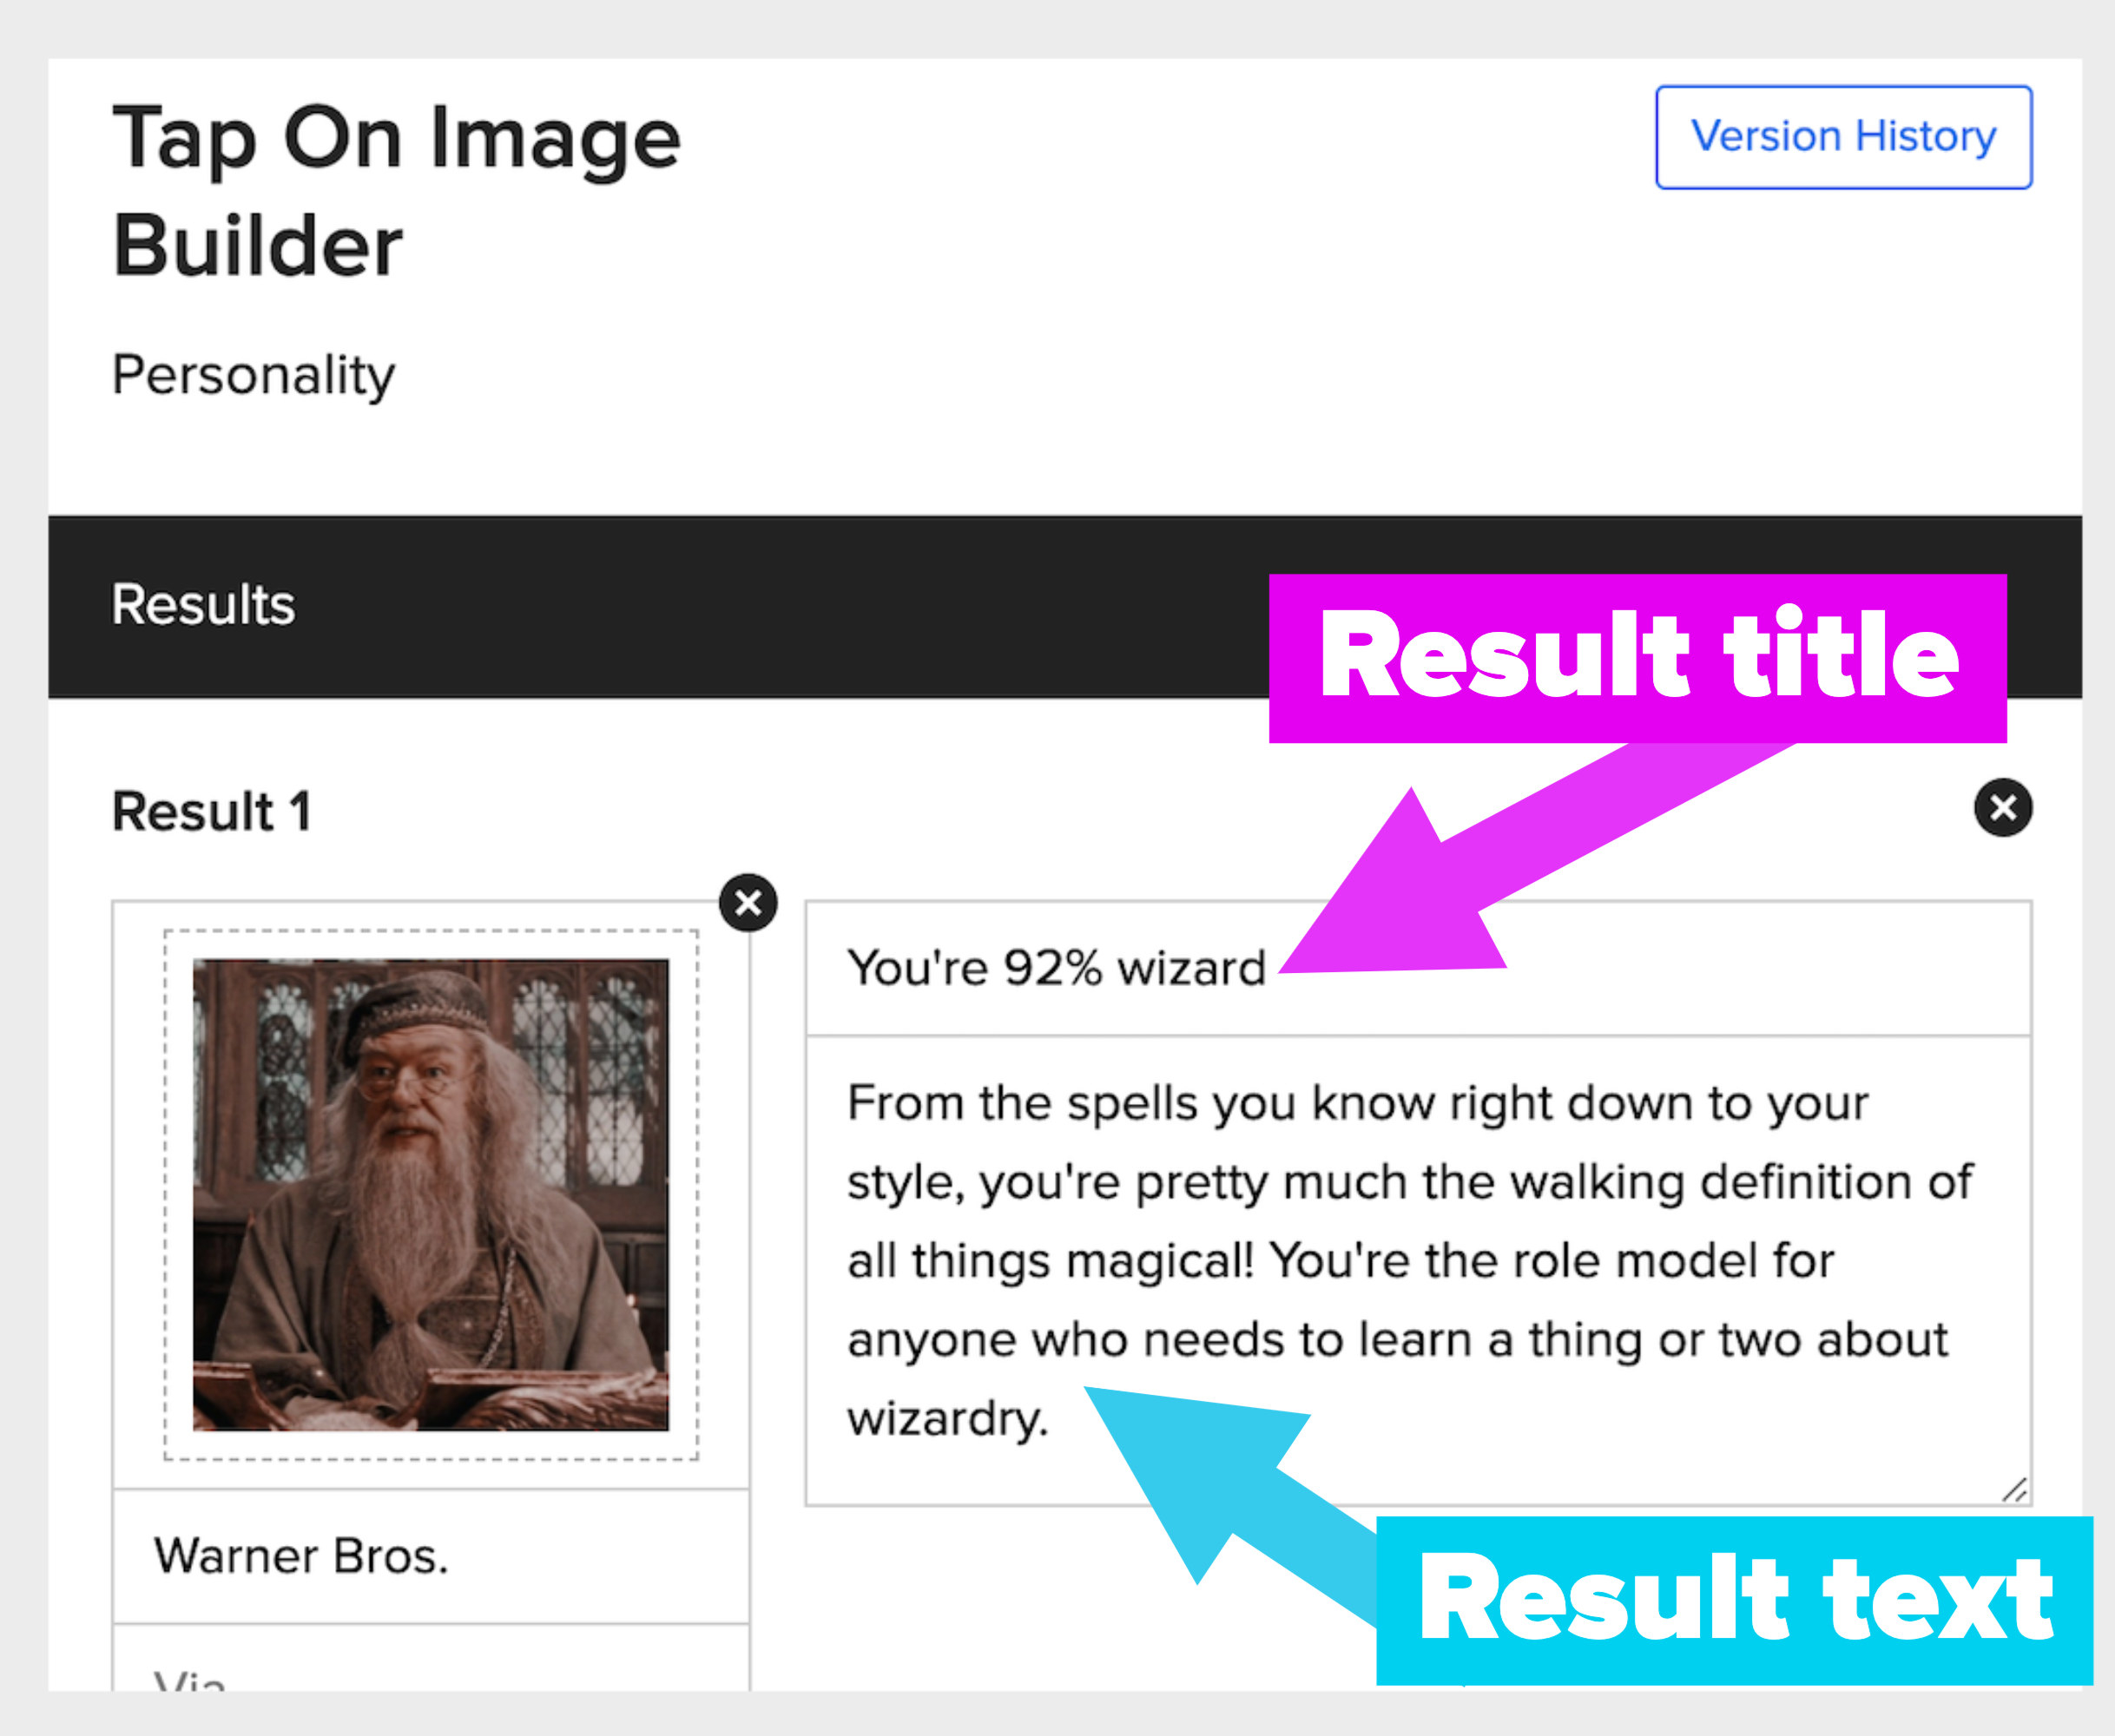
8. Don't forget to check which result is correct in this section, too.
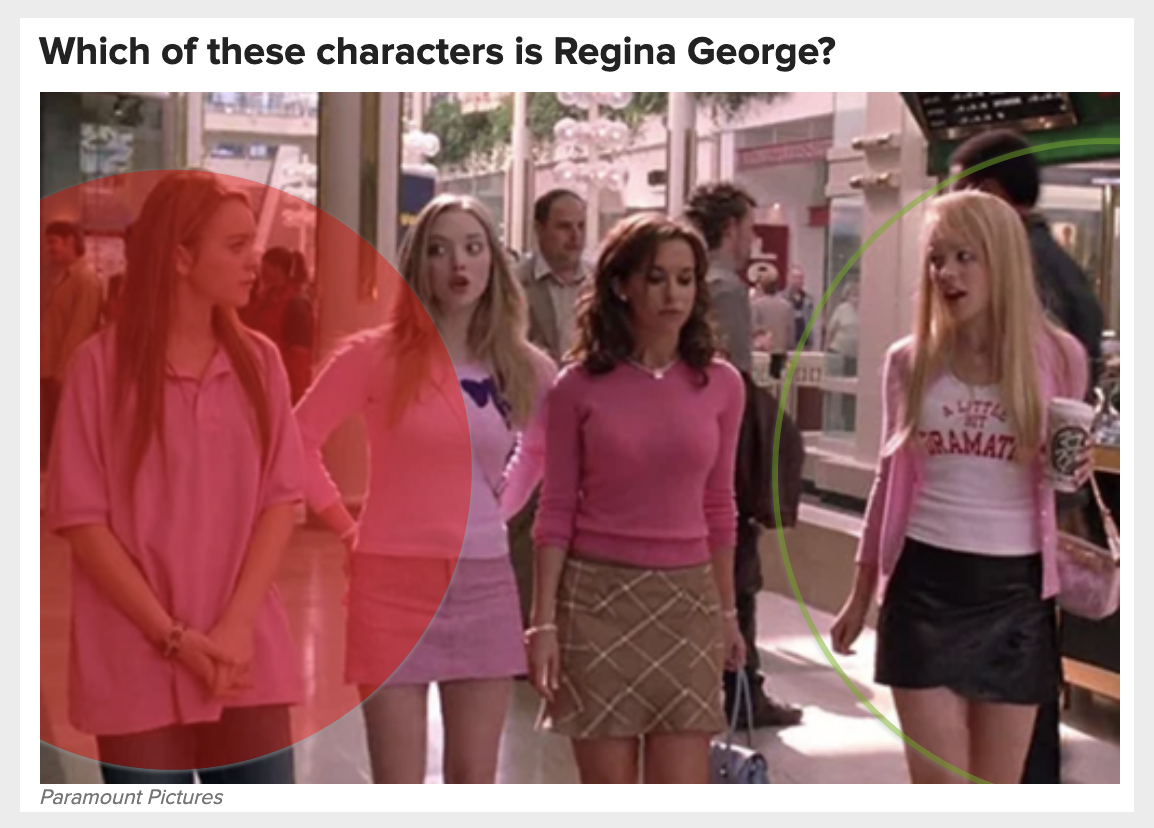
9. Based on the colors and shapes set in the example above in Step 8, this is what a quiz taker will see if they select the wrong answer: Their incorrect answer is circled in red, and the correct one is circled in green.
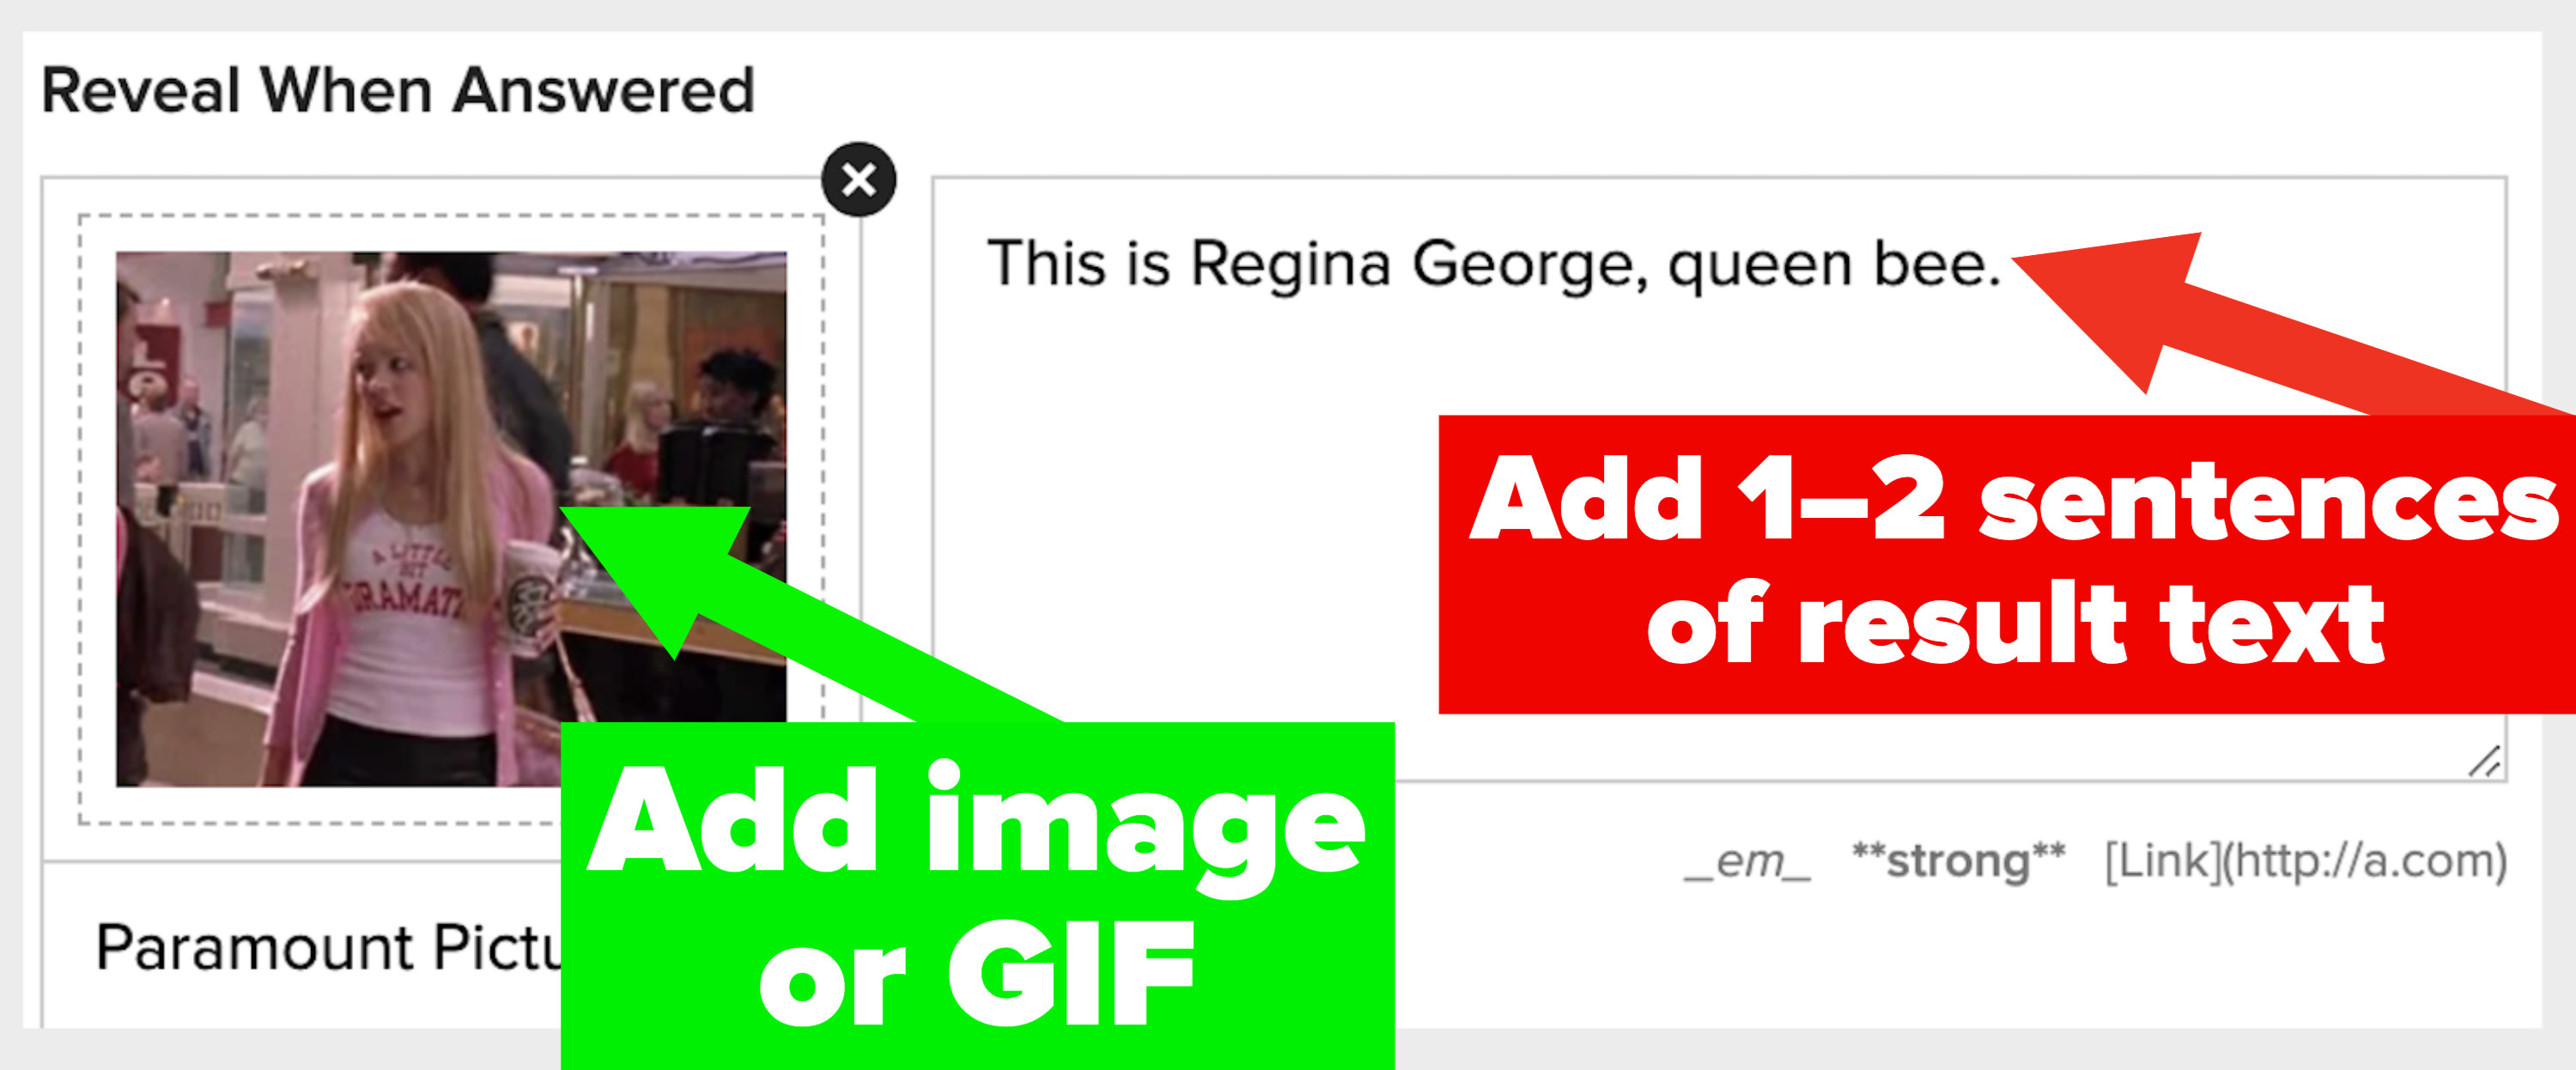
10. Finally, add an image (GIFs welcome!) and a sentence or two that will be revealed after the question has been answered. This is the chance for you to let whoever's taking your quiz know if they were right or wrong!
11. Repeat this step until you've added all of your quiz questions. For a great quiz, we recommend 5–8 questions; of course, you can add more if your heart desires.
Check out some other tips for making great quizzes here!
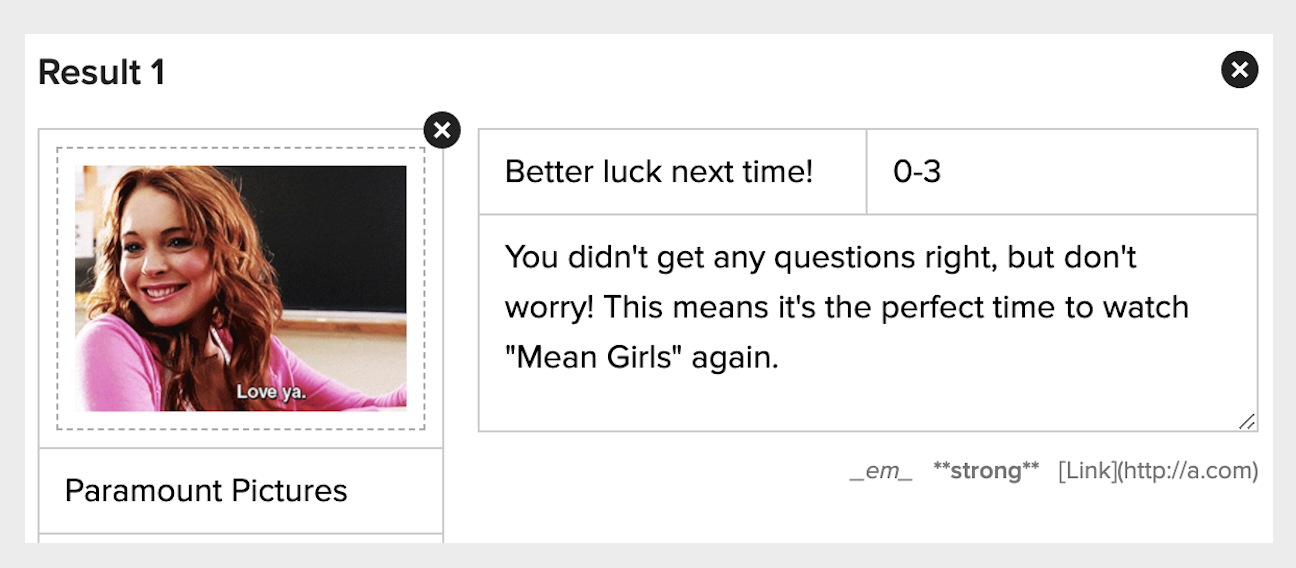
12. For a Tap On Image quiz, you must upload a result for every possible outcome a quiz taker might get. To clarify, if someone gets 0-3 correct on your quiz, you have to add a result for that! Then you add a result for 4-6, 7-10, and so on until there is a result for every possible amount of questions someone got correct.
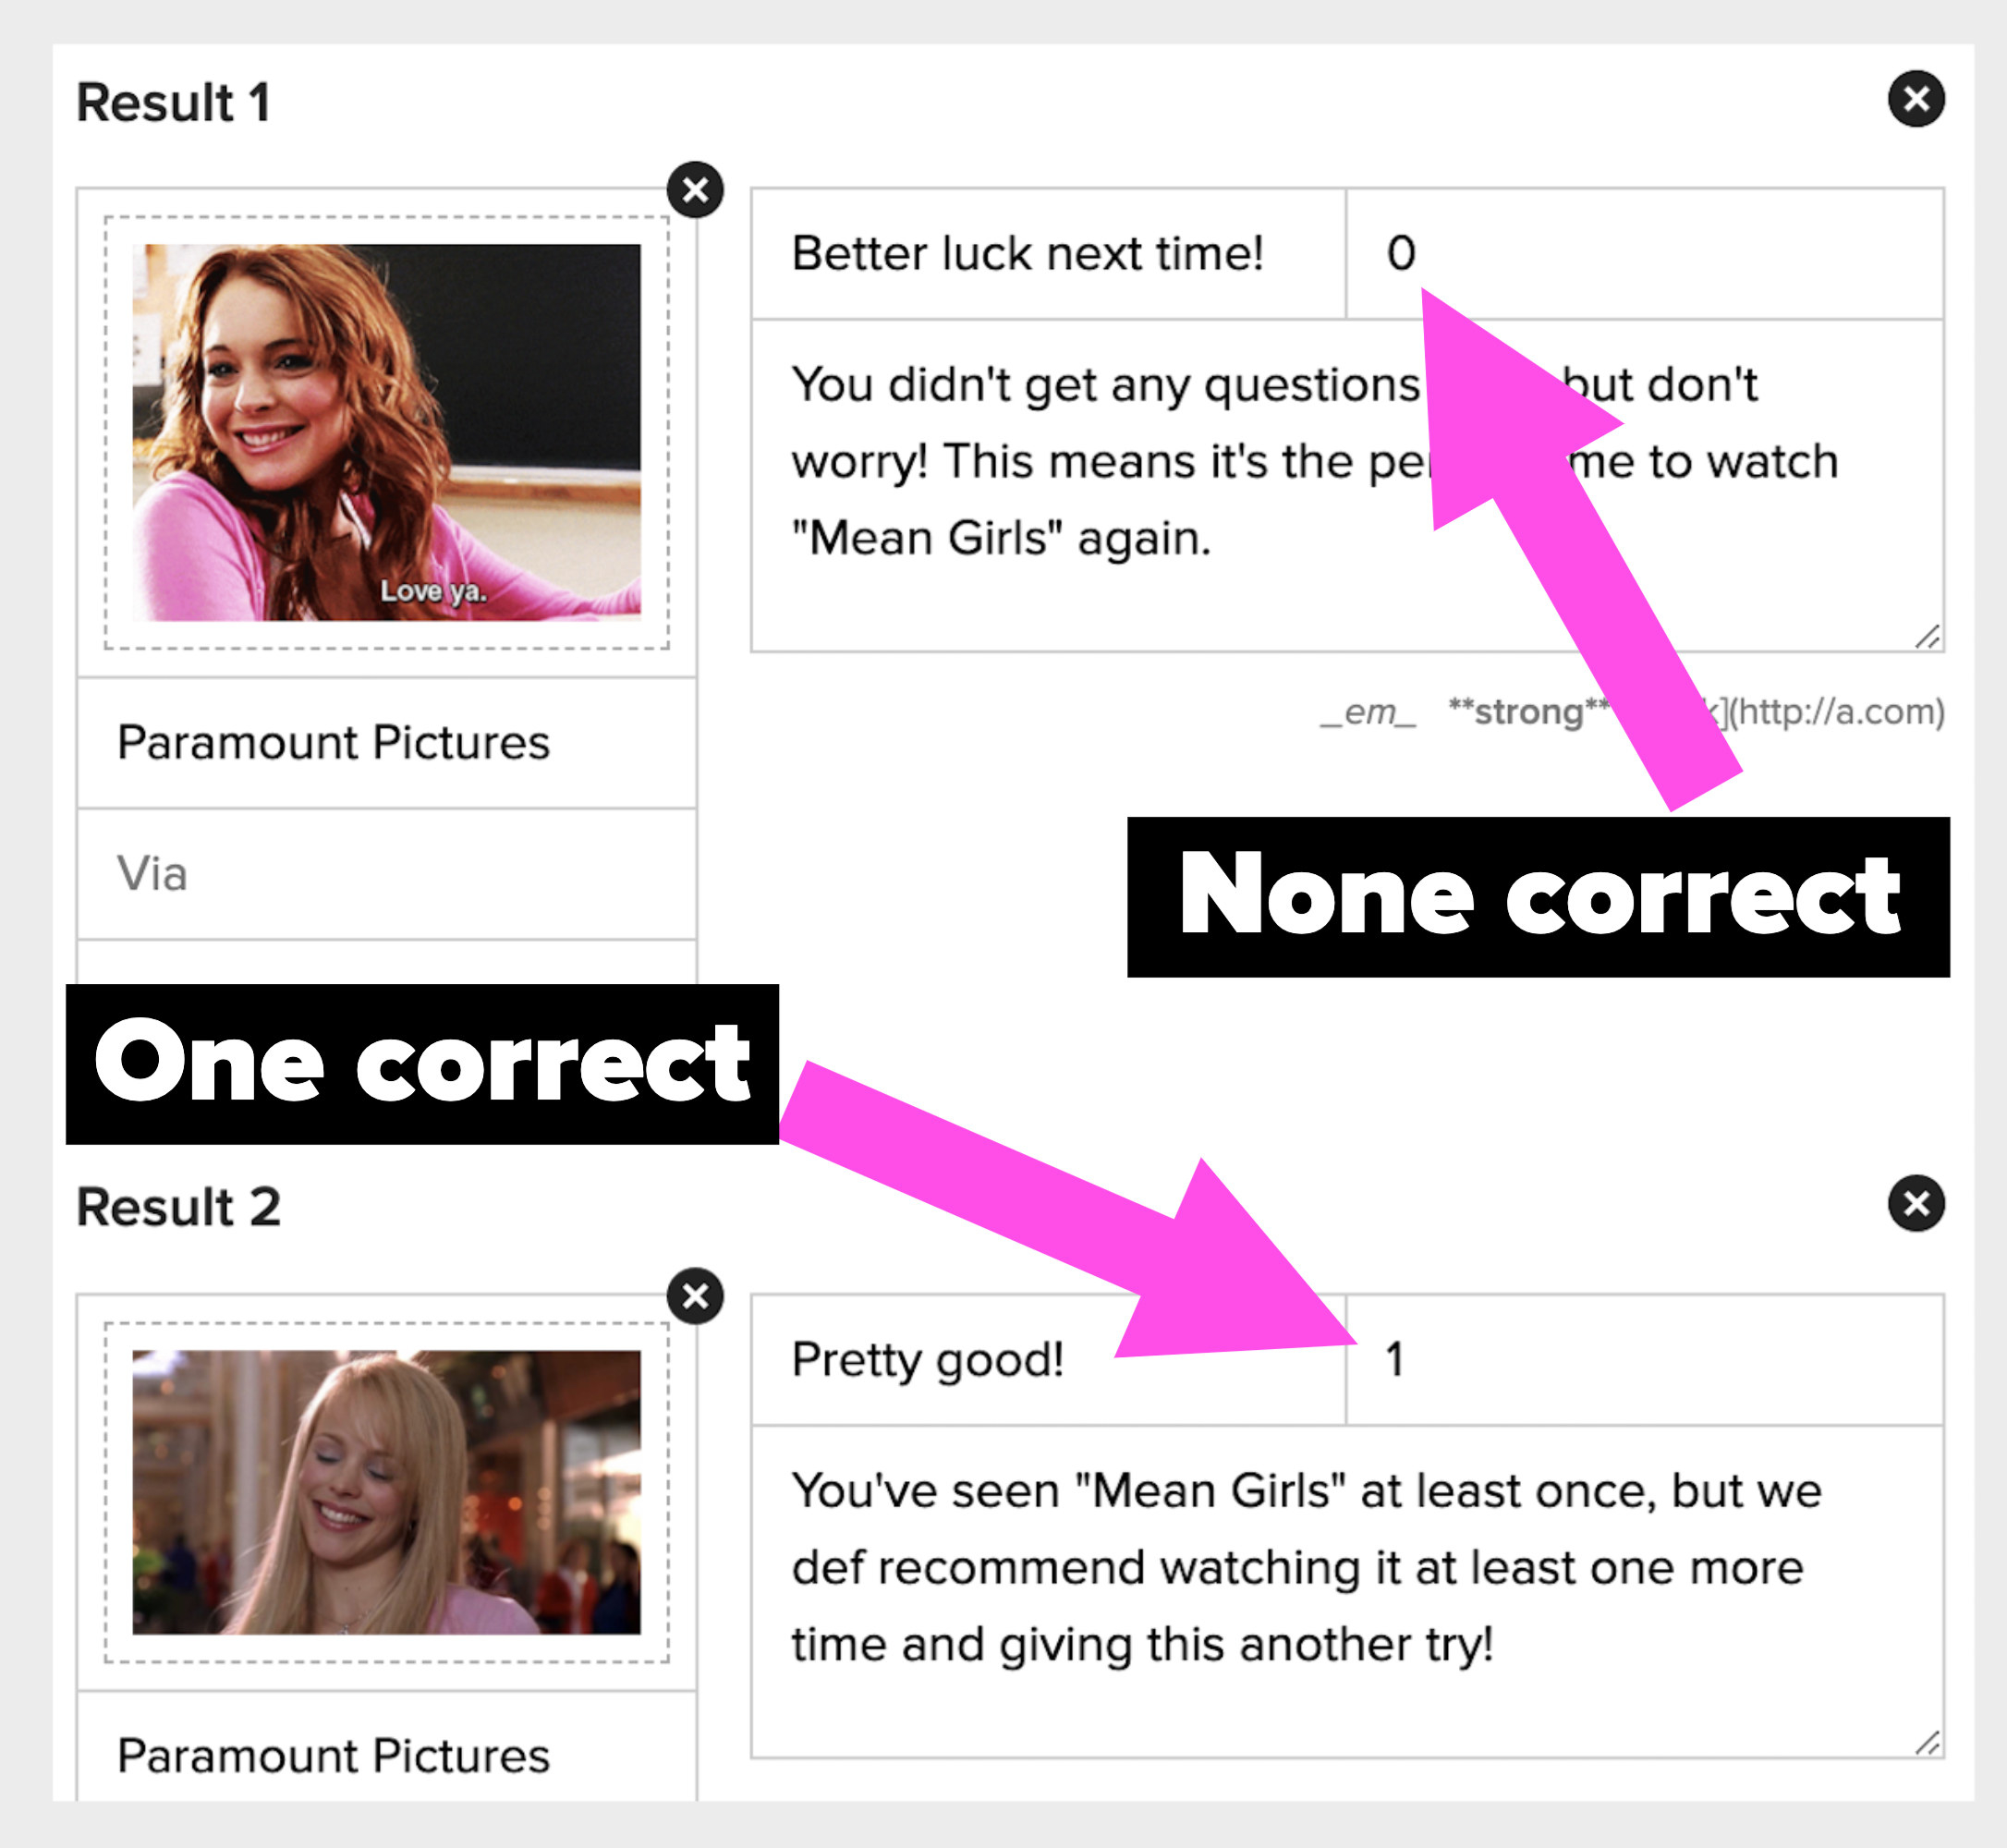
13. You are also more than welcome to create a single result for every possible amount of questions someone got correct. For example, you can make a result for 0 correct, one for 1 correct, 2 correct, and so on:
For a trivia quiz, that's pretty much it!
For personality tap-on image quizzes you'll add results first.

14.
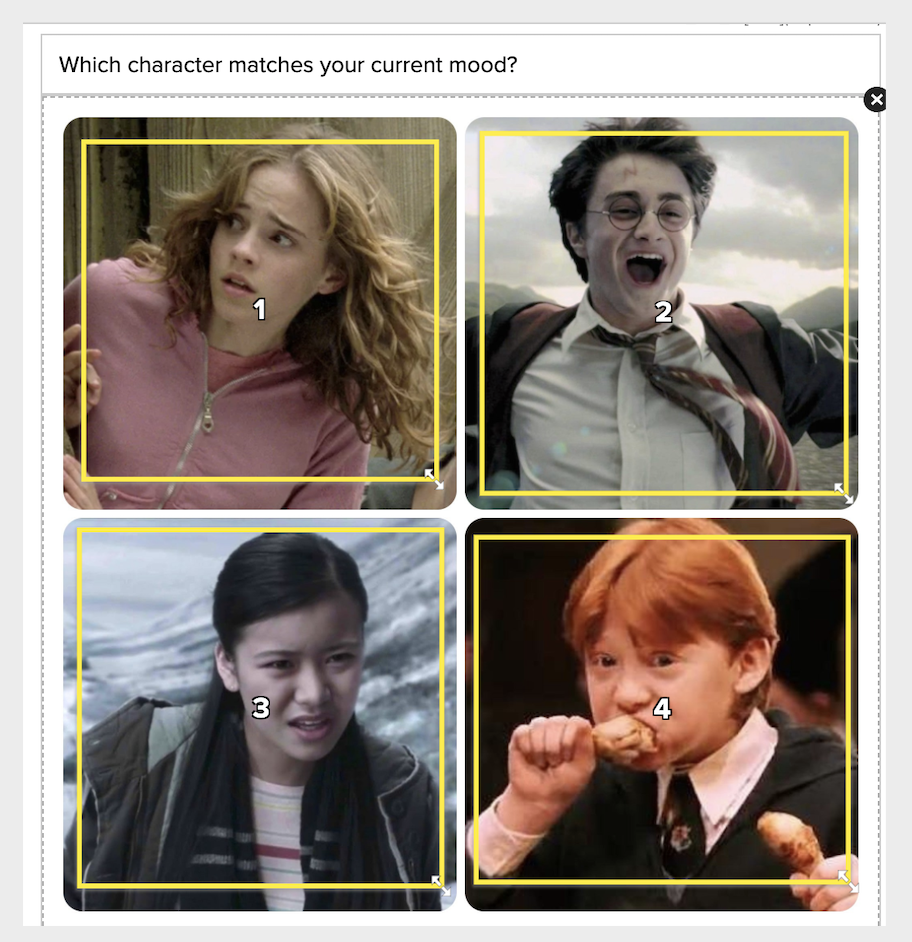
15. After you've added your results, it's time to add questions. Add a question into the box above the image, and then upload the pic you'd like to use as your tap-on image.
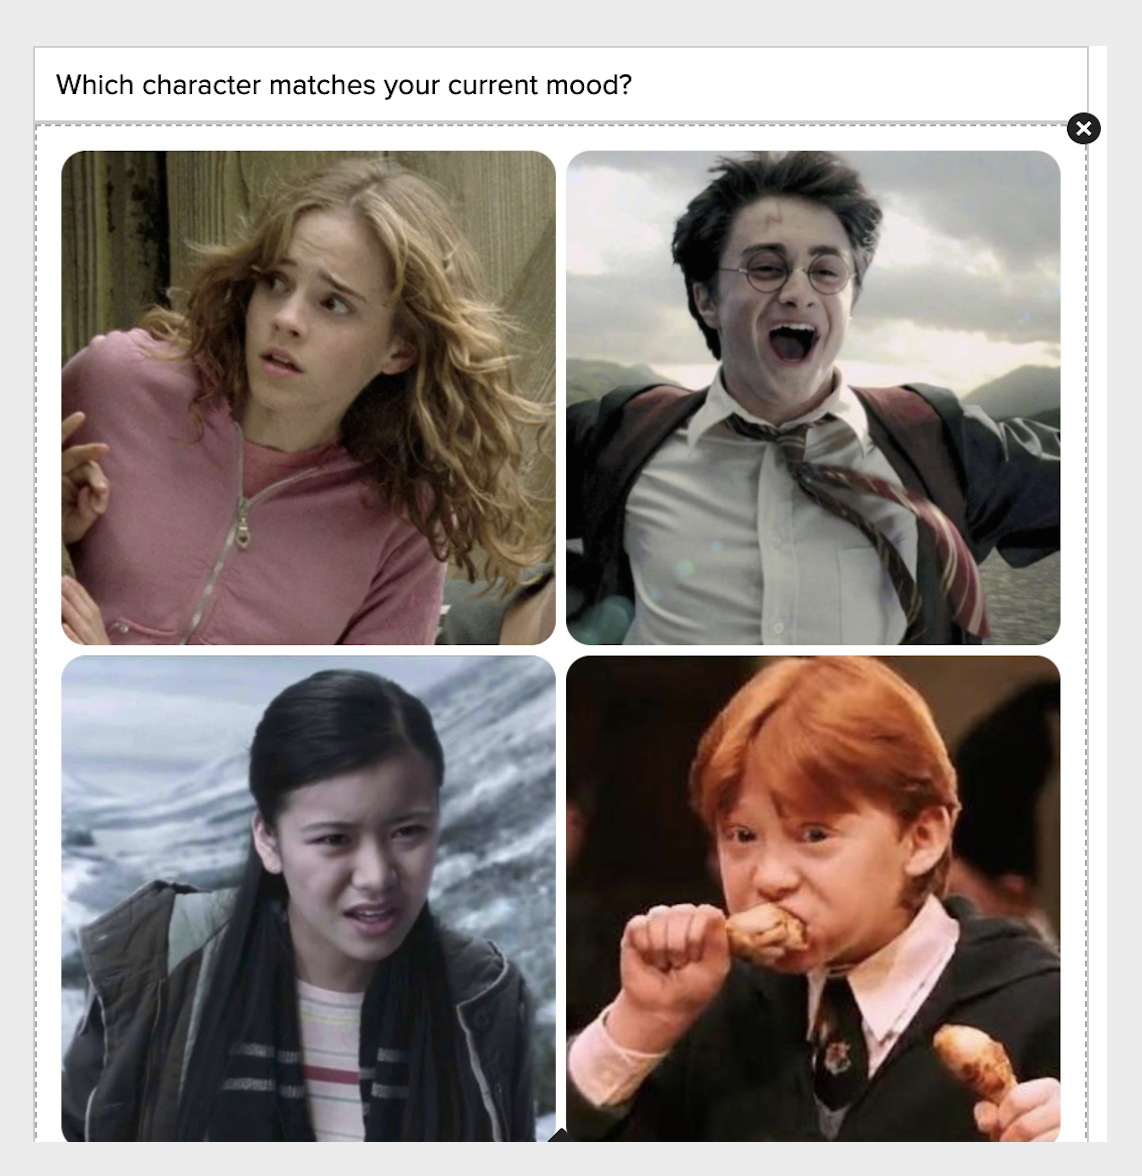
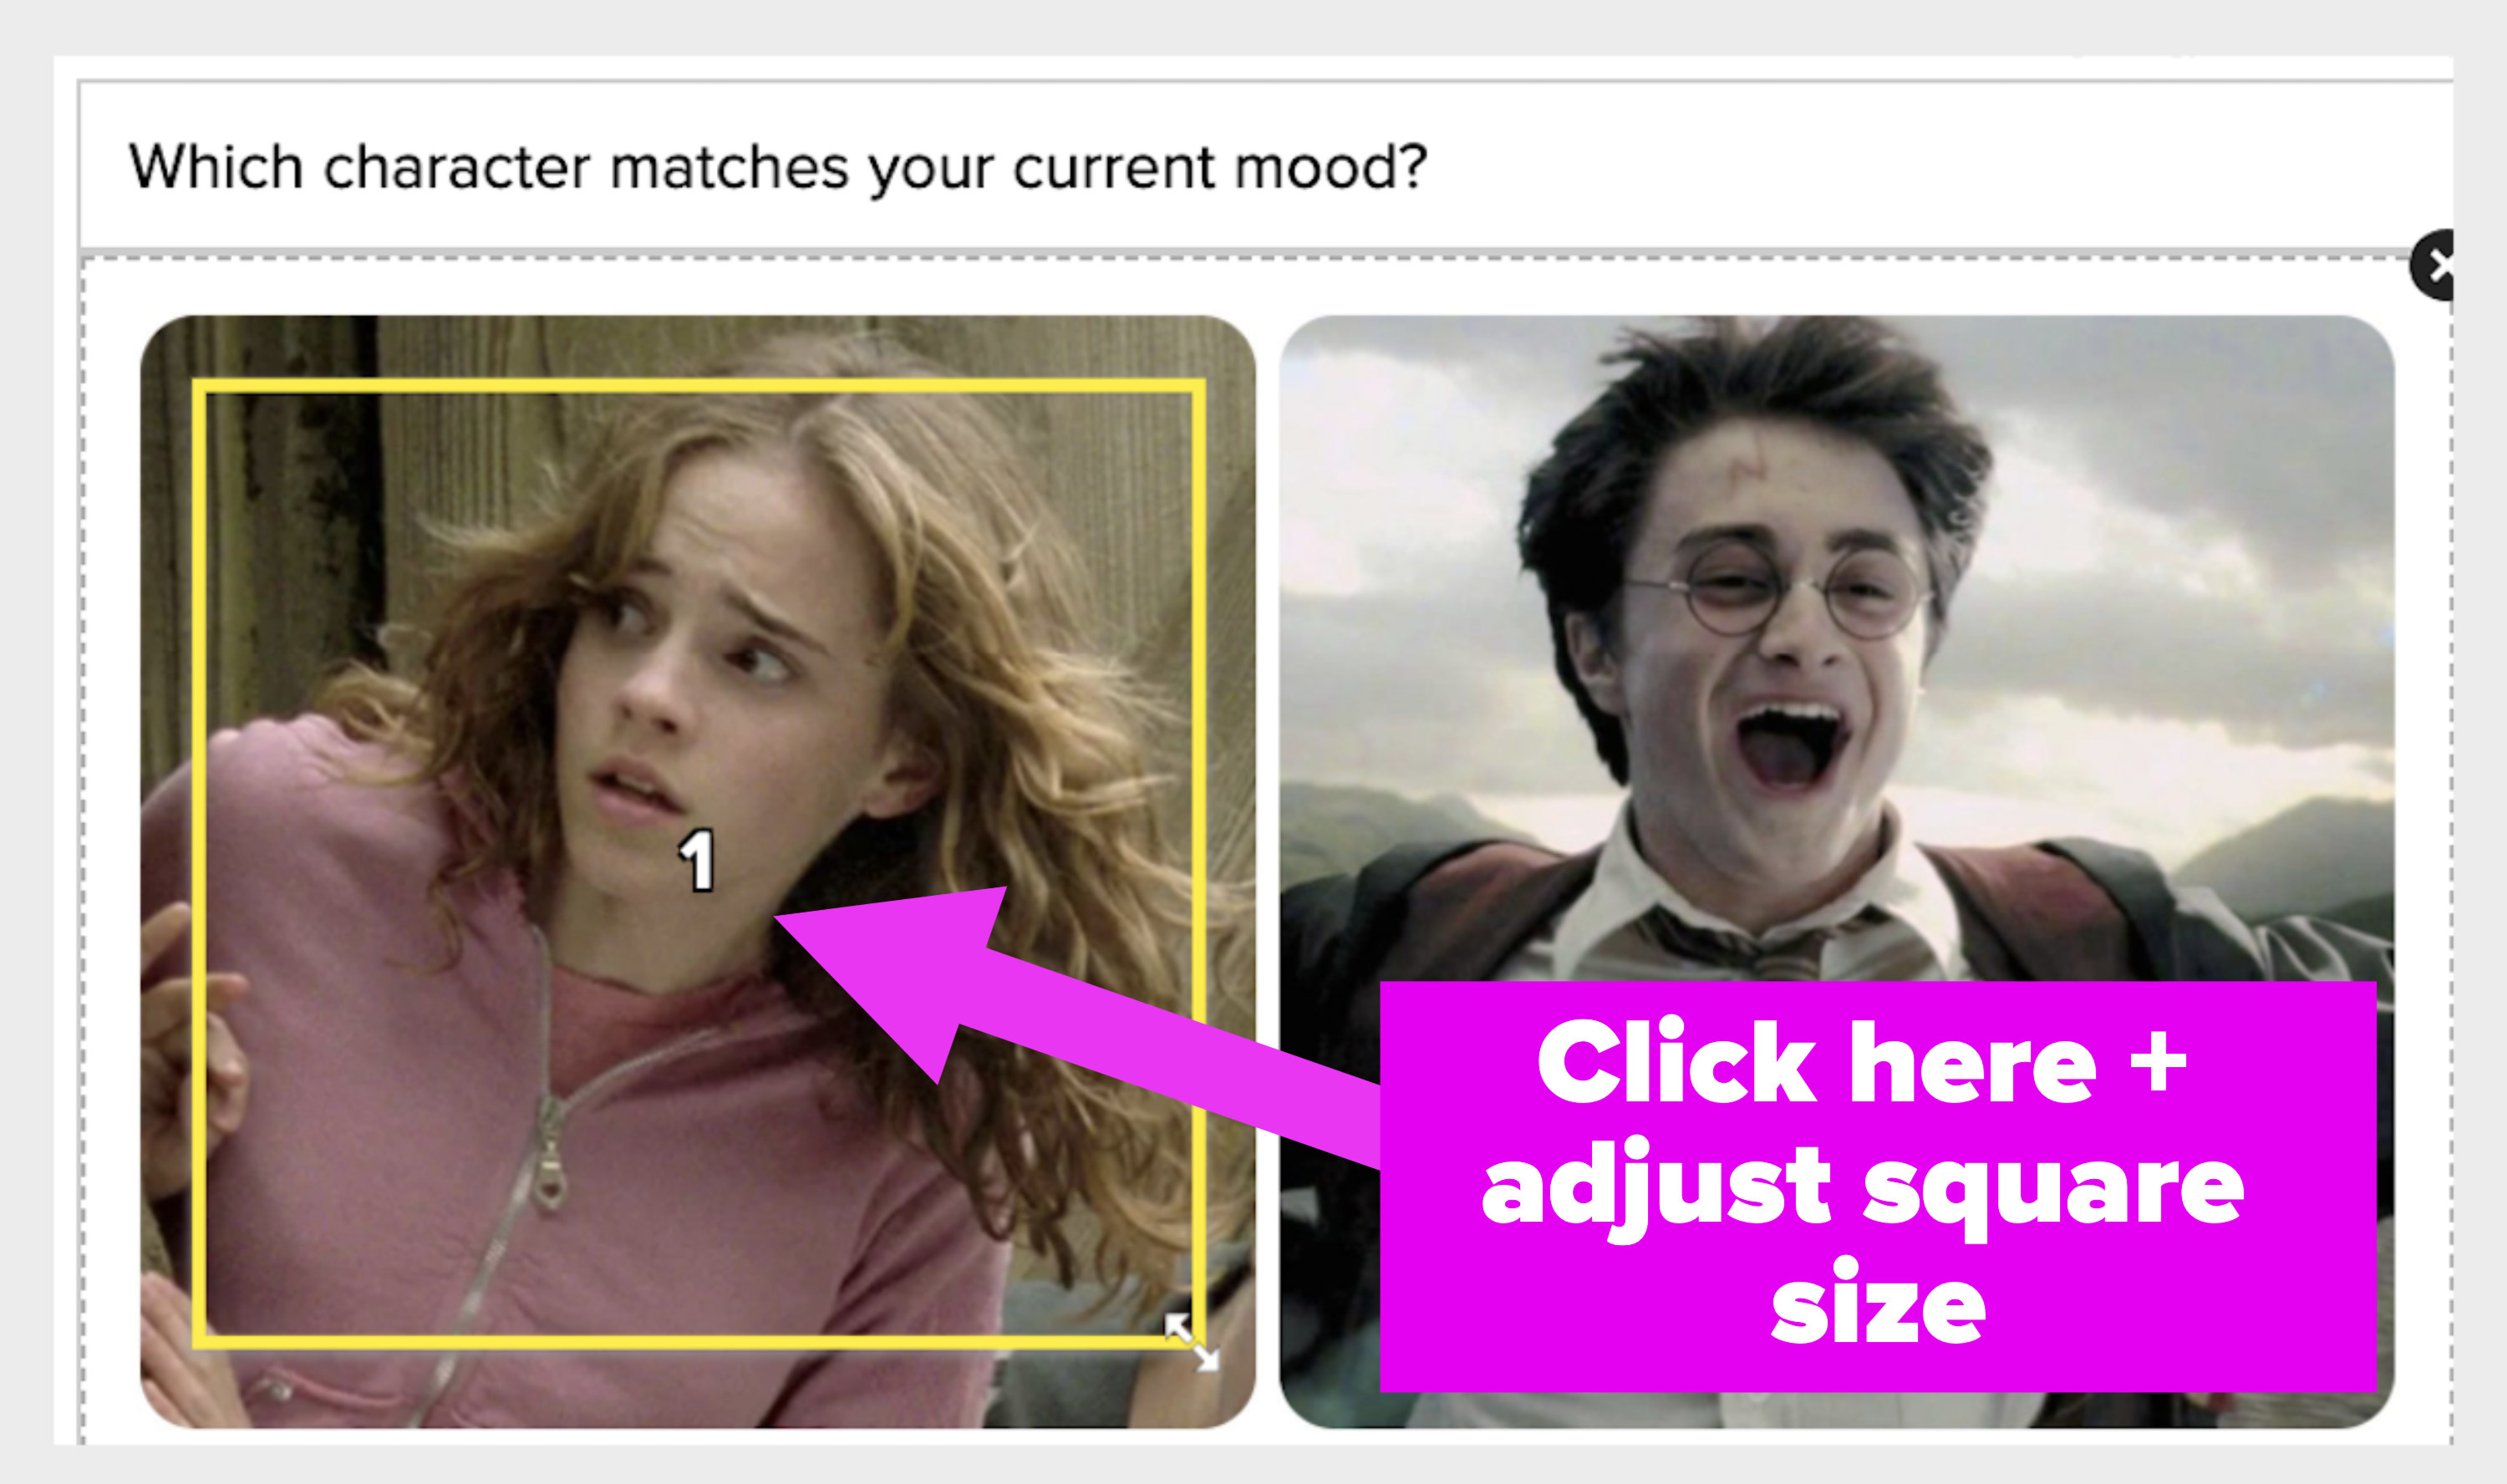
16. Next, click on each image that you'd like to lead to a result. In this example, you'll click on Hermione, then Harry, and so on until you've clicked on each character and they have a separate box around them. You can adjust the size and placement of each box.
17. After you've clicked on each item/image, your image section of your question will look like this:
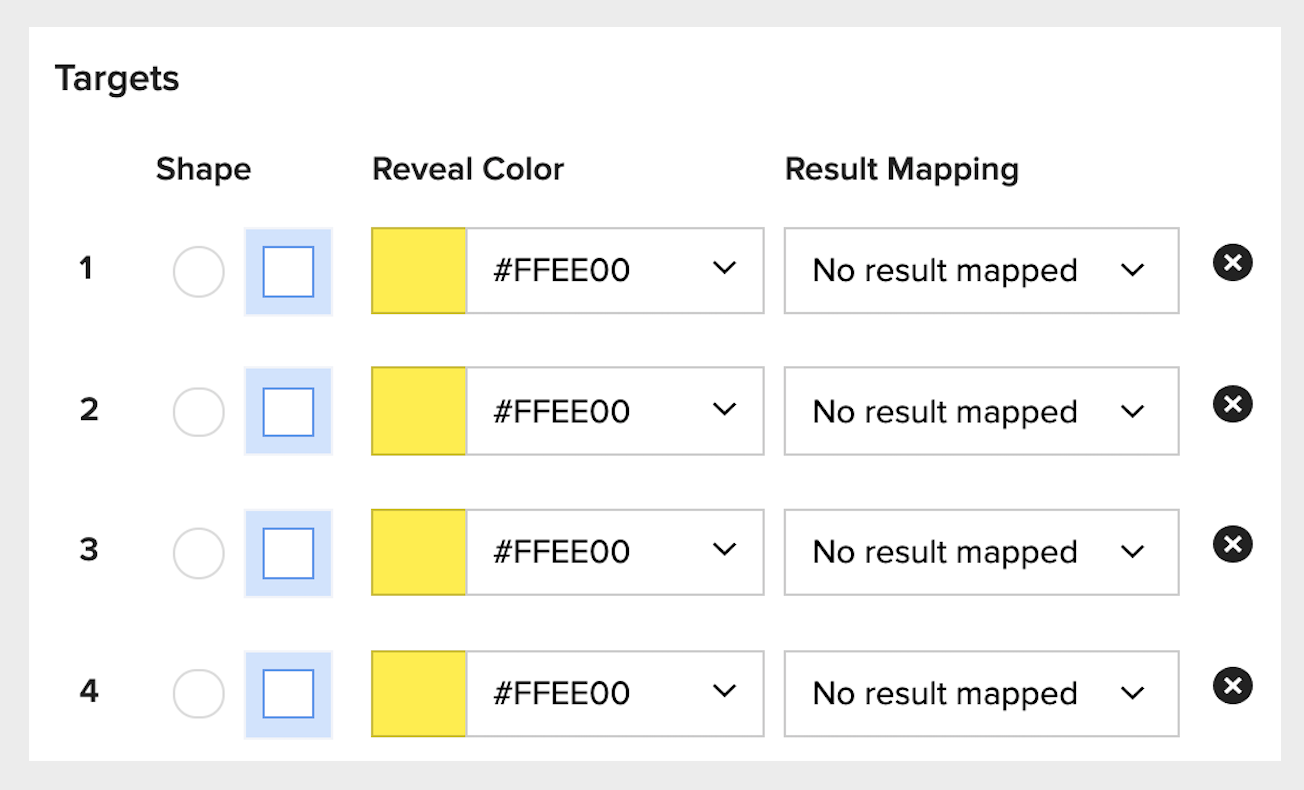
18. Scroll down to the "Targets" section, which will automatically look like this. Here, you can change the shape and color of each item you've added to your picture and direct each image you've clicked on to a specific result (under "Result Mapping").
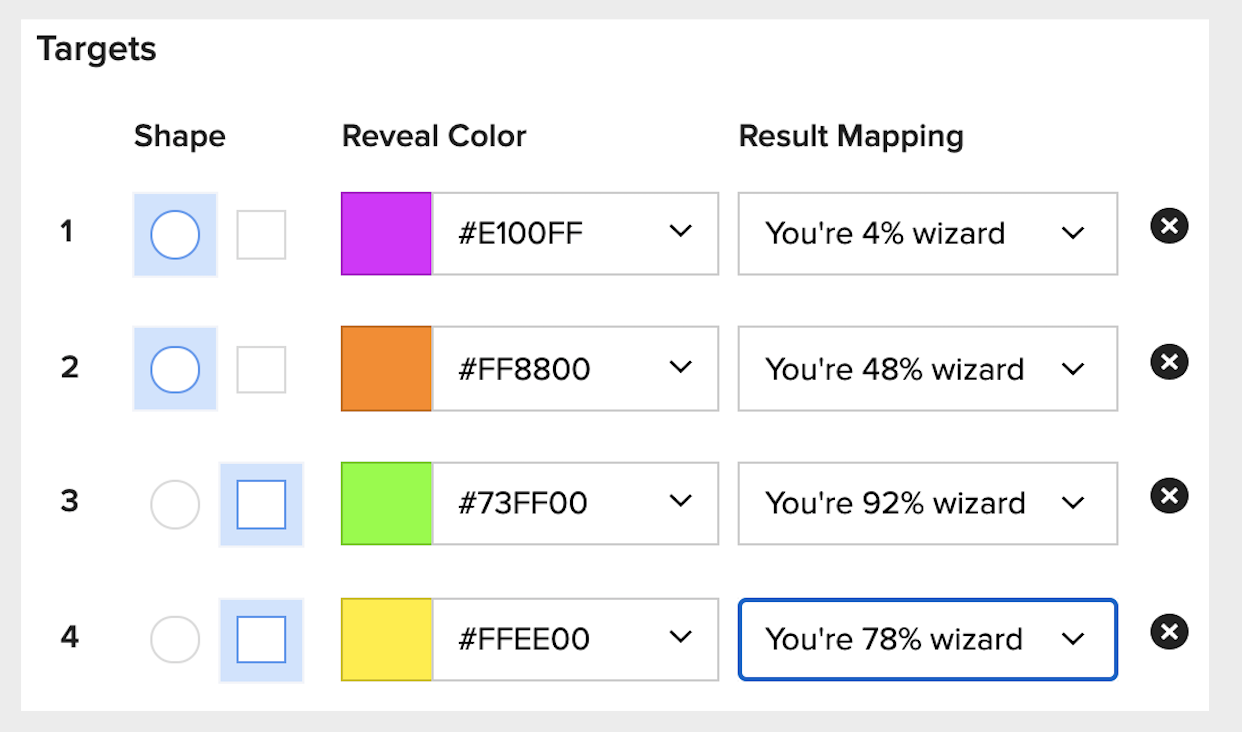
19. For example, if you play around with the colors and shapes in the "Targets" section like this...
20. ...this is how the question's image will look in your draft.
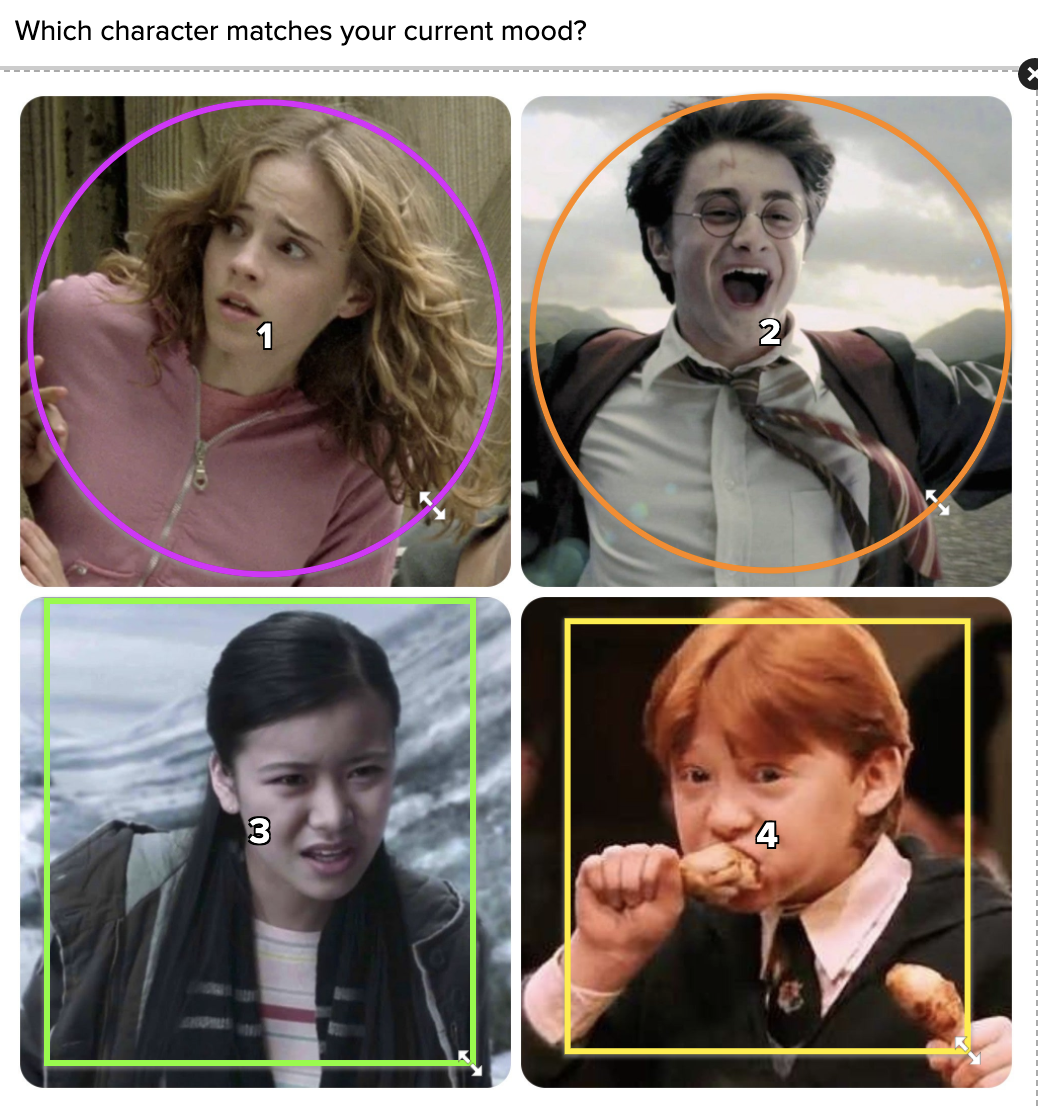
21. Setting these colors and shapes up is entirely up to your aesthetic mood, but basically what it does is allows you to pick what a quiz taker sees when they select a specific answer. So if they picked Hermione in the first question, they'll see this purple circle, if they pick Harry they'll see the orange circle you set up, etc.
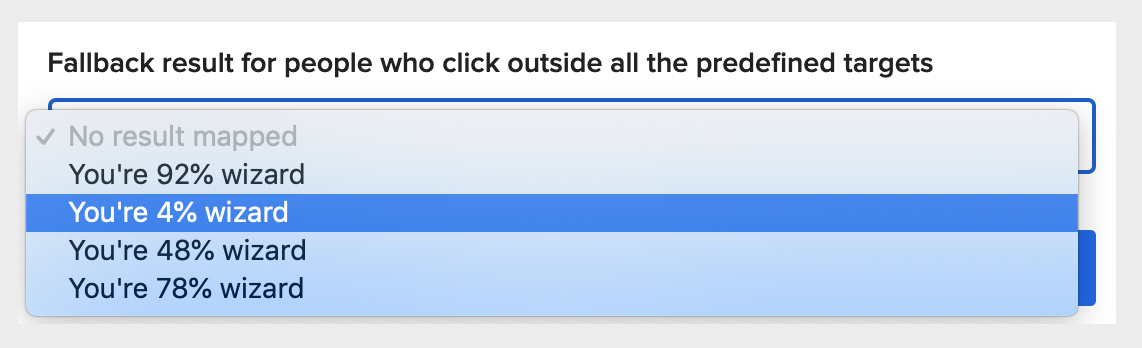
22. Finally, by selecting one of these options in the drop-down box, you'll decide what result someone will get if they click somewhere outside of the shapes you've defined on your end.