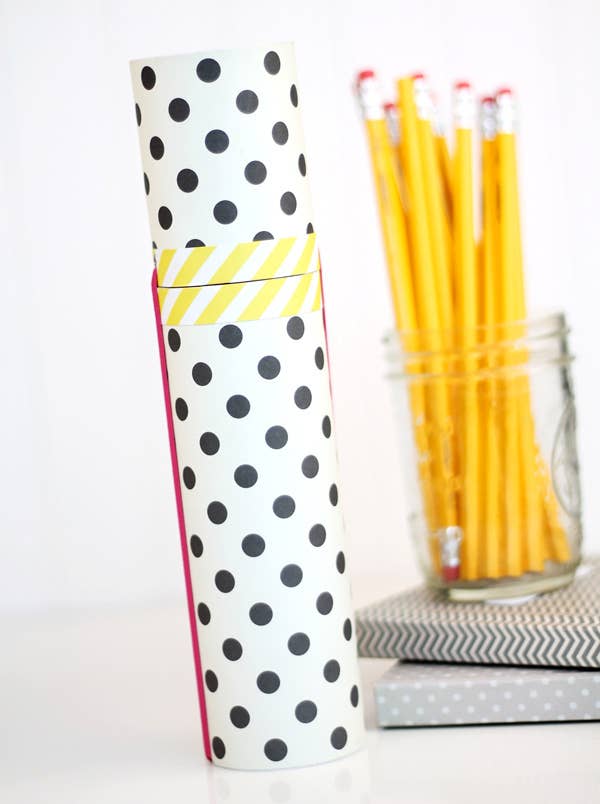
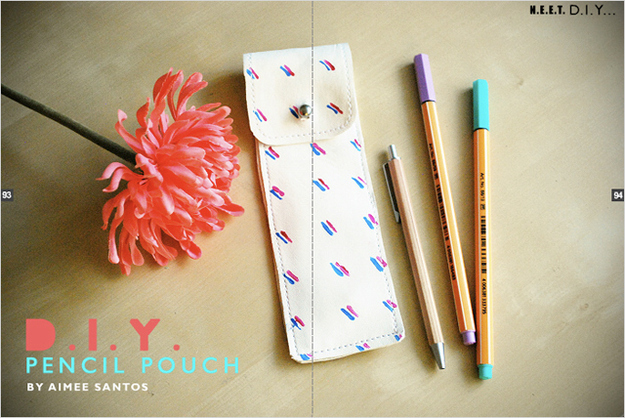
1. Polka Dot Pencil Case
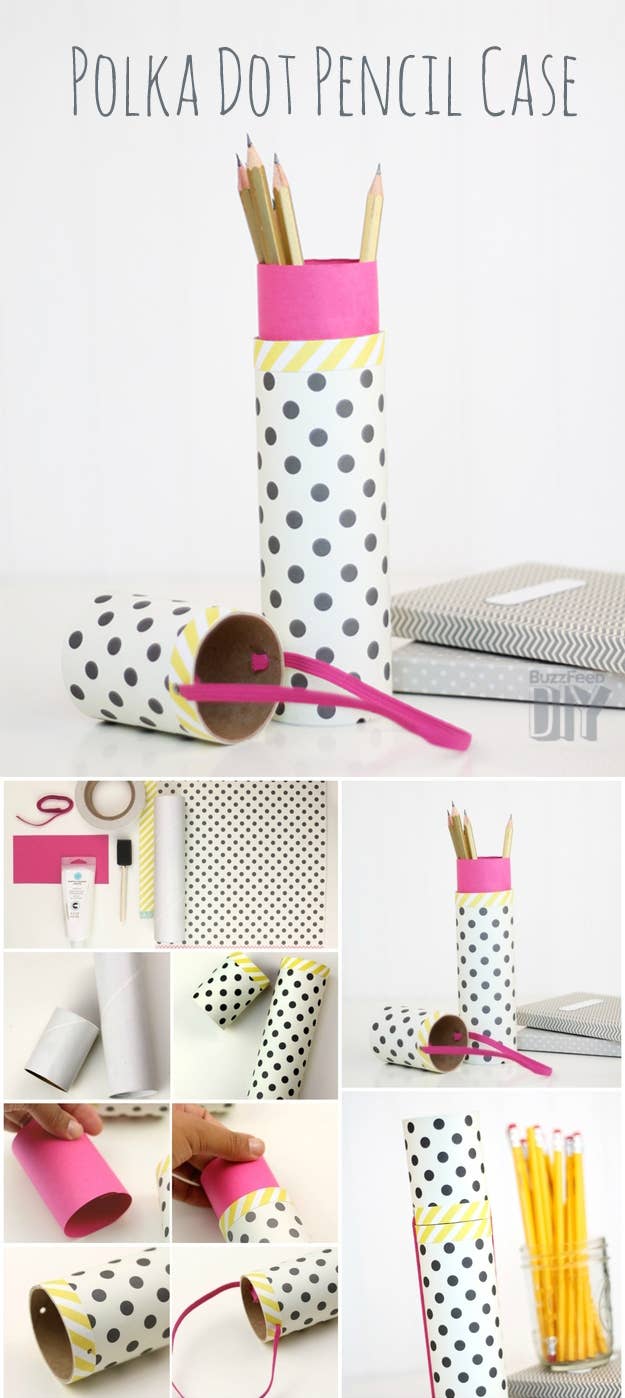
Materials: elastic band in color of your choice, solid colored card stock, double-sided adhesive and/or craft blue, foam brush, small mailing tube, patterned paper, a hole punch.
1.Using a saw or serrated knife cut the mailing tube into two pieces and cover with patterned paper using the adhesive or glue.
2.Roll the solid colored cardstock into a tube and insert it into the mailing tube. Glue it in place, allowing 1-2" to extend above the edge of the bottom portion of the tube.
3. Use a hole punch to place holes in the top of the mail tube as shown, and insert the elastic. Tie little knots to keep the elastic from slipping out. (Not pictured: use the hole punch to create notches in the bottom of the mail tube where the elastic can rest so it doesn't slip out of place.)
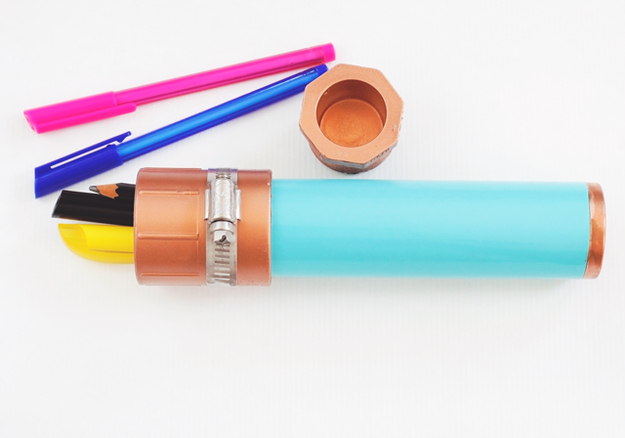
2. PVC Pipe Pencil Case

Materials: 1.25" PVC Pipe cut to 6" long, 1.25" copper test cap, 1.25" male adapter with corresponding plug, 180 grit sandpaper, copper spray paint, second spray paint in color of your choice, quick-set epoxy, hose clamp (optional), wire cutters (if using the clamp).
1. Gently sand the pipe, male adapter, and plug to prepare them for painting.
2. Following the instructions on your spray paint cans, paint the male adapter and plug with copper paint and the pipe in another color. You will need several coats to cover all the plastic. Allow the pieces to dry 24 hours before moving on to the next step.
3. Attach the male adapter to one end of the pipe, pushing it down as far as it will go. It will be very snug. If you have trouble, try gently tapping it with a hammer (place a towel between the adapter and the hammer so that you don't scratch the paint).
4. Mix together equal amounts of quick-set epoxy using a toothpick or wooden stir stick.
5. Using the epoxy, glue the copper test cap to the end of the pipe. Wipe any excess epoxy away immediately. Hold the cap in place until the epoxy has set enough for it to stay put on its own. Allow to dry according to the instructions on the package (usually overnight).
6. Slip the hose clamp over the male adapter and tighten into place, then trim off the excess with wire cutters.
7. Screw in the plug.
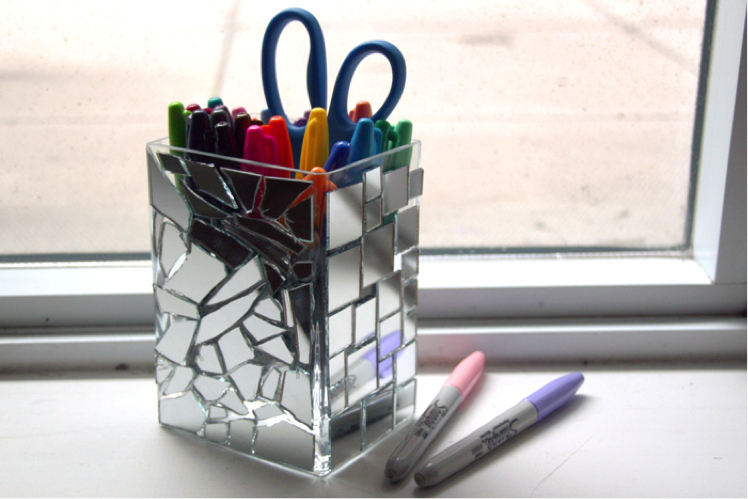
3. Mosaic Pencil Holder
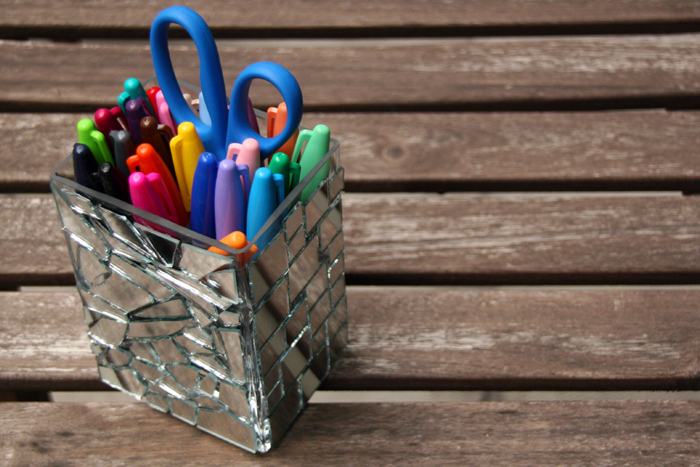
The goods: 2 sheets of large square mirror tile (purchased from local dollar store) and a handful of pre-cut small square mirror pieces of varying sizes, towel, hammer, glue gun, and a glass vase (taller than it is wide).
1. Start by laying the towel onto a sturdy working area, either a table or the floor. Place one piece of large square mirror tile on top of the center of the towel. Wrap the mirror tile with the edges of the towel.
2.Take the hammer and start tapping on the wrapped mirror tile gently. Open the towel and check to see if the mirror tile has broken into pieces. If you feel that the pieces haven't been broken up enough, repeat until you reach the desired broken pieces.
3. Be careful when handling the broken pieces- the edges can be sharp! Taking one piece at a time, squeeze a bit of hot glue onto the back and place firmly onto the vase's surface.
4. Continue to glue other pieces onto the vase's surface; be creative and work your way through like you're assembling a puzzle.
5. Once you've completed the entire surface, remove the glue residue with your fingers.
6. Now cover the next side with the small pre-cut square pieces using the same technique as above. Repeat until you've completed all sides.
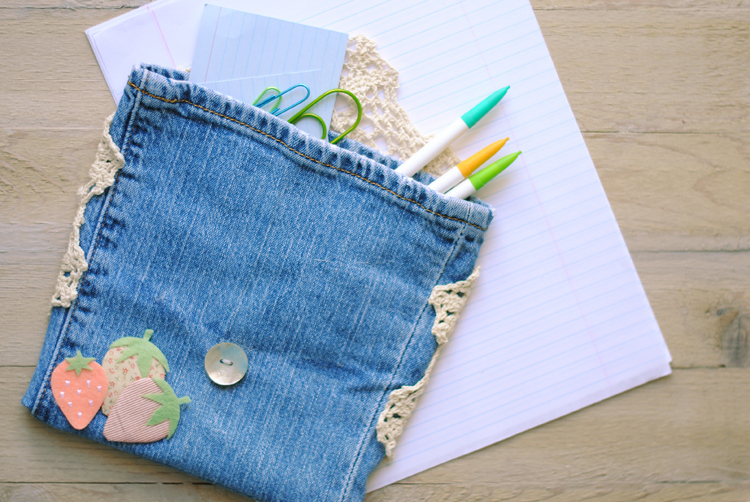
4. Jean Pencil Pocket
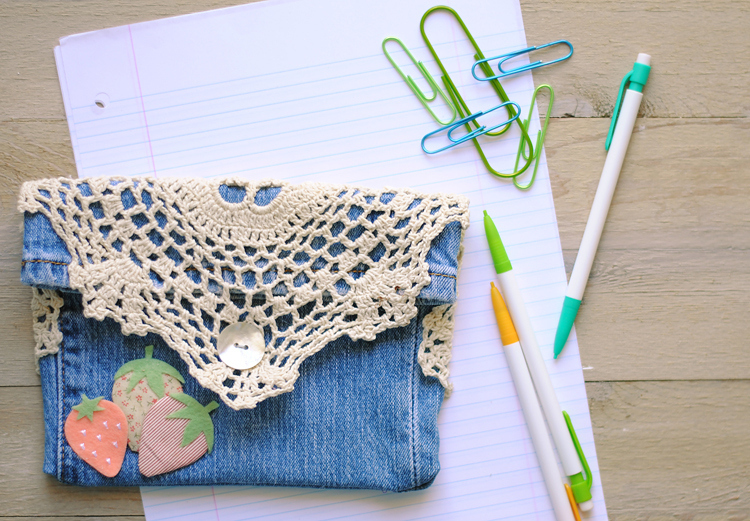
Materials: one leg from old jeans, fabric glue, one crochet doilie, one button, a ruler, one or more fabric appliqués, thread.
1. First you'll need to decide on the height of the pencil case. The one shown is 6" tall so the jean was cut 8" from the hem, allowing 2" of overlap.
2. Turn the jeans inside out, and sew the part that you just cut (by machine or by hand).
3. Turn the jeans right-side out. Fold over the overlap to decide where to put the button, then sew it on.
4. Lay the doilie from front to back, and make sure one of the doilie openings will fit the button. Then glue it into place on the back and on the overlap.
5. For a final touch, glue on fabric appliqués of your choice.
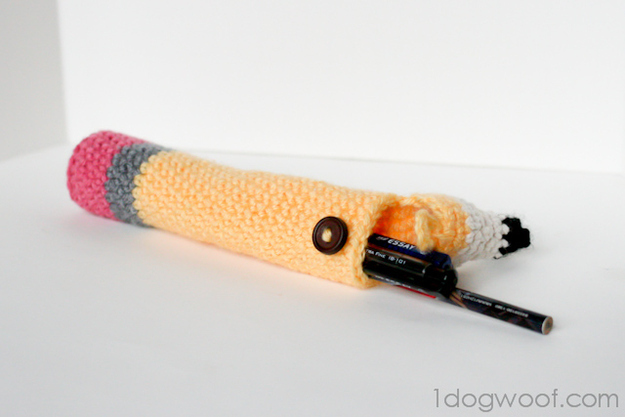
5. Crocheted Pencil-Shaped Case
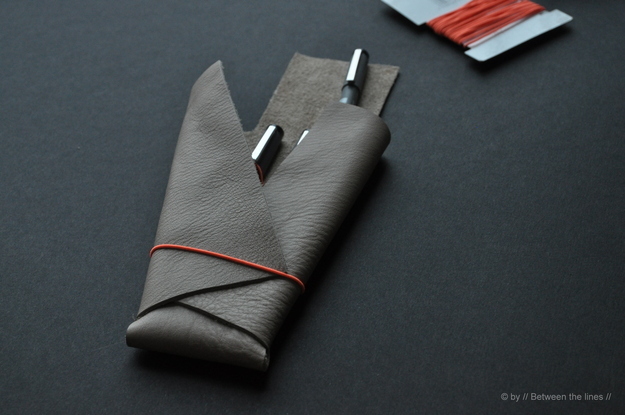
6. No-Sew Leather Pencil Case
7. Toilet Paper Roll Pencil Case

8. Upcycled Leggings Pencil Pouch
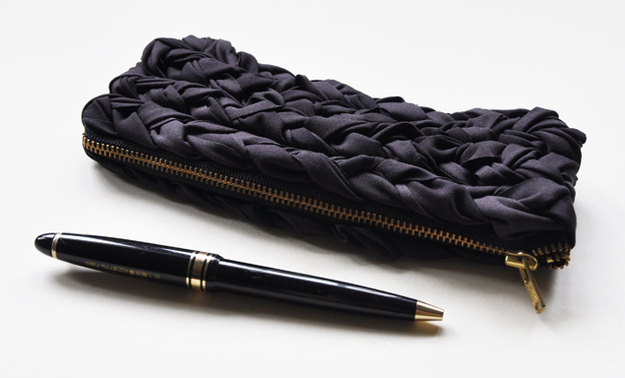
9. Patterned Leather Pencil Pouch
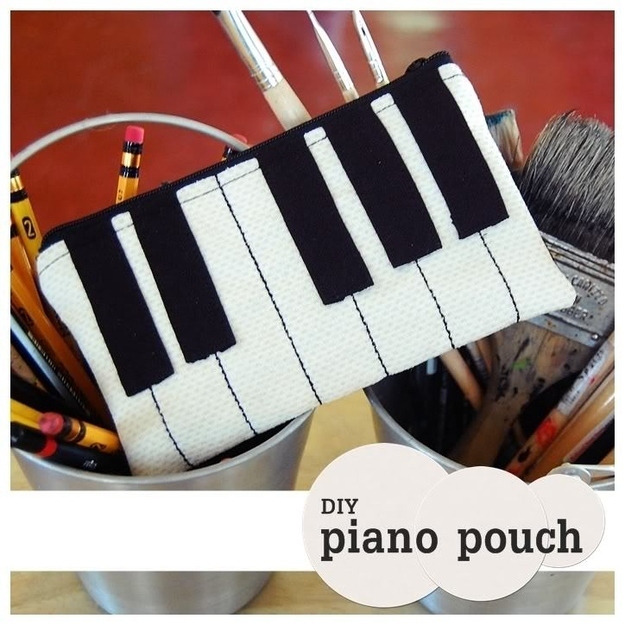
10. Piano Pencil Pouch