

Here are the tools you'll need:
- Base coat
- Silver glitter nail polish (we used OPI My Voice Is A Little Norse)
- Sheer yellow nail polish (we used OPI Colorpaints Primary Yellow)
- Sheer orange nail polish (we used OPI Colorpaints Chromatic Orange)
- Sheer pink nail polish (we used OPI Colorpaints Pen and Pink)
- Sheer red nail polish (we used OPI Colorpaints Magenta Muse)
- Top coat
- (Optional) Pre-glued nails (we used Patricia Inspire nails)
You can paint directly on your natural nail, or you can use pre-glued nails, which can make art much easier. Follow these instructions if you're going to use pre-glued nails.
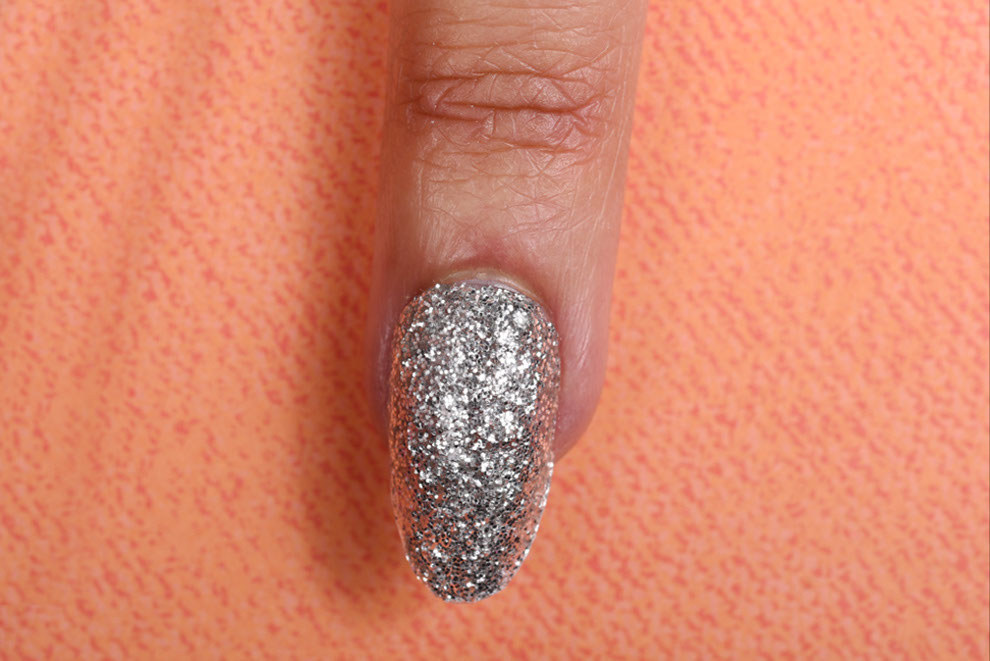
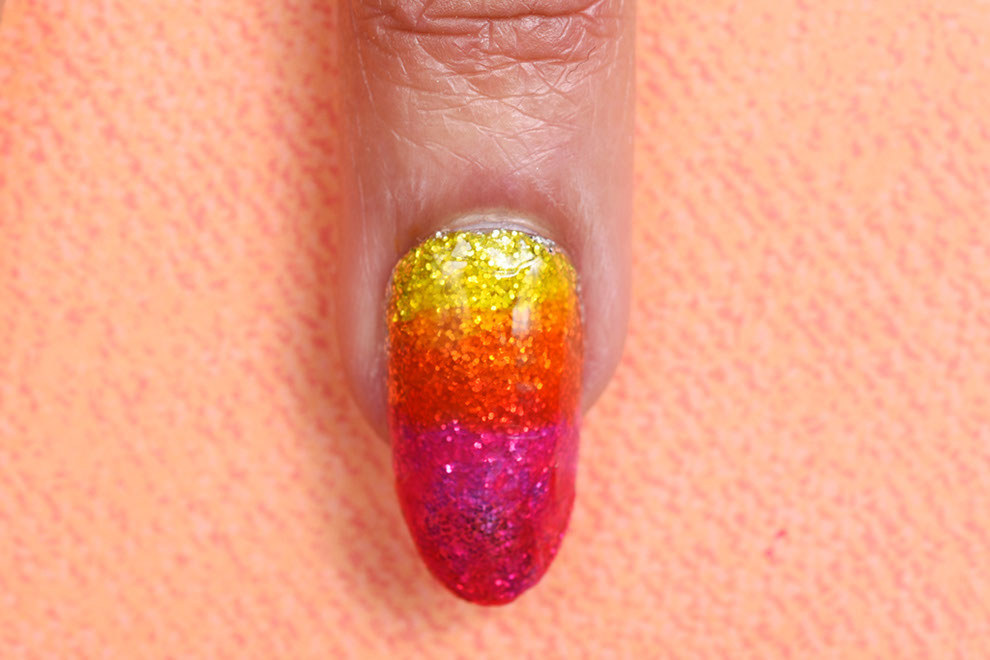
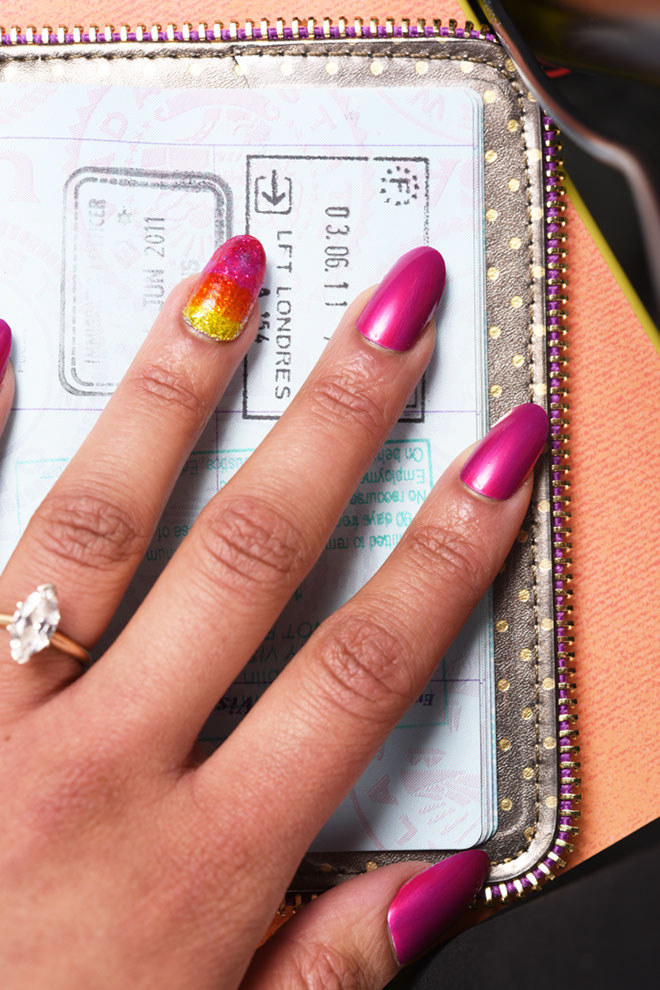
Step 1: After painting a base coat, swipe on two coats of silver glitter nail polish.
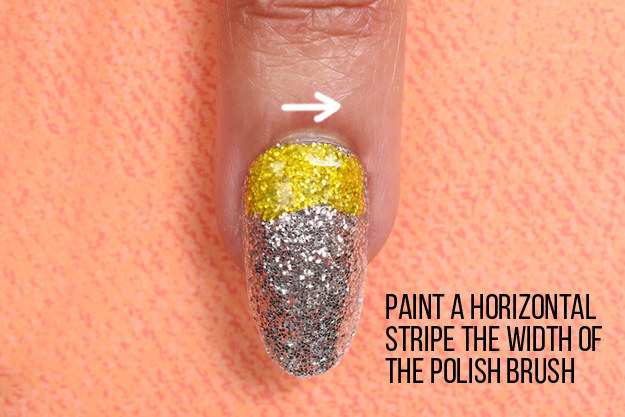
Step 2: On the bottom quarter of your nail, paint a horizontal yellow stripe.
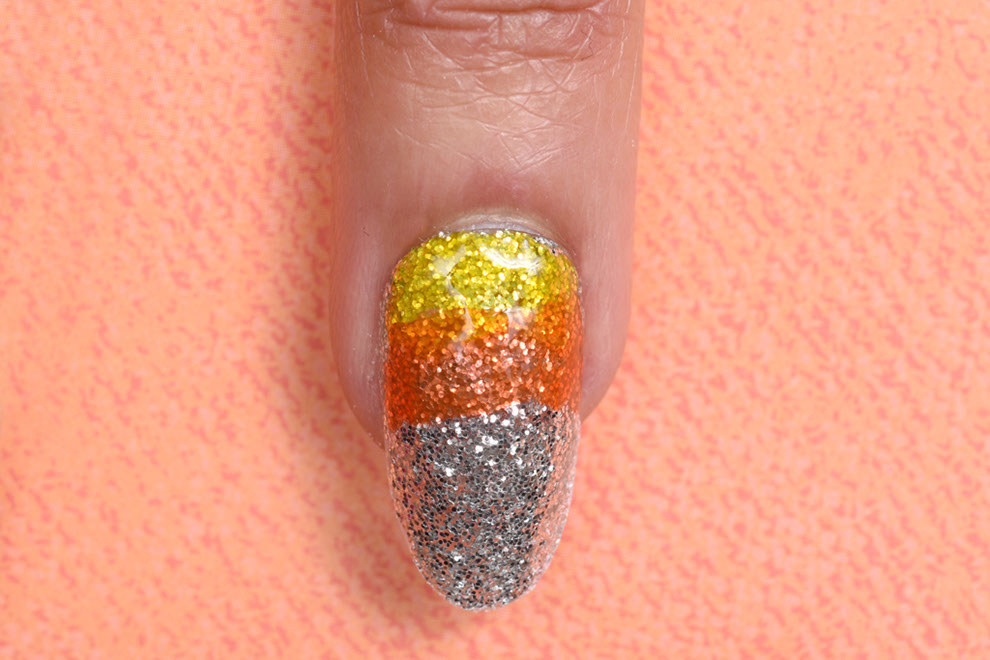
Step 3: Slightly overlapping the yellow stripe, make a second horizontal stripe with orange polish.
Step 4: Slightly overlapping the orange, paint a third horizontal stripe of pink polish.
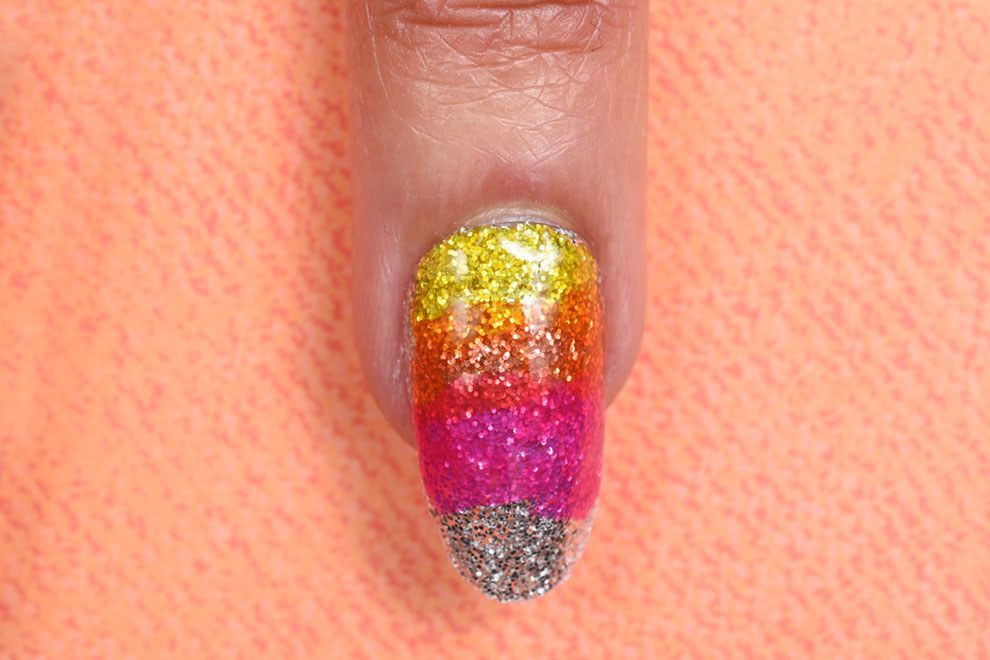
Step 5: Overlapping the pink just a bit, paint the rest of the nail with a swipe of red.
Now go sip some margaritas on the beach and enjoy yourself!
Find more wedding nail art ideas here.
Nail Artist: Miss Pop Nails
Patricia Inspire Nails were provided to BuzzFeed Life free of charge.